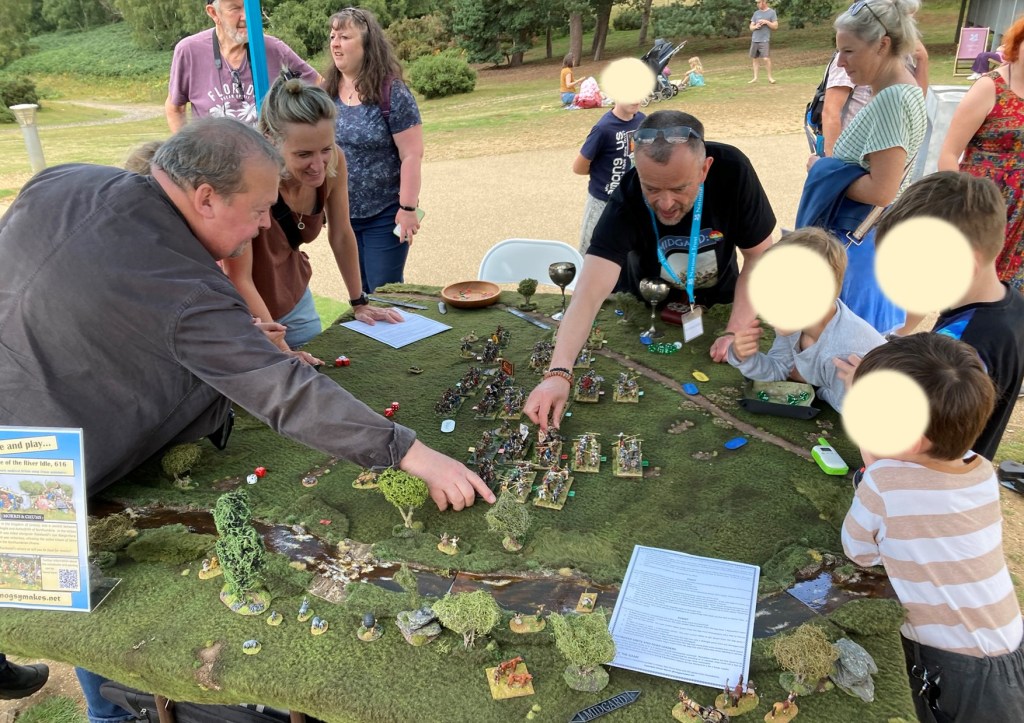
As well as our Battle of the River Idle game, there were two other miniature wargames on offer at the event.
Grahame, Carl and a number of other stalwart members of the Peterborough Wargames Club had made the trip to Suffolk. They too had chosen to put on a version of the Battle of the River Idle 616, but using Lion Rampant 2 rules. LR was an excellent choice for this, being quick to pick up, fast-playing (the Peterborough team estimated playing time at 40 minutes) and also easily accessible in case anyone fancied getting into wargaming after the event.
The Peterborough Club game also featured an information board and book table – always useful when engaging the public.
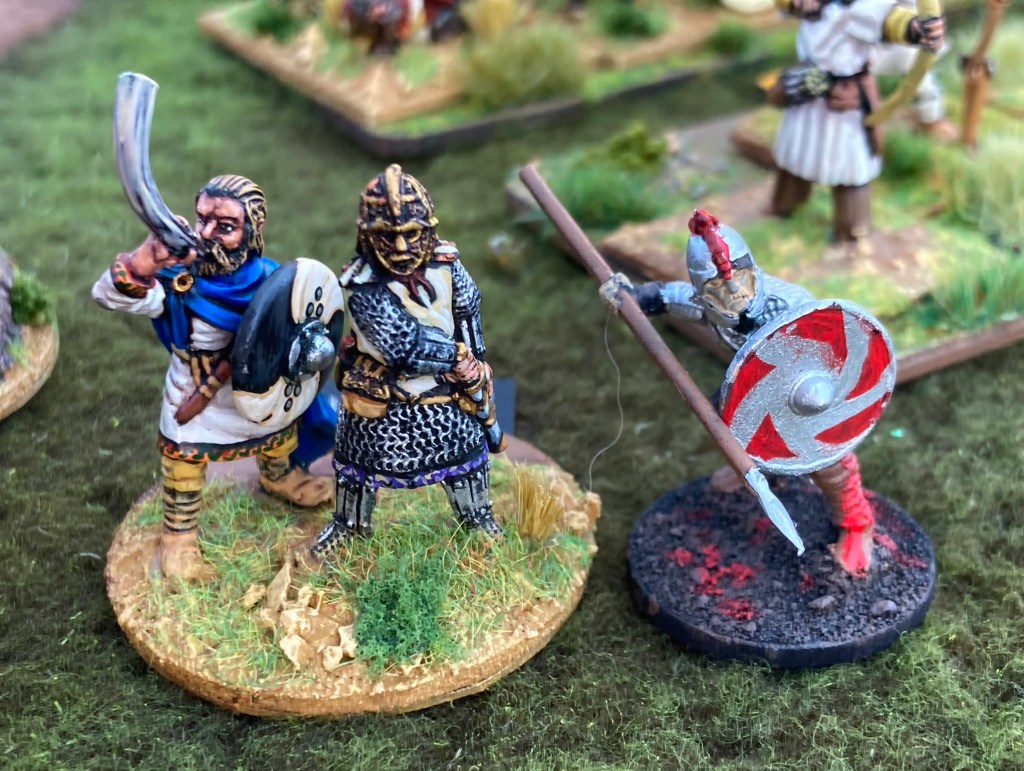
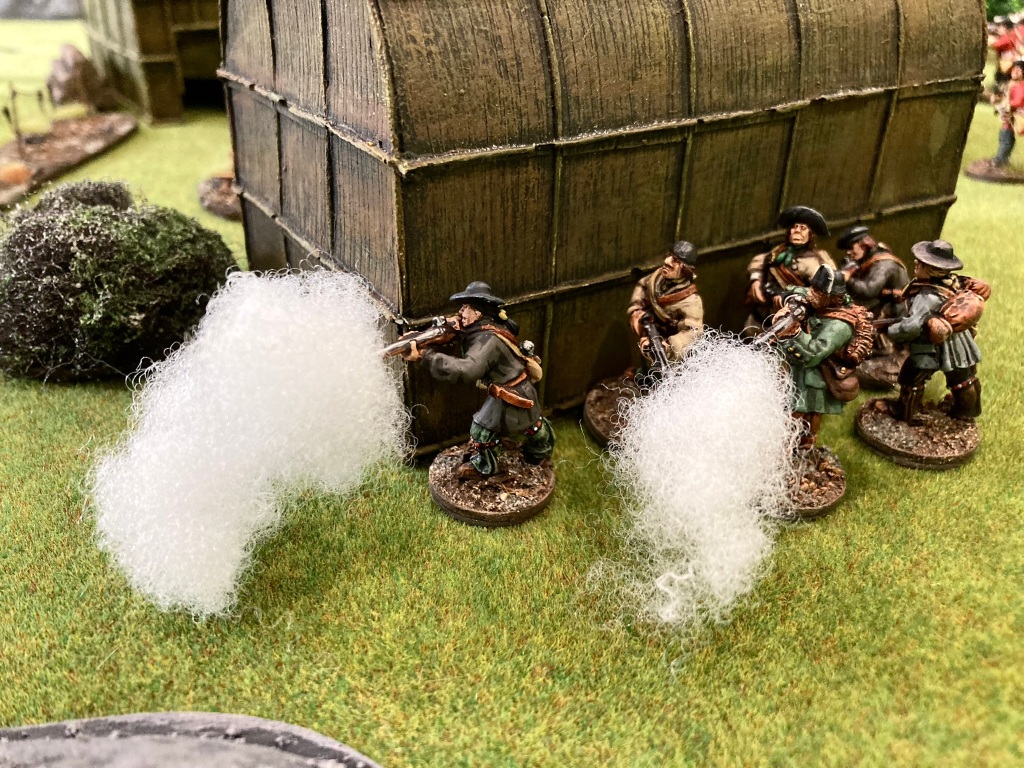
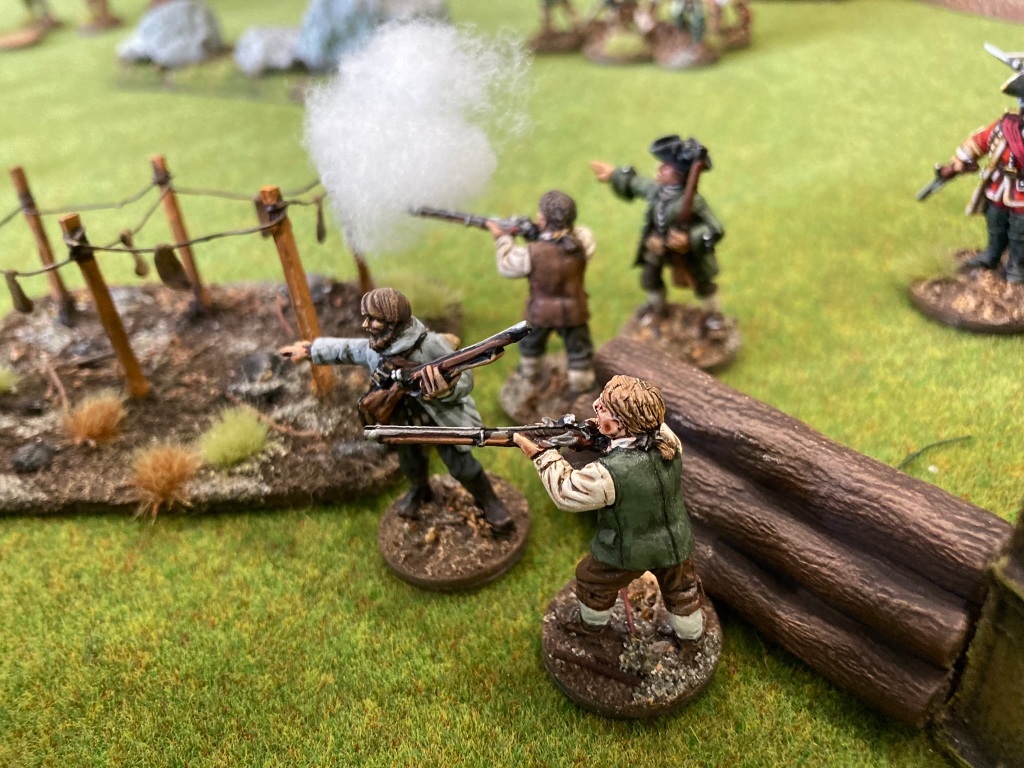
Ernie and Richard of East Anglian Gamers returned from last year, this time putting on a skirmish scenario based on a waterborne raid gone wrong. ‘Back to the Ship!’ involved a feared Saxon warleader (popularly dubbed ‘Black Dog’ due to his choice of canine companion) attempting to escape the angry locals with his loot.
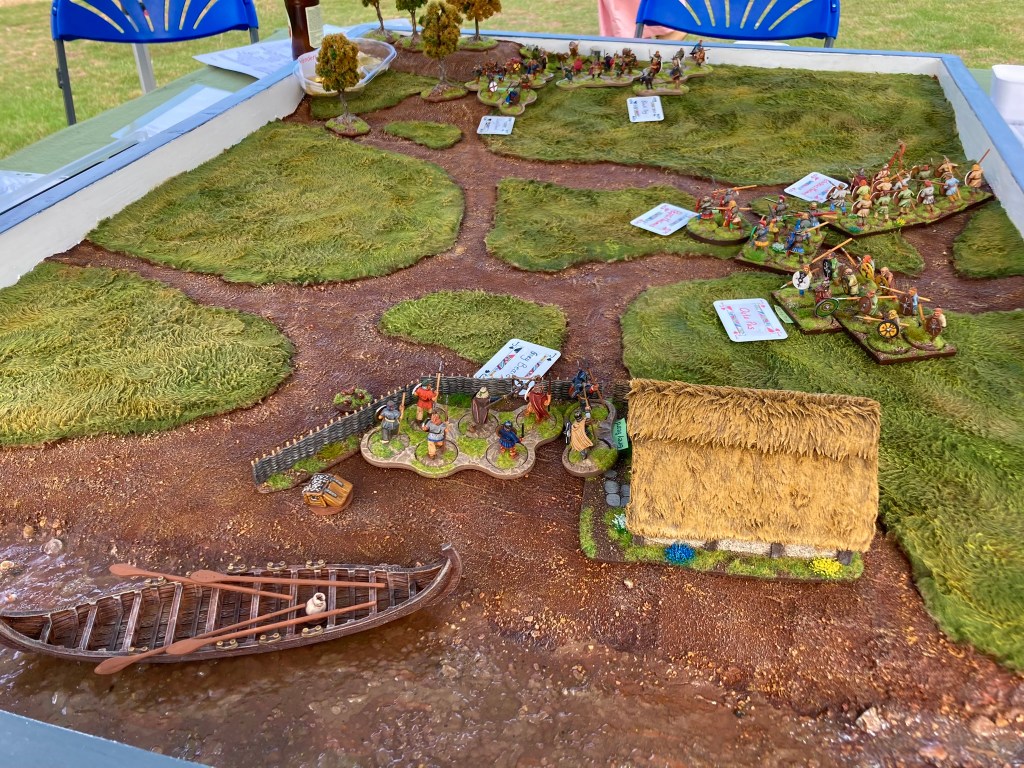
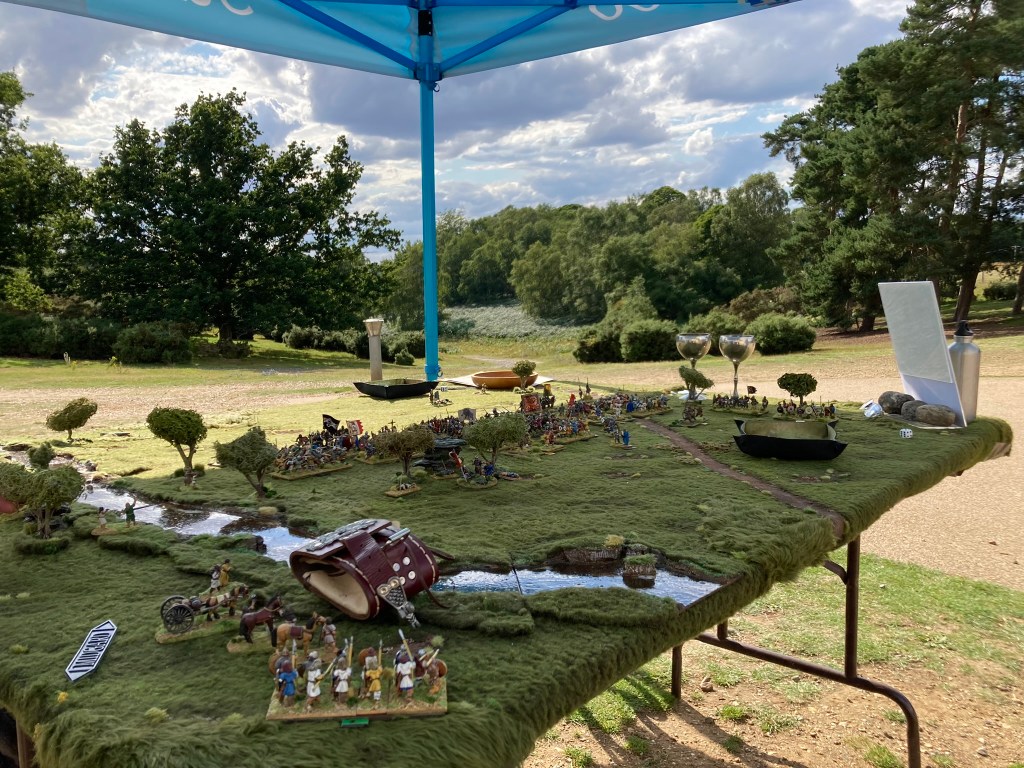
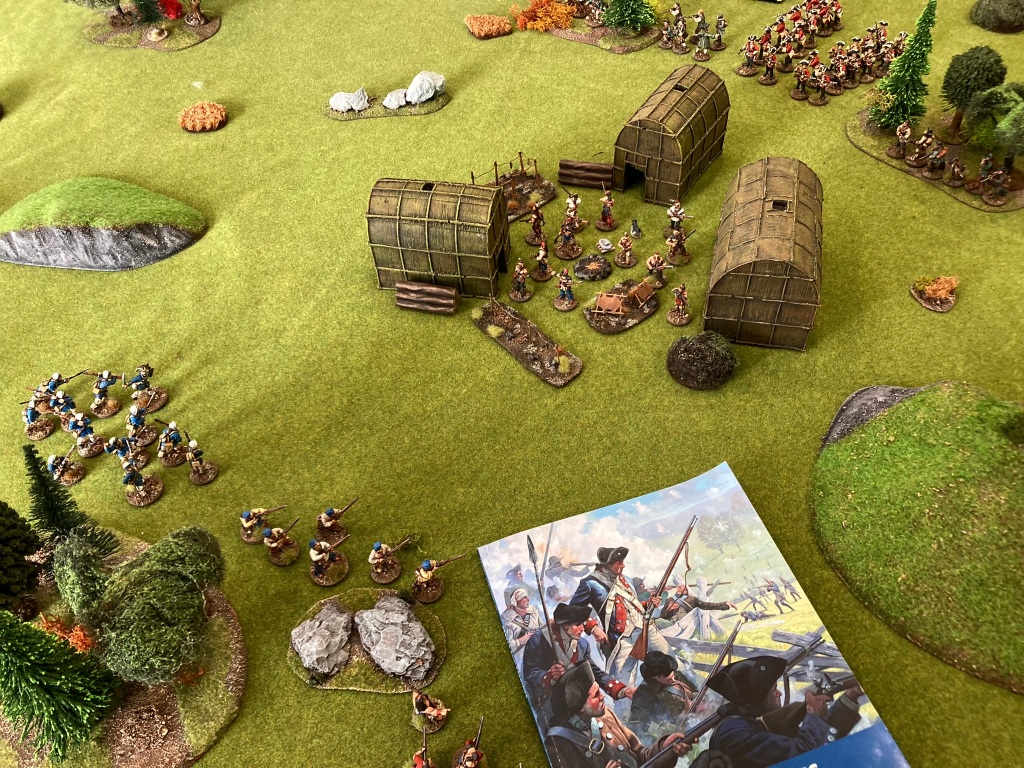
The game took place on a very smart custom-built board with a wooden frame which was ideal for withstanding the rigours of a participation game and the occasional high winds experienced at Sutton Hoo. Rules used were a simplified version of Dux Brittaniarum from Too Fat Lardies.
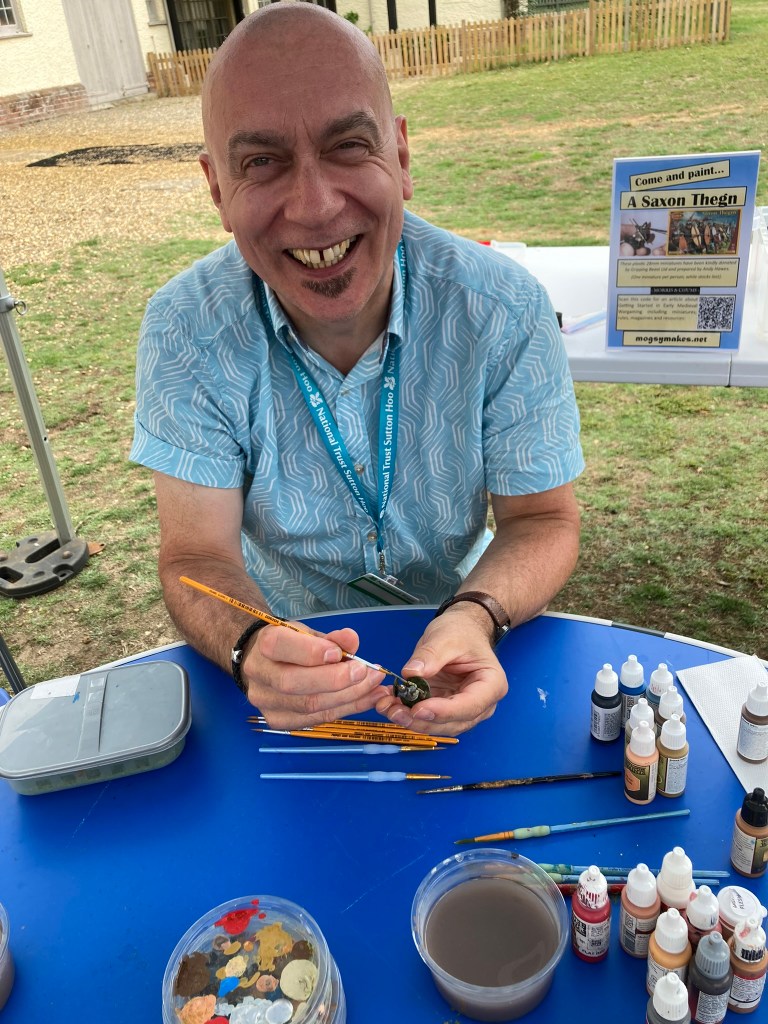
The games were busy virtually all weekend, but so was the painting room! This year, ‘Paint your own Saxon thegn’ took place in the stables block next to the games. Hobby heroes Gripping Beast once again provided the event with several boxes of their plastic Saxon thegns (thanks fellas!) which had been pre-assembled and undercoated by the team.
This area was phenomenally busy, with 123 models painted and taken away by members of the public over the two days. Huge thanks to Peter and Grahame who gave up their time to assist with this.
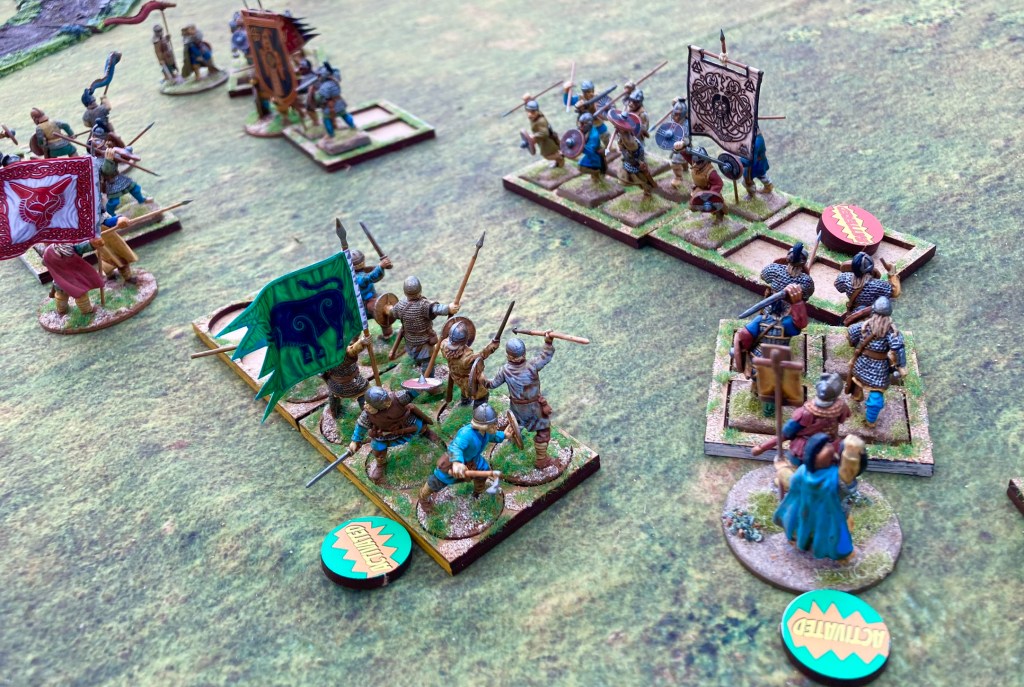
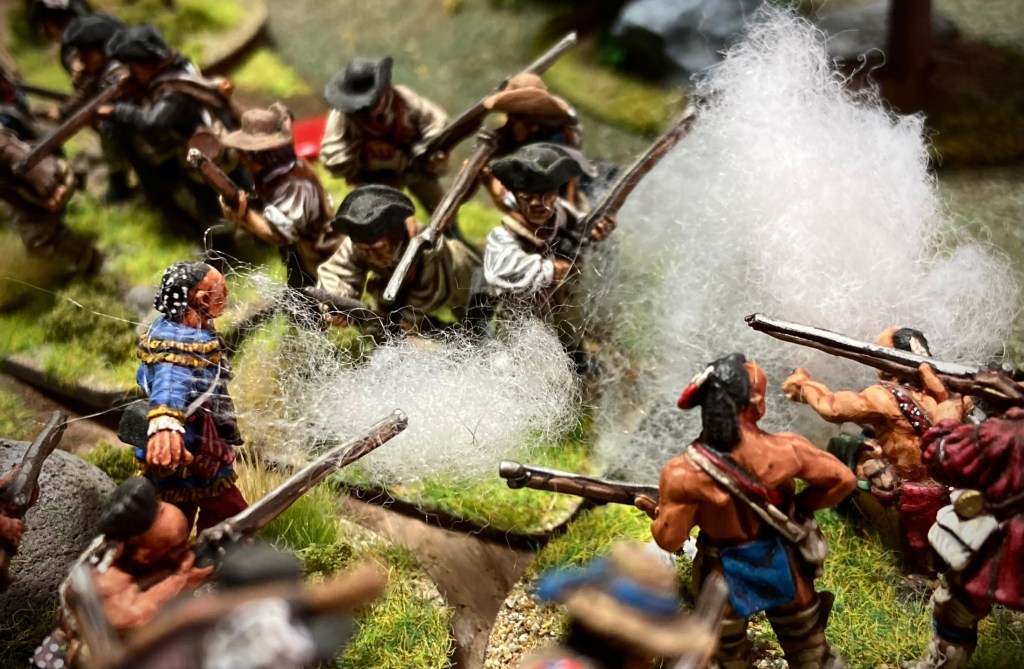
It wasn’t long before the painted miniatures began to appear on the gaming tables and we started to work them into games. Saxon champions ‘Whiteblade’ and ‘Red Shield’ fought it out at the start of one of the many Battles of the River Idle.
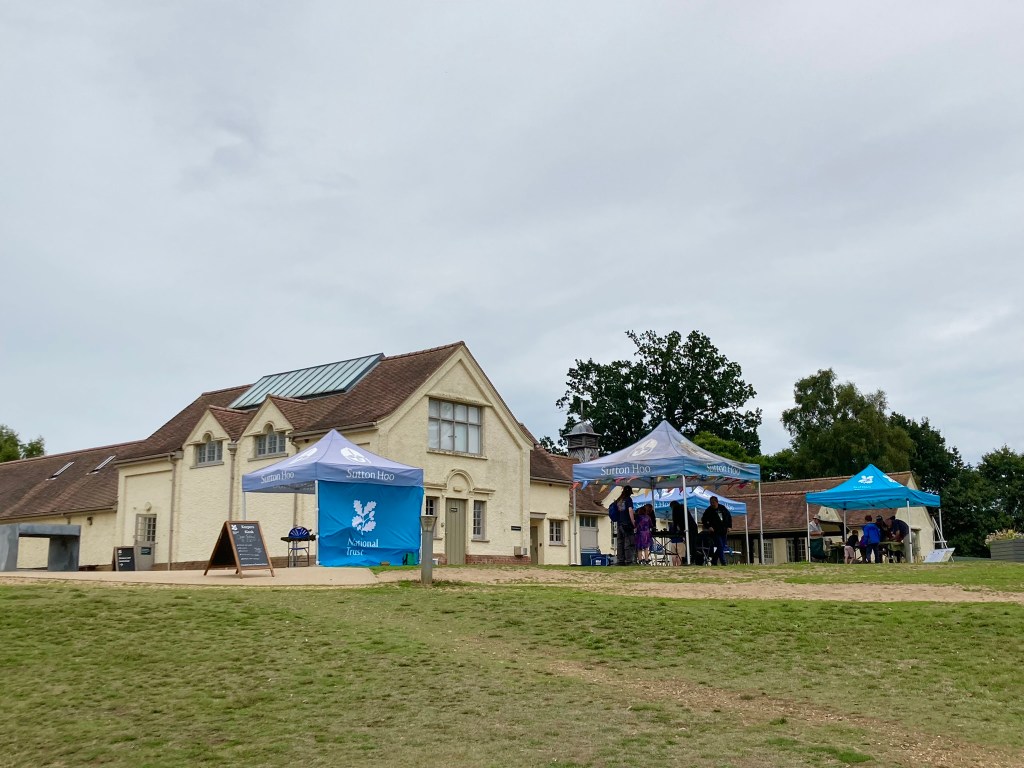
As well as the gaming and painting activities, there were a host of other things to keep visitors busy at the site, some of which we were able to sample in breaks from the game.
The site is exceptionally well-presented, with plenty of information panels.
As you walk out towards Tranmer House and the mounds, there are sculptures inspired by Anglo-Saxon art and metalwork.
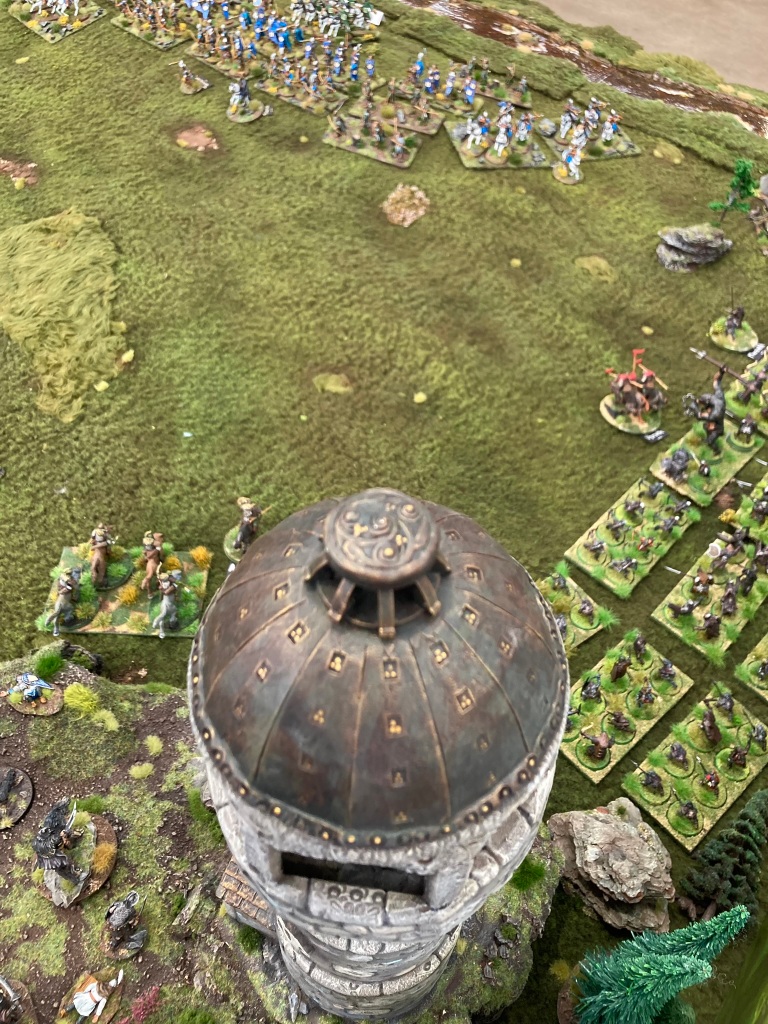
The viewing tower gives a fine overview of the mounds which had sensibly been mowed around to make them more visible amongst the summer grass. (The mounds are all lower than they were 1400 years ago, apart from Mound Two – the site’s other ship burial – which was purposefully reconstructed to its original height after excavation).
My son and I took one of the longer walks through the woods and down to the River Deben, where you can look across the water to Woodbridge where the Sutton Hoo Ship’s Company are currently building a reconstruction of the ship from Mound 1. It also gives you an appreciation of how the ship got to its final resting place and the effort that must have been required to get it up the slope!
The exhibition hall is full of top-notch displays and artefacts, though my lad really wanted to play Hnefatafl – one of the interactive exhibits. Over two visits across the weekend, we managed to play through six games, with the king winning every single time!
I can highly recommend a visit to Sutton Hoo, even if you have only a slight interest in the early medieval period. It puts the treasures in the British Museum (replicas of all of which can be viewed here) into context and presents the site brilliantly.
This giant helmet sculpture greets visitors in the car park
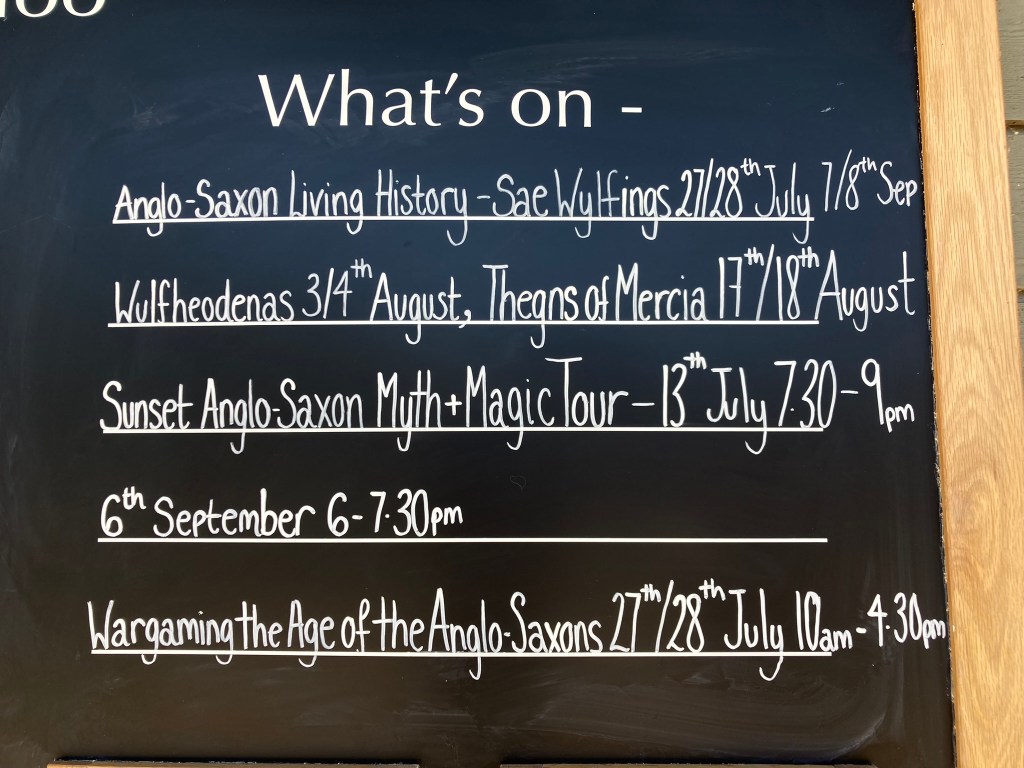
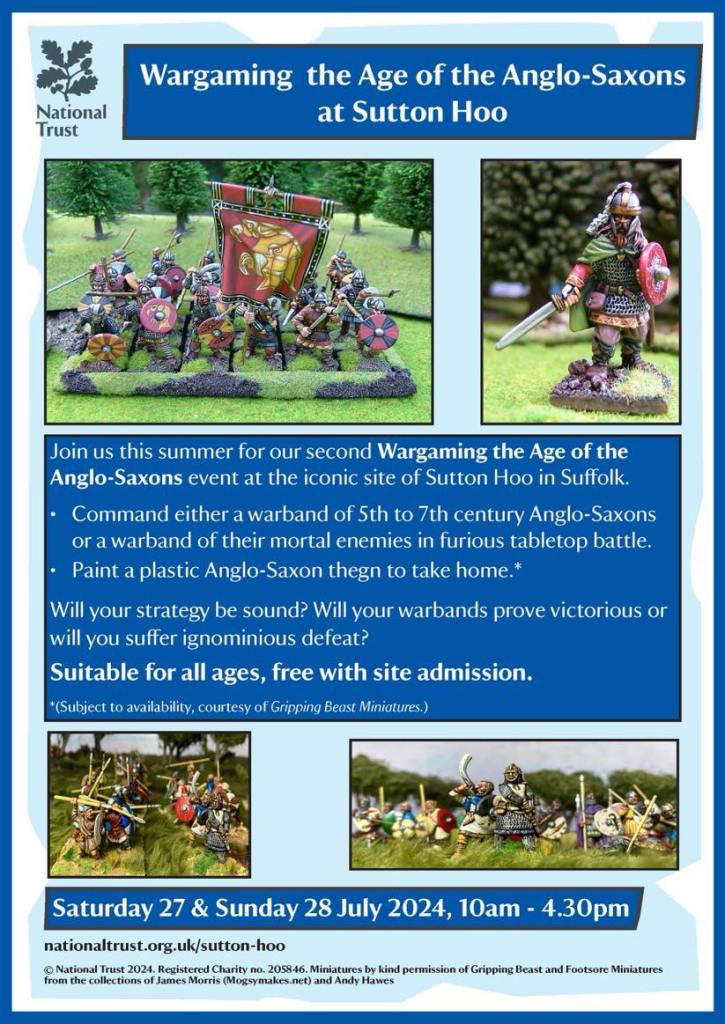
If you fancy visiting for more Wargaming the Age of the Anglo-Saxons, we have a provisional date of 26-27th July 2025 for the next one! (Note that this is provisional – please check with the National Trust nearer the time for confirmation).
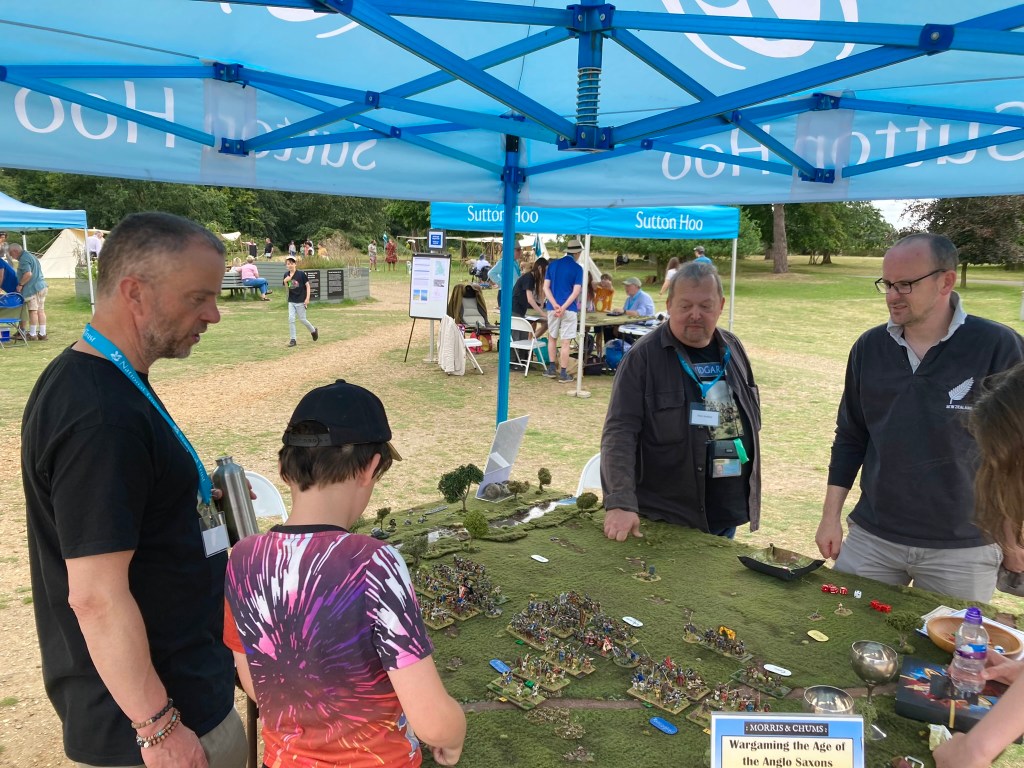
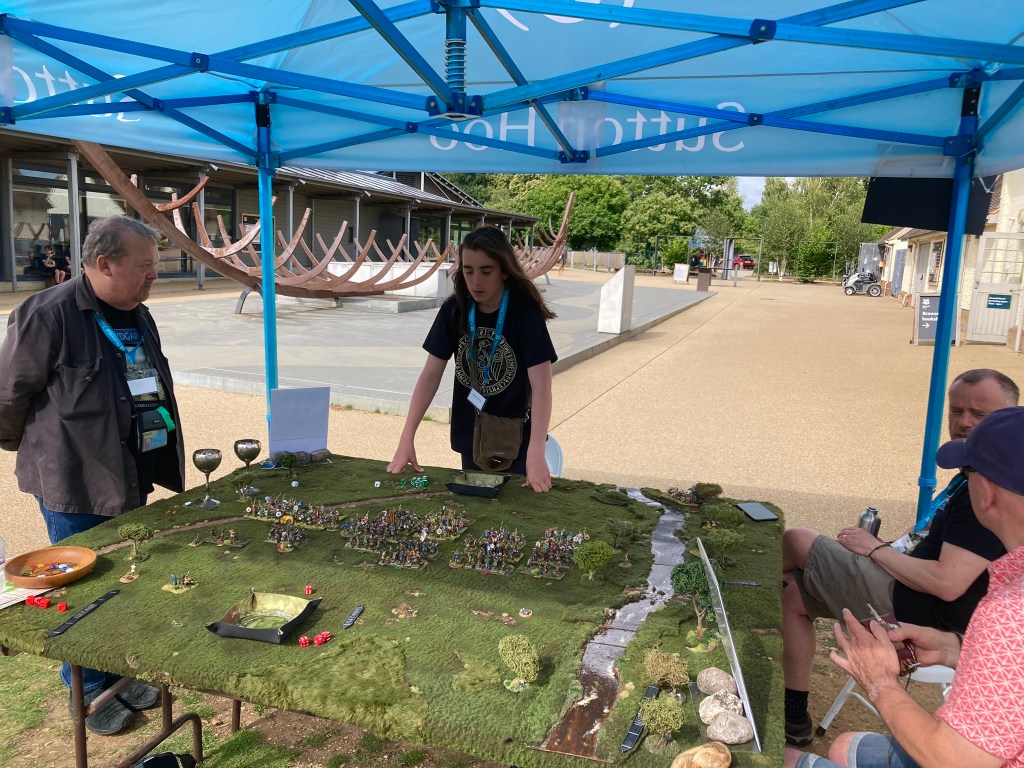
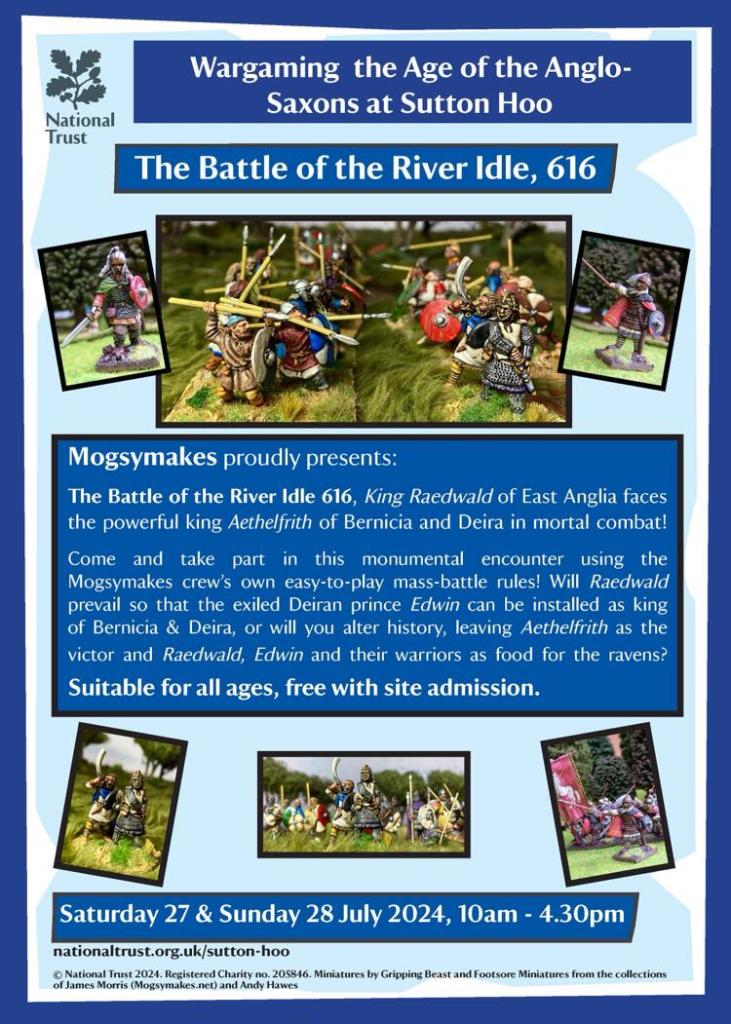
Following on from last year’s experiment with a one-day format, this year the Sutton Hoo team expanded the Wargaming the Age of the Anglo-Saxons event into a two-day event.
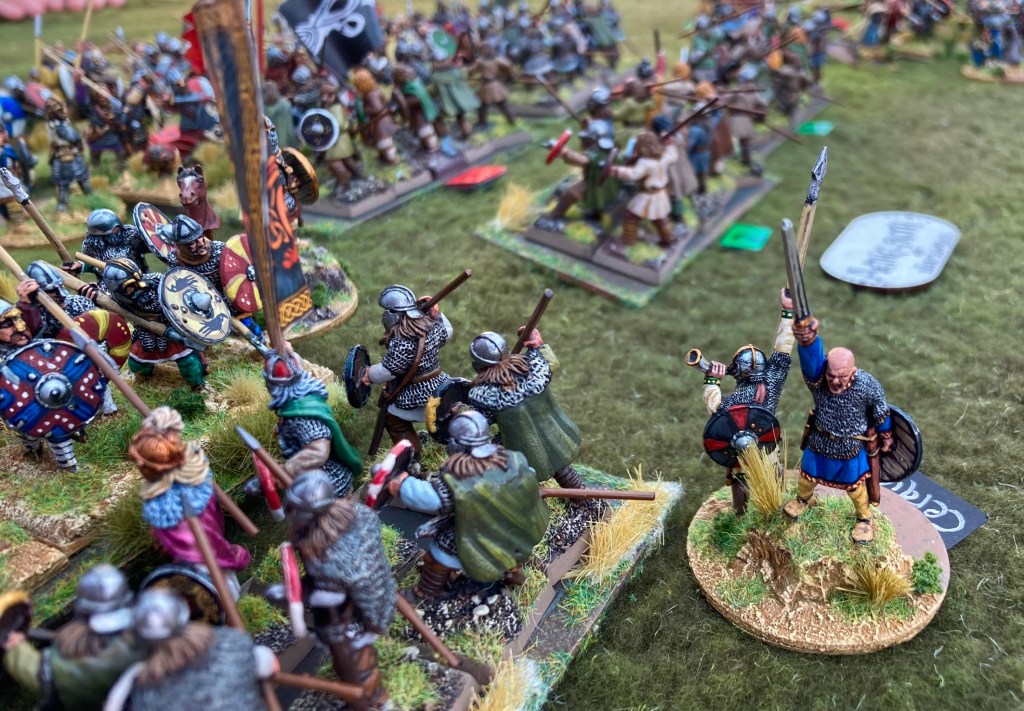
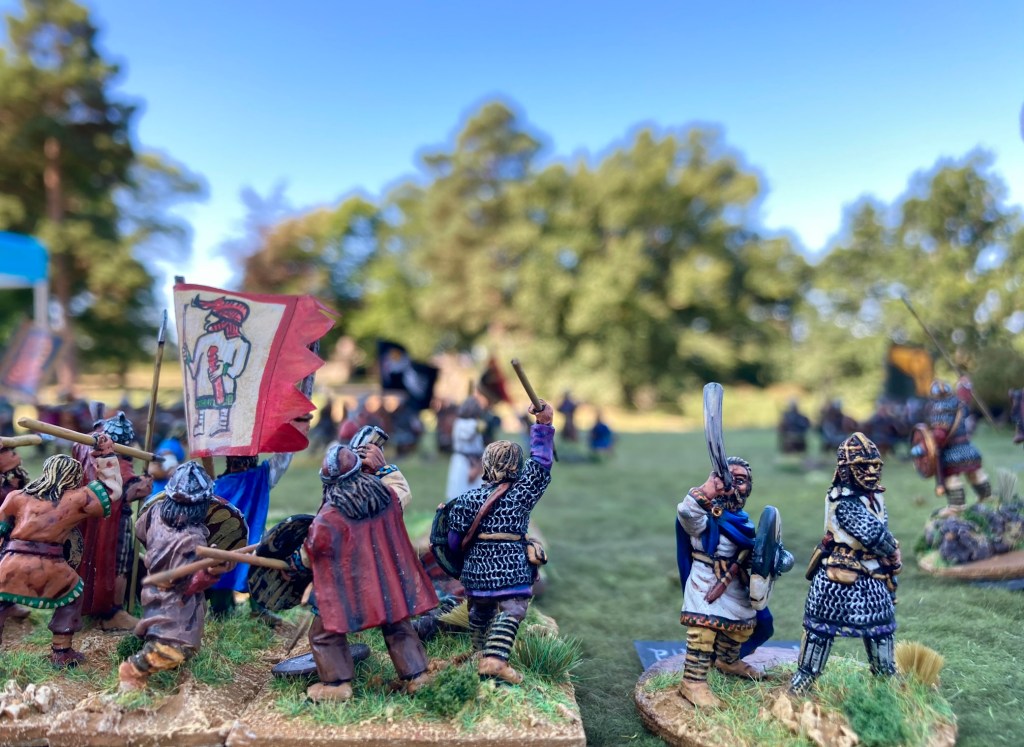
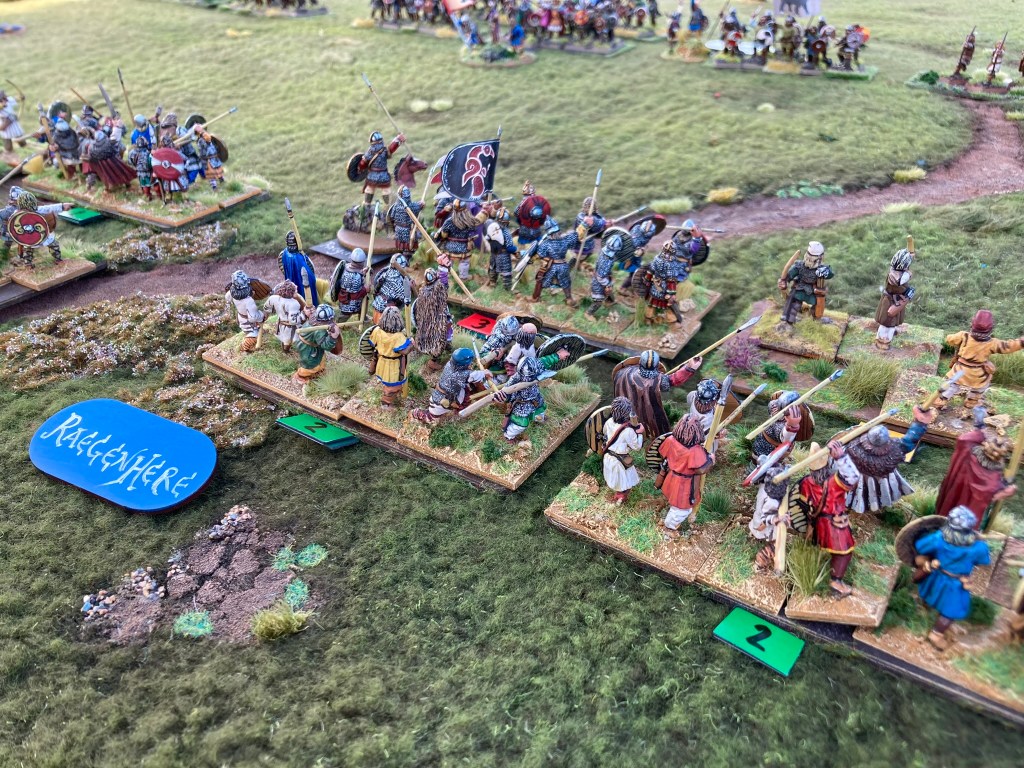
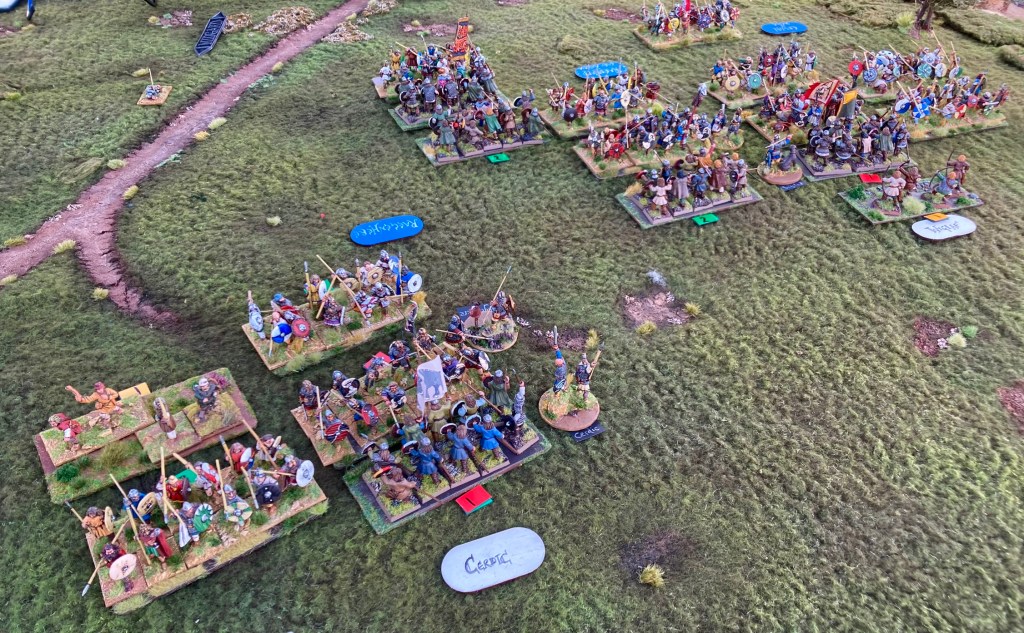
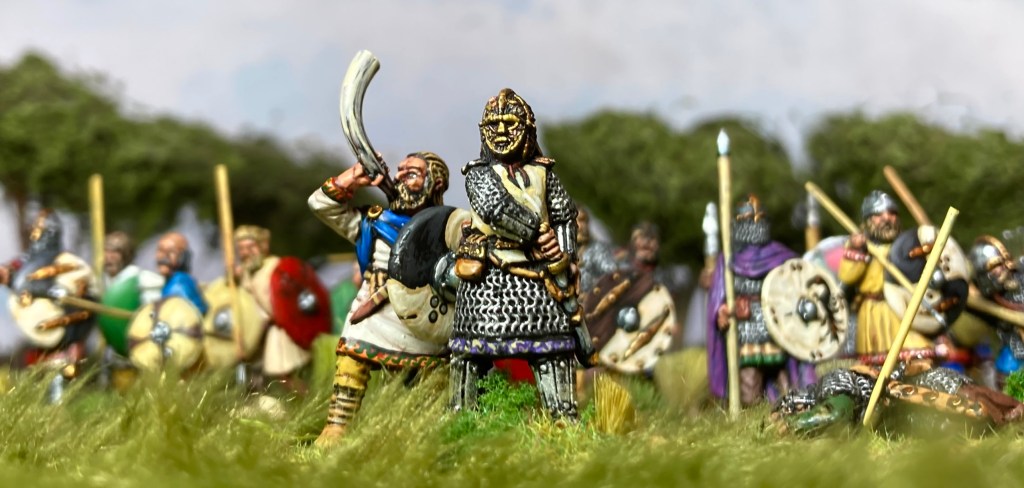
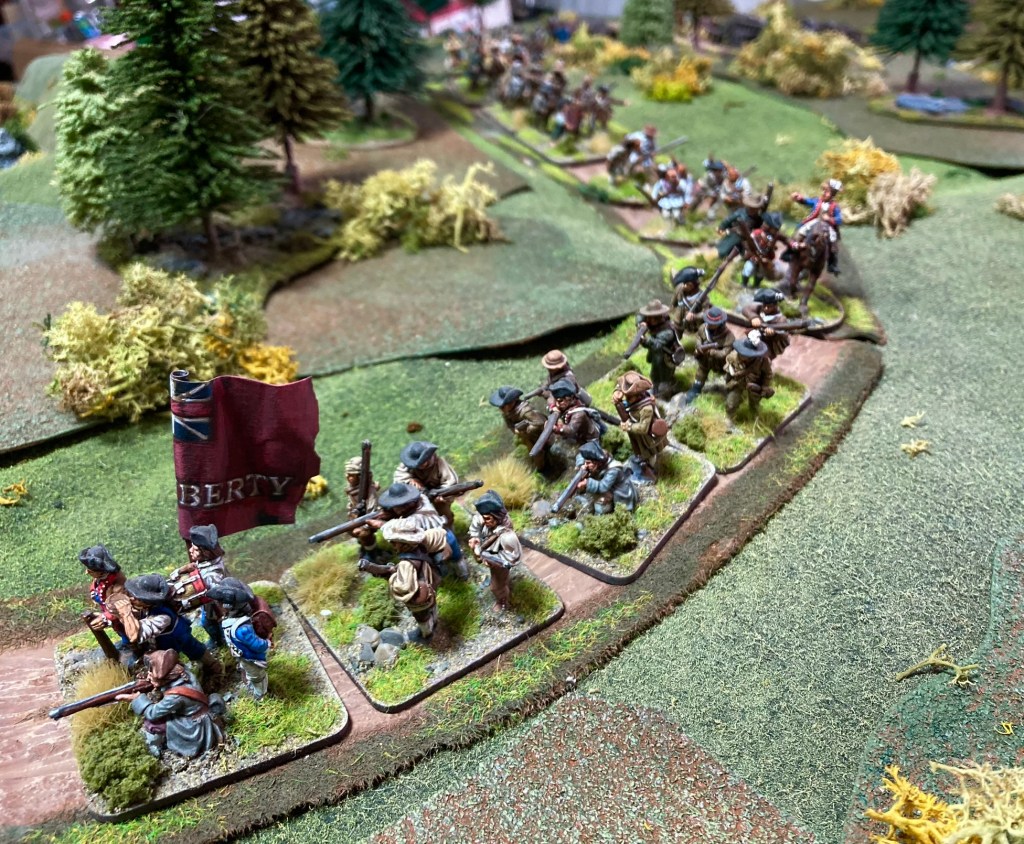
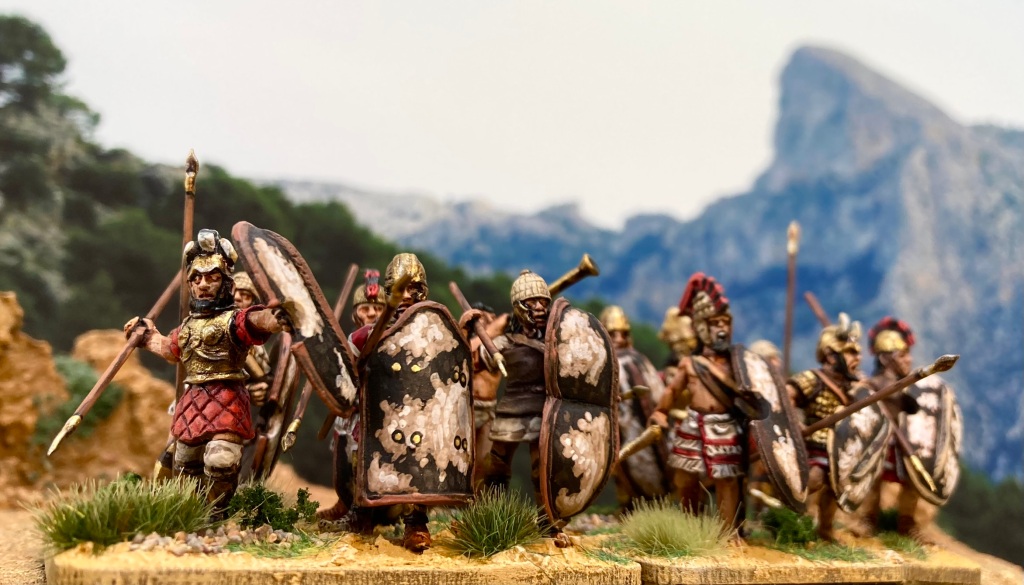
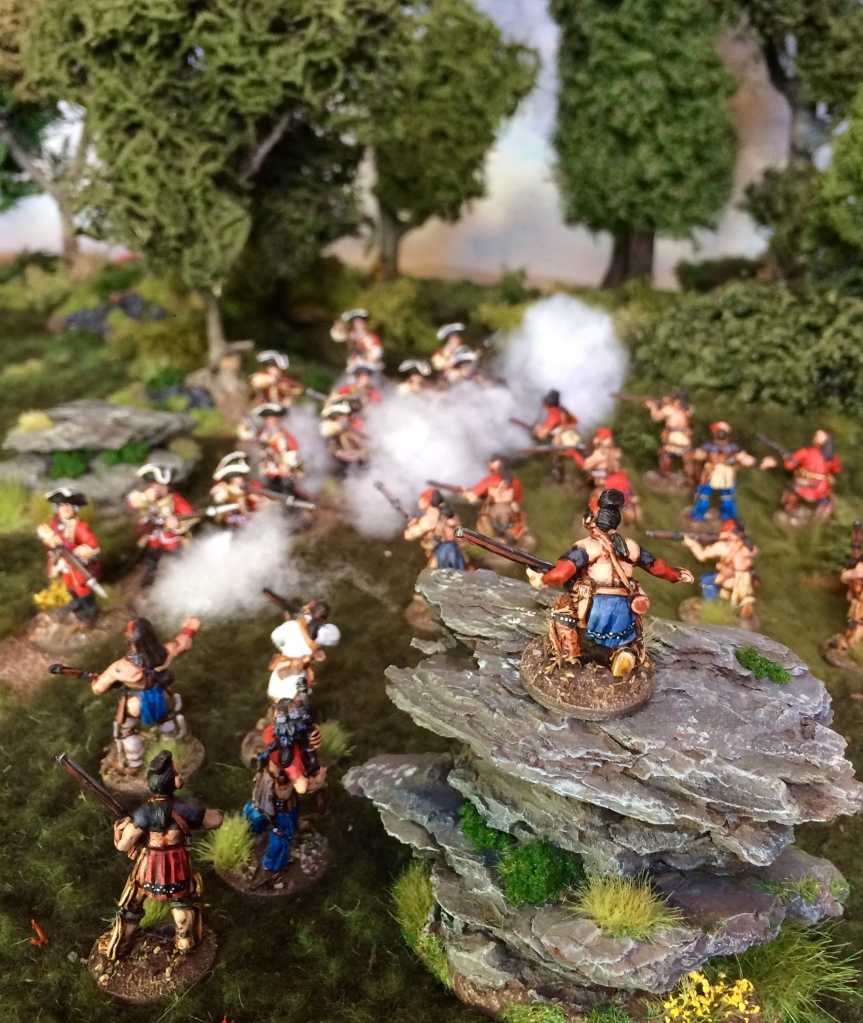
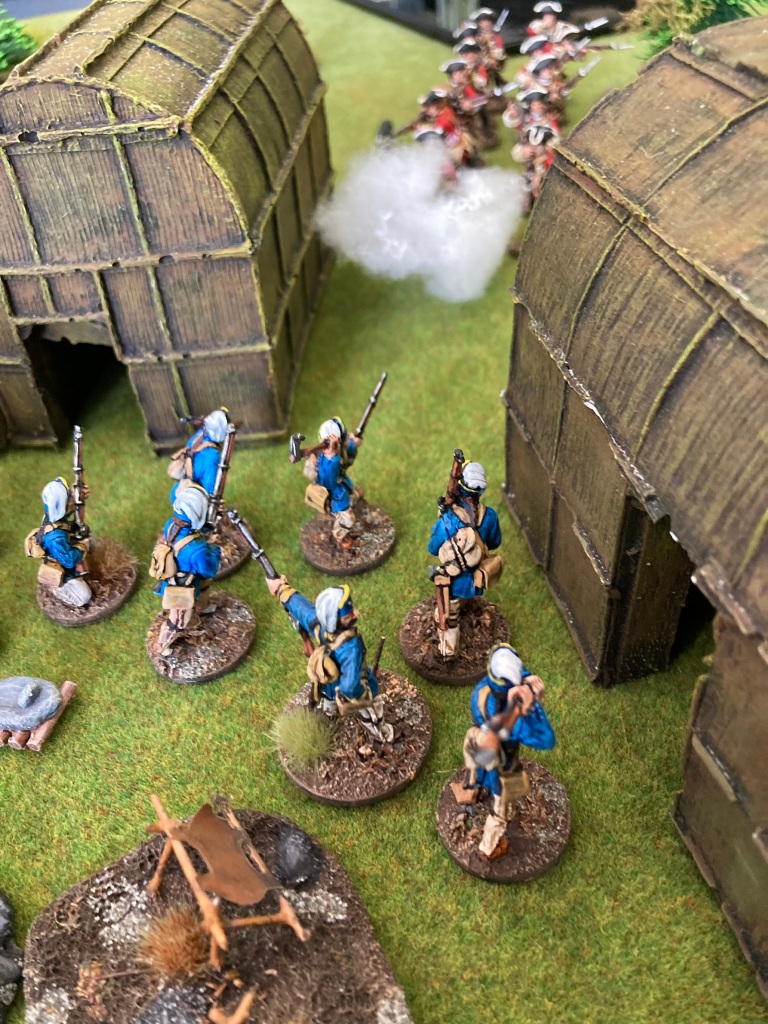
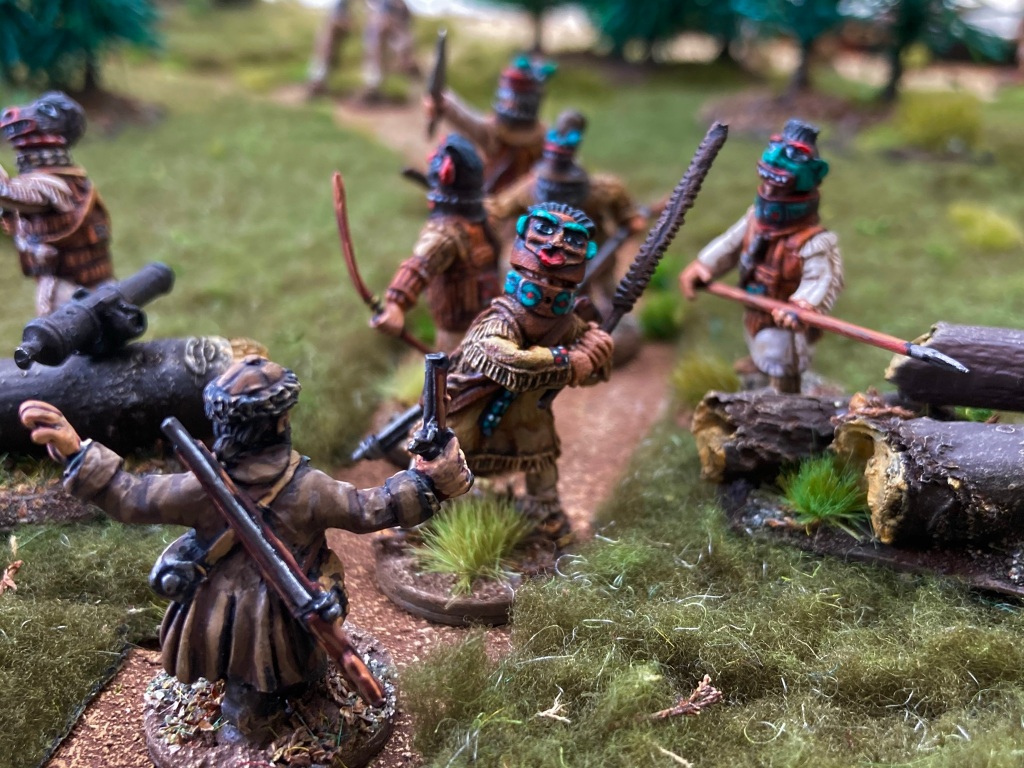
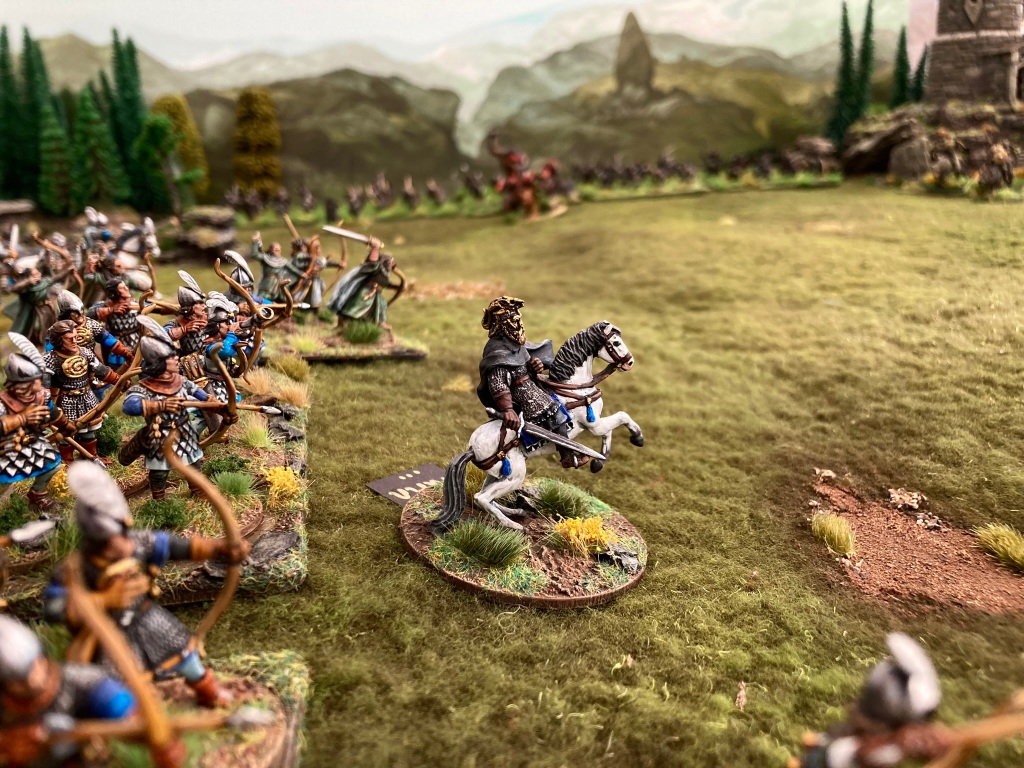
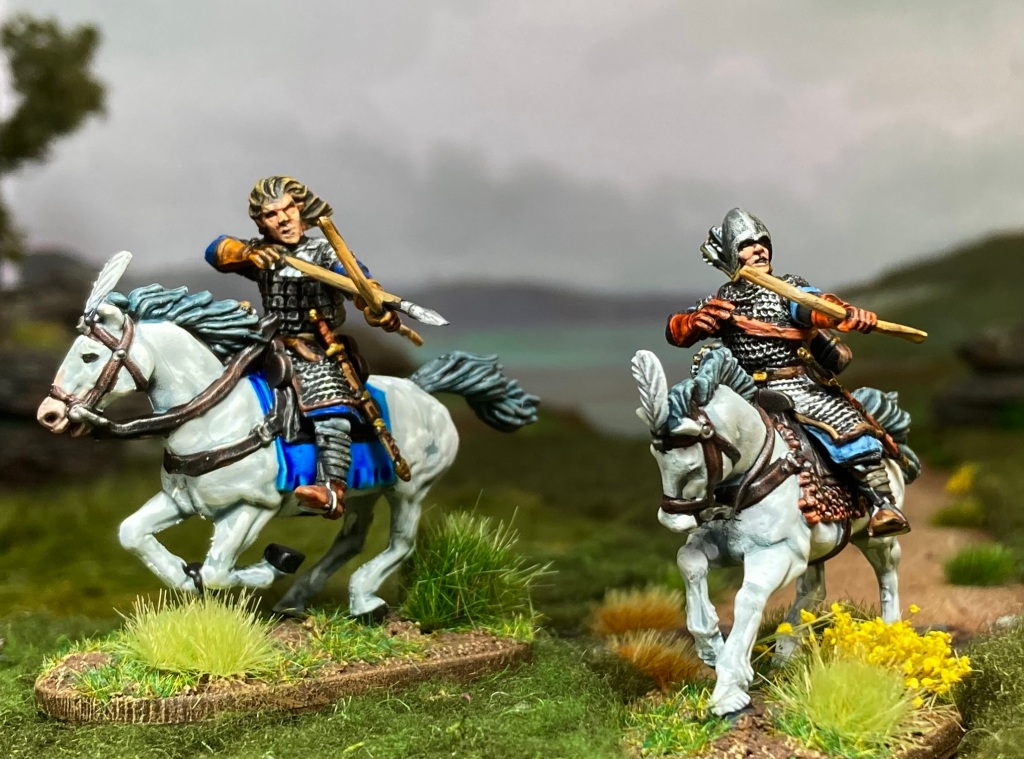
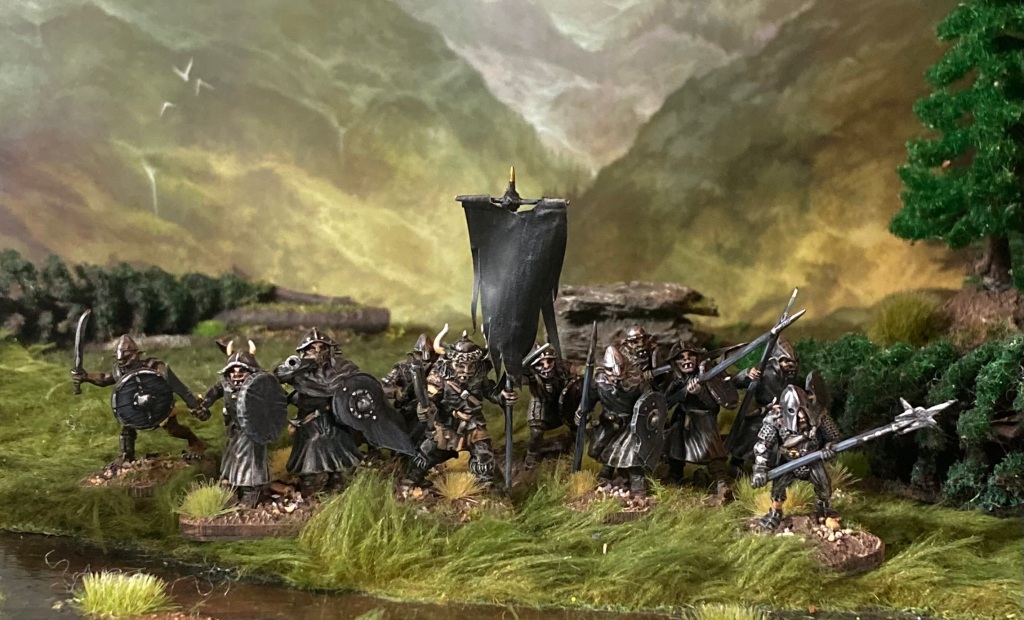
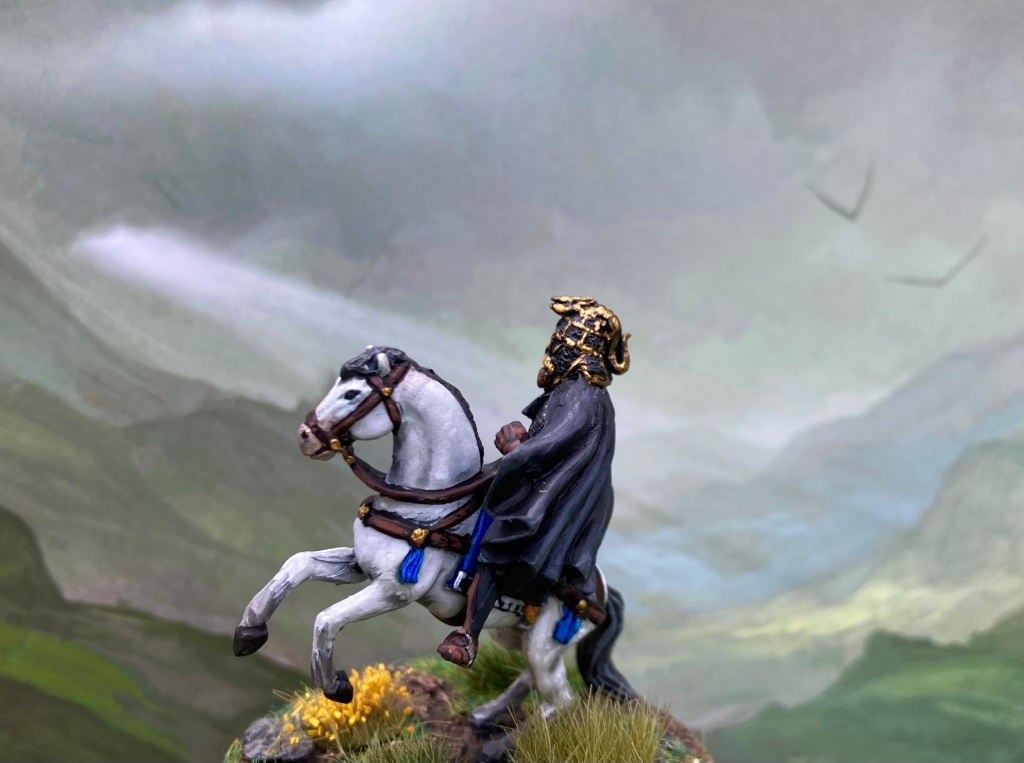
Action on the Northumbrian left flank as thegn Cerdic (right) battles the East Anglians under Prince Raegenhere. 28mm miniatures by Gripping Beast, Black Tree Designs, Footsore Miniatures and (OOP) Tanatus Miniatures.
Having personally toured Sutton Hoo during the excavations in the 1990s, it has to be said that the National Trust have done an amazing job of presenting this site to the public and creating the facilities needed for a family day out. We were delighted to be invited back to help out with this event (and huge thanks to Tom, Pete and Oz who joined me in this quest!)
The brief was the same as last year – to provide and run engaging miniature wargames set in the 7th century for the visiting public. Andy’s recommendation was to have a team of four people to run each game, which was absolutely necessary under the circumstances, as we were busier than pretty much any wargames show I have been to!
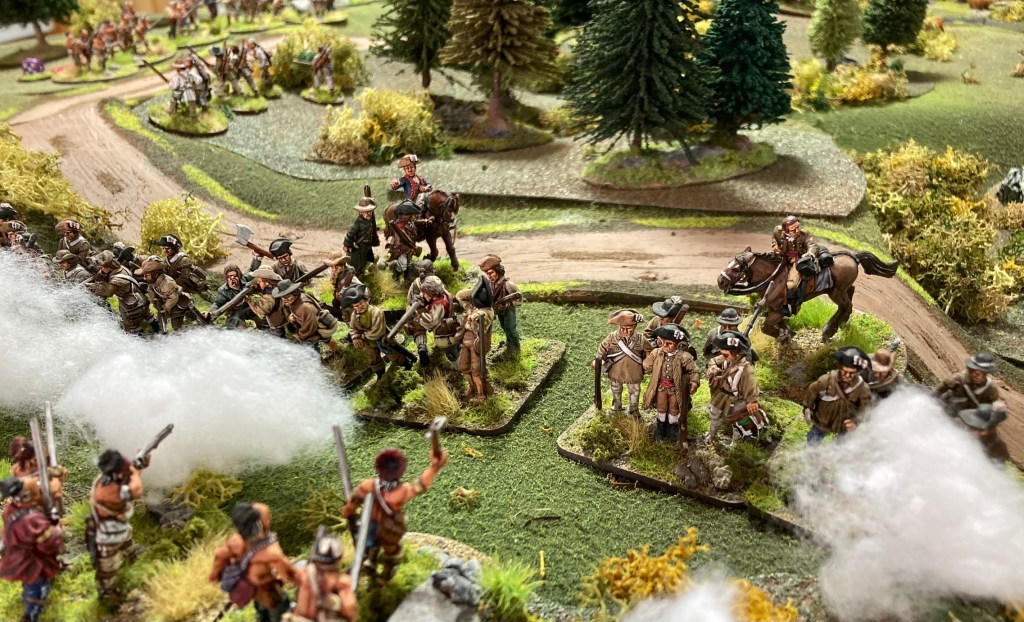
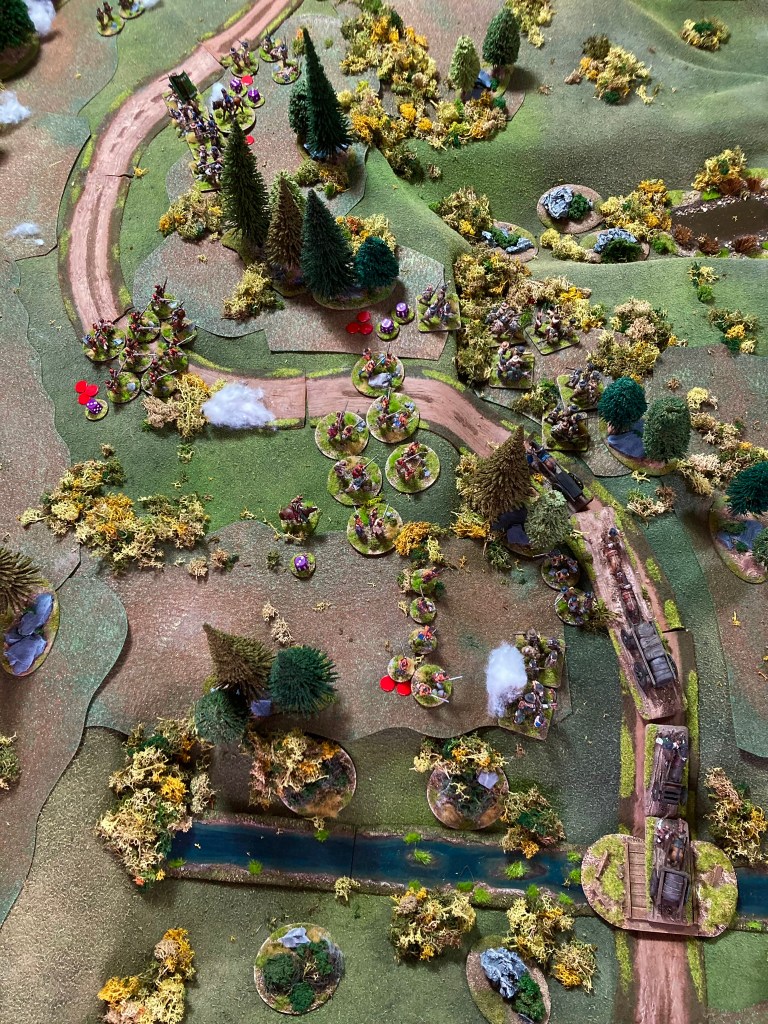
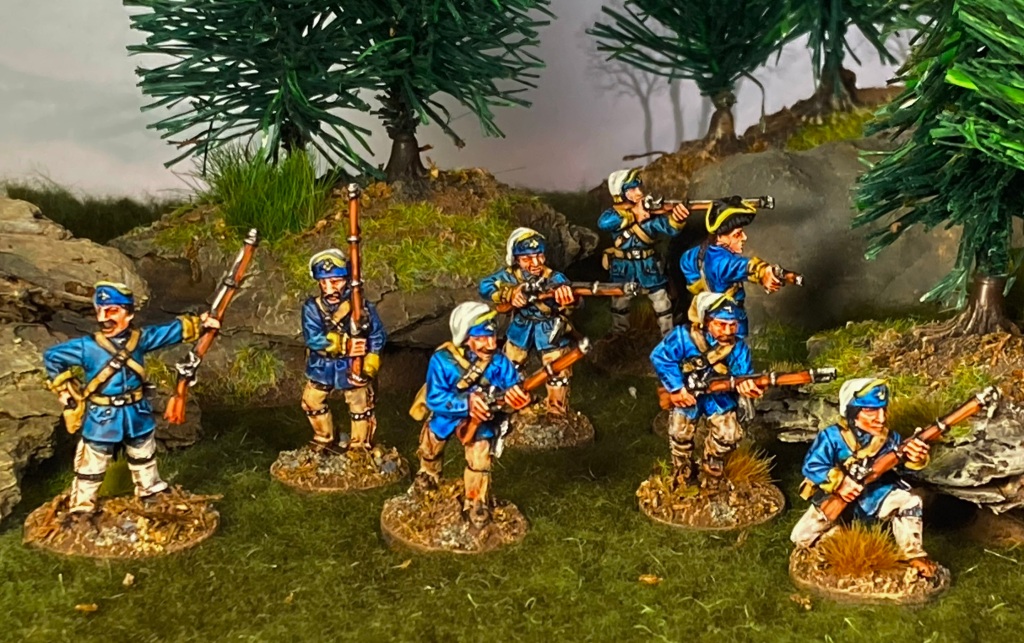
Our 28mm Battle of the River Idle in full flow with Pete and Tom running the actionVisitors from Northumbria!
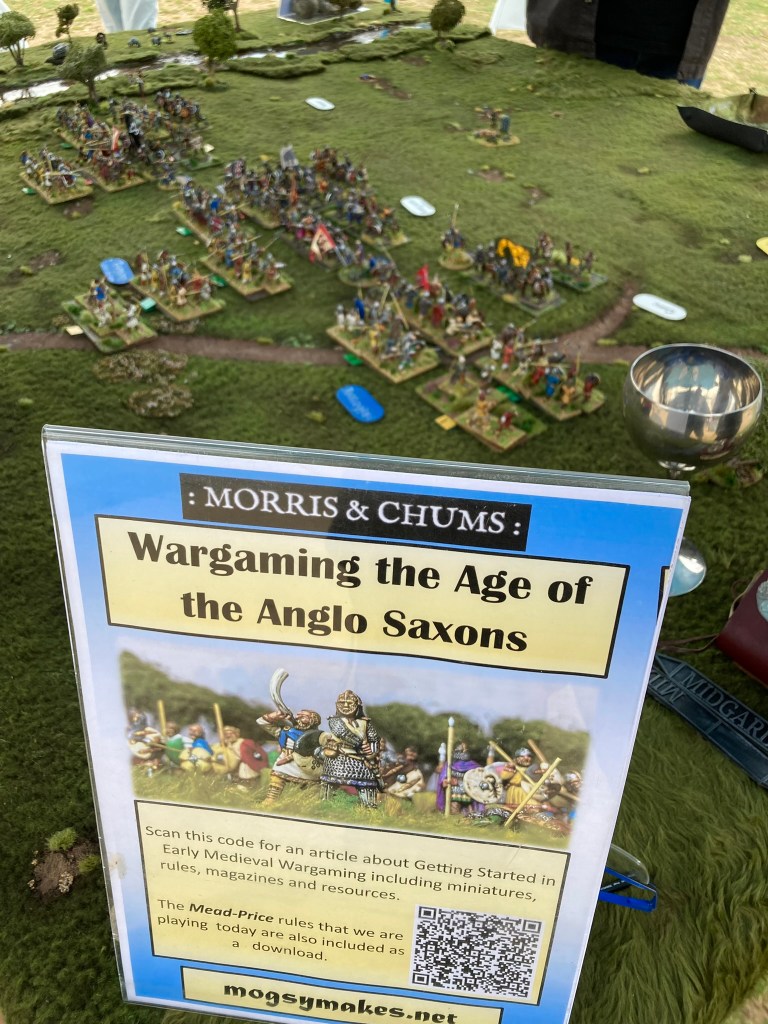
Rules had to be fast-playing and quick to explain, so once again we went for my own Mead-Price rules (available here as a free download) which allow an early medieval battle to be played out in around 20-30 minutes.
There were three games available alongside the ever-popular painting table (‘Paint your own Saxon thegn’) which I’ll talk more about in Part 2.
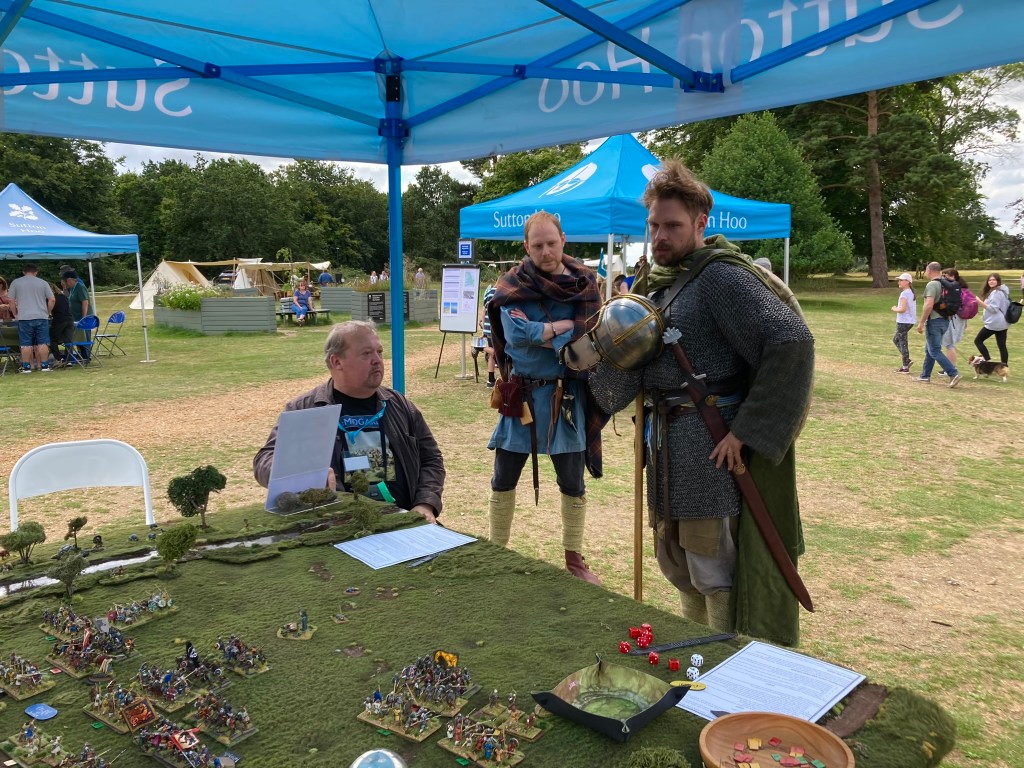
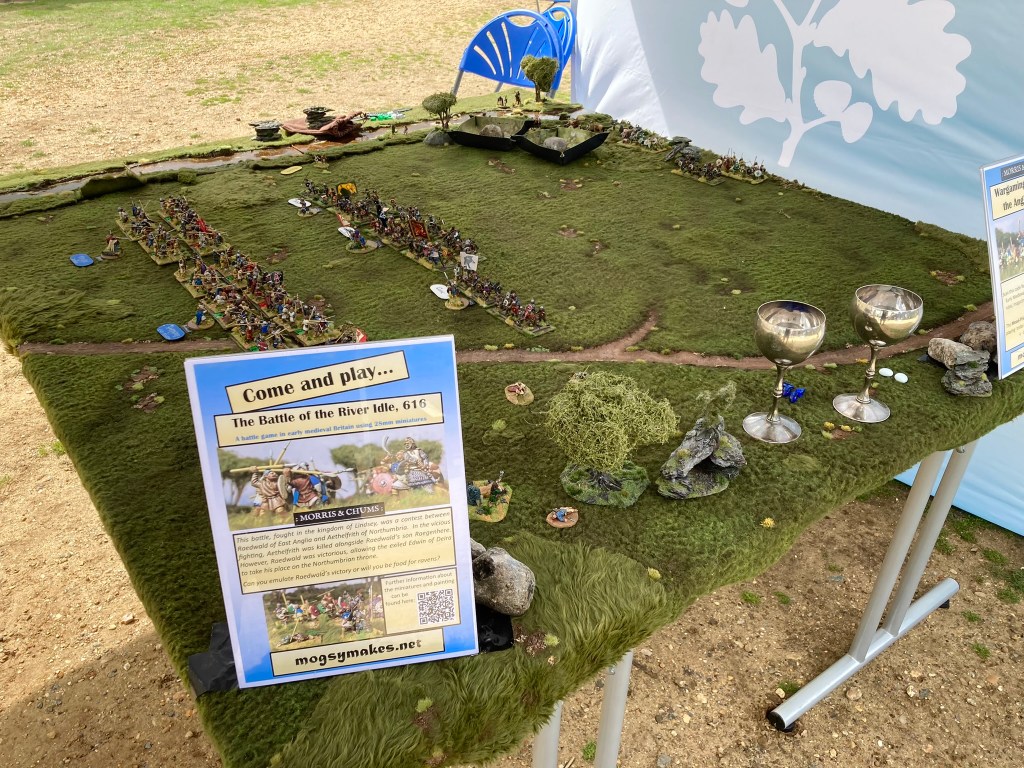
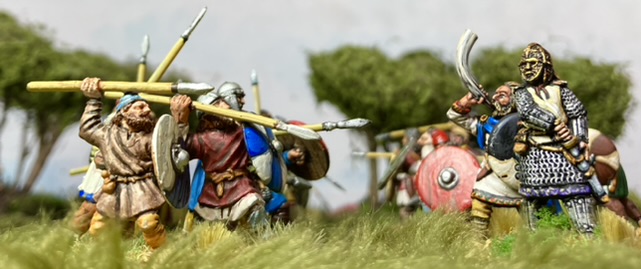
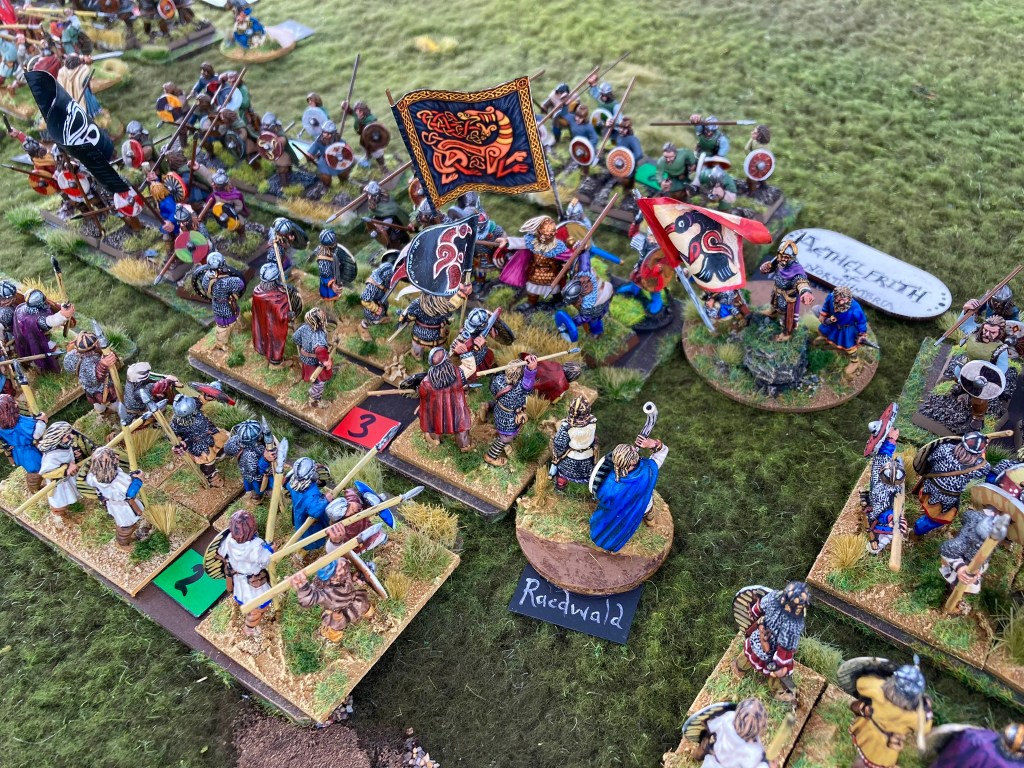
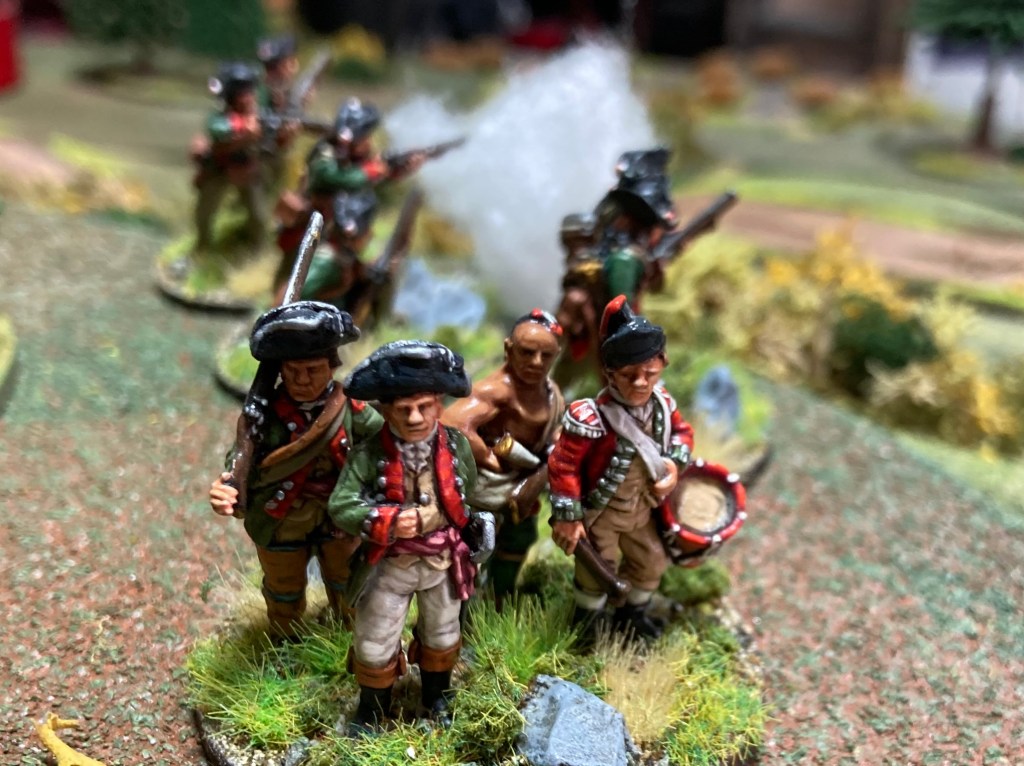
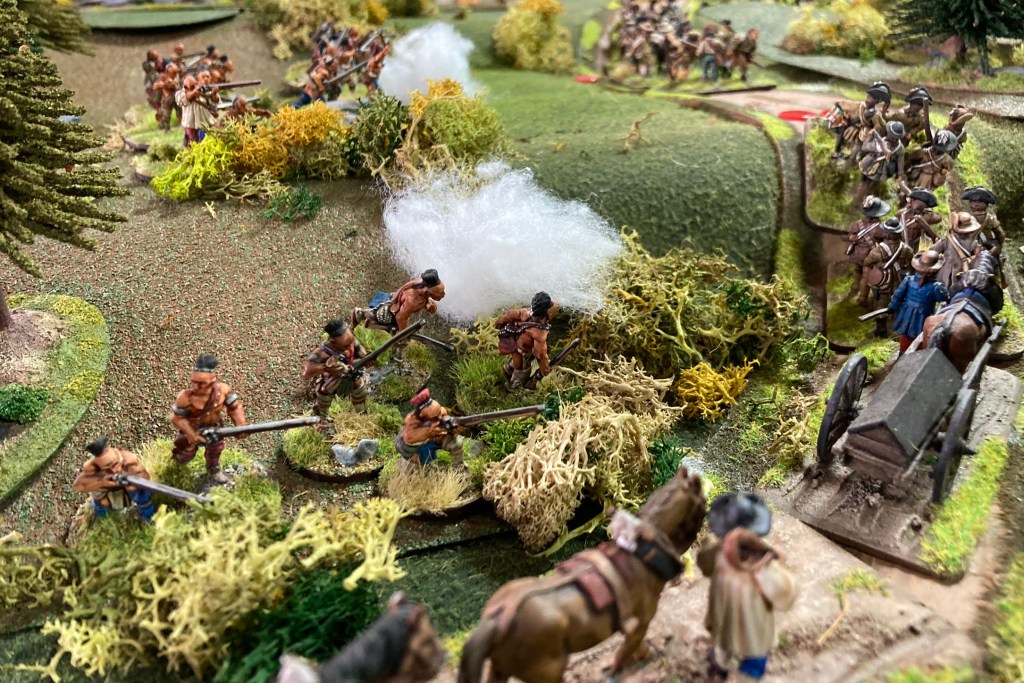
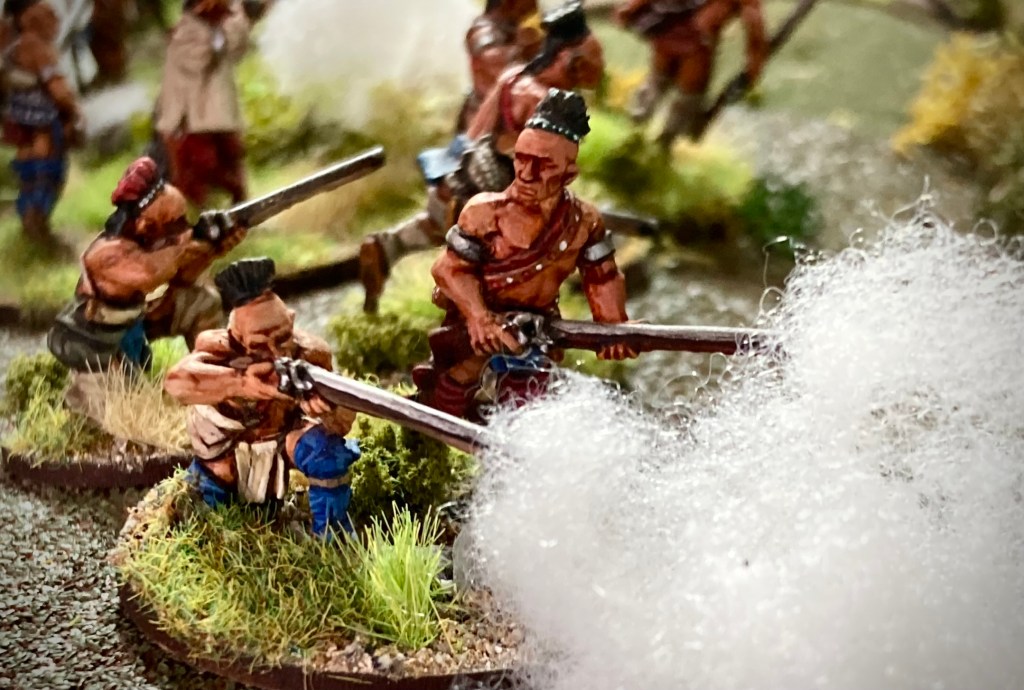
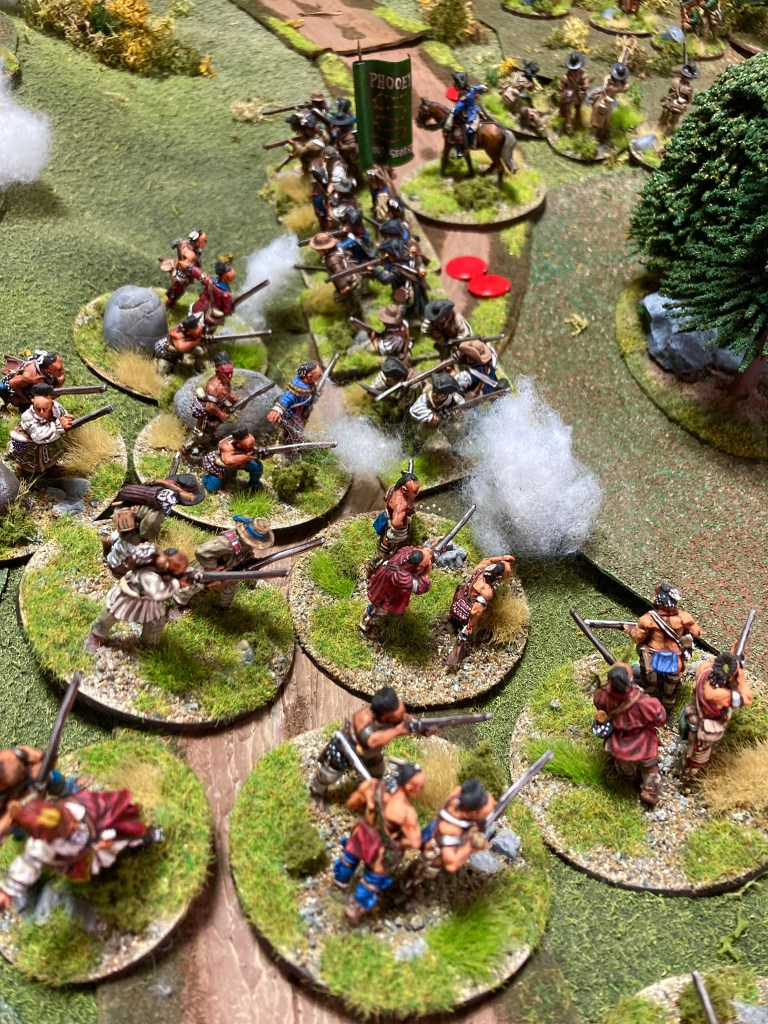
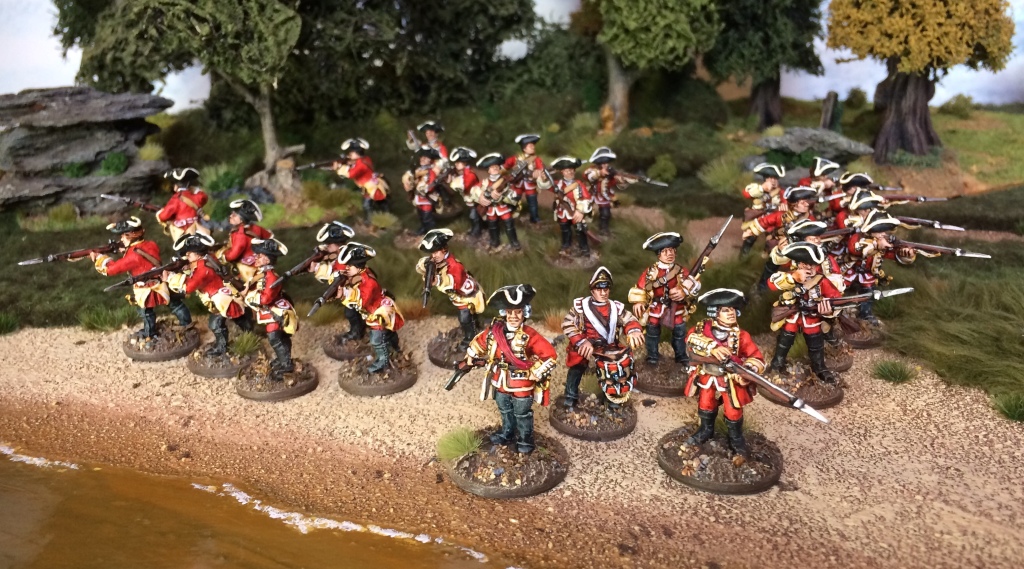
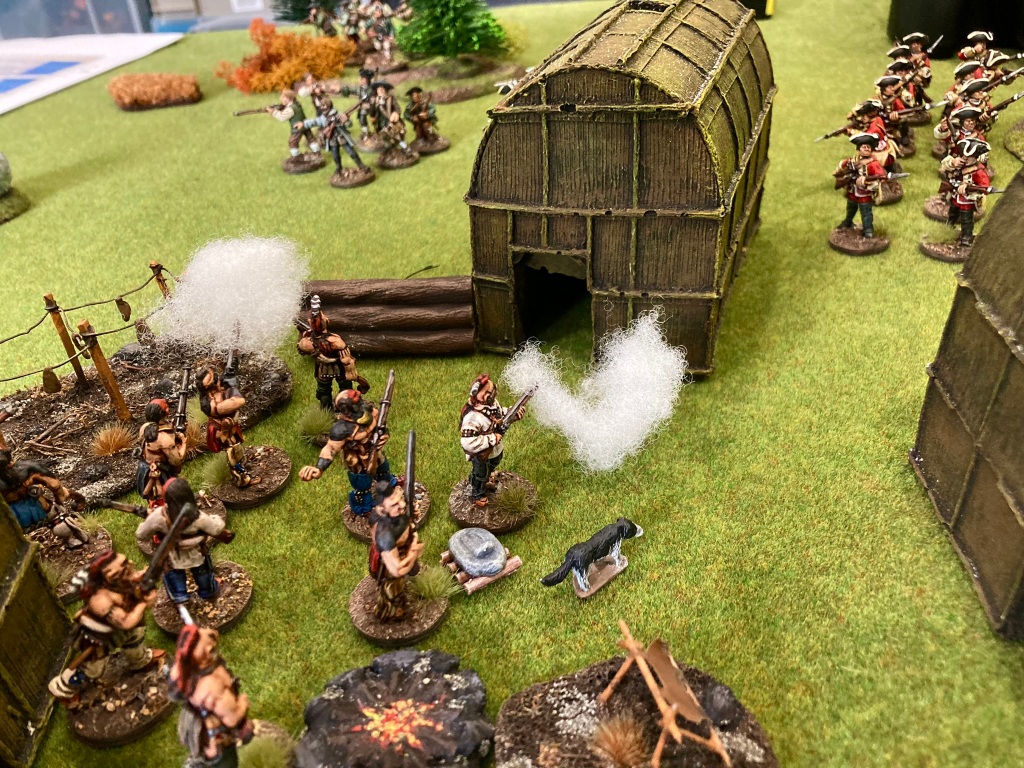
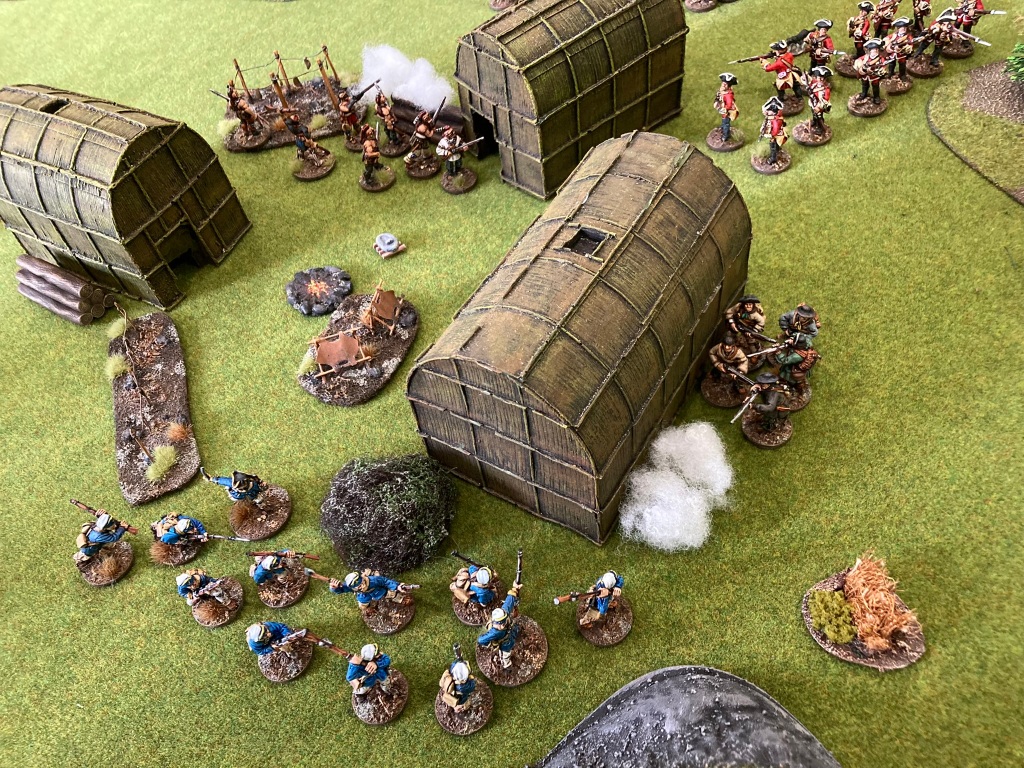
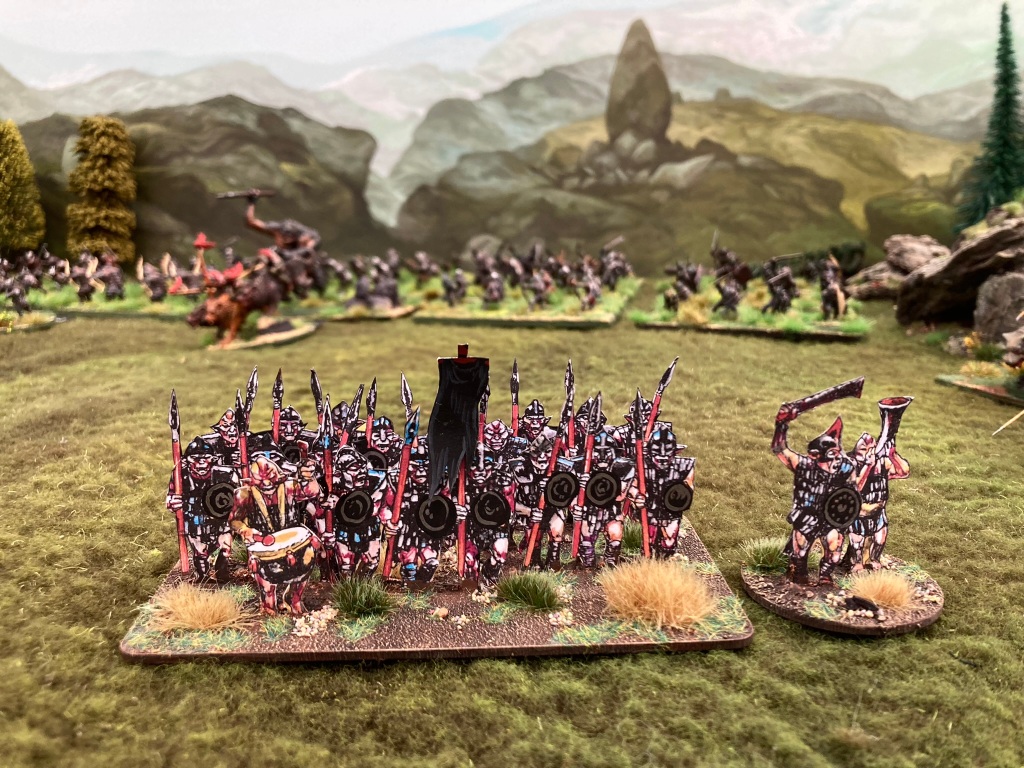
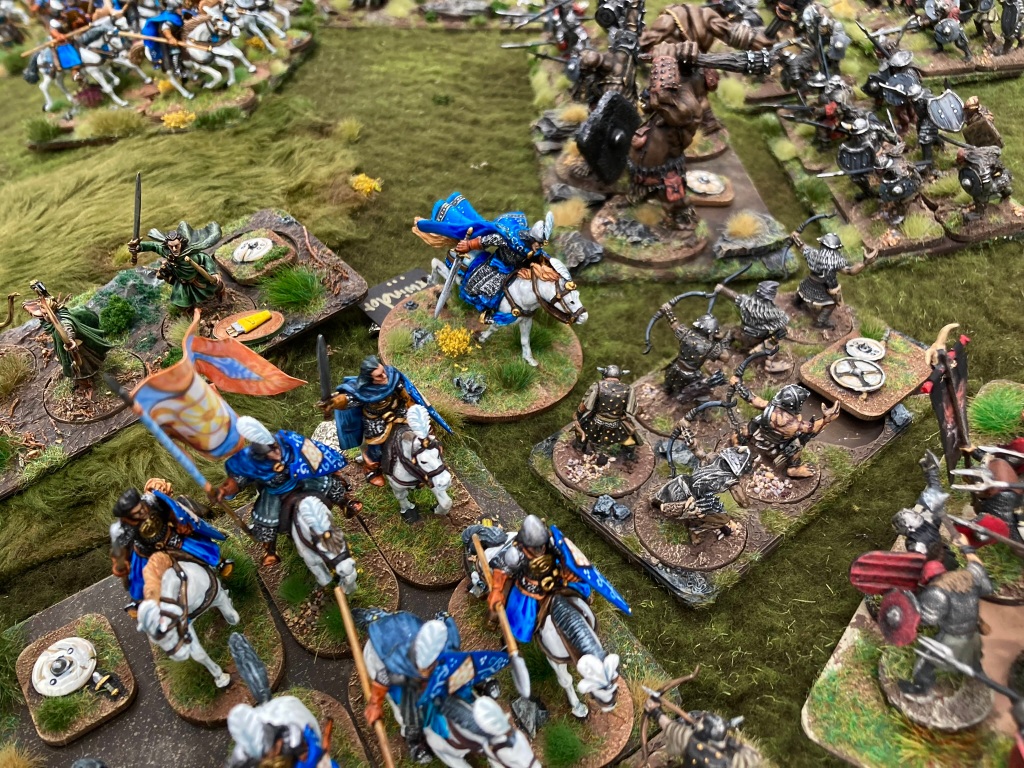
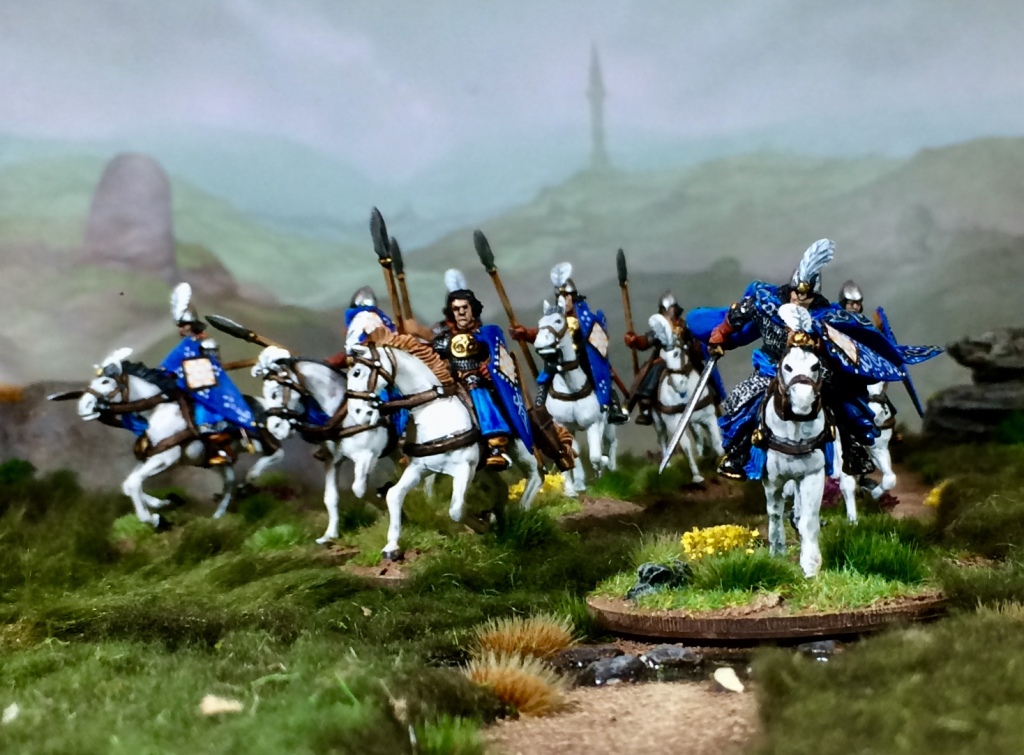
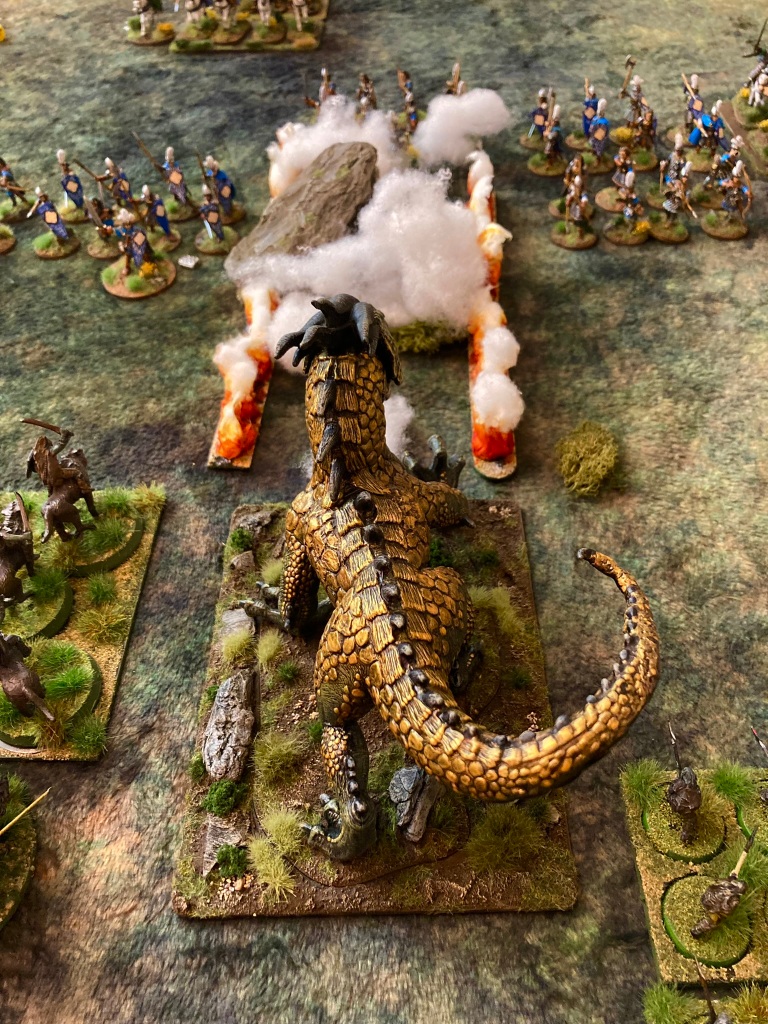
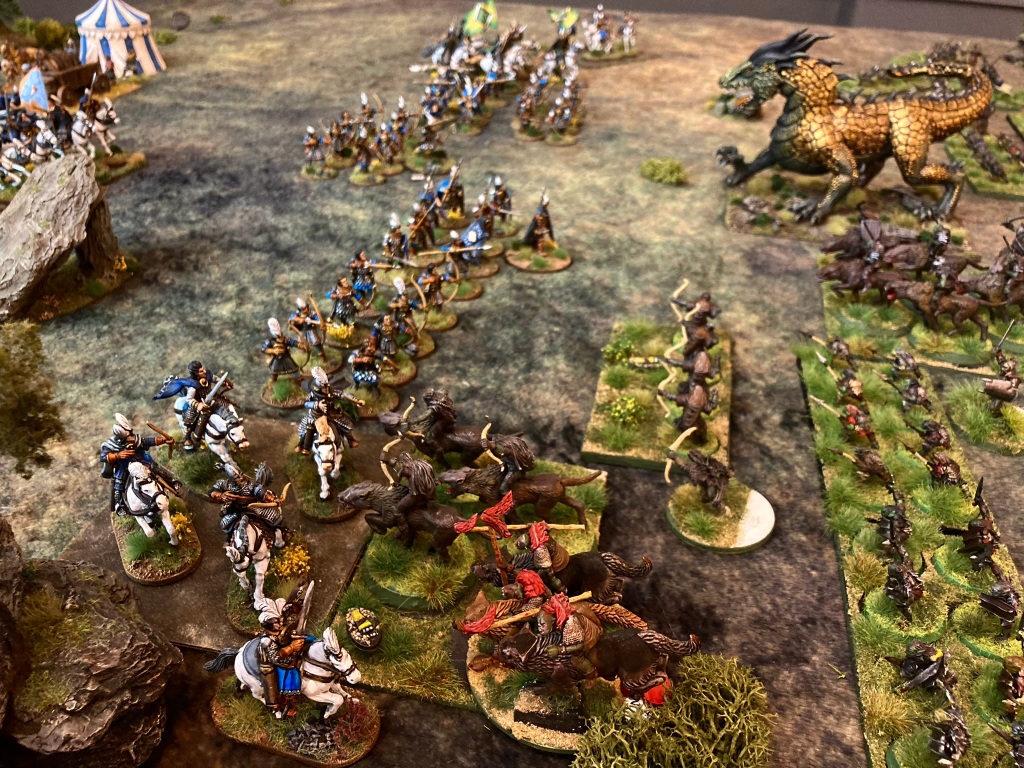
We (Morris & Chums/ Mogsymakes) were reprising our Battle of the River Idle 616 game from last year. Being the only battle that we know that Raedwald – King of East Anglia and the most likely candidate for being the occupant of Mound 1’s ship burial at Sutton Hoo – fought in, it was the obvious choice.
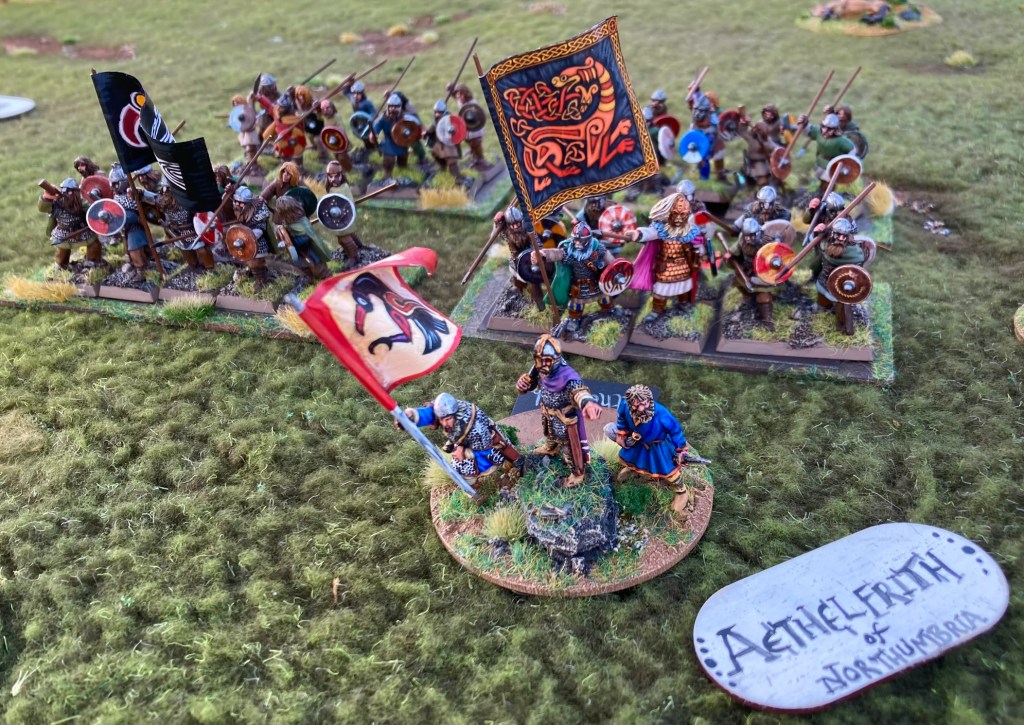
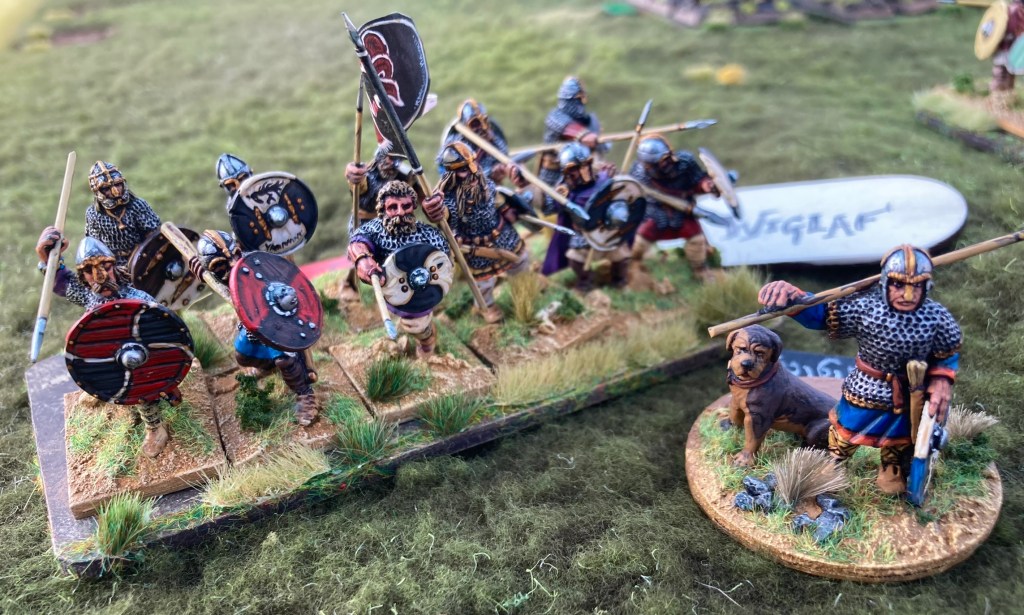
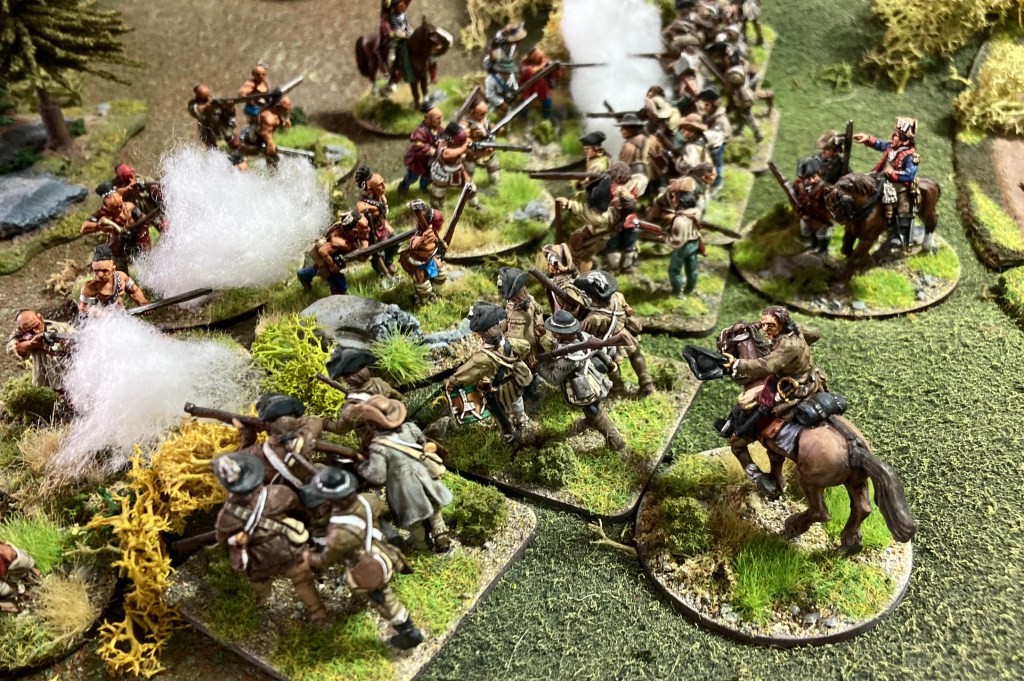
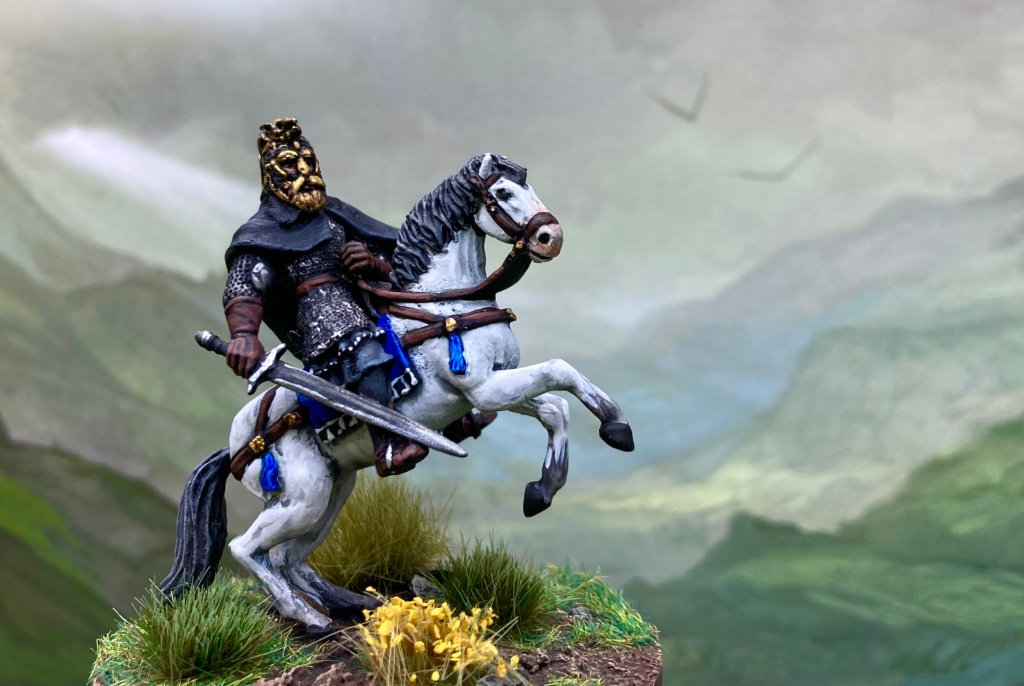
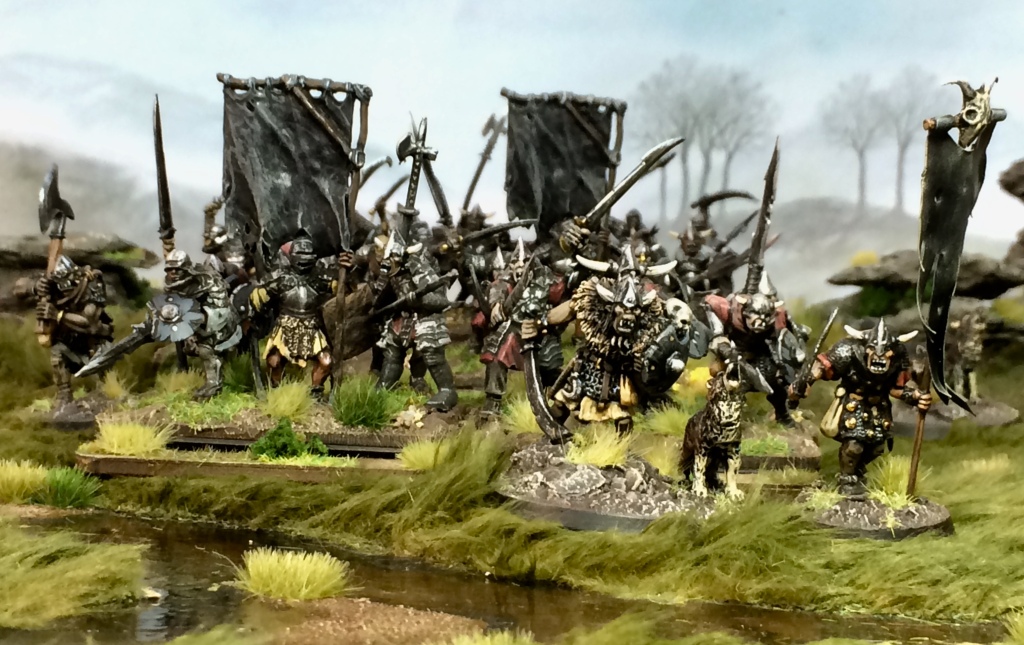
Aethelfrith of Northumbria and his warriors – 28mm miniatures by Gripping Beast, Black Tree and Footsore Miniatures
Although details on the actual fighting are sparse, the build-up to the battle is fascinating and always helps to set the scene for our visitors. Aethelfrith of Northumbria was probably the most feared ruler of his day; Edwin of Deira, his rival, had fled the north and taken refuge in the court of Raedwald of East Anglia. Aethelfrith attempted to pay Raedwald to have Edwin killed, but instead, Raedwald (with persuasion from his wife*) decided to take an army north and fight it out with Aethelfrith.
*Edited 6.8.24 in response to Bruce’s comment below – thanks, Bruce!
The two forces met on the banks of the River Idle in Lindsey (Lincolnshire) and Aethelfrith – with a smaller army – was defeated and killed. However, the victory was clearly hard-fought, as Raedwald’s son Raegenhere also died, The victorious East Anglian king returned home to bury his son (Raegenhere has been suggested as a possible occupant of Mound 2 at Sutton Hoo, the second ship burial), while Edwin of Deira was now installed as King of Northumbria.
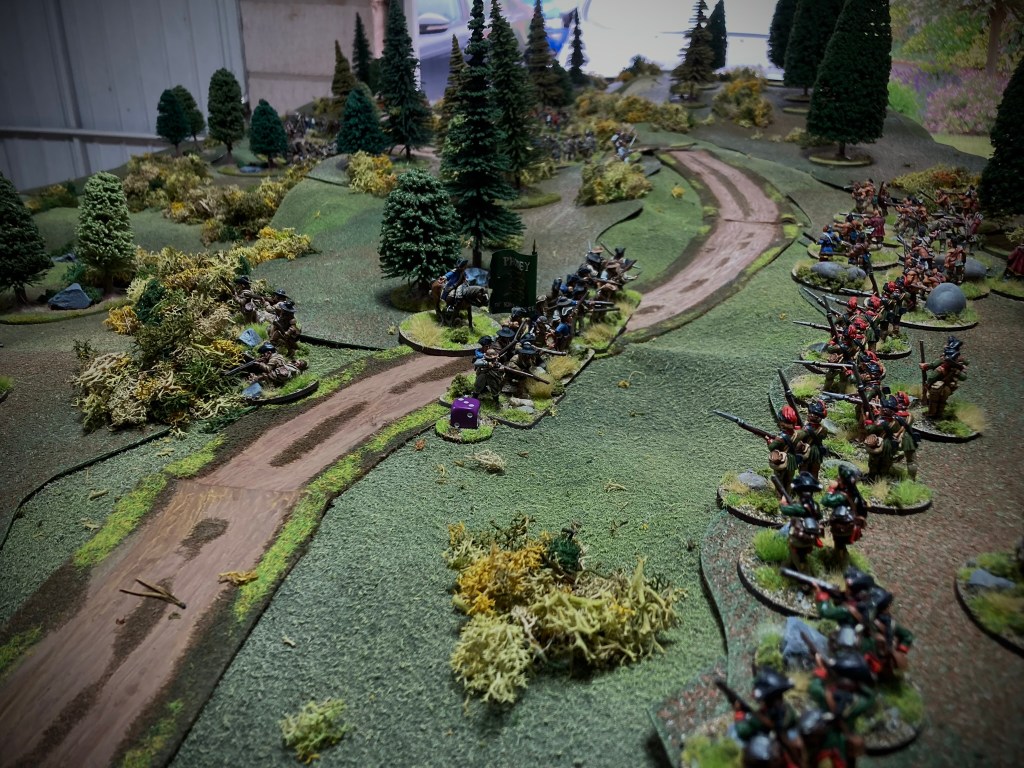
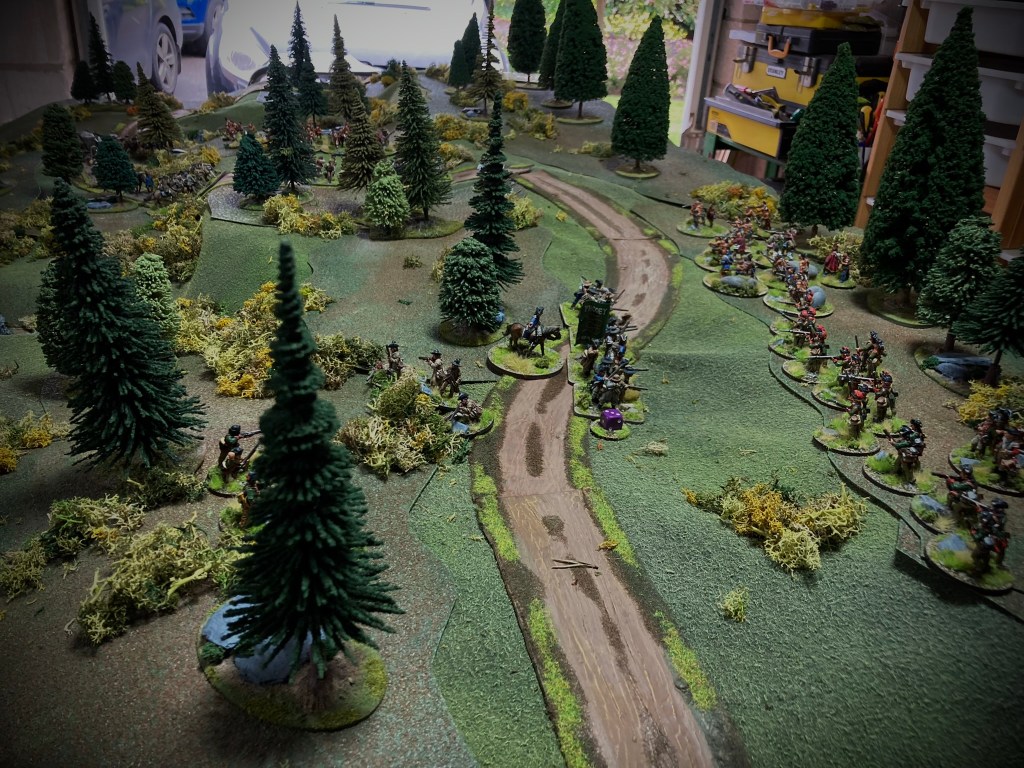
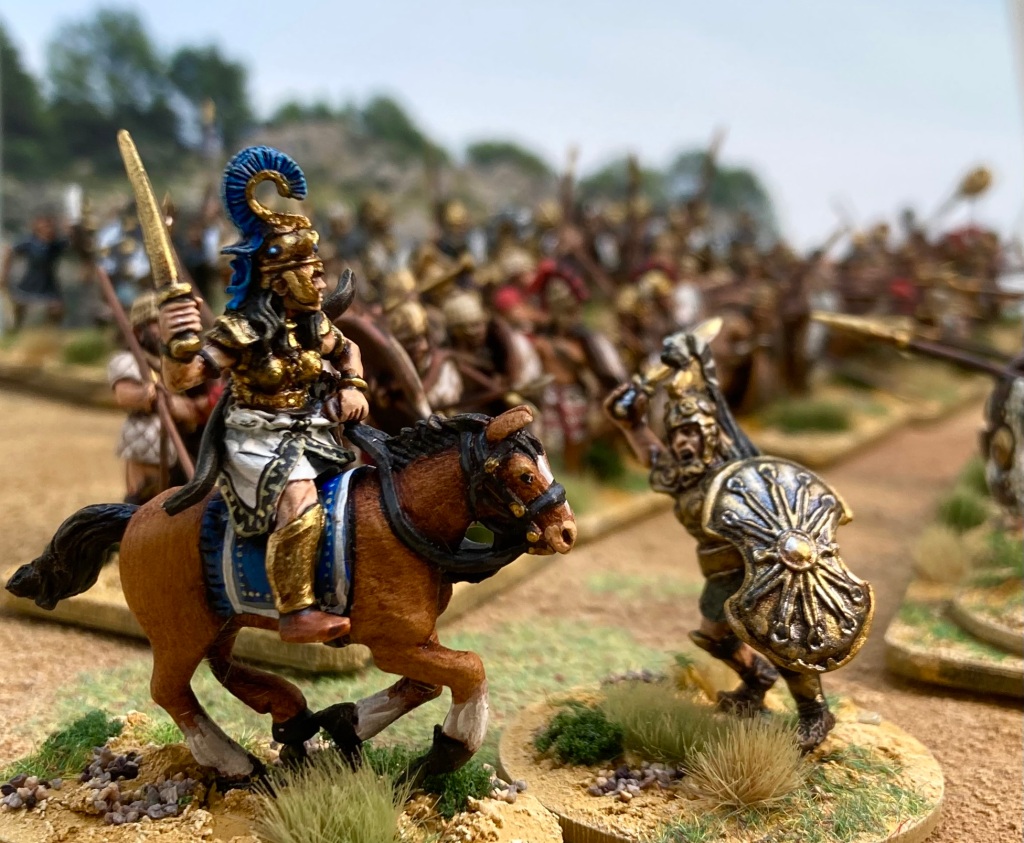
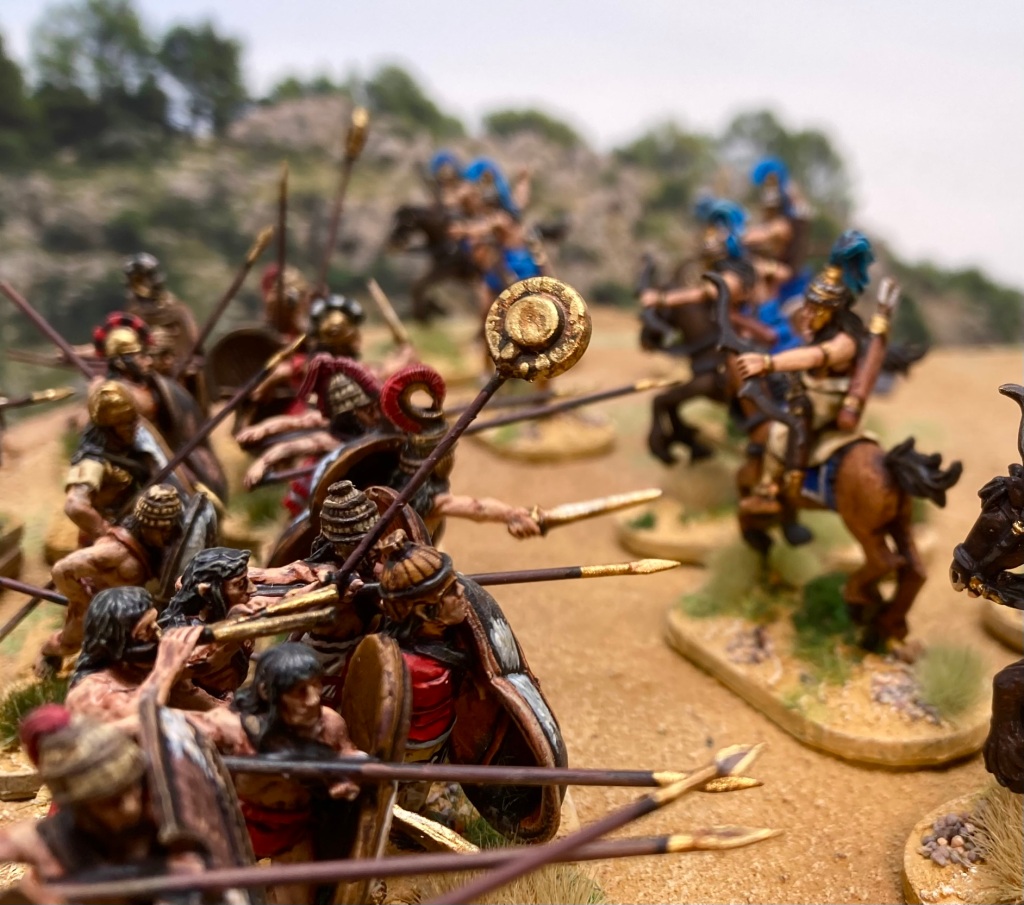
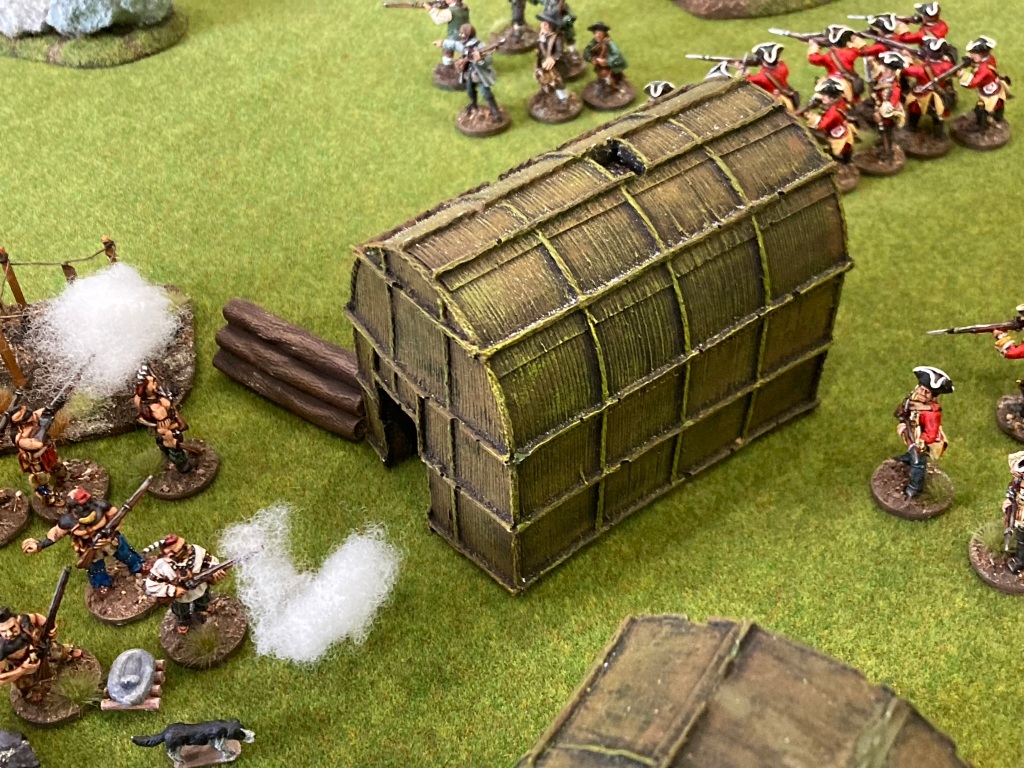
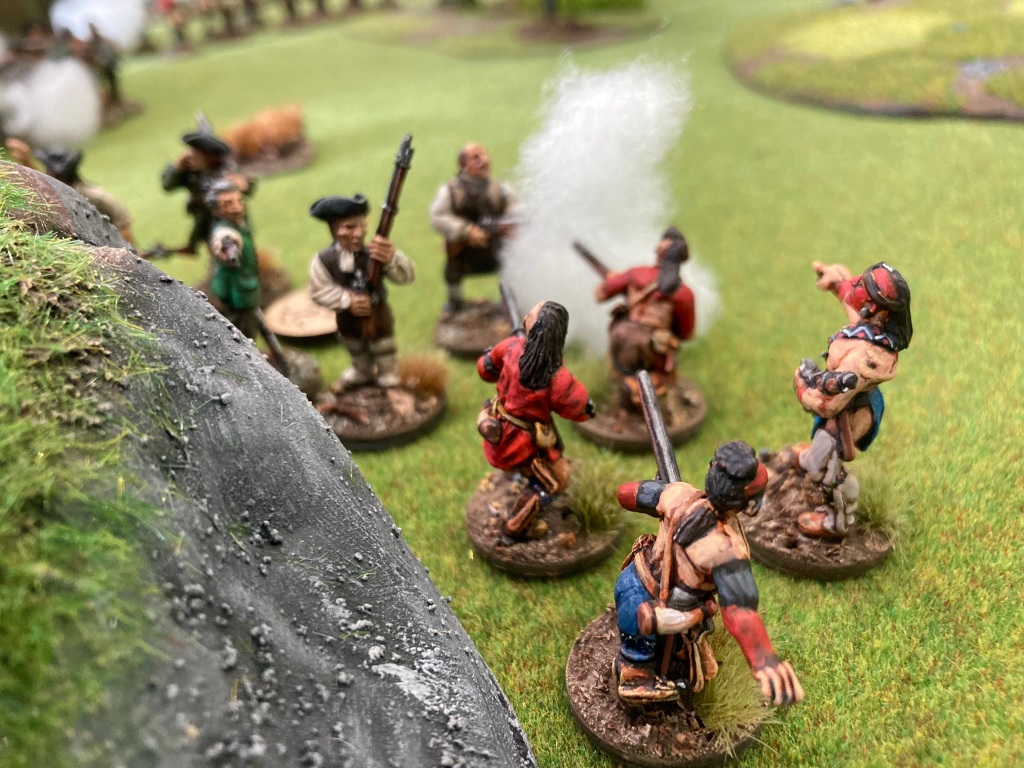
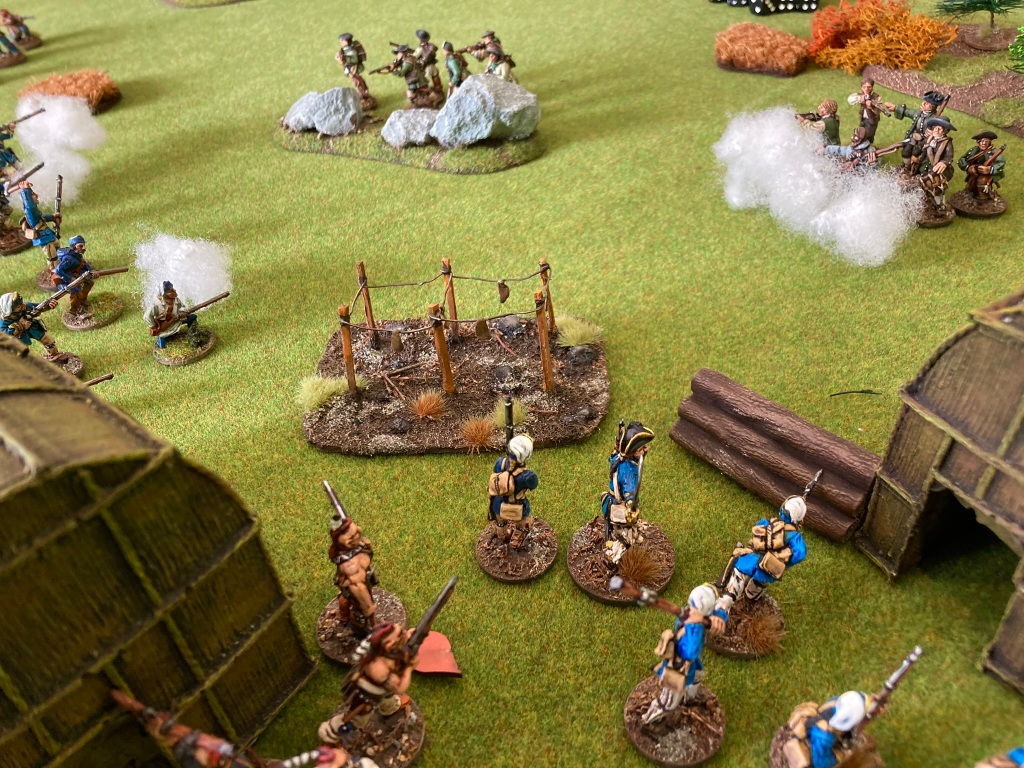
Our game divided each army into three commands, with Edwin (left), Raedwald (centre) and Raegenhere (right) in charge of the East Anglians. Each had an individual unit of hearthguard (marked with red tokens in the game). The Northumbrians were under the command of King Aethelfrith (centre), with the fictitious thegns Cerdic (left) and Wiglaf (right) on his flanks.
The River Idle set up for battle. The Saxon pouch was used to draw activation tokens for the commanders during the game
Following suggestions that Aethelfrith’s army was smaller than that of the East Anglians, we allocated him less troops, but allowed him four hearthguard units to represent the veteran warriors from his numerous campaigns.
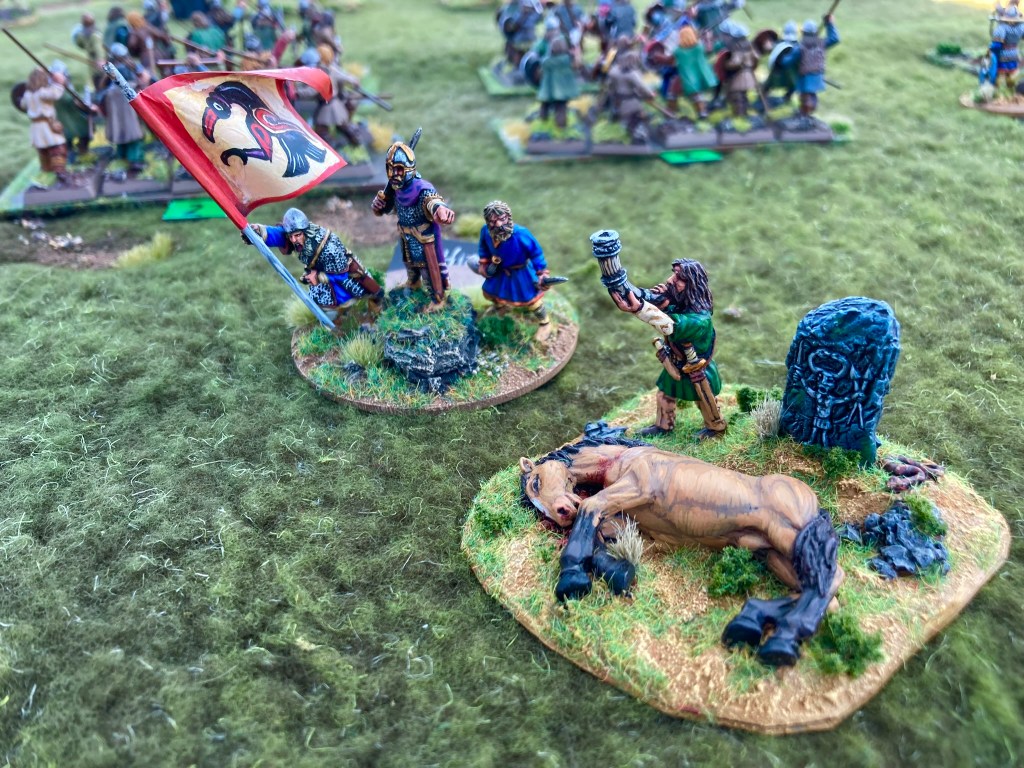
This created a scenario which was more nuanced than you might expect for an early medieval battle, whereby Aethelfrith was on the back foot but could achieve victory with a strong central attack. Luck was ever-present, especially in the survival of the commanders – the biggest shouts of the day were reserved for players rolling the feared ‘Raven Dice’ and finding that their hero had fallen.
Within 15 minutes of the site opening, we were running our first game and were then busy until closing time. One game would finish with a group waiting to play the next one as soon as we had re-set and some families came back and played multiple battles! As well as interested visitors, we also had a number of experienced wargamers and their families dropping in which was wonderful to see.
We ran 11 games on the Saturday and a similar number on the Sunday, so well over 20 overall, the most that we have ever run a single wargames scenario! On the Saturday, the East Anglians had an 8-3 advantage over the Northumbrians, but this evened out to around 50/50 in Sunday’s battles.
I was especially pleased with how the visitors took on board the wargame as a narrative, with history being both re-created and re-written. Sometimes we had an exactly historical result, with Raegenhere dying but Raedwald being victorious; in others, we had a reversal, with Edwin being struck down by an arrow in the early stages of the battle, thereby changing the entire history of Northumbria! In one particularly memorable game, all three of the East Anglian commanders were slain and their army destroyed, which might have completely changed the face of Sutton Hoo.
We had a number of repeat visitors from last year which was wonderful to see. One parent reported that, on the back of the event, they had ordered some miniatures for their children, which was lovely feedback.
One change to the event from last year was that the Saxon re-enactment groups had been pitched directly next to the gaming area, which was perfect in terms of interaction. A number of re-enactors dropped by to enhance our games and even to play. Harry and Paul of Ormsgard booked in a game early on Sunday morning, for which Harry gamely wore his full kit depicting a Northumbrian warrior of the 7th-8th century.
Part 2 of the report will cover the other games and some more about the site.
It’s nearly time for our second visit to Sutton Hoo as part of the National Trust’s Festival of Archaeology. We are delighted to have been invited back to run miniature wargames based on the Anglo-Saxon period. This was one of my personal highlights of last year – you can see my full picture report here if you missed it.
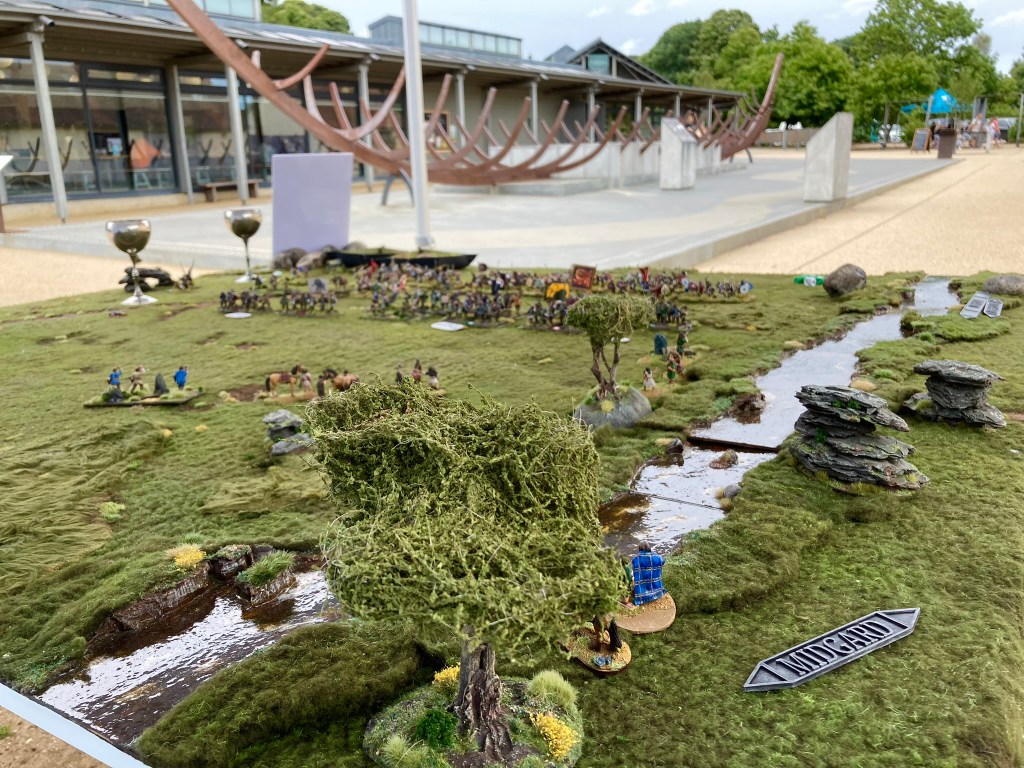
Battle of the River Idle 616 game set up next to the visitor centre at Sutton Hoo
The wargaming event is part of the NT Festival of Archaeology and the Sae Wylfings Anglo-Saxon re-enactment group will also be on site both days doing demonstrations and talks.
There are three games running this year, all of which are suitable for complete beginners or experienced gamers. First up is our own Battle of the River Idle 616, which pits Raedwald of East Anglia against the Northumbrians under the feared King Aethelfrith. This was very popular last year, using my own free download Mead-Pricerules).
Next up is another River Idle game, this time run by stalwarts from the Peterborough Wargames Club. I’ll be interested to see this, as details on the battle are sketchy so there’s always room for plenty of different interpretations. Thirdly, there is another game called Back to the Ship (very appropriate for a famous ship burial site!)
In addition to this, Andy and the team will be running the ever-popular painting table where you can paint up a Saxon warrior of the period (plastic miniatures kindly donated by Gripping Beast, one of the main wargames manufacturers).
There is no additional charge for the event (beyond standard site entry to Sutton Hoo) and no need to book for the games – just turn up between 10:00 and 16:30 onm either day.
If any of this piques your interest, I wrote an article last year called Getting Started In Early Medieval Wargaming that might be handy. Hope to see some of you at Sutton Hoo!
To celebrate the rare coincidence of both of us having a day off work at the same time, I got together with old mucker Steve Jones for a game. Although our joint history is largely ancient and medieval (we co-wrote the Age of Arthur book for Warhammer Ancient Battles way back when), Steve’s long term personal project has been the American War of Independence. Since the earliest releases by the Perry Twins (first at Foundry, then at Perry Miniatures), he has collected and painted units for the period to an incredibly high standard.
Gaming has included some Black Powder (Steve also wrote the Rebellion AWI supplement for Warlord Games) but has mostly focused on developing his own Bloodybacks period-specific rules, which are now up to version 9.0. The latest variant includes card activation for leaders and now uses D12s for most rolls – interesting stuff!
Chief Black Snake engages Visscher’s Tryon Militia in the closing stages of the game
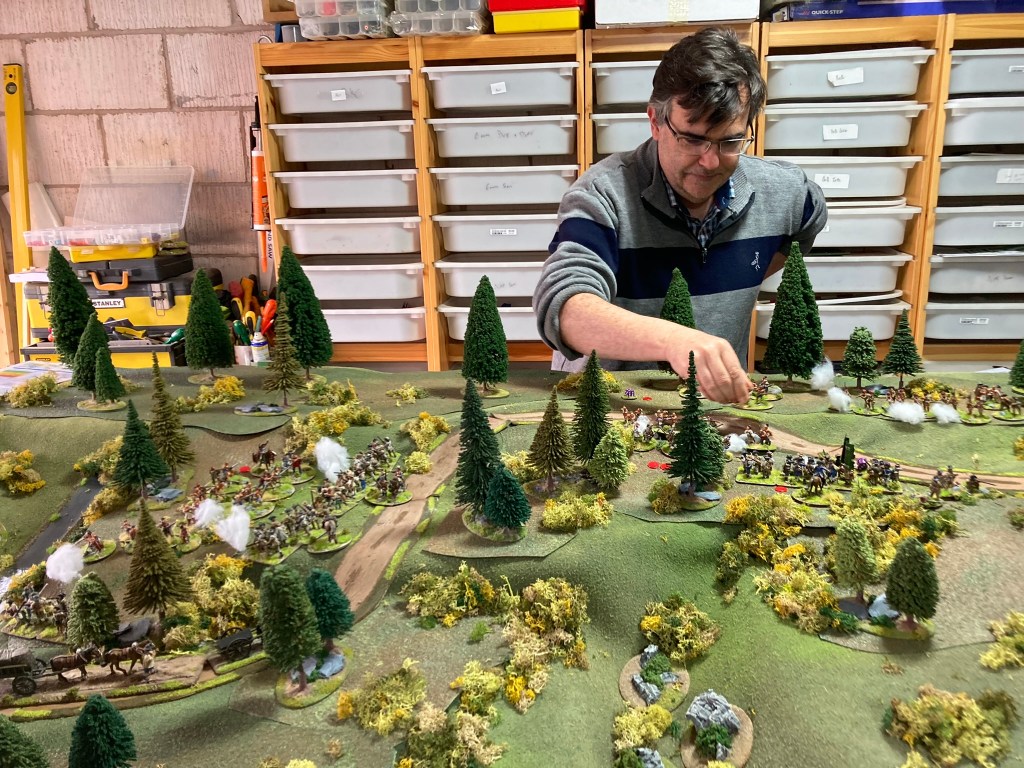
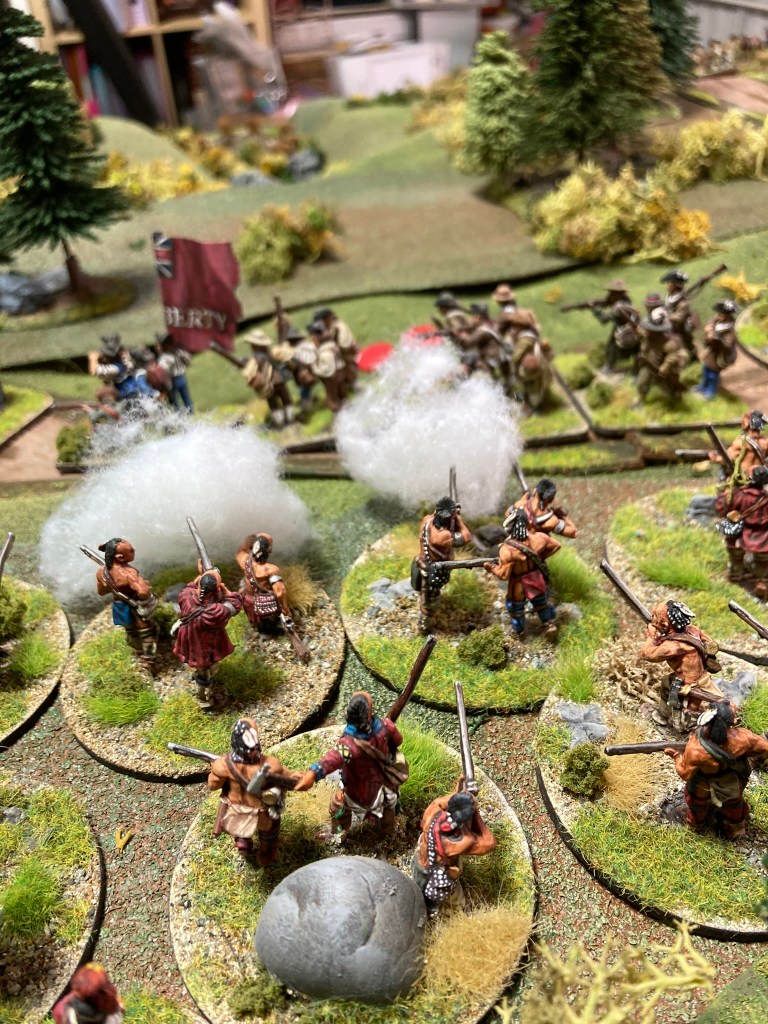
The scenario was a refight of the Battle of Oriskany 1777 – especially chosen for me as Steve knows I prefer irregular warfare and Native Americans! Oriskany (popularly known as ‘the bloodiest battle of the Revolutionary War’) was a British-led ambush on a Rebel column which was coming to the relief of the besieged Fort Stanwix.
A force comprised almost entirely of Indians staged an attack on Brigadier General Nocholas Herkimer and 800 men of the Tryon Militia, killing and wounding around half of them (including Herkimer, who died several days after the battle) before being driven off, aided by a sortie from the fort that attacked the ambushers’ camp.
Steve’s scenario included a number of features to encourage the historical events of the battle. Both sides had three commanders apiece and each turn began with rolling an average die (remember them? I don’t think I’d ever used one before) to determine command points for each leader.
The better commanders had an increased chance of gaining more command points, though everyone had a minimum of one, so there was always going to be something to do.
Col Sir John Johnston at the front of the ambush – a lovely command stand by Steve
From a gaming point of view, I think I prefer this to Black Powder, where a duff roll for a commander can mean doing nothing at all.
My favourite flag in Steve’s Rebel collection! (hand painted paper flag by Steve)
Activation involved a card draw to determine which commander activated when and also random events such as the duration of each turn, the timing of the ambush and a scenario-specific thunderstorm which halted action in the real battle for around an hour.
As play got under way, the Rebel column advanced further into the woodland before the inevitable happened.
Steve and I were playing in a fairly narrative fashion, with both of us moving and dicing for different sides in different parts of the game. Once the ambush had been sprung, I had a free choice of where to place the Crown forces and went for uphill of the Rebels, both for the height advantage and to avoid getting caught in the loop of the military road.
Historically, the Indians started shooting before the Rebel column was completely over the first creek, and this was replicated in our game.
Steve’s terrain is pretty much entirely scratch built. The cloth is a piece of polar fleece with a lot of paint to add extra layers, and it’s ideal for this kind of undulating terrain where the contours have been created with boxes, foam and mats underneath.
I should point out that nothing on the table was my work (apart from the roads, which I made and sold to Steve about 25 years ago!)
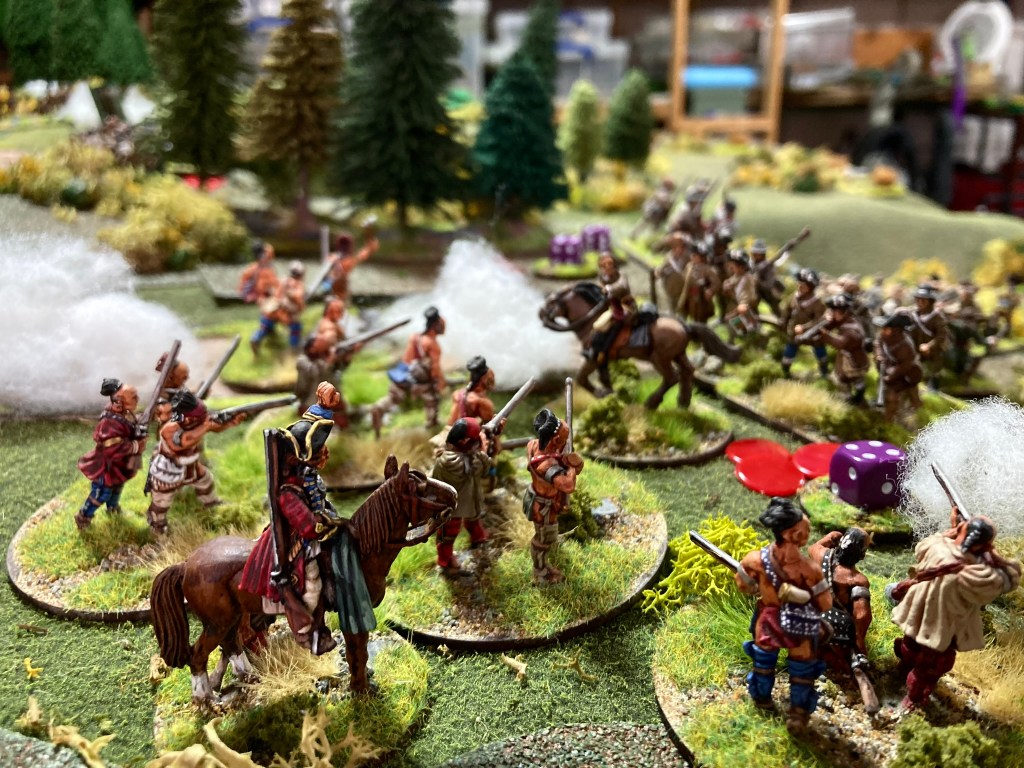
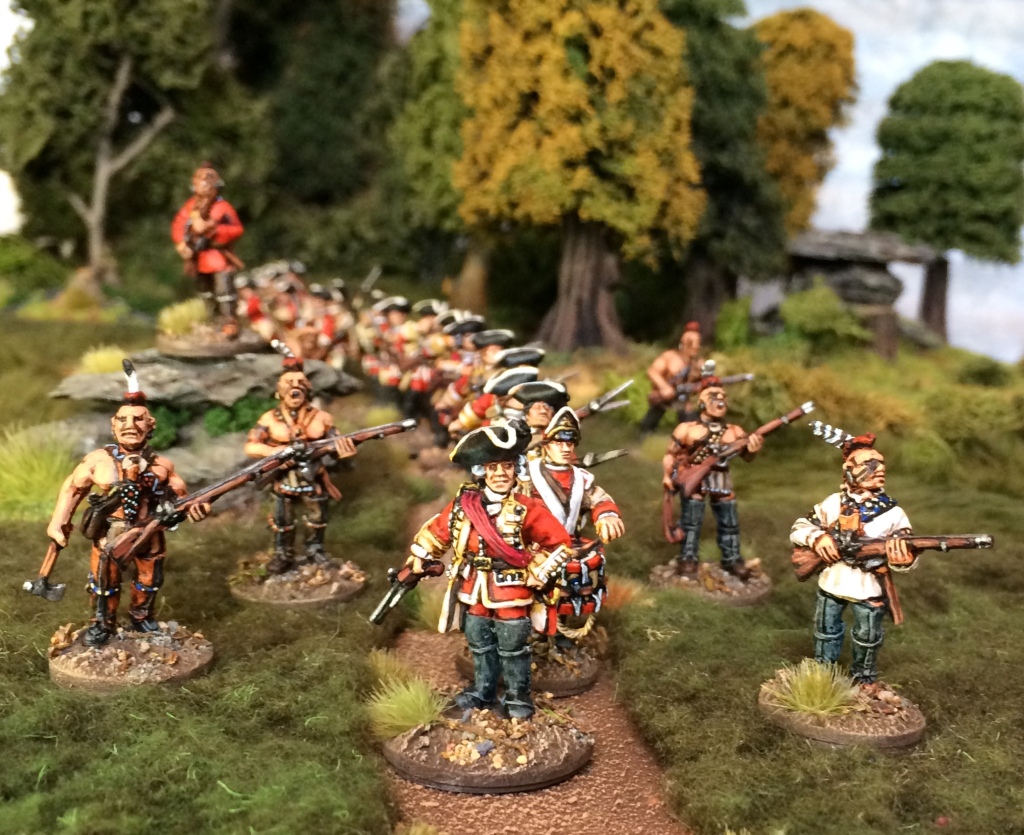
Joseph Brant’s Mohawks were the first to appear, with a couple of large units manifesting themselves uphill of Colonel Ebenezer Cox’s Tryon Militia and opening fire at very close range.
Cox was luckier than his historical self and survived the first first volley.
More Indians went for the baggage towards the rear of the column, but were held up by the small size of the unit and the fact that Black Snake was focusing his energies on the firefight further up the road.
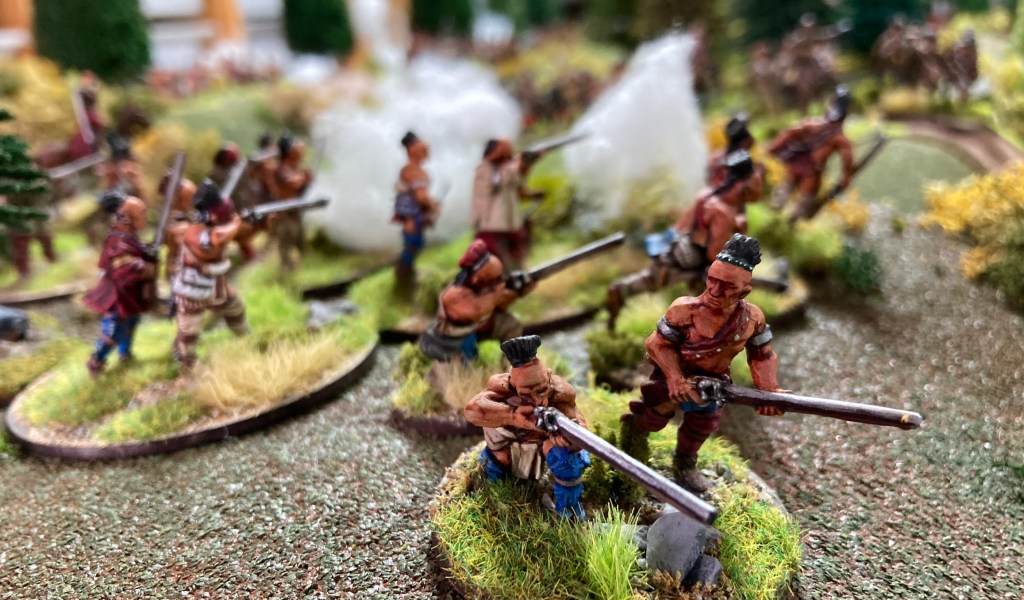
Black Snake’s warriors give fire
Indian commander Black Snake pulled up directly opposite Herkimer’s command and again opened fire.
Colonel Visscher was doing a fine job of holding the rear of the column together, risking himself at several points as he encouraged his men.
Col Visscher encourages the rear of the column
Having escaped the first volley, Colonel Cox rapidly rallied his militia and turned them to face the threat from both The Mohawks and a few British units that had deployed at the front of the column.
Cox holds on as casualties mountBritish rangers cover Cox’s flank
After an initially fierce firefight, the cards dictated that the thunderstorm had arrived.
Thunderstorm! Rather than spraying the table with Steve’s garden hose, we elected to take some photos on a dark filter and have a break for flapjacks
In the actual battle, this was so heavy that it halted all action, and we did the same in our game, only allowing some rallying.
Within an hour, the thunderstorm cleared and the combat started again.
Brant’s Mohawks decided to risk an all-out charge on the wavering British centre. Despite inflicting casualties, they were unable to break the Tryon Militia and fell back.
This highlighted one of the things that I really like about Bloodybacks; units can, with a good activation roll (and leadership) take multiple actions in a turn. It reminded me a little of the Song of Blades And Heroes mechanisms, where you can push your luck and take up to three activations. This nicely represents the bursts of activity in this kind of battle and kept the action moving.
Brant’s warriors broke and ran, freeing up Herkimer’s Militia to attempt to move down the road and join up with Visscher’s rearguard.
By this point, Visscher had successfully brought up some more Tryon Militia to support Herkimer and fend off the attentions of Chief Black Snake’s warriors.
Herkimer (rear left) and Visscher (rear right) join forces to hold off Black Snake
Feeling bolstered by a couple of good command rolls and feeling the need to break the deadlock, the Tryon Militia attempted to drive off their ambushers with a charge.
With some less than auspicious dice-rolling, this all went a bit Pete Tong, and both Herkimer and Visscher fell as casualties during the combat.
Steve’s rules don’t currently have a Leader casualty table, but after rolling a 5 and 6 respectively, we decided that Herkimer had been mortally wounded and Visscher brained with a tomahawk.
Visscher goes down fighting
The leaderless Tryon Militia then found themselves being charged in the flank by the British Light Infantry, who had pursued down the valley at the behest of Johnston. Rude!
The Militia had had enough, and broke and ran. This was enough to seal the fate of the Rebel column. The rearguard began to retreat, leaving the wagons as prizes for the remaining Indians.
A super narrative game with some awesome minis and scenery. I was glad that I had Steve there to talk me through his rules and will doubtless play again in the future!
‘Bull’s hide shields being dressed in line, they rushed at the Danaans,
certain that these could not resist the charge that swept now on the black ships.’
-Homer, The Iliad
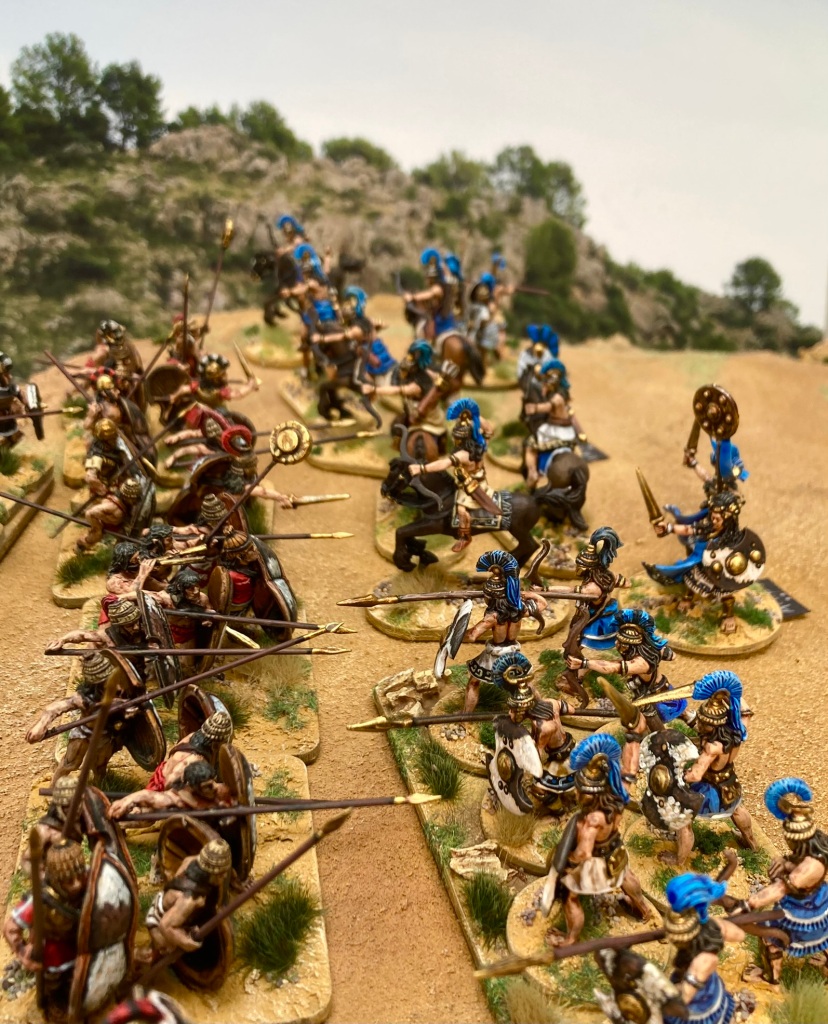
Despite completing the 6mm Trojan Wars project (for now), I’ve been quietly plugging away on a few more miniatures for the 28mm version.
L-R: young champion, Old Nestor, Menelaus (what a massive helmet)
Here we have Nestor, Menelaus and a young (as yet unnamed) champion of the Achaeans. I don’t feel that he’s a major player as he doesn’t have a bronze breastplate or helmet, but he definitely has some heroic speeches in him!
Rear views: I opted for a painted shield for Nestor to show his rank. Menelaus was the testing ground for the GW Contrast paint purple – it’s loud!
These are all Wargames Foundry miniatures. I’ve done my usual method at the moment, which is base coating in GW Contrast/ Army Painter Speedpaints over a white undercoat, followed by assorted highlights in acrylics.
The bronze (my favourite part of the paintwork) is added after matt varnishing. After a basecoat of dark brown or black, I paint all the bronze with Vallejo Brass. This is followed up by a wash of Winsor and Newton Nut Brown ink and then a highlight of Vallejo Gold, with a tiny amount of Army Painter Sjining Silver on blade edges. As usual, I’m not looking to win any painting prizes, just trying to get some colourful minis onto the gaming table.
The heroes are on 30mm round bases from Warbases – I will label them up with their names for Iliad gaming.
Warriors are on a 20 x 25mm round-cornered base (or equivalent for multi-bases), again from trusty old Warbases.
These Achaeans are headed for the Lard Workshop at Britcon 2024 in Nottingham, where they will be taking on the Amazons in a heroic clash using my (still forthcoming) Midgard Heroic Battles rules.
With this in mind, I also set up a few photos with the opposition. Nearly all the Amazons are by Lucid Eye Publications with a few conversions.
Unusually for me, backdrops this time are not from Jon Hodgson, as I’m eagerly awaiting the new books for some more Mediterranean options.
Achilles vs the Amazon champion
Instead, these are photos from my travels printed out at A3 by my chum Pete.
Hopefully I can recapture something like this on the gaming table at Britcon.
Finally, here’s one of the survivors off on his travels somewhere mythic!
Trojan Hero (Foundry) with a Harpy (Artisan Guild 3D print from Etsy)
Next up in the project will be some chariots and Sea Peoples.
Rebels and Patriots is one of the rules sets that’s been sat on my shelf – unplayed – for years. I enjoy all the different variants that sprang out of Dan Mersey’s original Lion Rampant, but this was the only one I hadn’t tried. A quiet Sunday afternoon was just the time to sort that out!
French & Indian War miniatures from Galloping Major, painted by me during lockdown
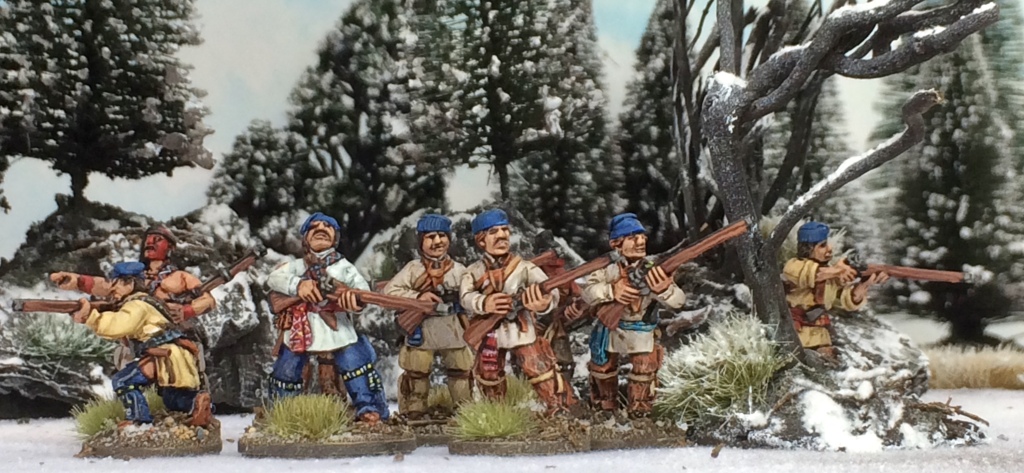
During lockdown, I collected two forces for Muskets & Tomahawks from Galloping Major miniatures with a view to adapting the rules to game the rather more obscure conflicts between the native Tlingit tribe of Alaska and Russian traders in the 1790s-early 1800s.
Russian fur traders vs Tlingit (Tlingit by Varang Miniatures, Russians converted from Galloping Major)
While I enjoy a bit of M & T, it was clear that it wasn’t going to work straight out of the box with two forces with similar composition. Every Tlingit unit would be classed as ‘Indians’ and activate on the same card, therefore producing a rush of activity all at once in the game; also, we experimented with Tlingit in a test game and found the close combat perhaps too deadly for this setting. These small issues were nothing that couldn’t be solved with some house rules, but I wasn’t sold on it for the Tlingit skirmishes.
Rebels & Patriots is a 2019 Osprey collaboration between Dan Mersey and Michael Leck to game large skirmishes in North America in the 18th and 19th centuries. It uses the core ideas of the ‘Rampant’ series (skirmish units in ‘blobs’ with no facing, activation rolls on 2D6 per unit, leaders permanently attached to units, simple D6-driven combat and shooting, etc). However, each edition treats these slightly differently, and R & P is no exception. I’ll drop in some notes about these changes in the battle report below.
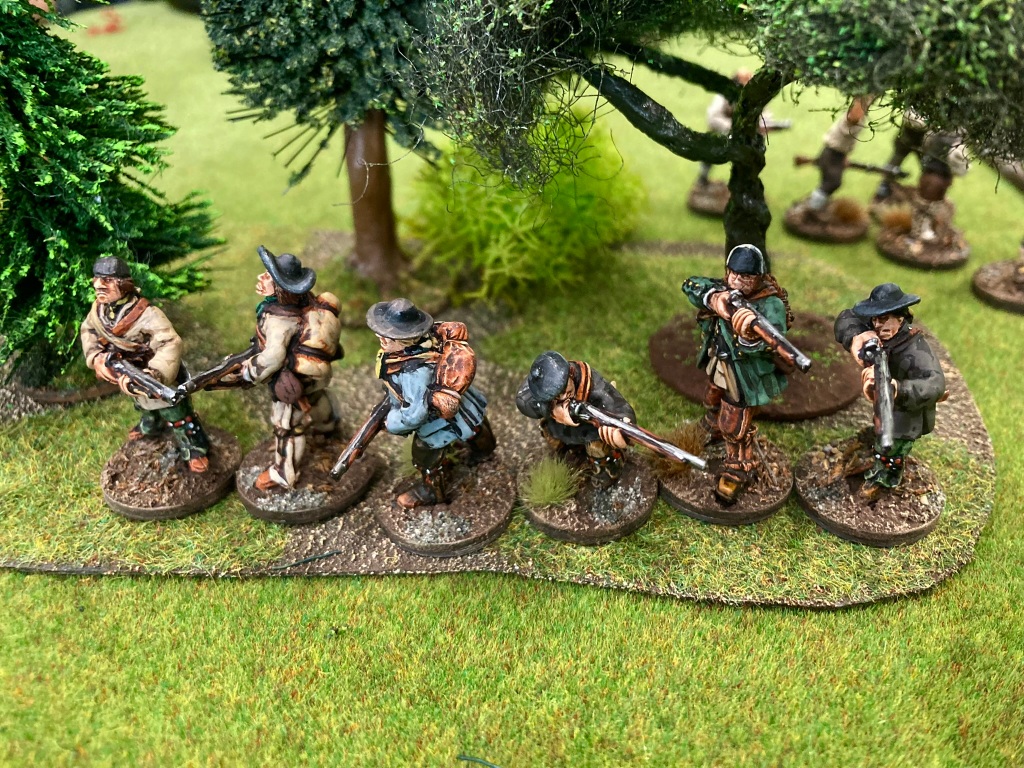
Ambush! All figures from Galloping Major miniatures on my scratch built terrain. Smoke from ethically-sourced teddy bears
We generated two 24-point ‘companies’ for the game based mostly on my collection, of which Tom commanded the British and I took the French.
Rangers from Galloping Major Miniatures
BRITISH
2 units of Line Infantry (12 figures each); Aggressive @5 points each
2 units of Skirmishers (Rangers, 6 figures each): Good Shooters, Aggressive @5 points each
2 units of Skirmishers (Militia, 6 figures each) @2 points each
Lt Wensleydale strolls out (all Galloping Major miniatures)
2nd Lt Wensleydale commanded the British and rolled the special rule The Quartermaster’s Brother, meaning that his unit had gained extra ammunition for target practice and could reroll a failed firing dice each turn!
Compagnies Franches de la Marine by Redoubt Miniatures, background by Jon Hodgson Backdrops
FRENCH
2 units of Compagnies Franches de la Marine (Light Infantry, 12 figures each) @6 points each
1 units of Canadien Militia (Skirmishers, 6 figures) : Sharp Shooters @6 points
2 units of Huron (Natives, small units, 6 figures each) @3 points each
Canadien Militia and Indian scout by Galloping Major miniatures in slightly less clement weather
Commanding the French was Lt Roquefort. I rolled a magnificent double 6, meaning that his officer trait was Heroic Leader – a +2 bonus to all his leadership rolls, but a higher chance of getting shot! Perfect!
Playing the Scenario My Enemy’s Enemy from the R & P rulebook, we laid out a 4 x 4′ table with an Indian village in the centre and started in opposite corners. The village contained a unit of Natives that had not yet declared its allegiance but would do so as soon as a French or British unit approached within 6″
The first couple of turns whizzed by as we advanced on the village. One change to the Rampant series was that all units activated (and passed morale tests) on a 6+ on 2D6. This really speeded up play, without having to look up and down at command sheets to remember which unit activated on which roll.
Rangers take up position in the woods outside the village
Like Dan’s colonial rules The Men Who Would Be Kings, R & P dispenses with the mechanism of failing an activation roll ending your turn. If you fail a roll, you simply move onto the next unit until all have had a chance to activate. Personally, I missed the comedy/ stress (delete as appropriate to your personality type) of failing an activation and passing play straight to the other side, but this gave a smoother game and would scale up to a larger number of units with ease ( something that Lion and Dragon Rampant don’t do well).
With a movement of 8″ and the bold leadership of Lt Roquefort, the French reached the village first. Fortunately, the locals turned out to be friendly (on a random dice roll) and agreed to open fire on the approaching British, resulting in Lt Wensleydale nearly getting toasted by a round of musketry.
“You can take our salmon, but you’ll never take our freedom!”
This made the redcoats hesitate. Wensleydale sent some of his Rangers round the side of the village, where they quickly found themselves under fire from Hurons working with the French.
A British militia unit was sent in to pin down the Huron, who ended up pulling out their tomahawks with the expected effect. However, several casualties from the combat and return fire from the Rangers reduced the Huron to half strength, making them pretty much ineffectual for the rest of the skirmish.
Huron take out the militia
One of the changes to the Lion Rampant/ Dragon Rampant engine for R & P is the potential to have up to two Disordered markers following failed morale tests: one marker means the unit is disordered, two is broken and three is routed. This slightly more granular system means that units hang around longer, although can be quite ineffectual when damaged (especially if at half strength, when they have a Permanent Disorder marker that cannot be rallied off). It’s a nice touch, especially with games like this involving four or five units.
Another interesting mechanism to note here is that small units (6 figures) roll the same number of dice as standard units (12 figures), but are less resilient. This seemed to work really well, with the 12-figure units having far more staying power over the course of the game. INatives can also be fielded as large 18-figure units, giving a lot of options for tailoring units for particular games and settings.
Unfortunately, the new French allies inside the village had now taken a drubbing from British fire and were forced to withdraw, being replaced by Lt Roquefort’s heroic Compagnies Franches.
Faced with sterner opposition, the Redcoats took the obvious option and advanced with fixed bayonets into the village. The resulting melee drove the French back, but worse, our hero Roquefort was laid low! His Heroic Leader trait had kept his men moving in the early stages of the game, but now he paid the price.
Lt Roquefort (top right, waving sword) goes down in heroic style
This transpired to be the turning point of the game. Without a leader adding +2 to all activation tests within 12″ (i.e. meaning that most units could activate on a 4+ on 2D6), the French were rudderless and failed a few critical activations that could have turned the tide.
Nevertheless, we kept on playing as the French force was far from broken. The British militia jumped the woodpile and took position inside the village, while the depleted Redcoats drove off the remaining Indians and formed close order around the camp fire.
French attempts to get round the flanks were foiled by Rangers shooting at a distance and a number of cries of ‘merde!’ as they failed several activation tests. The Canadien Militia – so effective in the early stages of the game, with a range of 24″ and 4+ to hit – found themselves without targets due to the Redcoats moving into the village.
The Compagnies Franches attempted one more attack to drive the British out, but volley fire put paid to them, and the game finished after 9 turns with a win for King George’s men.
Overall, this was a thoroughly enjoyable game which cracked along at an excellent pace (assisted by the universal 6+ target number for activations and morale) . We really enjoyed the tweaks to the Rampant system, all of which felt very appropriate to this theatre. I was initially concerned that the ability of muskets to shoot every turn wouldn’t feel right, but we had our share of failed activations (clearly more powder being passed up the line) and low-level shooting (one clever feature of the Natives unit type is that they have to perform a Skirmish action to shoot, shooting with half their dice but being able to move as well). The option to field units at different sizes gives a great deal of flexibility and will probably make Rebels & Patriots a shoe-in for my forthcoming Tlingit project.
There was a bit of maths at the end (the usual trying to calculate 33% etc of units lost for morale purposes) but this didn’t detract from what had been an excellent game with plenty of memorable moments and chances for both sides to win. This rules set most certainly won’t be spending the next four years on the shelf!
Reaper Bones Werebat (77448), also in front of a Jon Hodgson Backdrop
Reaper Bones minis, if you’re not familiar with them, are made from a semi-flexible plastic that feels similar to the Siocast used by Warlord Games and other companies. They have their limitations (human-sized models often have very flexible weapons; mould lines are hard to remove entirely) but they are unbeatable for big beasties.
Frost Giants by Reaper Bones tower over a pair of 28mm Vendel Dwarves
The Frost Giants used in last year’s Rainbow Bridge game at Salute & Partizan are from Reaper Bones; they cost an absolute fraction of a metal or resin miniature of similar size, and are much less likely to damage in play or transport. My first encounter with Reaper Bones was actually via Mighty Lancer during a wargames show ten years ago, but they also offer a very efficient mail order service too – great folk to deal with if you’re in the UK.
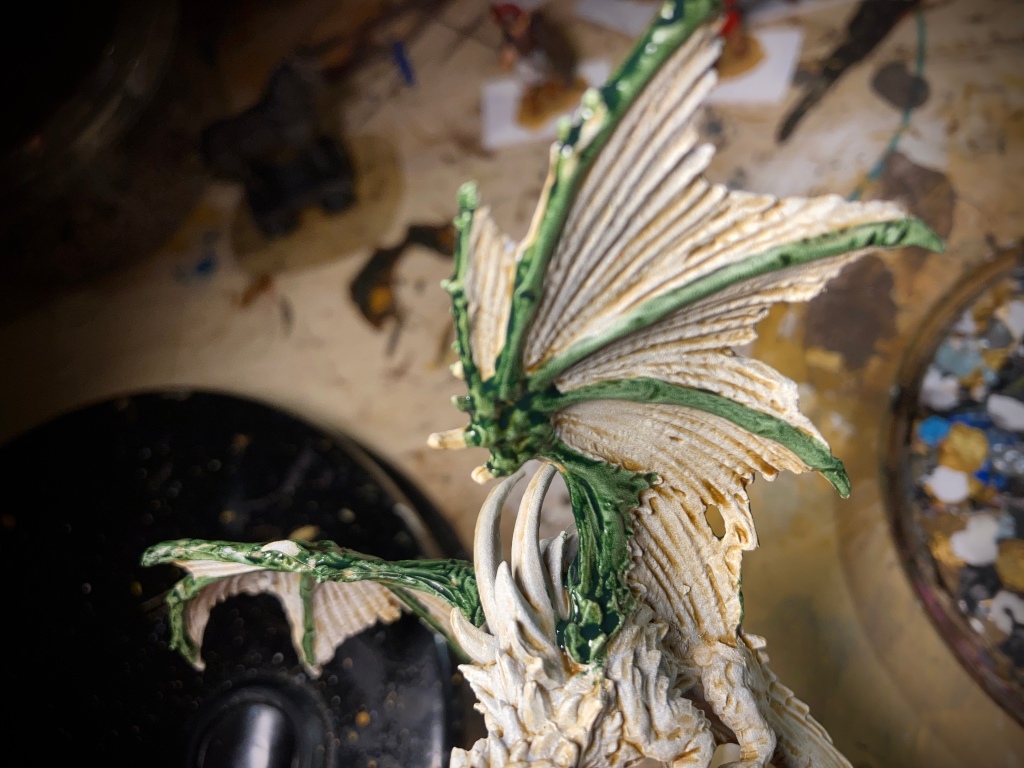
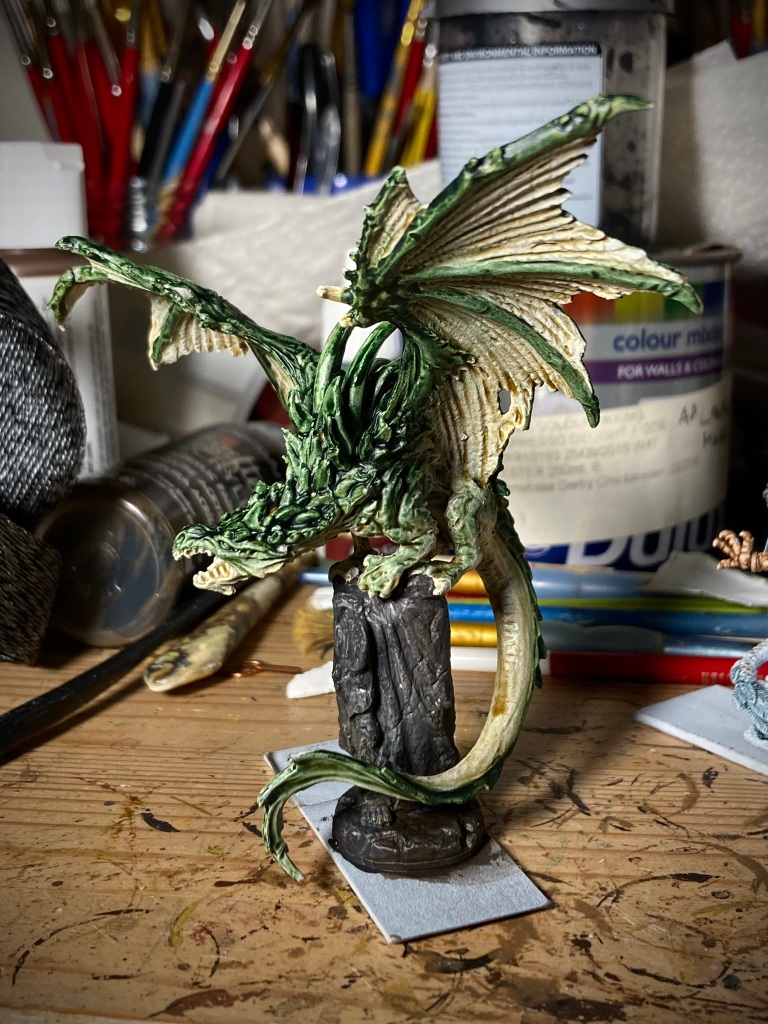
Having given the models a wash (the Temple Dragon (77503) comes in an impressive six pieces), I took a new scalpel blade to remove the few mould lines as best I could. The Dragon was then assembled with superglue and gaps filled with some Milliput.
The Reaper Bones packaging proclaims that no primer is needed, and they market their own range of paints specifically for these miniatures, warning that regular spray primers may react badly with the plastic. While I’m sure that the former works, I haven’t painted a mini without primer since I was ten, so I prefer to use one.
All the models got a couple of light coats of Halfords Grey Plastic Primer followed by some Halfords White Primer for the Temple Dragon and Halfords Matt Black for the bats.
The Temple Dragon then got a base coat of thinned down GW Contrast paint Skeleton Horde to bring out the detail. I still hadn’t fully decided on a colour scheme at this point but was verging towards green with a yellow-white underbelly.
The green then went on in layers, mostly being GW Contrast Creed Camo. I thinned this at various points with Contrast Medium and added additional layers with Contrast Dark Angels Green and some Army Painter Grim Black Speedpaint mixed in. I’d be lying if I said there was a plan to all this, it was just a case of adding darker areas until it looked right!
Finally I picked out the claws, eyes and teeth using traditional acrylics, as well as adding some light highlights to raised areas.
With this done, the model received two coats of matt varnish (I’m using my last of my stash of Testor’s Dullcote at the moment but will be moving on to Winsor & Newton when that runs out),
The whole thing went on a 60mm Warbases MDF base and then off for a photo session with the Jon Hodgson Backdrops book.
The Bats were a Werebat (77448) and Giant Bats (07058) for general flying beastie duties. These were a very simple paint job (so simple I forgot to photograph any of the stages!), consisting of layers/ dry brushes of grey on top of the black undercoat, then picking out teeth, eyes and claws for contrast.
After two light coats of matt varnish, the models went onto 2p coins (26mm diameter) which add a nice bit of weight to the minis.
I suspect that the Werebat might serve as one of Morgoth’s servants in the Silmarillion, whereas the giant bats will probably find themselves accompanying the evil forces in the Battle of Five Armies.
Anyway, these were a pleasure to paint, and come highly recommended!
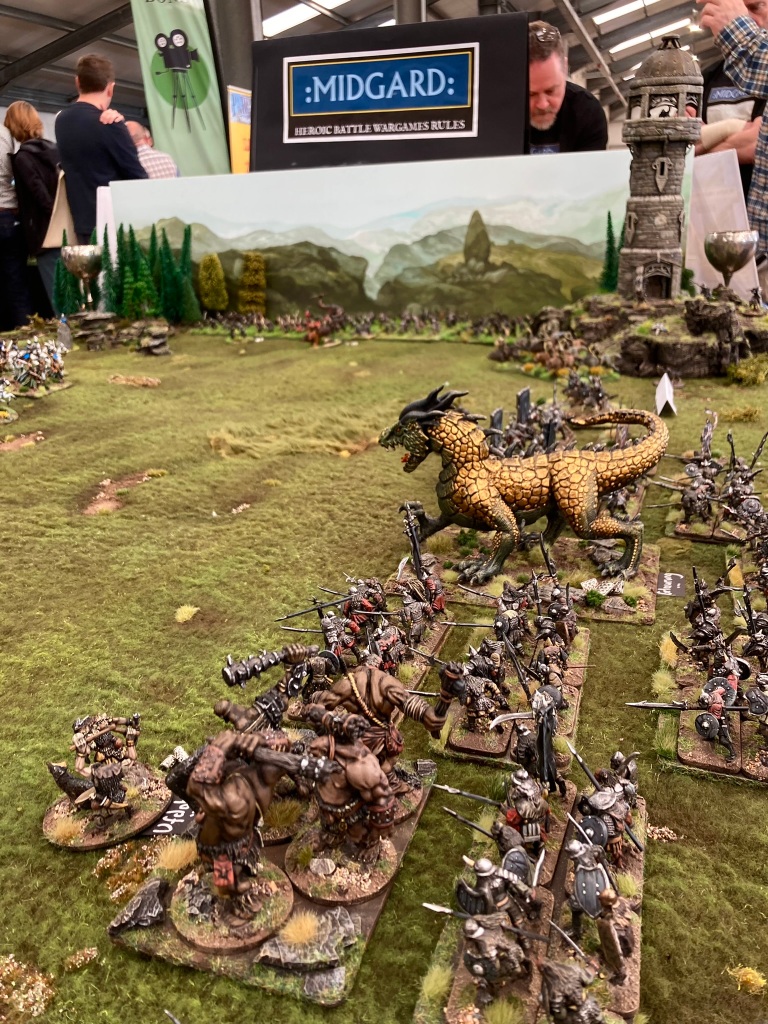
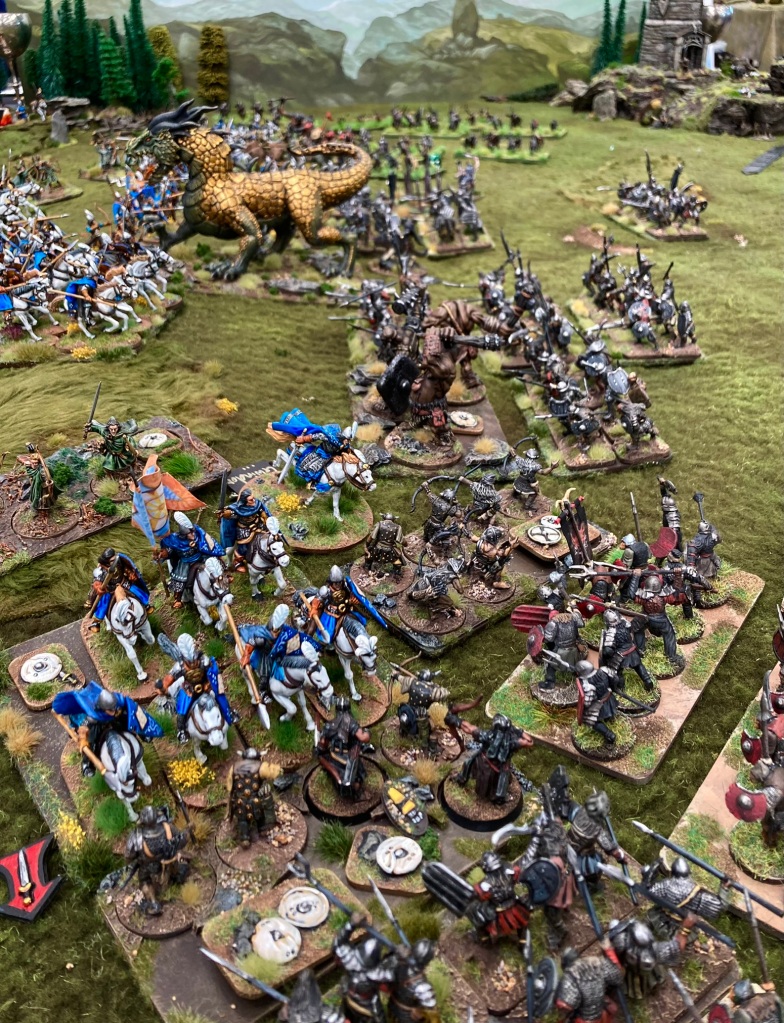
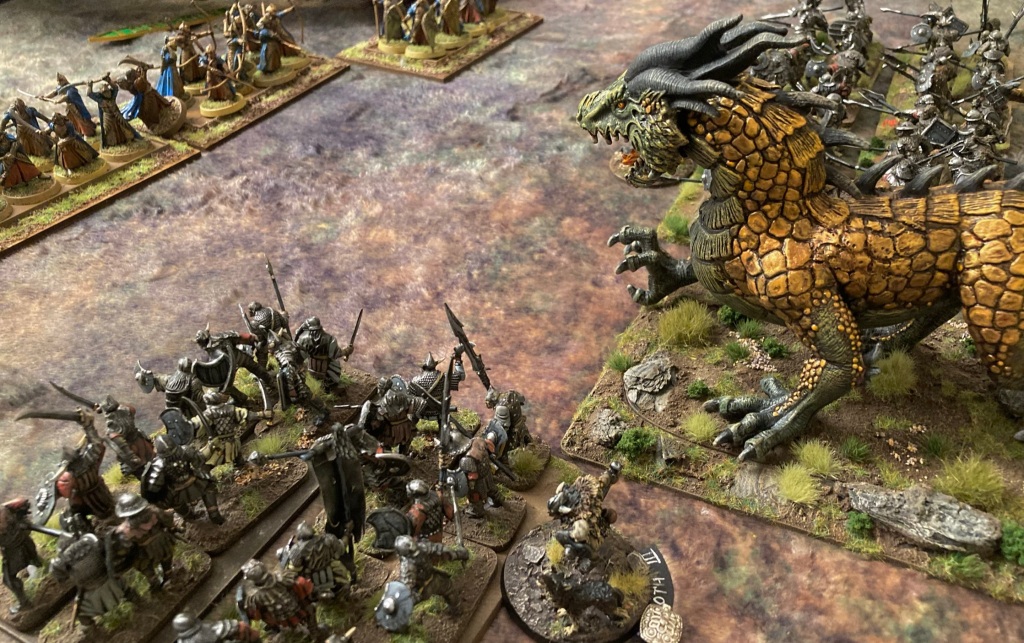
Glaurung rampages through the Noldor of Nargothrond. Many thanks to Jon Hodgson Illustration for permission to use his artwork as a background to our game.
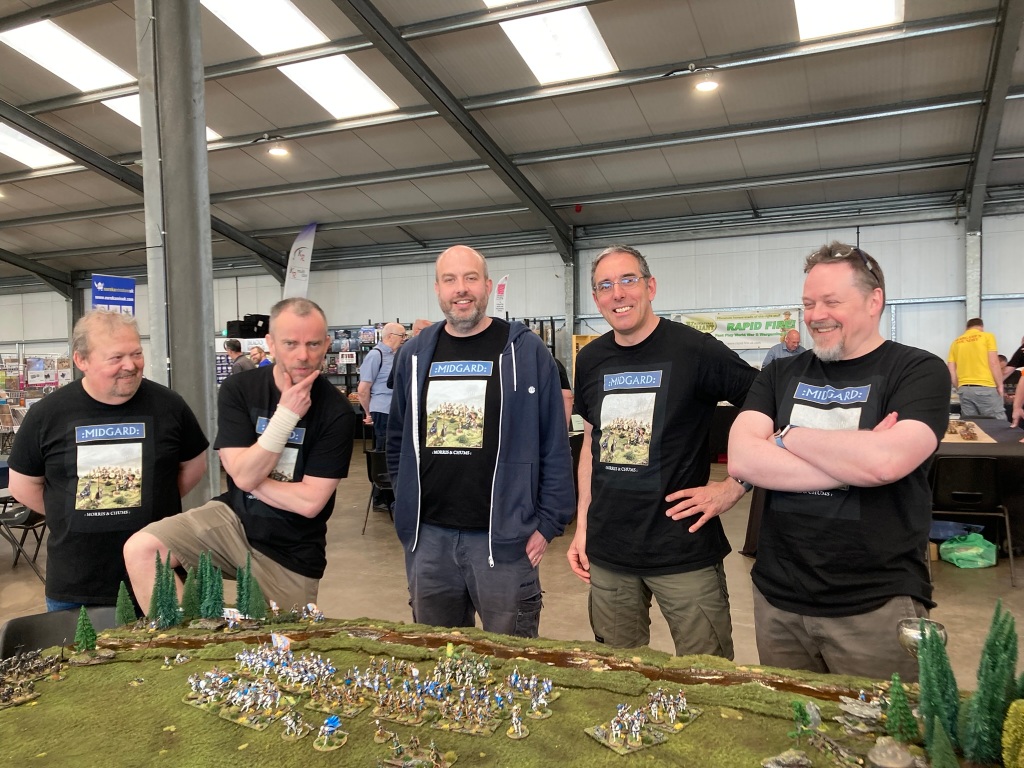
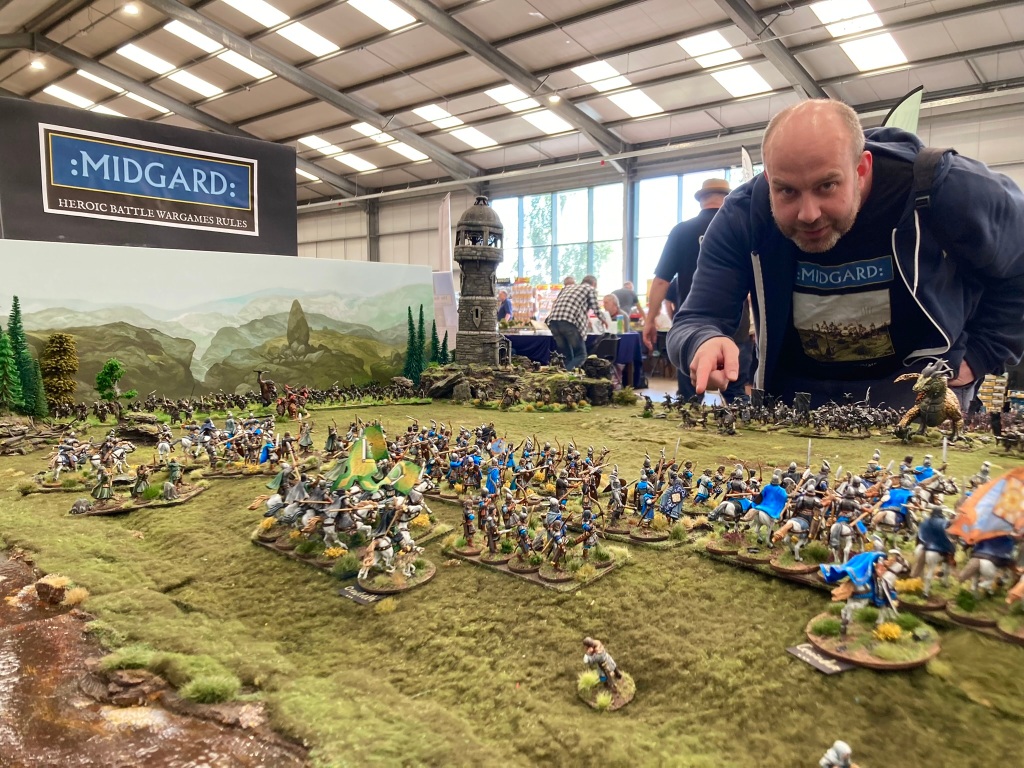
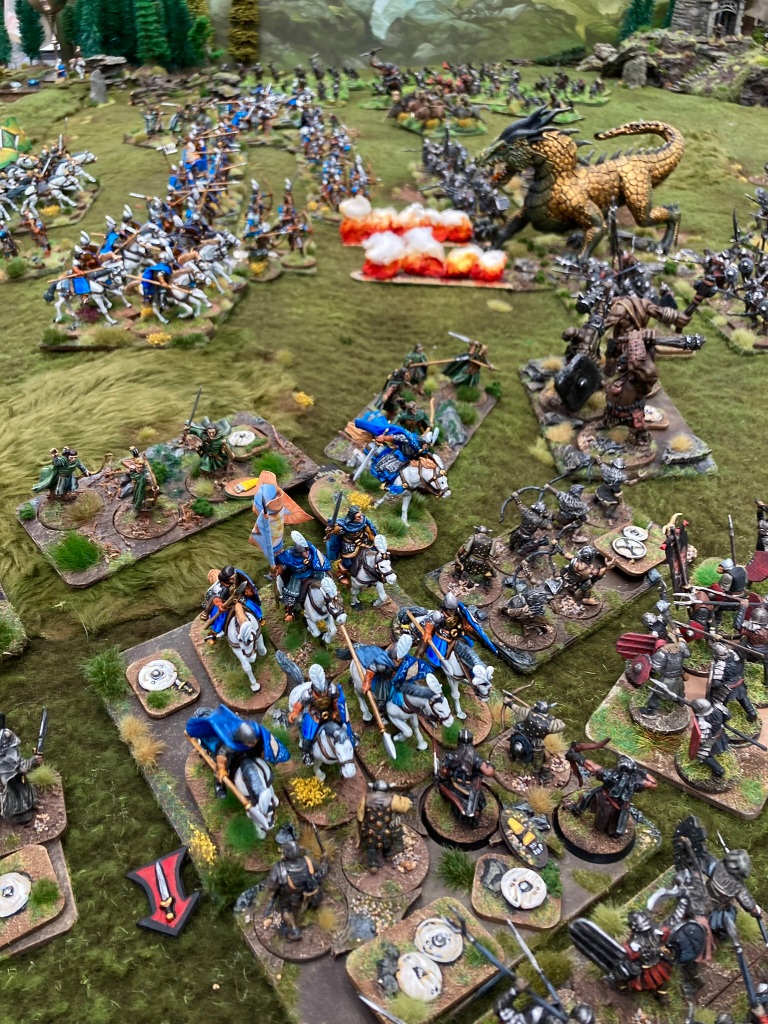
Sunday 19th May saw myself, Tom, Pete, Andy and Martin crawl out of our beds far too early and get on the road to the awesome show that is Partizan at Newark Showground. Setting up on the edge of the Lard Zone, we put up our double-headed game format to promote my forthcoming Midgard Heroic Battles rules. It’s all very well telling people that your rules will work with any scale of miniatures, but it’s far better to show them!
So this time we had Trojan Wars in 6mm back-to-back with a battle from Tolkien’s Silmarillion in 28mm. This also neatly showcased the fact that Midgard can be used across the spectrum of historical, mythical and fantasy gaming.
Jon Hodgson (of Handiwork Games and Jon Hodgson Backdrops ) had kindly granted us permission to use two of his pieces as backdrops for the battles, so we had a lovely vista on both games.
Once I had micro-managed every single miniature and piece of terrain into its correct location, we had a quick team briefing and then got stuck into the games. While it’s fun to have two games on show, of course, it’s double the work for manning them, and we try to have games being played as well as being available to talk.
I played through several turns of the Silmarillion game with Pete and Andy in between chatting with everyone passing by, so the battle moved at a leisurely pace on my side of the table.
Tom and Martin took the Trojan Wars game so I apologise for the lack of photos of this – Tumhalad was taking up most of my attention!
I didn’t see the action develop in the Trojan Wars game but understand that Hector challenged Achilles to single combat, and found himself being dragged three times round the walls of Troy by his heels…
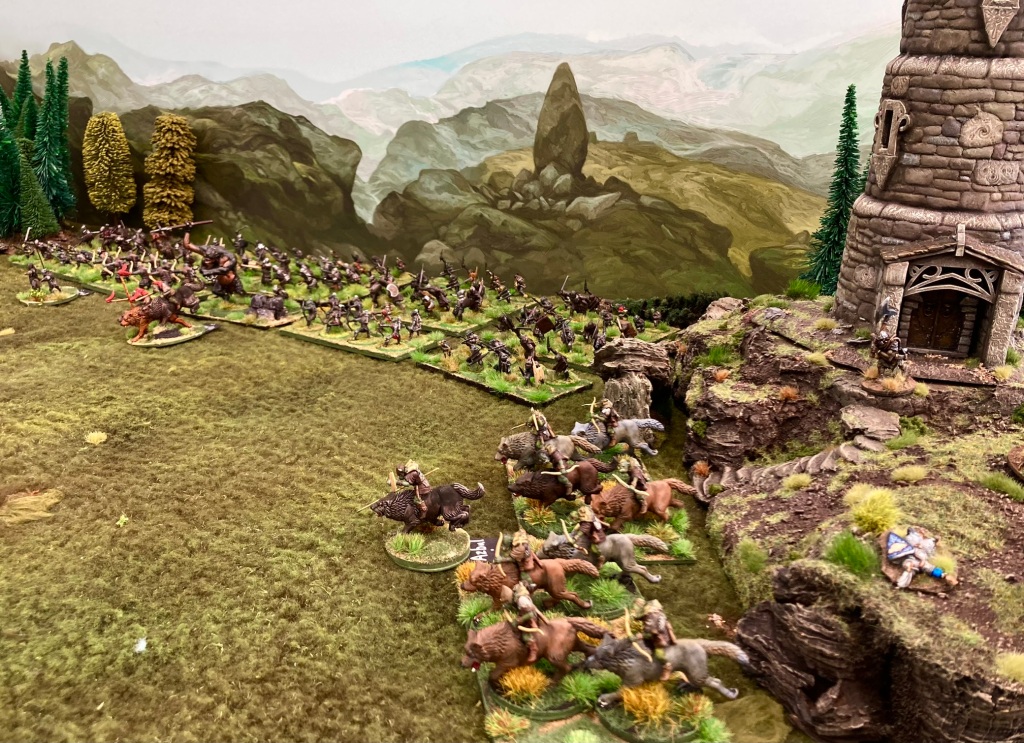
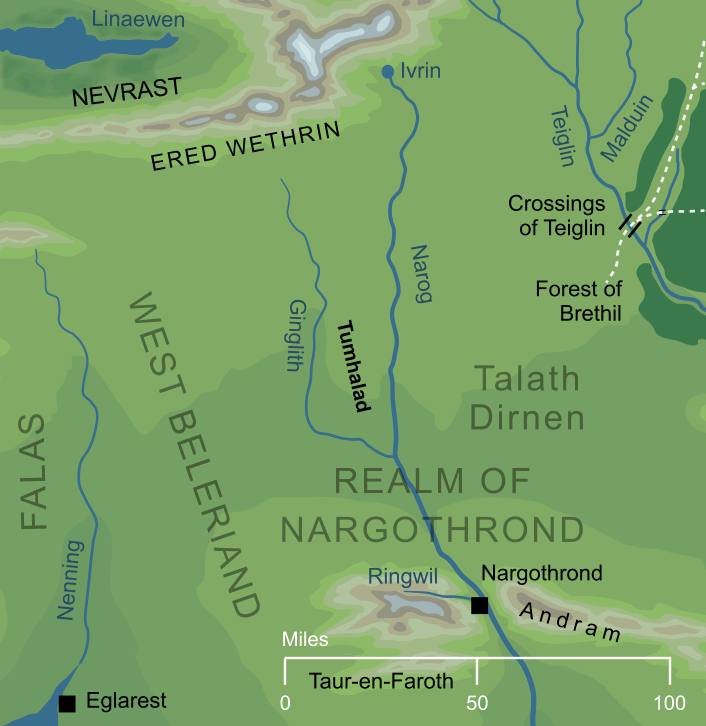
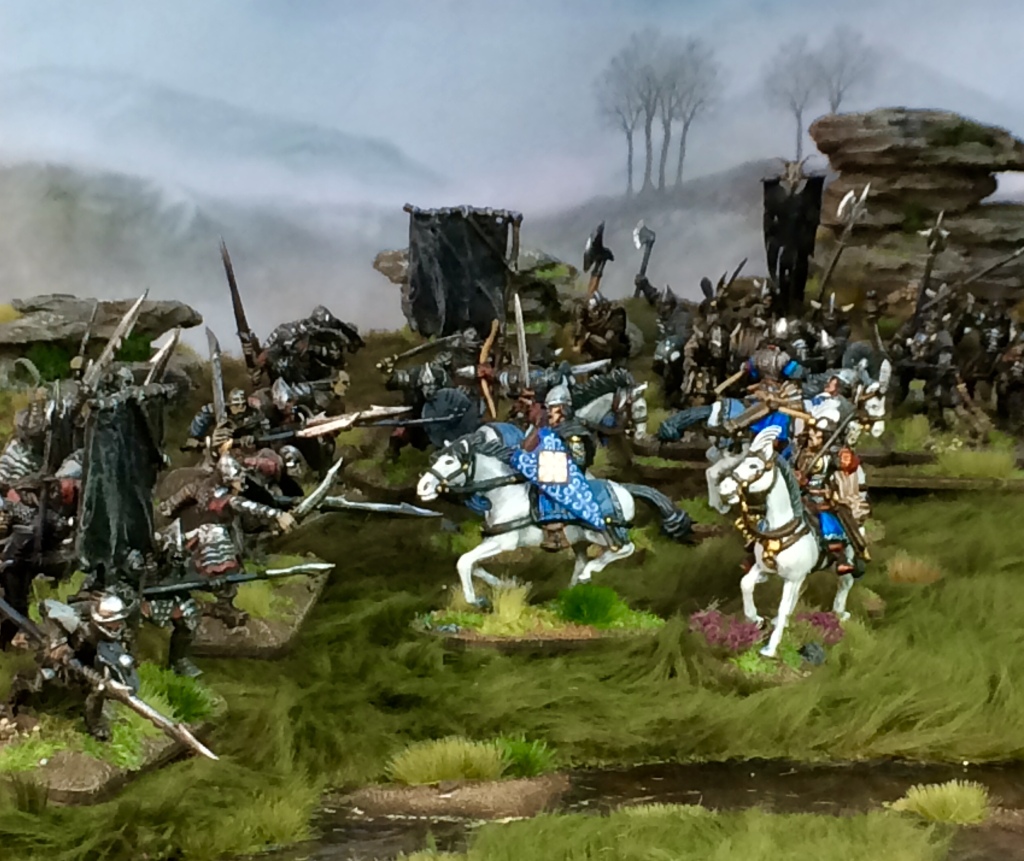
Back to the Battle of Tumhalad…the Orcs deployed on three sides of the battlefield, with the Elves of Nargothrond trapped with the River Ginglith to their backs.
Surrounded, the Elves elected to throw their archers forwards and harass the Orcs as they came on.
Turin Turambar takes up position
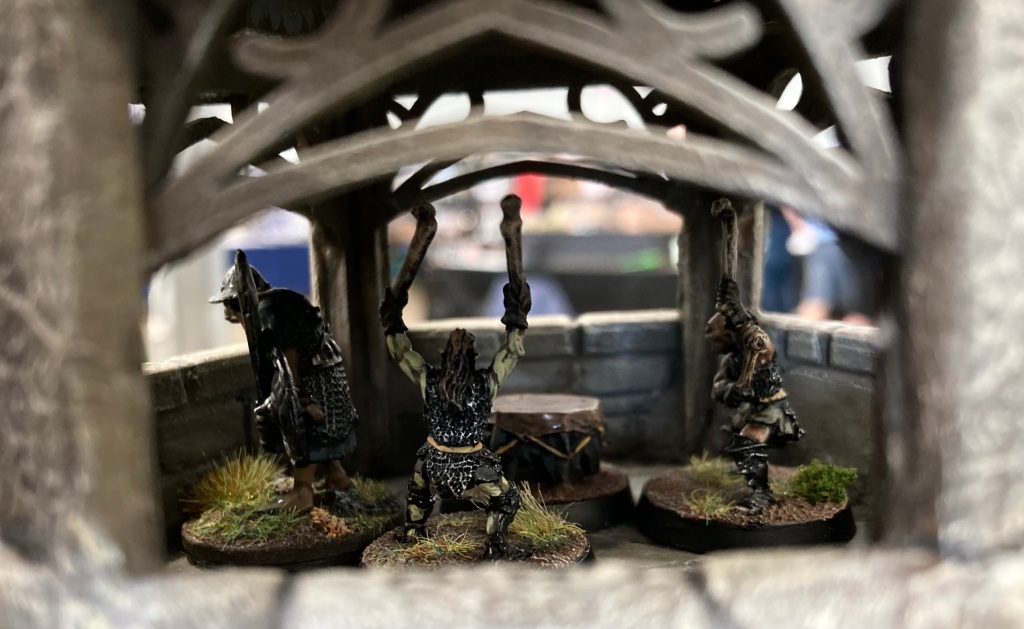
The game featured an Elven watch tower that had been taken over by Orcs and was now manned by their drummers creating an almighty racket!
Yet more Orcs arriving from the North!
Here we have some of the Peter’s Paperboys Orcs taking part in their first Midgard game. They said that they were worried about feeling a bit flat, but were soon made welcome and no-one mentioned their 2D qualities!
Although the Elven archery felled the front ranks of the Orcs, more came on and Glaurung breathed fire upon the Noldor.
Elven Hero Gwindor son Guilin leads the charge into the Orc ranks
Glaurung piled into the Elven ranks but the Elves held on for a minor victory, having more Reputation tokens in their goblet at the close of play. A few more turns might have settled it, but that’d best be played out at a club night rather than a show!
Thanks for all our helpers for today and especially everyone who came and chatted – I hope we have some Midgard news for you soon.
Second of the games that we’ll be bringing to Partizan on May 19th will be our version of one of the battles from the First Age of Middle-earth. The Battle of Tumhalad, which took place in the year 495 of the First Age, only merits a short description in Tolkien’s works but heralds the destruction of the Elven underground realm of Nargothrond.
The Silmarillion states that ‘in the autumn of the year, biding his hour, Morgoth loosed upon the people of Narog the great host that he had long prepared; and Glaurung the Urulóki passed over Anfauglith, and came thence into the north vales of Sirion and there did great evil. Under the shadows of Ered Wethrin he defiled the Eithil Ivrin, and thence he passed into the realm of Nargothrond.’
Map from the Encyclopedia of Arda, (copyright Mark Fisher) showing Tumhalad to the north of Nargothrond.
‘The warriors of Nargothrond went forth, and tall and terrible on that day looked Túrin…as he rode on the right hand of Orodreth. But greater far was the host of Morgoth than any scouts had told, and none but Túrin defended by his dwarf-mask could withstand the approach of Glaurung; and the Elves were driven back and pressed by the Orcs into the field of Tumhalad, between Ginglith and Narog, and there they were penned.’
‘On that day all the pride and host of Nargothrond withered away, and Gwindor son of Guilin was wounded to the death. But Túrin came to his aid, and all fled before him; and he bore Gwindor out of the rout, and escaping into a wood there laid him on the grass.’
A portion of Ted Nasmith’s ‘Turin bears Gwindor to safety’, one of the few renderings of the Battle of Tumhalad by a master Tolkien illustrator.
This doom-filled account fits nicely with one of the scenarios in the forthcoming Midgard Heroic Battles rules, so I’ve adapted The Last Stand for the forces of Morgoth and Nargothrond.
The Elves are holding a ridge, hopelessly outnumbered and attacked on three sides by the Orcs. However, they can still win a moral victory if they can hold on and protect Orodreth, Lord of Nargothrond, until sunset (or Turn 6 of the game, if you prefer).
The Elven Force is, of course, commanded by Orodreth, but Túrin Turambar is the real warlord, having urged the Elves of Nargothrond into open battle. Armed with the black sword Gurthang (‘Iron of Death’ in Sindarin) and wearing the Dragon-helm of Dor-lómin, he cuts a frightening figure as the only man in the Elven ranks.
Our third main commander is Gwindor, a maimed Elf who has been rescued from Morgoth by Túrin.
The Elven warriors are a variety of formed archers and spearmen with a considerable mounted wing. Heraldry is the emblem of the house of Fingon, though Orodreth and his bodyguard bear one of his uncle Finrod’s symbols.
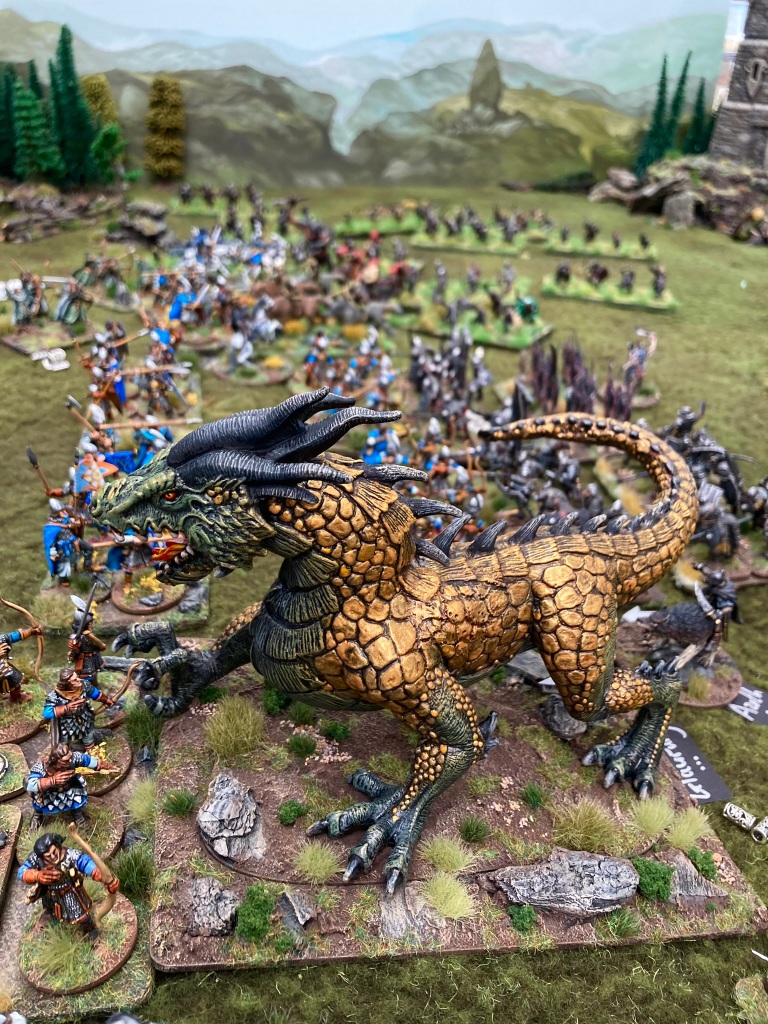
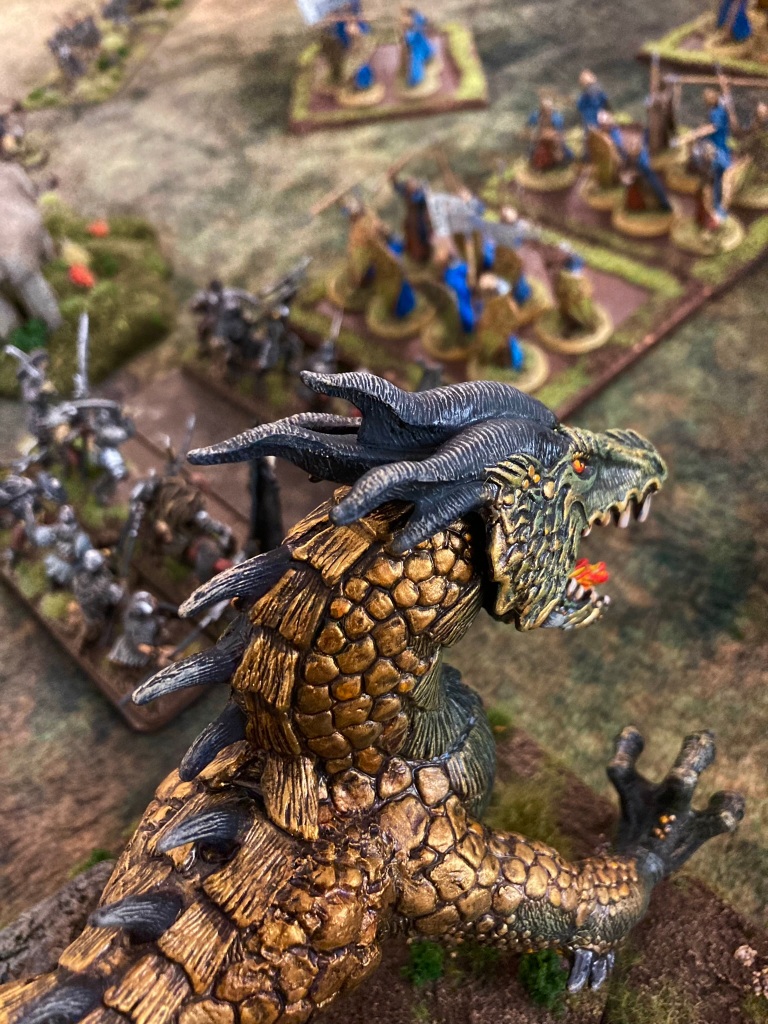
The Orc host is great fun to field, not least because the commander is a fire-breathing dragon! Glaurung- the first, wingless dragon of Middle-earth – originally emerged from Angband in FA 260 but was beaten back by Elven horse archers.
By FA 455, he was fully grown and led Morgoth’s forces in several major battles. As a sentient creature, for game purposes, we have treated him as a Monstrosity Unit with a Level 3 Major Hero permanently attached.
I have added various lowly Orc captains, but Glaurung is the star player here. The model is a heavily converted toy by Schleich which I covered in a previous blog article.
The rest of the Orc host is composed of a huge variety of miniatures from mine, Martin and Pete’s collections.
We’ve all enjoyed converting various plastics from Oathmark, GW, Warlord, Wargames Atlantic, Gripping Beast and many others for that uniquely orcish look.
I’ve chosen to give the Orcs a low armour value for game purposes, which means that they die in droves but can potentially swamp the Elves with more warriors, which feels about right.
There are a few Orc archers that we’ve massed into formed units (it’s interesting to note how many characters in Tolkien are killed by Orc arrows) and some wolf riders to act as scouts.
Anyway, we’re looking forward to see how the scenario plays and to a great show at Partizan! Hope to see some of you there.
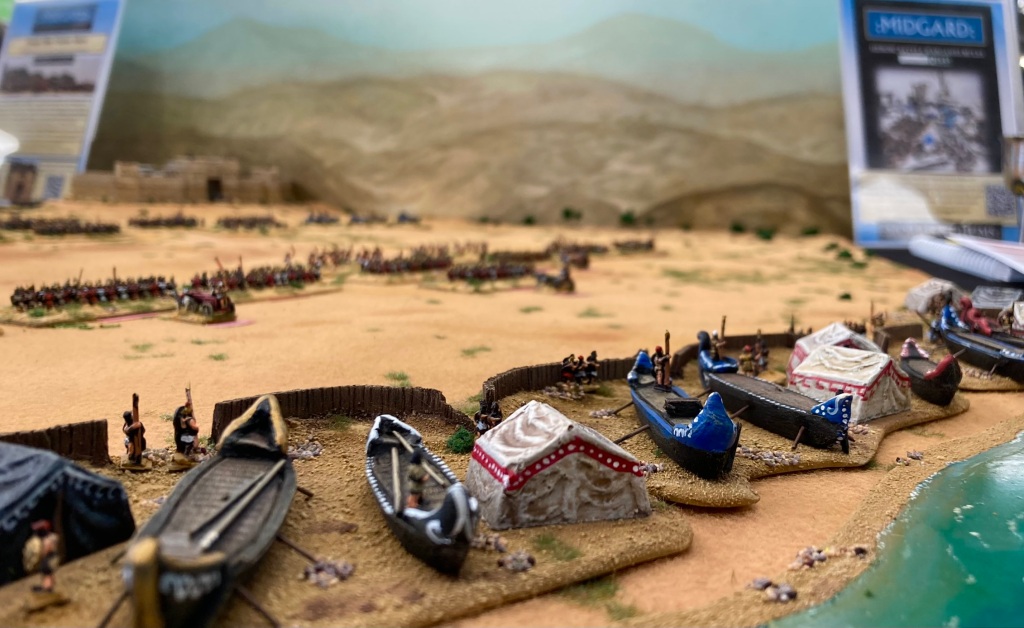
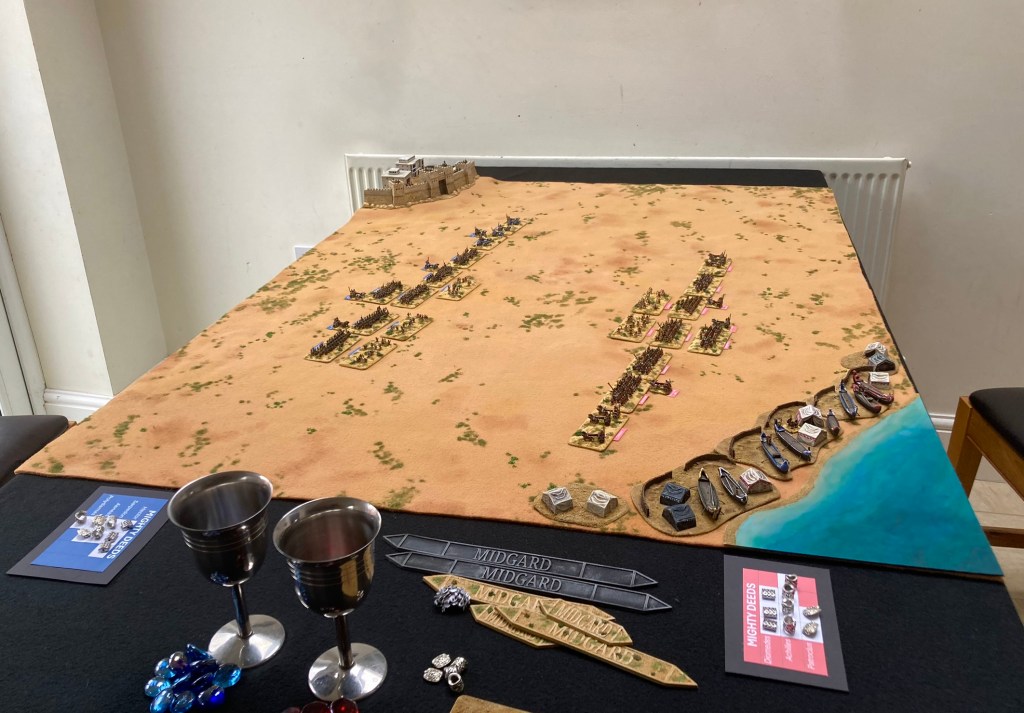
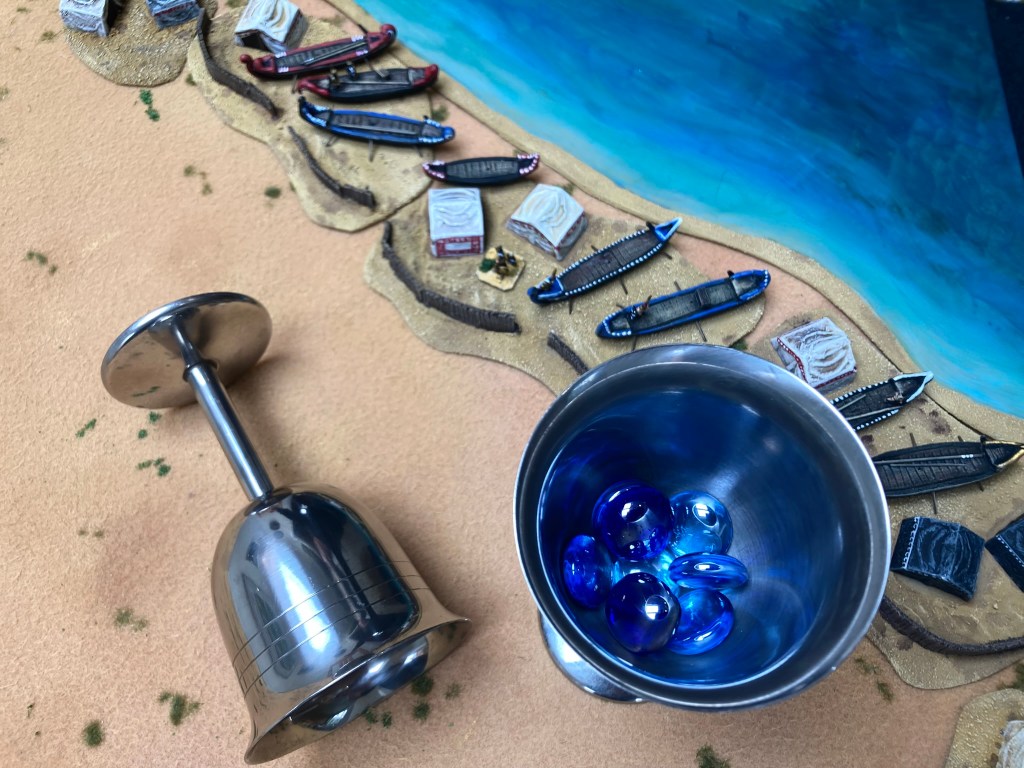
The nearly-finished layout being tried out in our first game. Miniatures by Baccus 6mm and Rapier Miniatures; walls, buildings and tents by Leven Miniatures; the cloth, sea and boats are scratch built.
The Partizan show in May at Newark Showground is one of the gaming highlights of my year, and we usually get the Morris & Chums group together to put on a game or two.
Hector rides out from the Scaean Gate. 6mm figures by Rapier MIniatures and Baccus 6mm; walls and buildings by Leven Miniatures.
Tom WD got us onto the cunning/ unhinged idea of displaying in two scales at once back in 2017 (where we ran the WW1 Battle of Oppy Wood in both 12mm and glorious 54mm), and it resurfaced last year when I put together a Midgard double-header of 28mm Norse Myth (The Rainbow Bridge) and 15mm Early Medieval (The Battle of Degsastan 603).
As the forthcoming Midgard Heroic Battles* is very flexible on figure scale and setting, it’s nice to be able to demonstrate it with two different periods and sizes on the same table. This year’s ‘smaller’ game is the Trojan War in 6mm, featuring Hector and Achilles duking it out in front of the walls of Troy on a 3 x 4′ layout.
*early caveat: the rules are still in layout and I’m waiting for news about release dates. Hopefully I’ll know more by Partizan.
This game is run with two 300 point Forces (the recommended starting size for a game of Midgard – you can read more about Force sizes and composition here).
These were as follows:
GREEK FORCE
Diomedes (Level 3 Major Hero, Army Commander)
Achilles (Level 4 Legendary Hero)
Patroclus (Level 2 Minor Hero)
5 Units of Spearmen (Warriors)
2 Units of Myrmidons (Warriors)
2 Units of Archers/ Slingers (Skirmishers)
2 Units of Chariots (Light Riders)
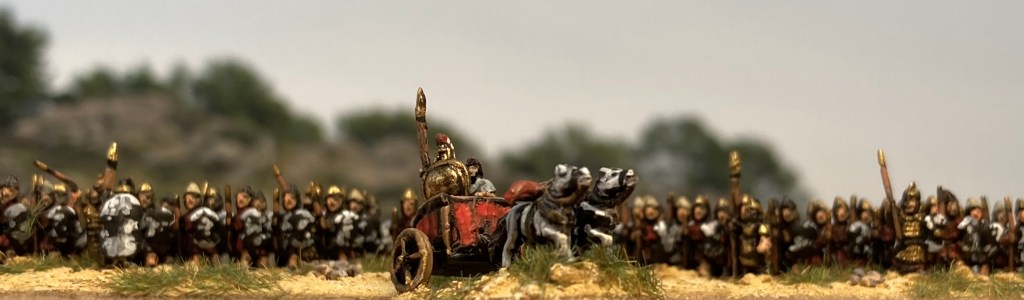
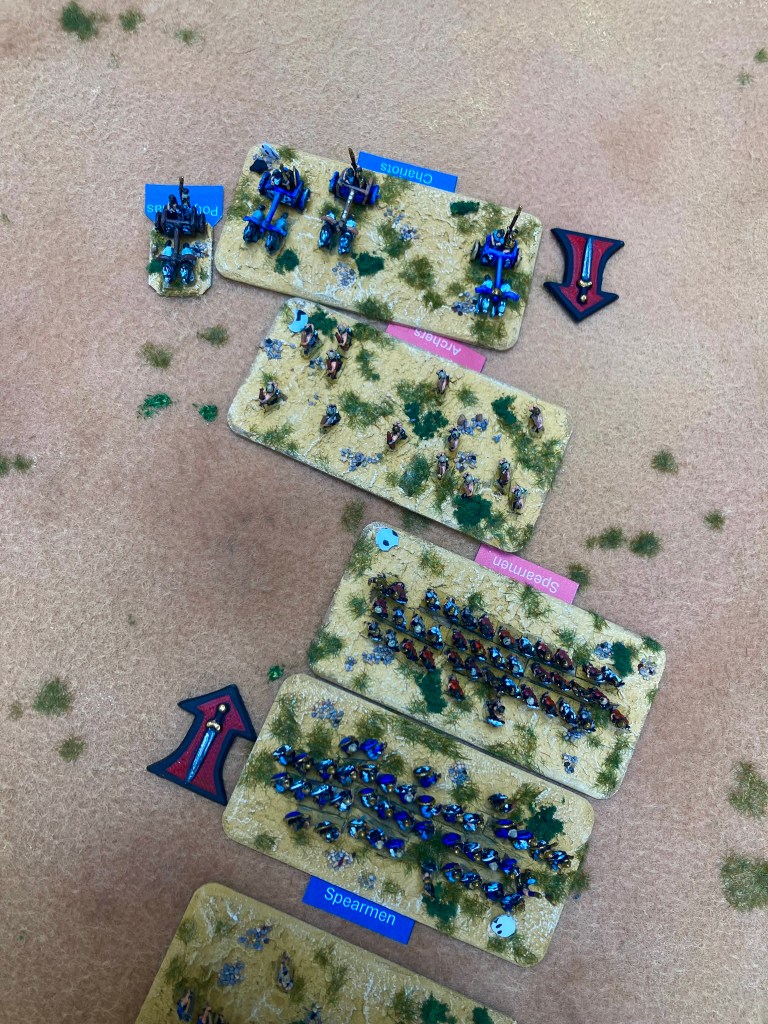
Greek troops using Rapier and Baccus Miniatures.
TROJAN FORCE
Hector (Level 3 Major Hero, Army Commander)
Aeneas (Level 2 Minor Hero)
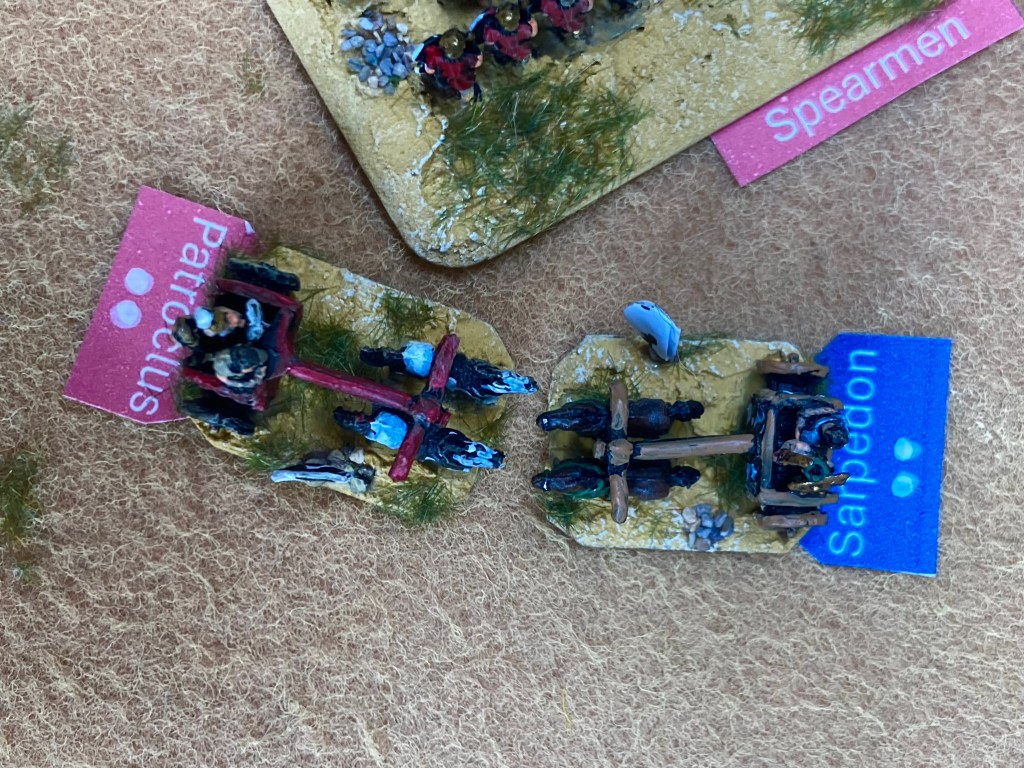
Sarpedon (Level 2 Minor Hero)
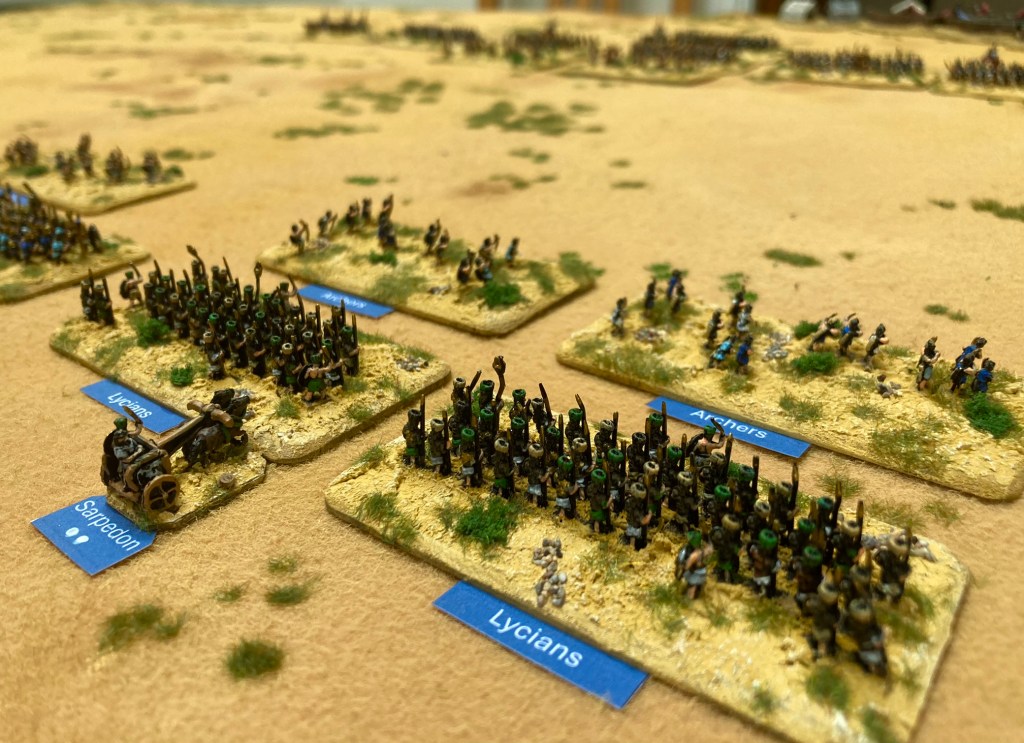
Polydamas (Level 1 Champion)
4 Units of Spearmen (Warriors)
2 Units of Lycians (Warriors)
3 Units of Archers (Skirmishers)
2 Units of Chariots (Light Riders)
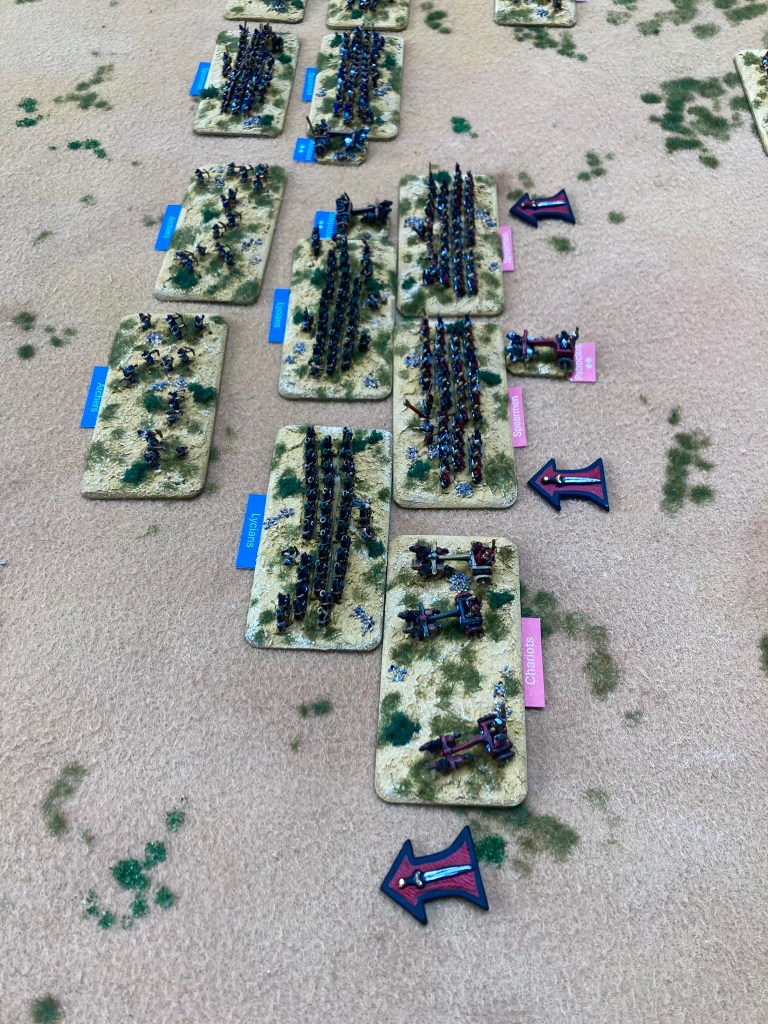
The Lycians deploy for battle on the Trojan right under the command of Sarpedon (chariot by Rapier Miniatures, Lycians and archers by Baccus 6mm).
Heroes in Midgard Heroic Battles need Mighty Deed markers. For 28mm gaming, we place these by the side of the Hero miniatures on the table, but for smaller scales, it works well to have them recorded on a card at the side.
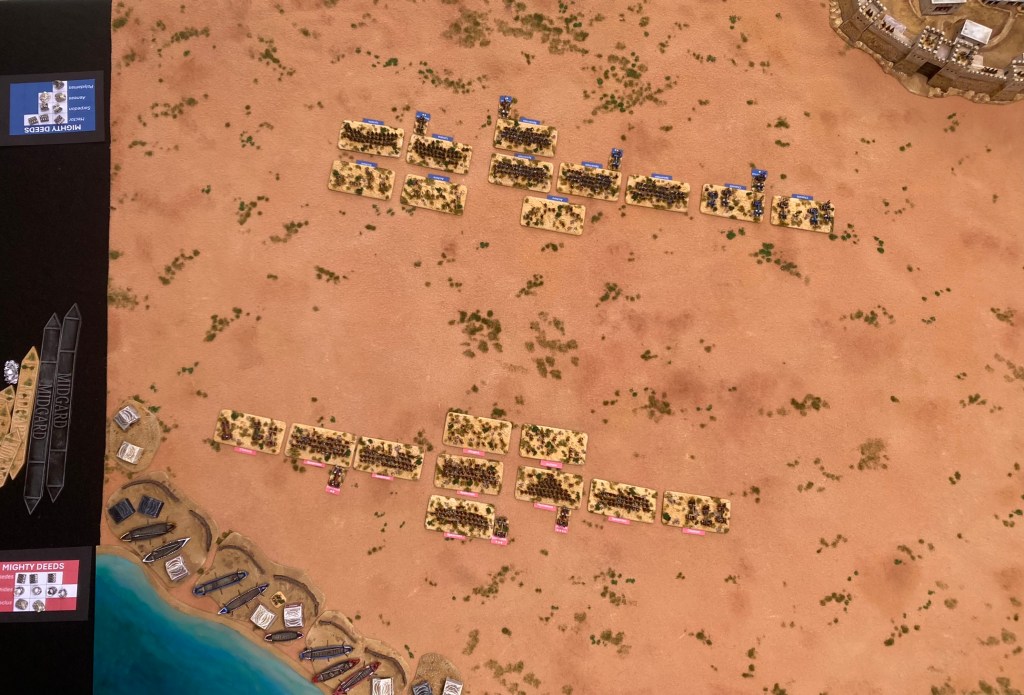
For our play test game, the Greeks (played by chum Martin) decided to go aggressive and sent everyone forward.
The two Forces at the start of the battle: Trojans (blue) and Achaeans (red).
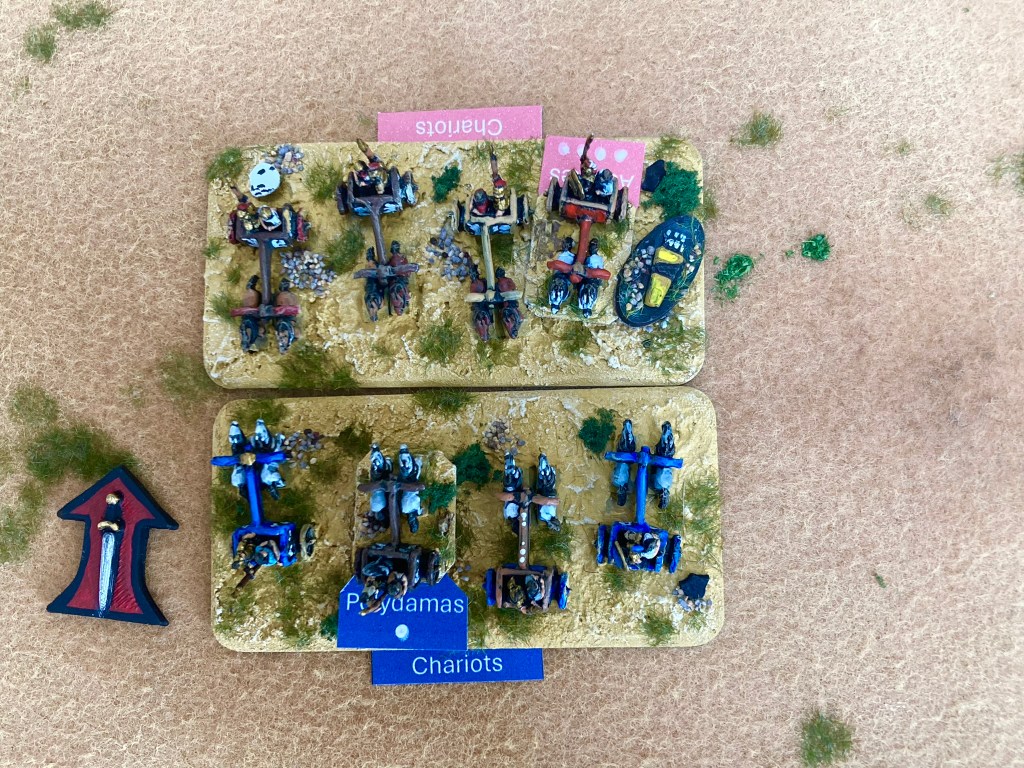
Achilles threw an early charge with his chariots at their Trojan opposite numbers; his momentum carried the Trojans away, but in a twist of fate, he was wounded by a javelin in the melee.
Trojan Hero Polydamas, son of Panthous, boldly led the remaining Trojan chariots into Achilles and found himself being challenged to single combat by the greatest warrior of them all. Polydamas didn’t wish to lose Reputation by turning down such an opportunity, despite the fact that it was likely to be a fatal honour!
However, the Gods were most certainly not with Achilles; cautiously holding back a couple of his Mighty Deeds for a future turn, the Greek Hero fluffed his (numerous) combat dice. With a mighty flourish – and some more fortunate dice – Polydamas dispatched the wounded Achilles with a sword thrust to the heel. This sent tremors through the Greek Force as the goblet of Reputation suddenly emptied – but was it half empty, or half full?
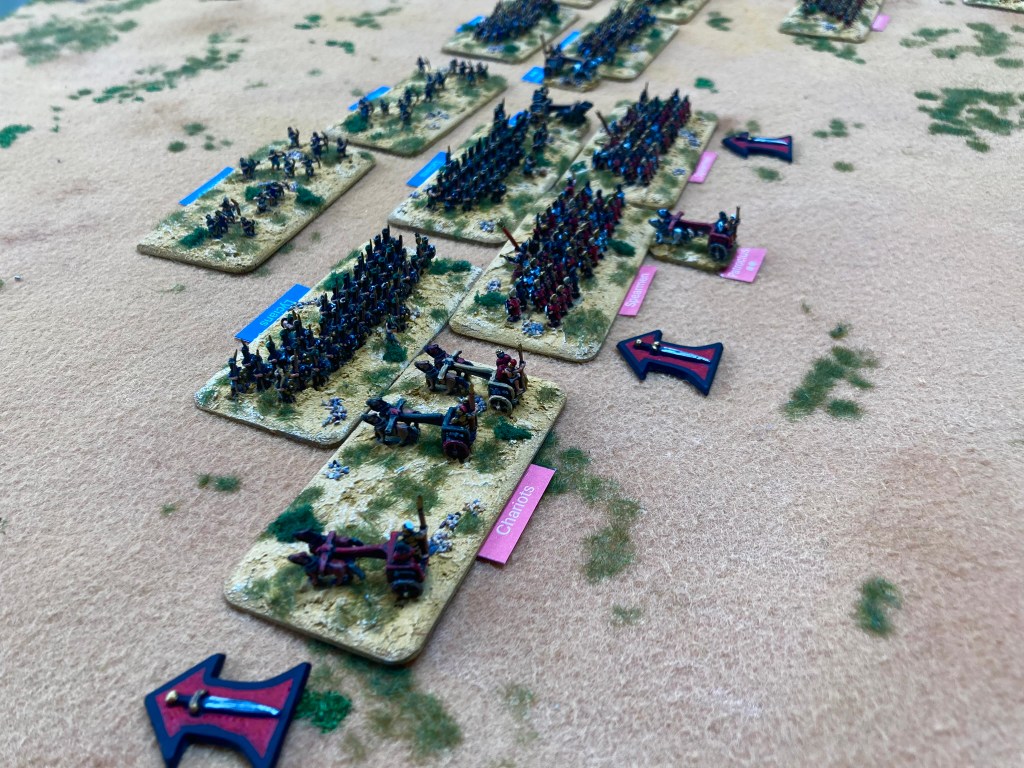
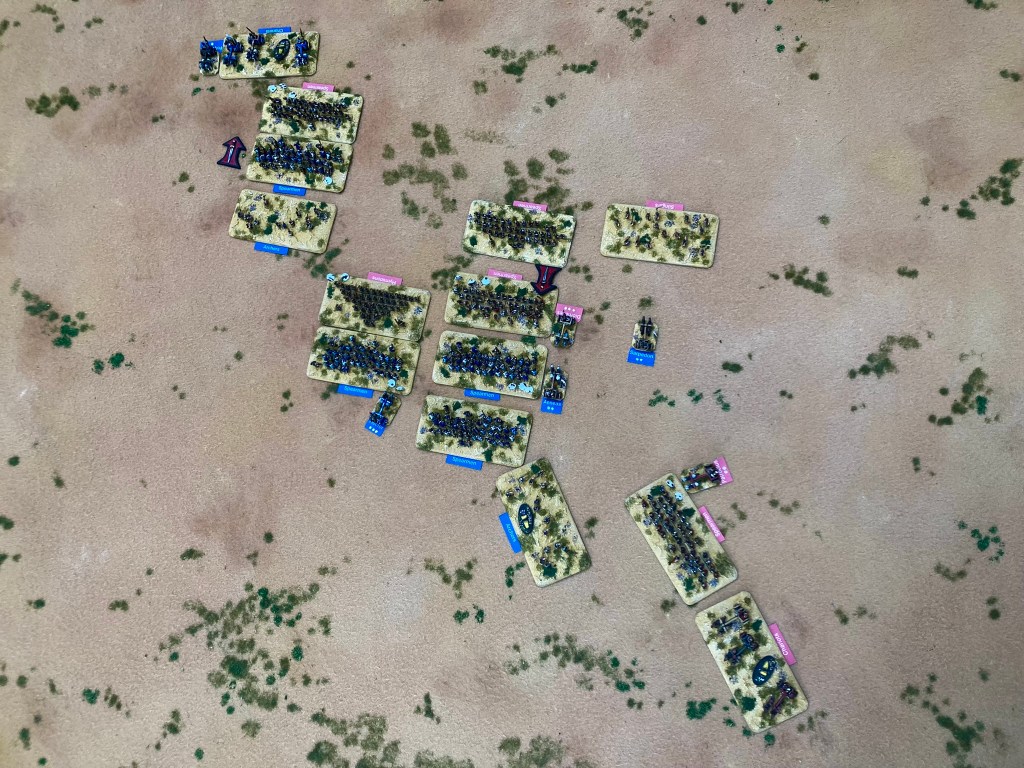
Wounded Achilles is brought down in single combat with lowly Polydamas!Greek chariots go in against the Lycian warriors (the red arrows are Charging or Winning markers)Patroclus’ chariots and warriors clear the Lycians and start to turn the Trojan right flank (bottom); a full-scale melee is raging in the centre.Hector and Aeneas commit the Trojan centre and get stuck in to the fight themselves.Although the Achaeans are winning on their left, at the top of the picture, Polydamas’ chariots are about to intervene in the Greek rear.
The Trojan right flank was crumbling – Sarpedon’s unit broke and ran, leaving the Lycian Hero high and dry! He was lucky to survive the attentions of the Achaean slingers…
The battle lines have swung round, though the Greeks (red, bottom right) have yet to exploit their breakthrough, whereas Polyadamas’s Trojan chariots (blue, top left) are already in the Myrmidons’ rear.
Having lucked out and dodged the sling stones, Sarpedon did what any Homeric Hero would do and charged Patroclus’s spearmen. Naturally, a challenge was issued and accepted. The Heroes clashed shields before Sarpedon dispatched the luckless Patroclus with a spear thrust to the neck…’and darkness engulfed his eyes’, as Homer would have put it.
With this loss, the Greek goblet of Reputation was empty, and the game was over. The Achaeans began to flee back to their black ships, hotly pursued by the victorious Trojans.
We both enjoyed the game which could have gone either way, although the fateful loss of Achilles early in the battle paved the way for the Trojan chariots to encirlcle the Greek right flank.
We look forward to replaying the battle at Partizan!