
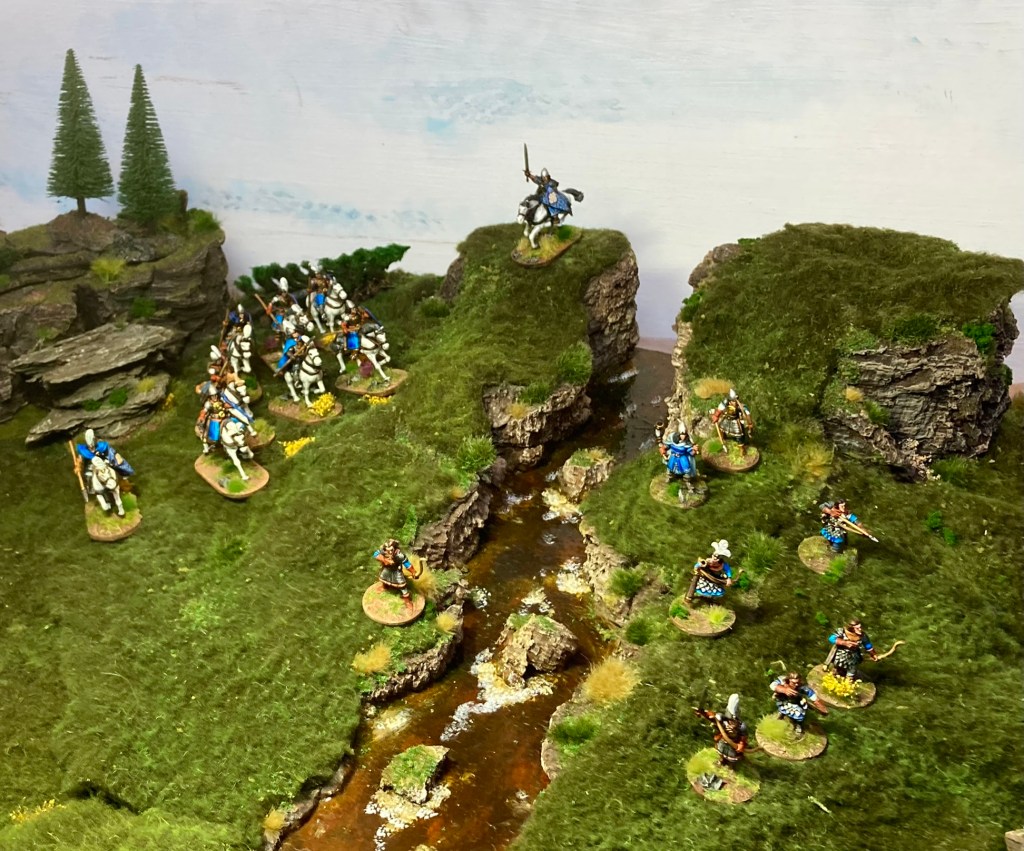
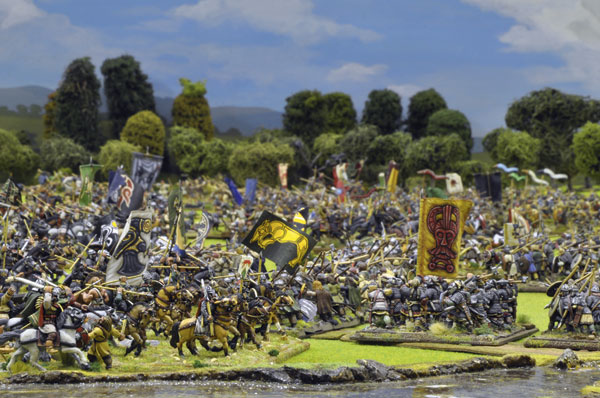
The river pieces that I’ve used in a couple of recent games (Mortimer’s Cross at Partizan and Stamford Bridge in Middle-earth) have drawn quite a few questions, so I thought an article about them would be useful. I apologise in advance that this isn’t a tutorial per se, as when I made the original river many years ago, I didn’t take any WIP pics. However, I’ve recently refurbished the pieces, so have included some upgrade photos and general commentary that I hope will be helpful if you’re considering building something similar. Here goes!

Like hills, roads and woods, rivers are thoroughly multi-purpose pieces of terrain which will serve on the gaming table across many historical (and fantasy) eras. A great number of battles have been fought over river crossings and they feature heavily in the early medieval conflicts that have always fired my imagination, so making my own was always going to be on the cards.
RULE 1: MAKE IT IRREGULAR
Rivers are rarely perfectly straight; they are far more likely to meander through the landscape, finding their way between the hills and gullies of the countryside on their way to the sea. They are hard to replicate exactly in miniature form, but you can make a great start by varying all the pieces slightly.

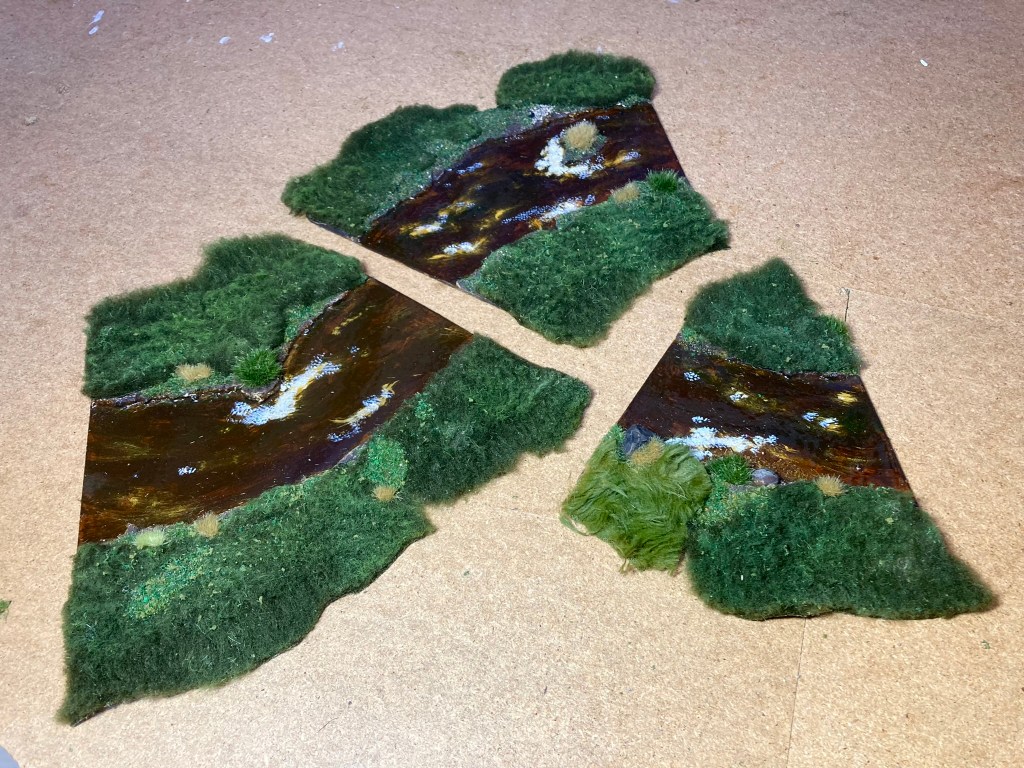
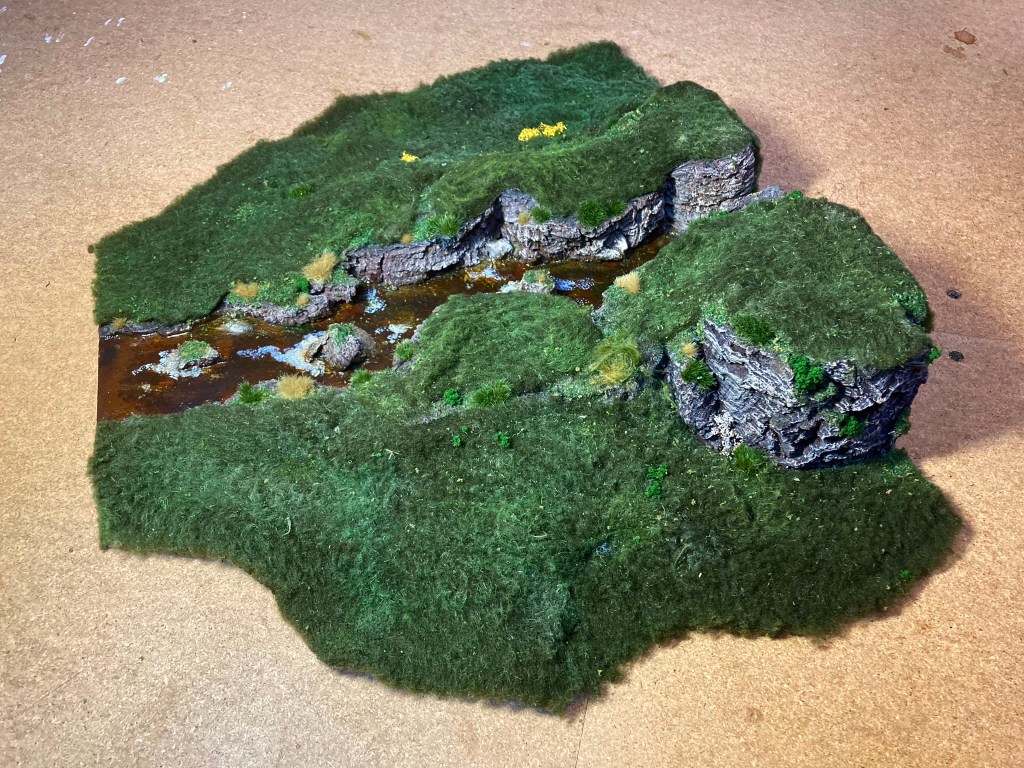
I cut all the base pieces of my river from 3mm hardboard (I’d probably use MDF nowadays to reduce warping) using an electric jigsaw. Each piece has the same width river and bank at the ends, but the rest can vary and increases the illusion of reality. Irregular banks can also ‘mask’ where the piece joins the table, as shown in the photo of our recent Mortimer’s Cross game at Partizan.
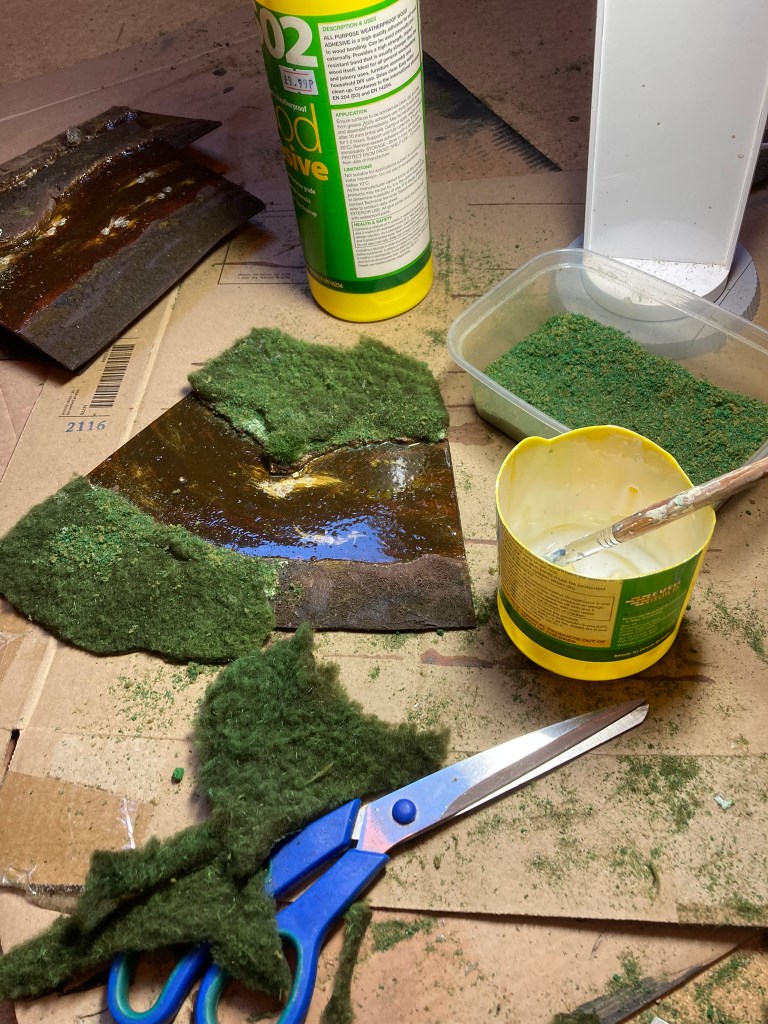
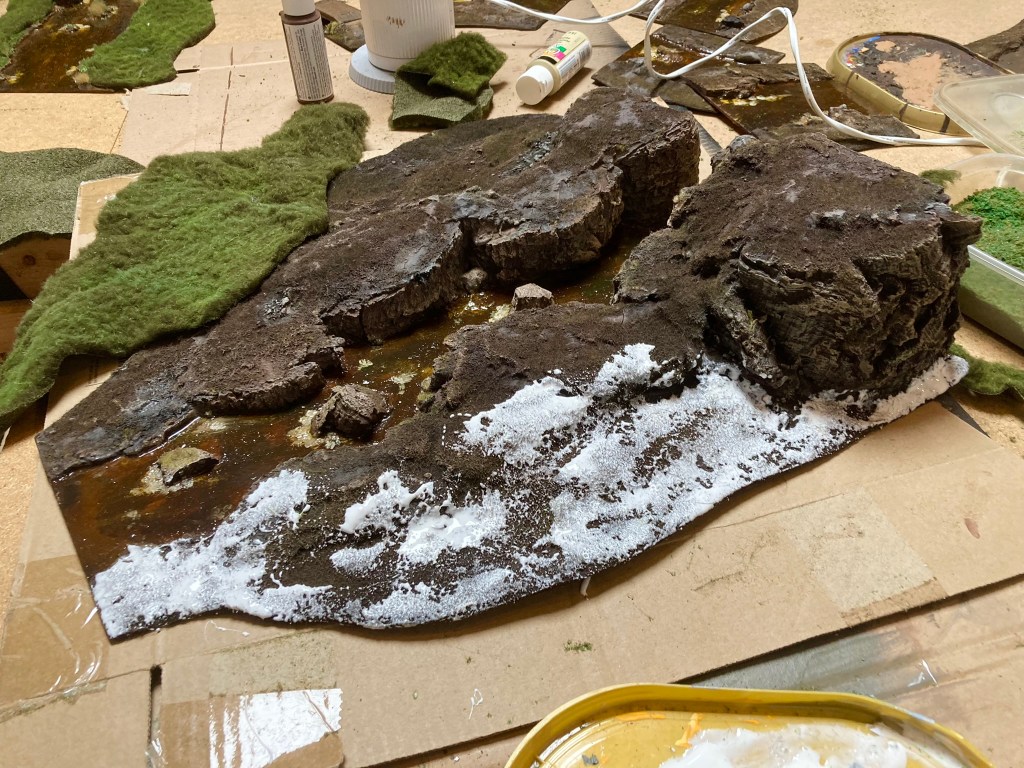
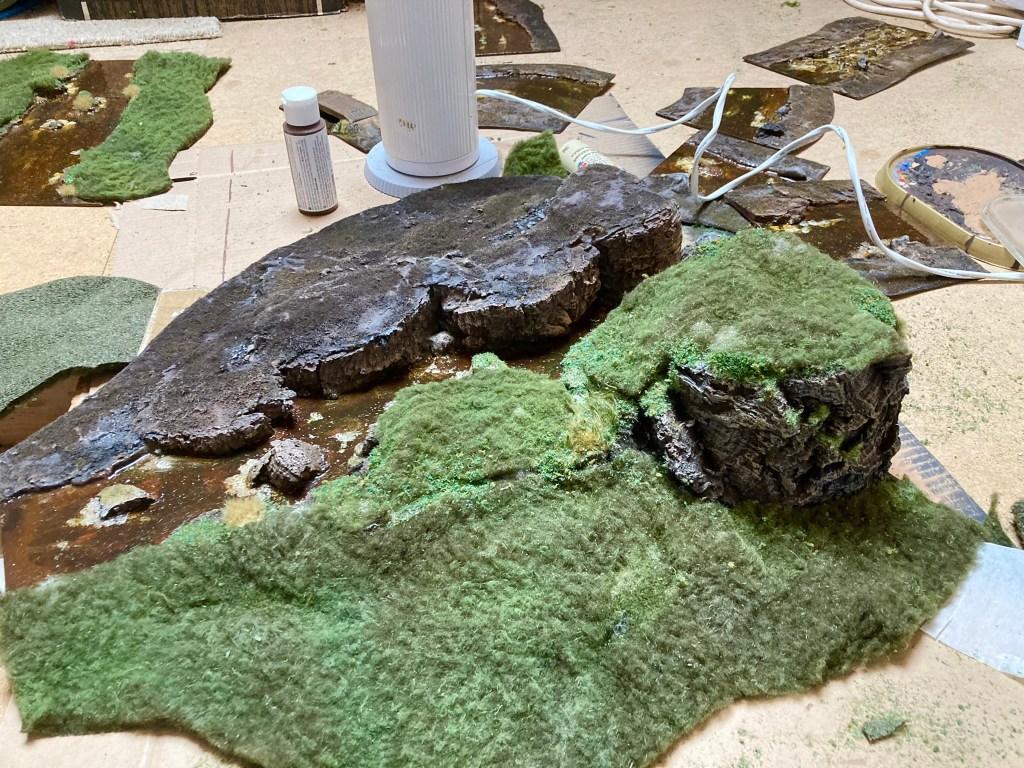
The groundwork for the banks was largely done with thin slices of cork bark (cut around 5-10mm thick using a saw). These were stuck down with wood glue to create the basic watercourse, then the banks were filled in with a mixture of filler, brown paint, wood glue and sand, with a few extra rocks placed in the river (cork bark or chippings again).
Originally, each bank was dry brushed and flocked, but when I refurbished the river this year, I added fleece fabric to match my current terrain cloth (see my article Sherpa Fleece Terrain Mat for full details of this project) alongside some teddy bear fur and grass tufts by Gamers Grass. The cloth covering overlaps the wooden base by an inch or two and gives a less harsh edge when placed on the table.

RULE 2: MAKE ENOUGH PIECES
If you’re going to make your own river, it’s a right faff to have to try to add extra pieces later on and match the exact colour and shine each time. Yes, it’s a bit of an investment in time and materials, but if you make slightly more than you think you’ll need, you’ll probably have enough.

Pieces can be adapted later on (I had to slightly modify one of the sections to fit Chris B’s watermill for our Mortimer’s Cross game), but making more pieces is going to be a colour-matching pain. I think I have about 12′ of river – there’s a full inventory below.


I also built a waterfall and ravine section which are detailed below. They’re not necessary for a basic rivers set (and in any case, they don’t get used much) but they are lovely for photos and set dressing in larger games.
RULE 3: PAINT IT BROWN
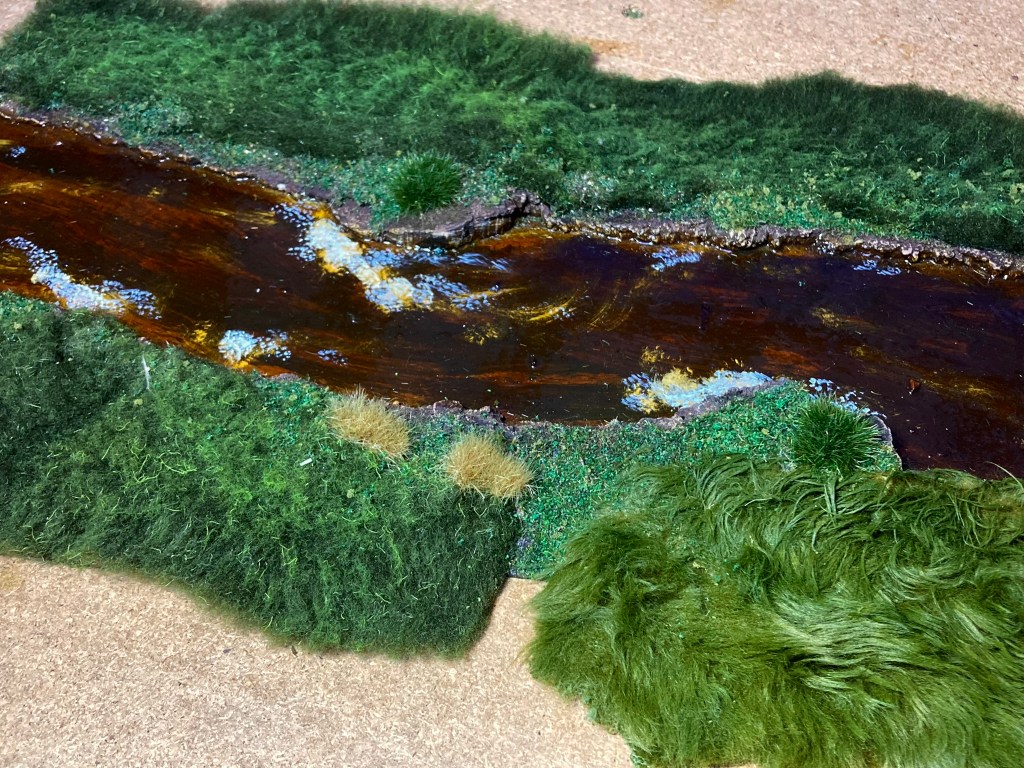
I know this is a favourite wargamer argument and that everyone has their own opinions, but…I find that a pure blue river often wrecks the illusion of many a wargames layout, especially in a northern European setting.

I wanted to create the streams and rivers of the British ‘Dark Ages’, so it was going to be brown and peaty, all the way. Rivers in northern Europe sometimes appear blue on a sunny day but this tends to be due to the reflection of the sky rather than white sands and crystal clear water.

RULE 4: MAKE IT SHINY
So much of the illusion of depth in a river terrain piece is created by the reflection on the water’s surface. There are some amazing water modelling products out there at the moment, but they all add a fair deal of expense, complexity and often weight to what is going to be a much-used portable gaming piece. The shiny surface on my river is created entirely with yacht varnish bought in cheap 250ml pots from my local DIY store.

After painting the river bed with multiple layers of brown acrylics and a few streaks of colour, it then received two coats of yacht varnish painted over the surface. When these were dry, I stippled on some areas of white to create the impression of a current, with patches gathering around rocks.

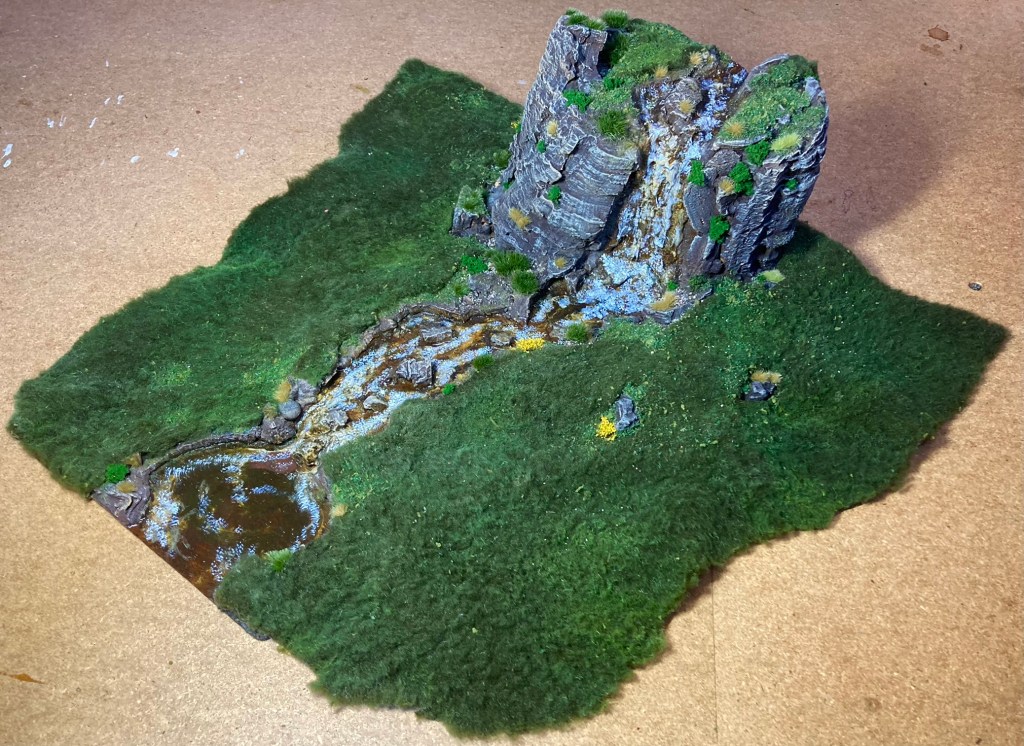
SPECIAL SECTION #1: THE RAVINE

The ravine was one of the extra sections that I’d built to go at the end of the table to suggest a rocky area such as my beloved Peak District. The whole thing was based on a piece of 3mm hardboard, though if I was doing it again I’d probably use 3mm MDF or something even sturdier. It was essentially built from slices of cork bark, increasing in height, with the slopes filled in with expanded foam. The edges of the slopes had warped over the years, but as I was going to overlap these with sherpa fleece fabric as part of the refurbishment, this didn’t need to be fixed.


SPECIAL SECTION #2: THE WATERFALL

This was born of walking in the Lake District and watching the John Boorman movie Excalibur! Like the ravine, it’s constructed from cork bark and foam, with some texturing on the waterfall itself with hot glue and filler. This is one area where I suspect that using modern water modelling products could improve it, but it does the job.


Great post. The refurbishment is a big improvement. The ravine is a lovely piece too.
Cheers,
Pete.
LikeLiked by 1 person
Thank you very much.
LikeLike