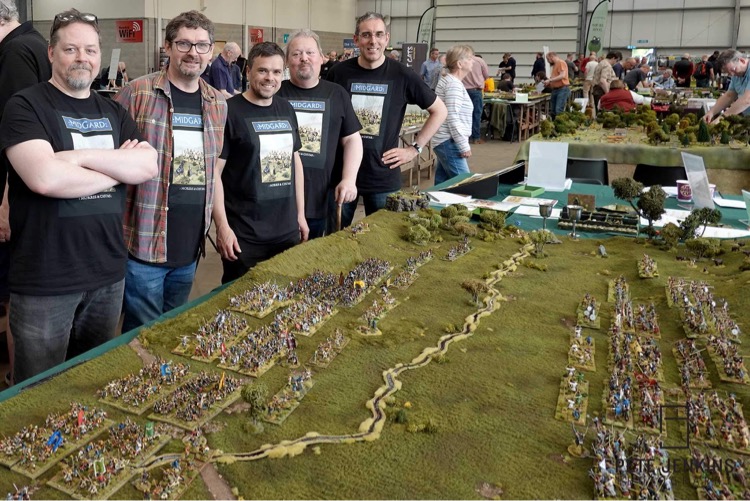
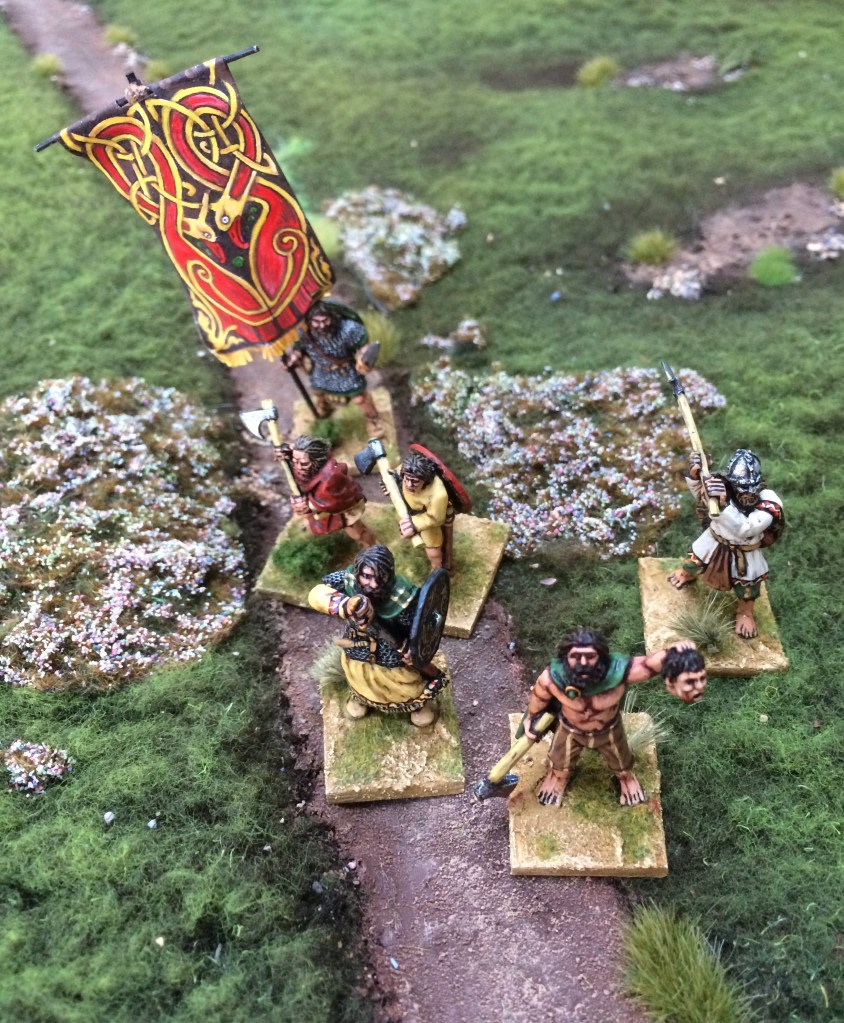
There were numerous requests after the recent Partizan show for a ‘how to’ on the terrain cloth that we used for our Battle of Degsastan game, so I’ve hauled out the photos from when I made it and written a short piece.

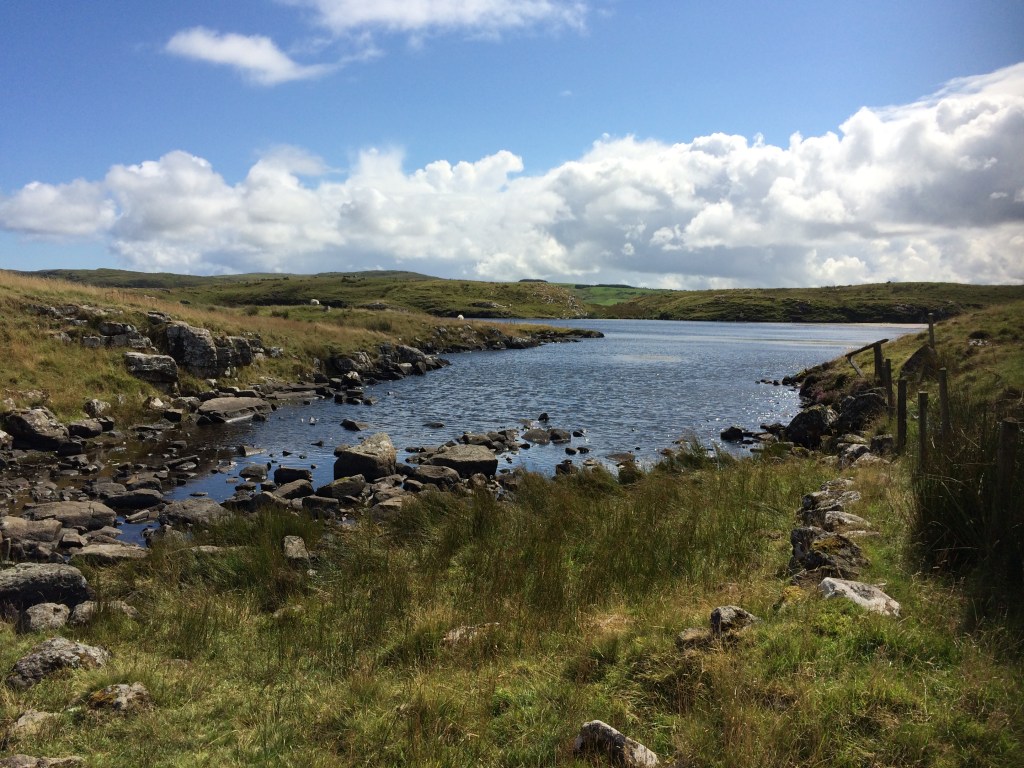
I spent years as a child gaming over a plain green table tennis table, which was just fine, but I distinctly remember every time I went for a walk in the countryside thinking ‘my terrain looks nothing like this.’ And it doesn’t really matter, does it? Gaming terrain has to be practical: you have to be able to pack it away easily; miniatures need to be able to stand on it; and it needs to be portable. [Points 1 and 3 can, of course, be solved if you have a large wargames room and plenty of storage for your collection of sculpted terrain boards – but I’ve never lived like that and am unlikely to do so. ]

But, y’know, to me it does matter. Gaming with miniatures is a visual hobby – we try to create our own little worlds to create an illusion where our heroes and monsters battle it out with each other for a evening. We often spend hours on individual models, swapping tips over social media about the best ways to paint mail armour, eyes or bronze helmets. When you look at a game, however, the biggest visual impact is the terrain, so I think it’s always been worth investing some time in that.

After the ubiquitous TSS expanded polystyrene terrain tiles of the 1980s and 90s, printed terrain cloths have been one of the huge breakthroughs of recent gaming history. Cigar Box Mats and Geek Villain (to name but two) now provide highly portable and visually stunning cloth mats. Unfortunately for me, I like making stuff, which is what led me to the sherpa fleece solution.
A few years ago, inspired by some of the stunning tables on the internet, I’d been toying around with various types of teddy bear fur fabric, trimming and painting away, but hadn’t quite found the right solution for what I had in mind. Teddy bear fur actually requires quite a lot of work to create the illusion of grass, and also, for me, conjures up a great impression of the Russian steppe or African savannah, but wasn’t quite right for the moors and valleys of the British Isles (mythical or otherwise) where my games were taking place. Eventually, a trip to Northern Ireland – surrounded by the most beautiful scenery – pushed me over the edge, and I decided to go looking for something else.

I’d always purchased any fabric for terrain projects direct from a market where I could physically see and feel what I was buying, but this is becoming harder to do and there’s actually a wider selection of fabrics out there online. Fortunately, many ebay sellers provide a posted sample for a nominal fee, so I decided to invest in a whole variety of these and see what came through the door. I have fond memories of the fleece that would have been ideal for making a Kermit the Frog puppet but was somewhat out of kilter for a Dark Age moorland!

When the sherpa fleece sample turned up, I nearly discounted it immediately: it didn’t look like what I was after. However, once I’d started giving it a brush-through with a wire brush, it started to transform into a more grass-like texture. I experimented with all kinds of different techniques
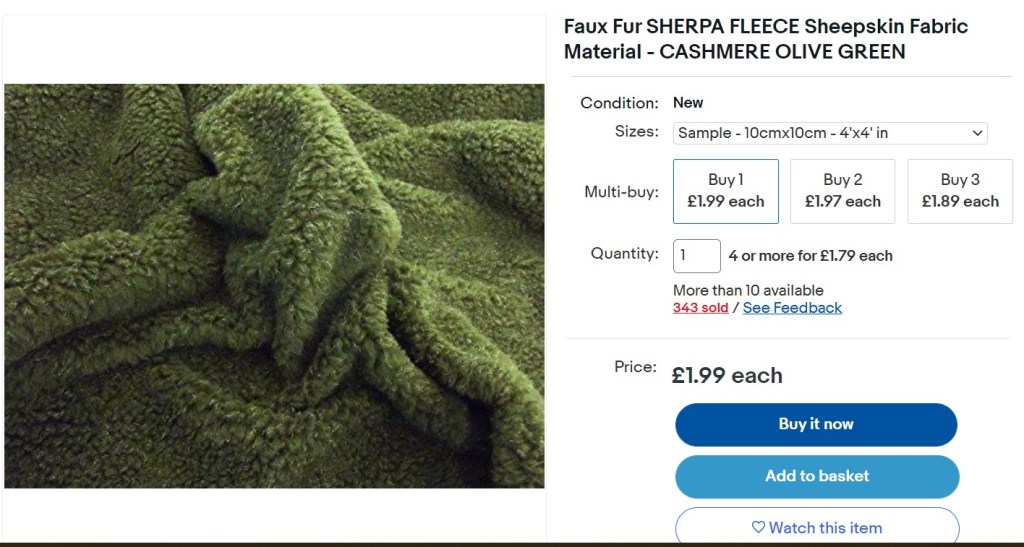
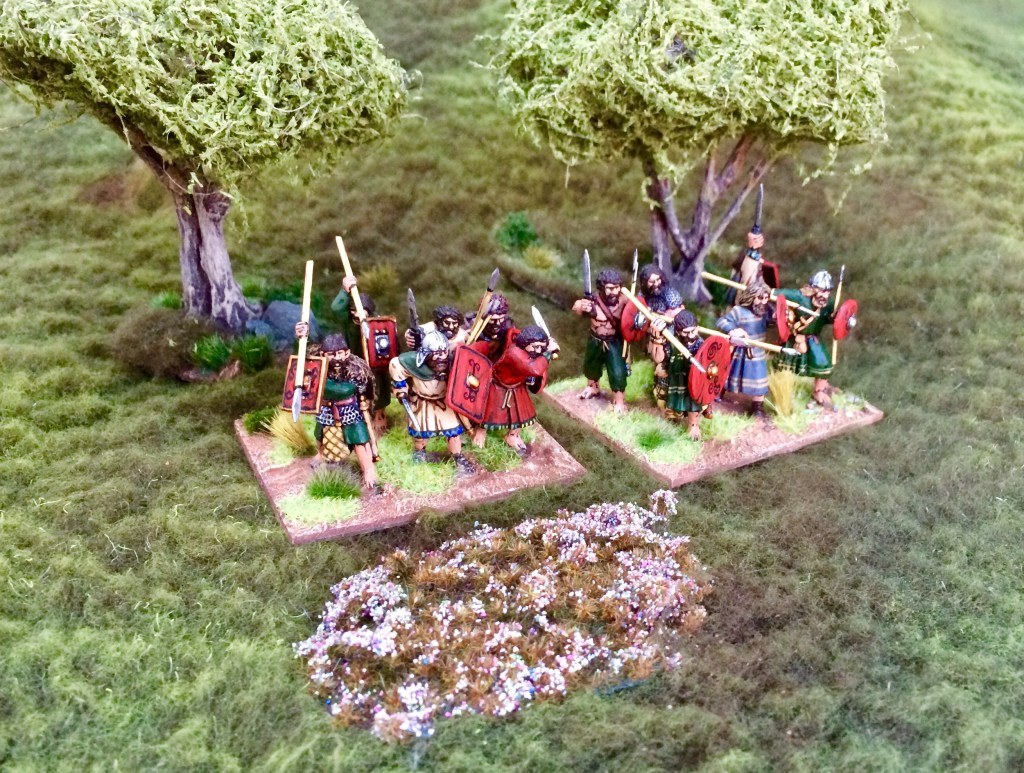
NB: before you rush out and buy some, you need to know that sherpa fleece is quite a ‘bouncy’ material; it has a fair bit of depth to it and is not ideal for single-figure based skirmish gaming. It can be shaved, trimmed and melted down to a lower level, but it is best suited for gaming using figures on large bases. (My games generally involve units on 120 x 60 mm bases and heroes on 40, 50 and 60mm round bases.) Dice trays are also useful to avoid cocked dice!
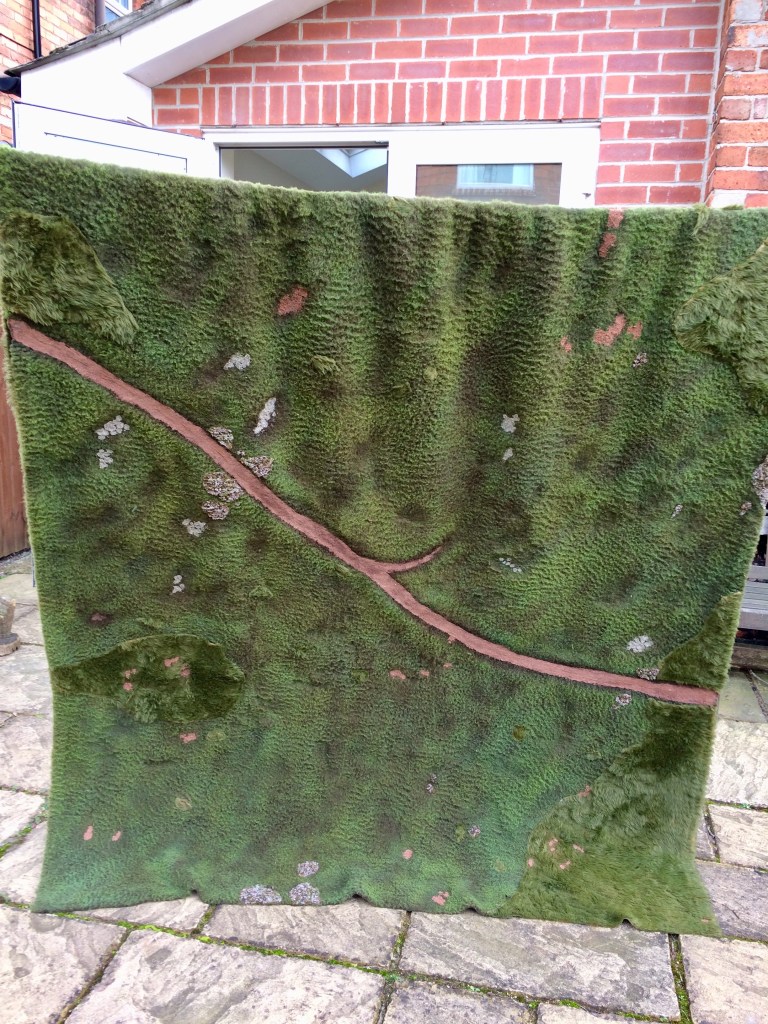
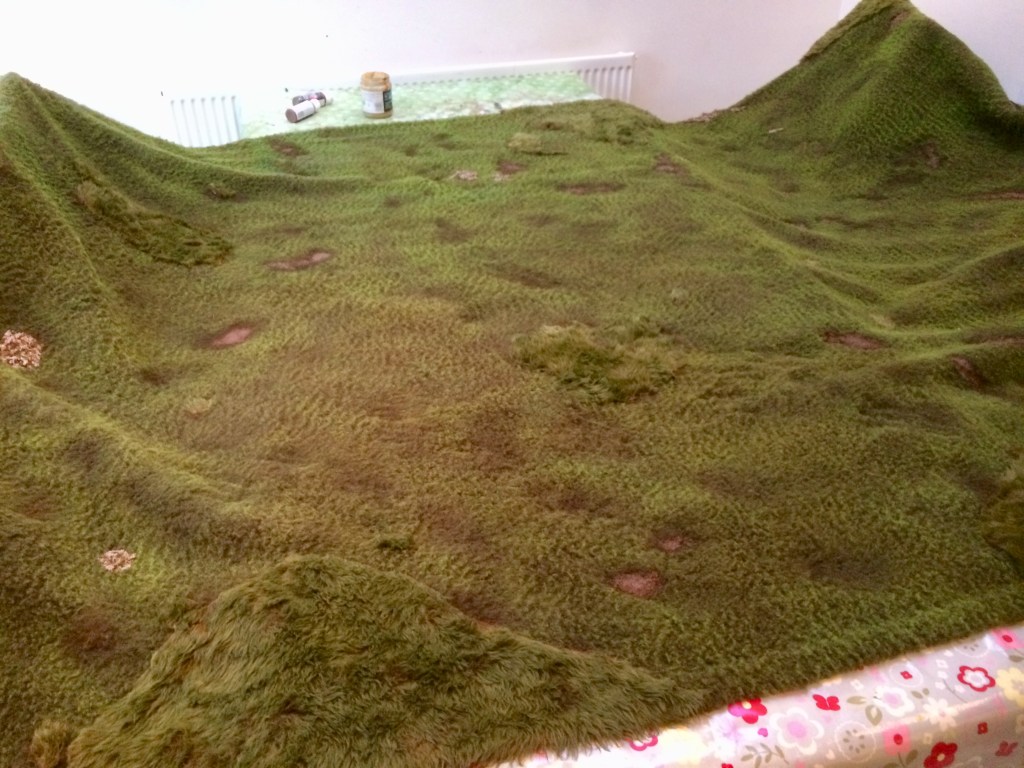
After a load of experimentation with my sample pieces, I decided to go for broke, working on a 12′ x 5′ cloth and recording my progress as I went along, so this is what follows.
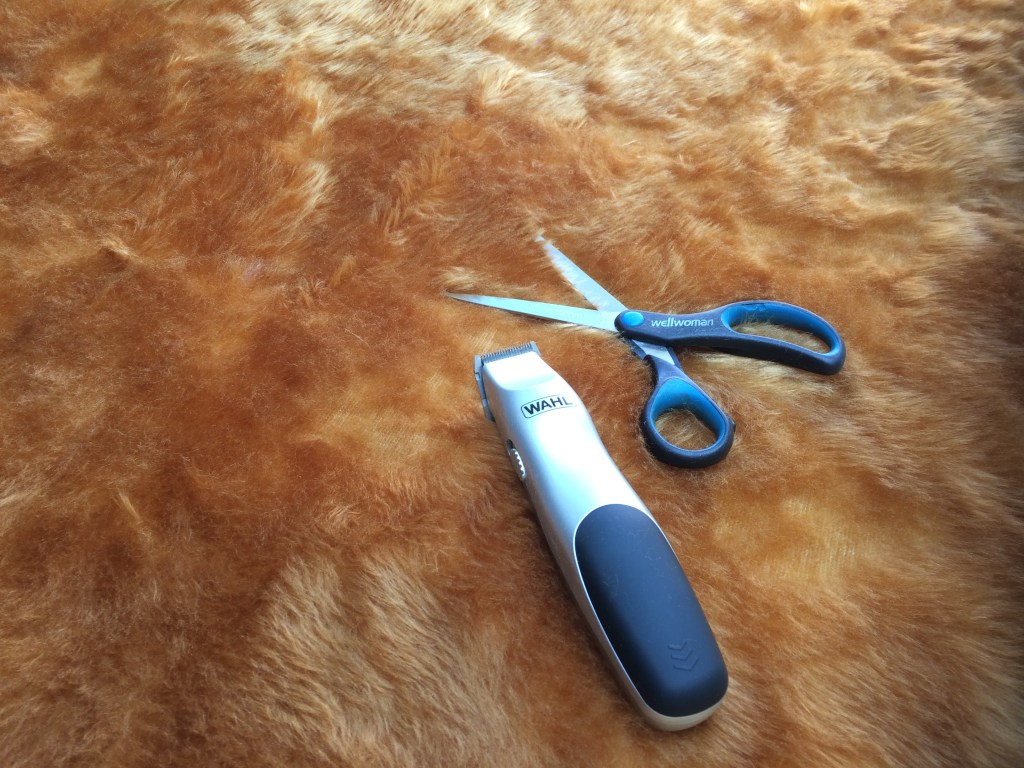
STEP 1: Wire-brush the whole fleece to remove fluff and create texture

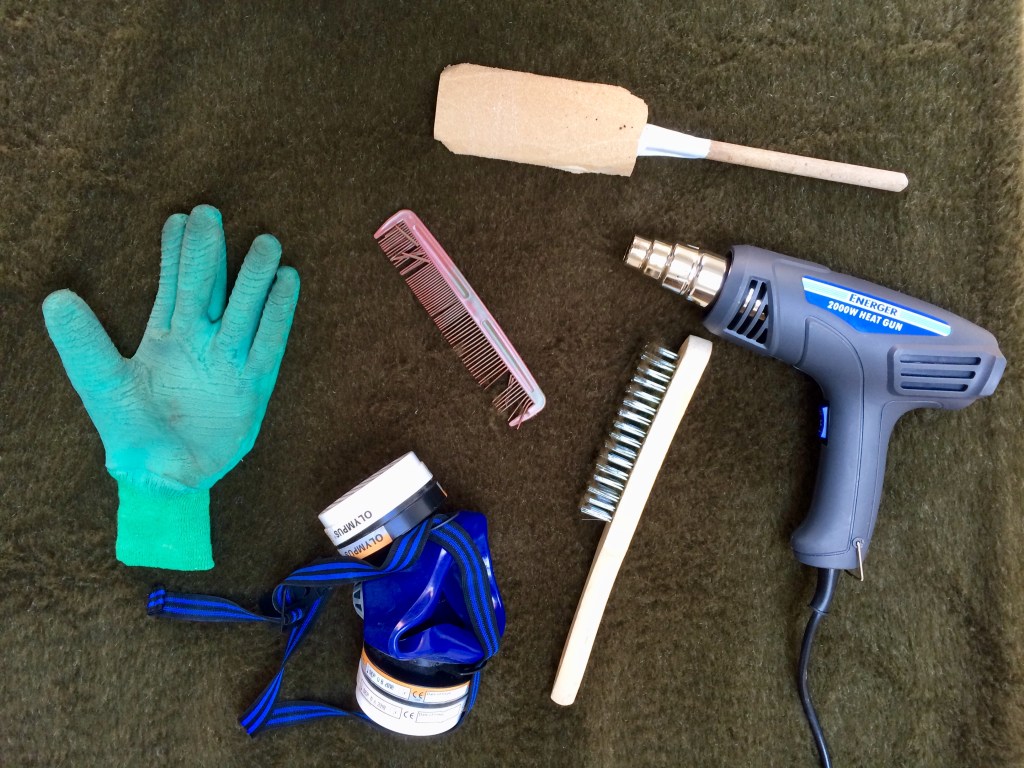
STEP 2: use scissors to trim down areas of the fleece and then a heat gun to flatten areas

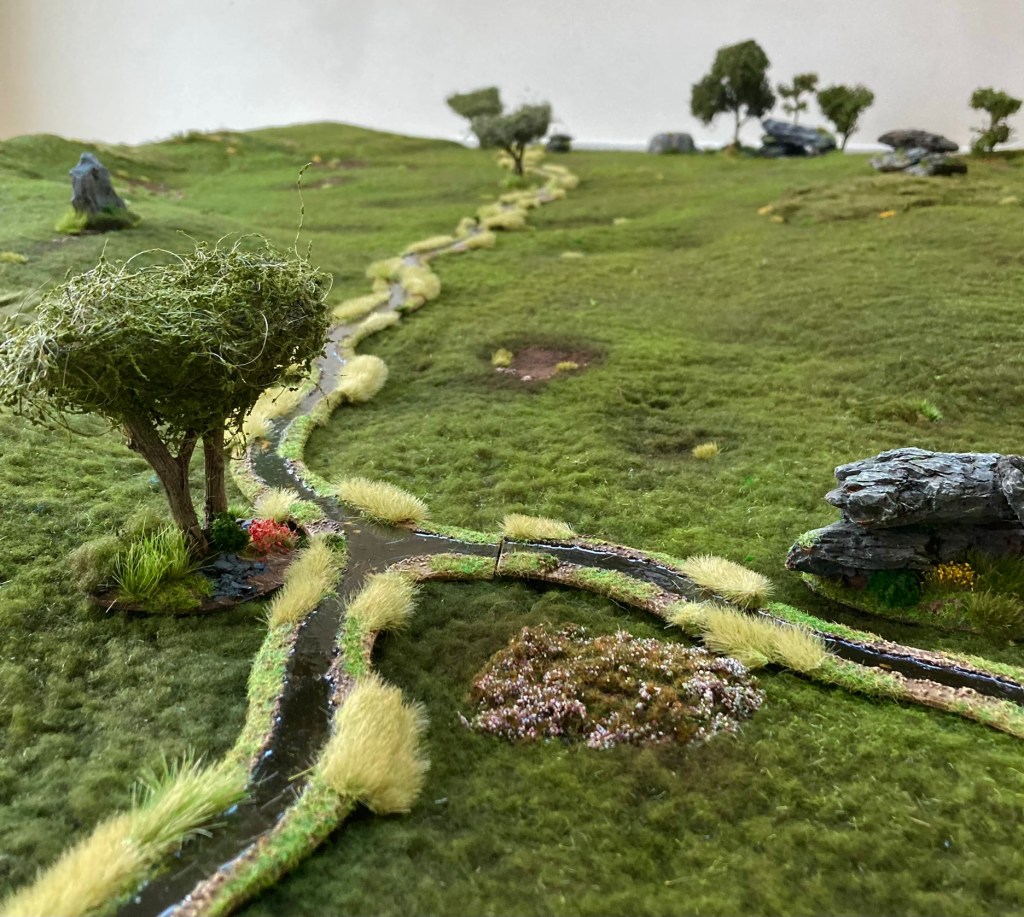
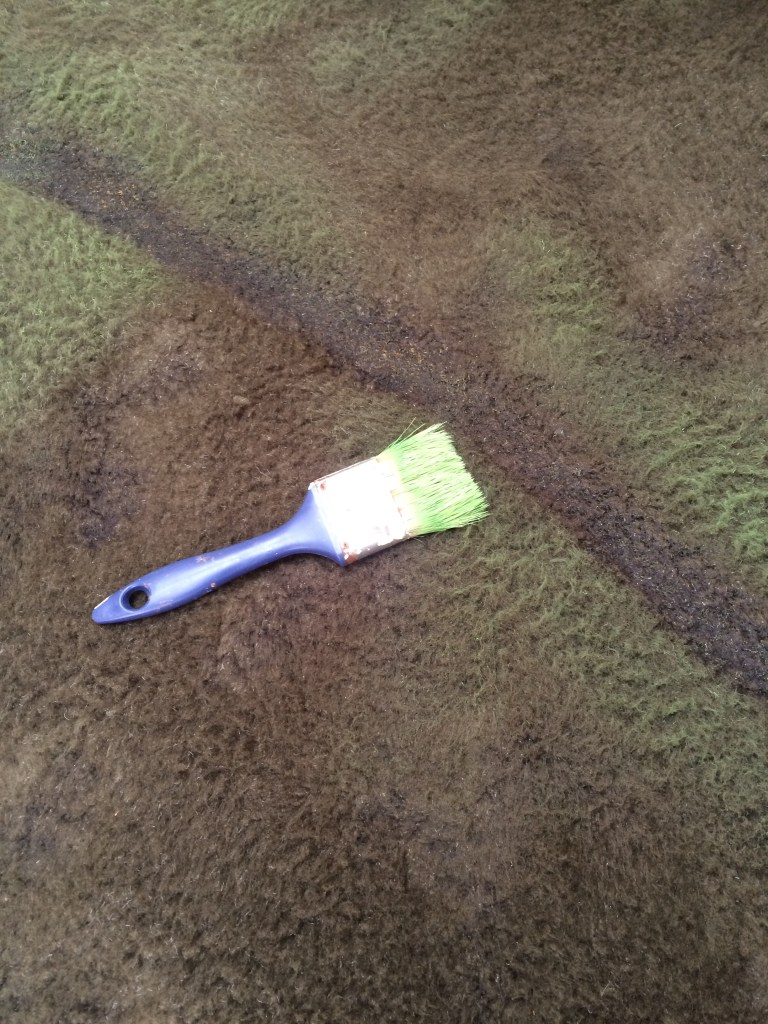
STEP 3: using the heat gun to create roads. I decided that I wanted a trackway crossing my mat at an angle, so I carefully melted this in with very gentle blasts of the heat gun, flattening down each area with the sandpaper/ wooden spoon combo as I went.

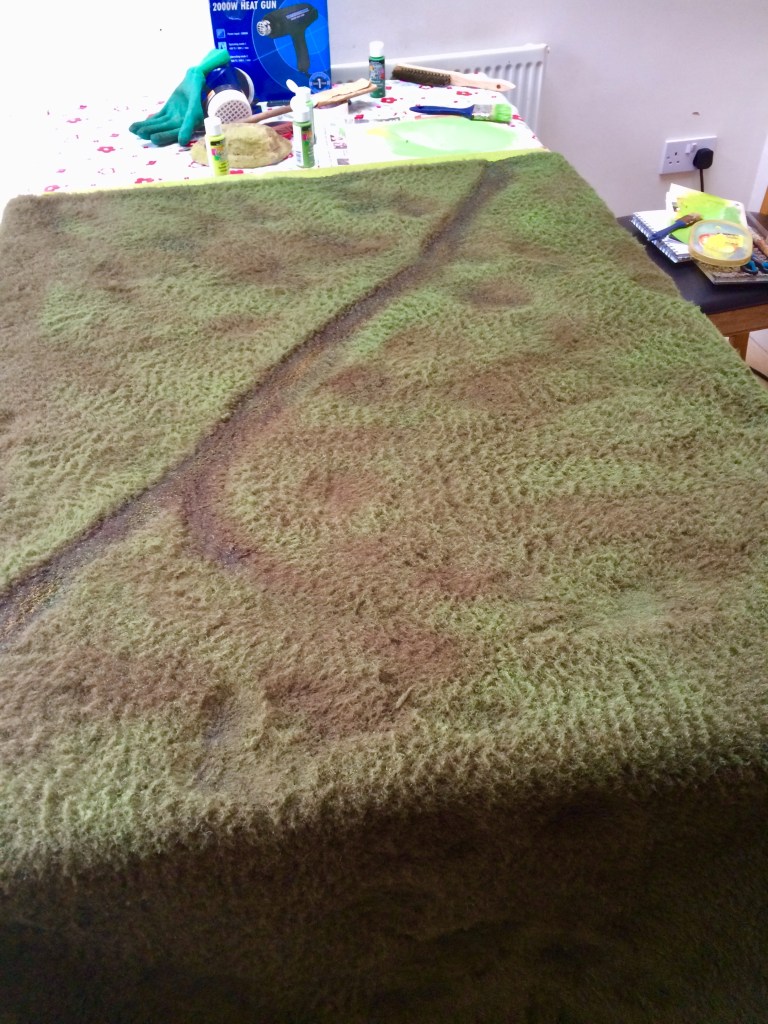
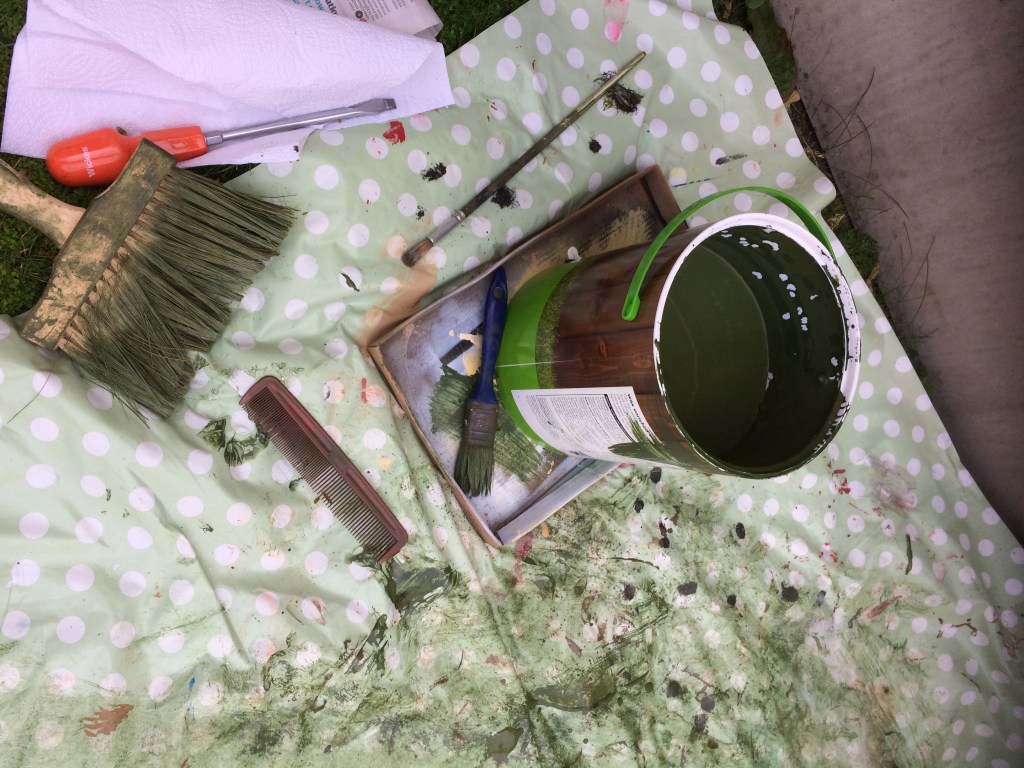
STEP 4: initial painting. Using a house decorating brush, I dry-brushed the cloth in various different shades of green. All the paints were bottles of acrylic craft paint.
STEP 5a: creating some longer ‘grass’. To get the mix of grass lengths that I was after, I’d decided to combine some patches of longer pile fabric made from teddy bear fur. This was prepped by wire-brushing and trimming as usual.
STEP 5b: painting the teddy bear fur. This was a seriously messy process involving a 3″ fence brush and some green fence paint – basically slapping it on both sides of the fabric before combing it through to involve clumping.
STEP 5c: drying the teddy bear fur. Best done outside if you value your marriage/ significant relationship/ pets!
When it’s dry, sometimes it needs a bit more wire brushing to bring it back to life.

STEP 6: adding the ‘longer grass’ to the cloth. I cut irregular sections of the teddy bear fur and used them as a template to cut out slightly smaller sections of the sherpa fleece cloth. The teddy bear fur was then hot-glued into its place and very firmly pressed down.

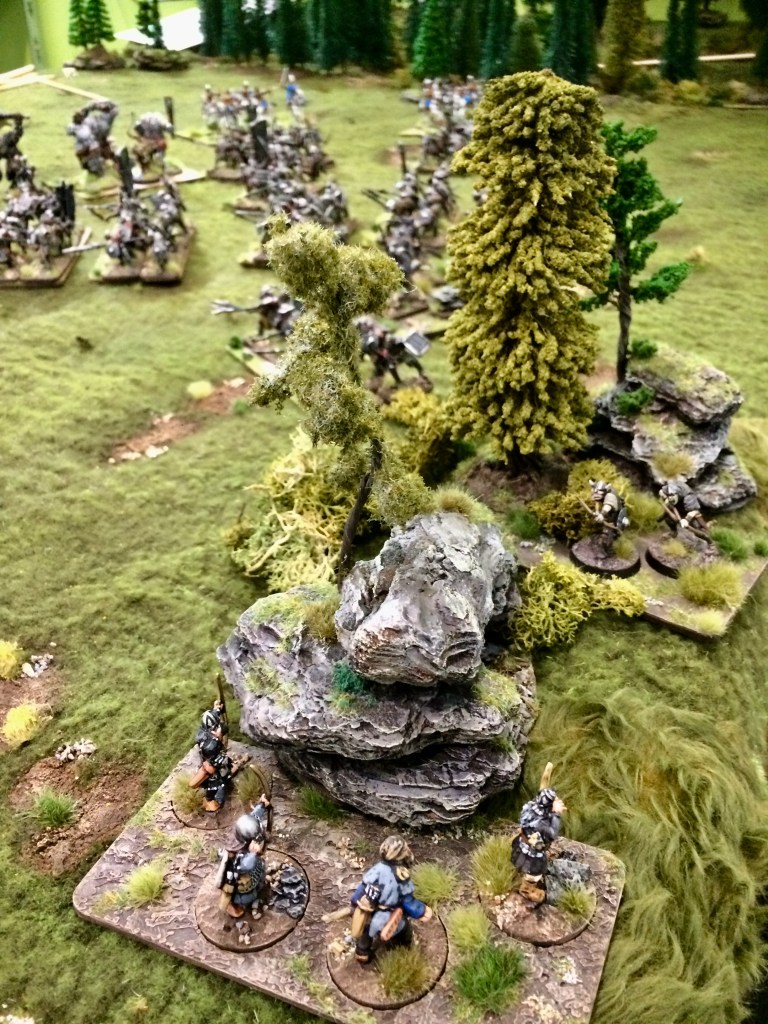
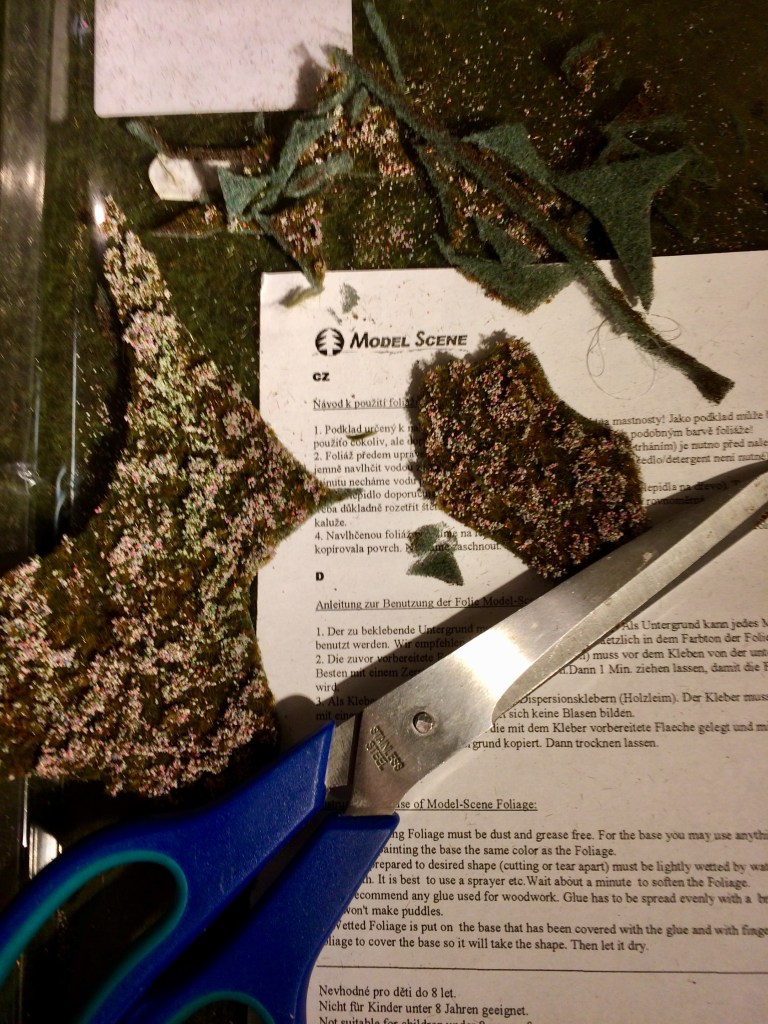
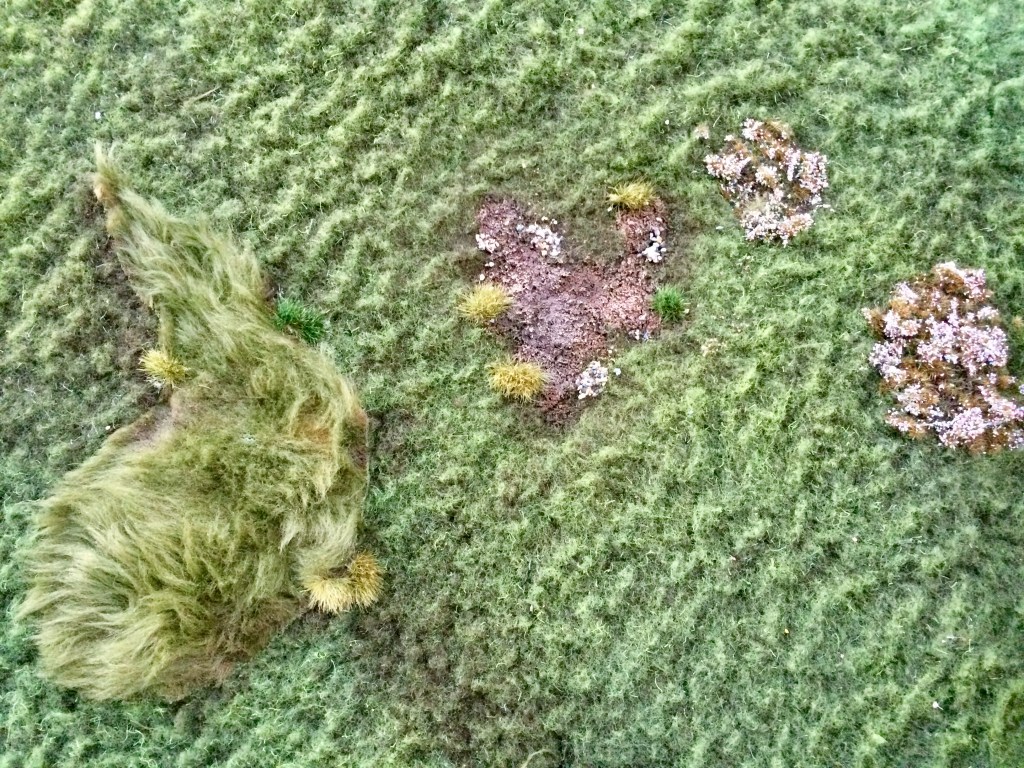
STEP 7: adding heather. I invested in a pricey (£20) but lovely sheet of fake heather from Model Scene, cut it up into small irregular patches and then stuck these on to the base cloth (again with hot glue) in strategic places. This kind of fine detail, while expensive, lifts the visual impact of the whole cloth.

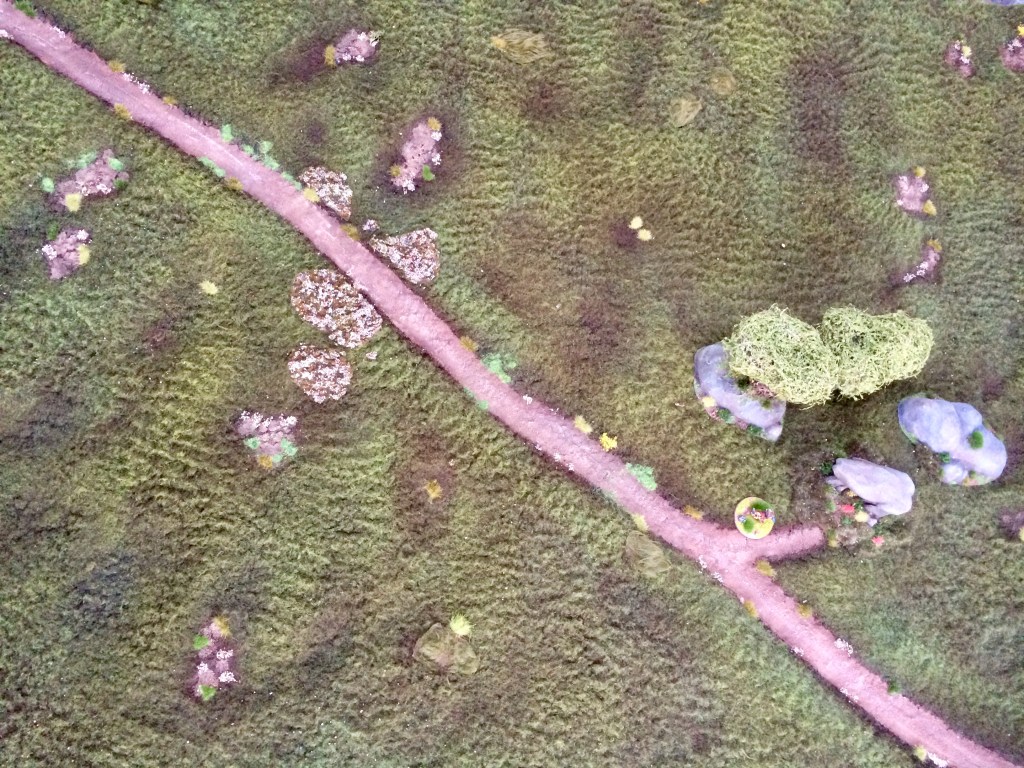
STEP 8: the road. A bigger road would probably have been better created as a separate ‘drop on’ piece of scenery, but in this case I wanted a winding track crossing the moor. I reckoned that I could get away with flexible frame sealant as long as it wasn’t too thick or wide, and I was right. This is cheap brown frame sealant spread thinly over the (heavily flattened) track area, which I then pressed sand into while it was still set for added texture.


STEP 9: earth patches. These were created by applying patches of PVA wood glue (good quality thick stuff from a DIY shop, not the thinned down ‘craft PVA’) with sand scattered on to them.
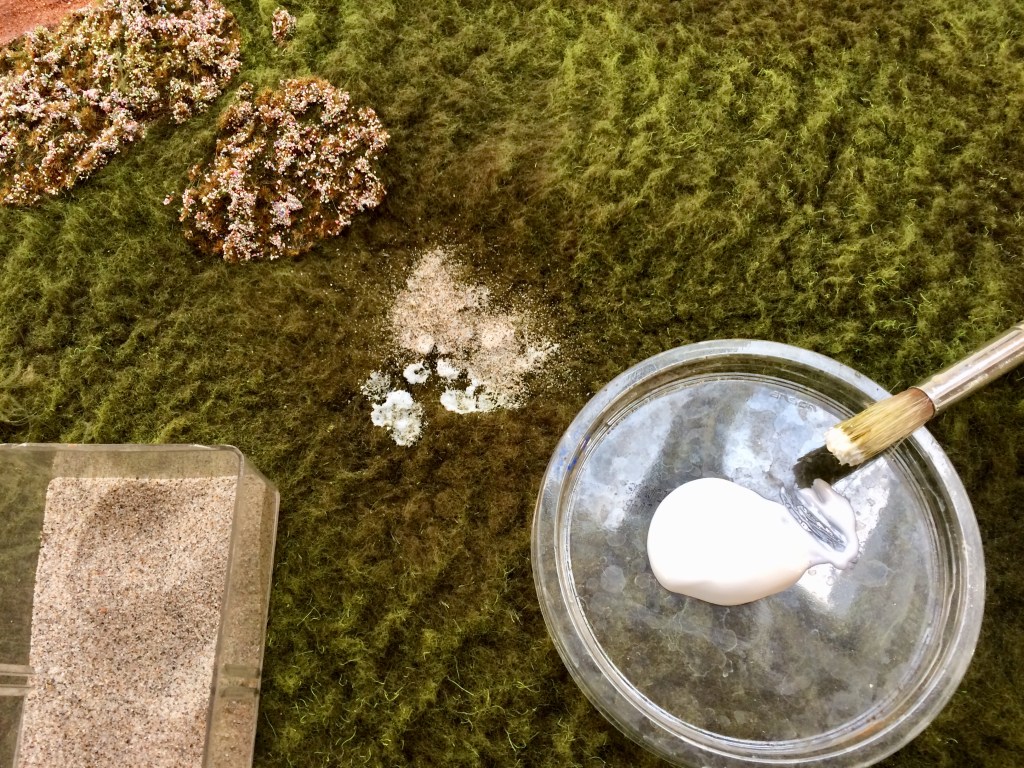

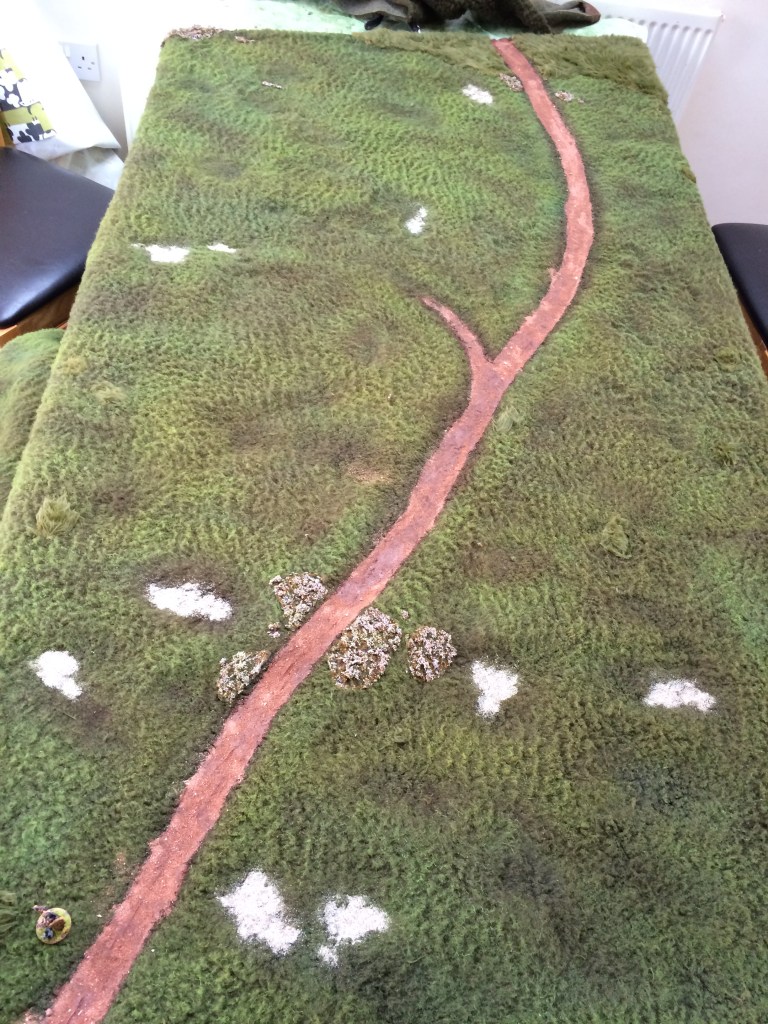
STEP 10: selected painting and staining. Burnt Umber craft acrylic was used to wash over the road and sandy patches to create a uniform base colour.
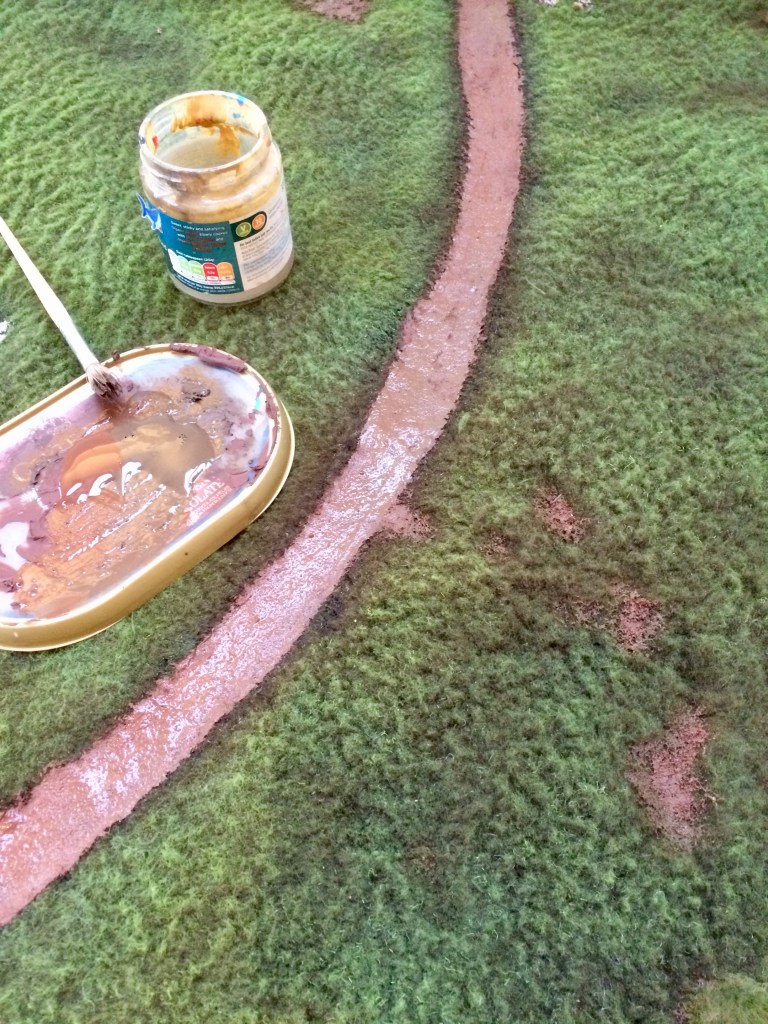
STEP 11: when dry, the road and soil patches were dry brushed with a light brown to bring up the detail and create contrast

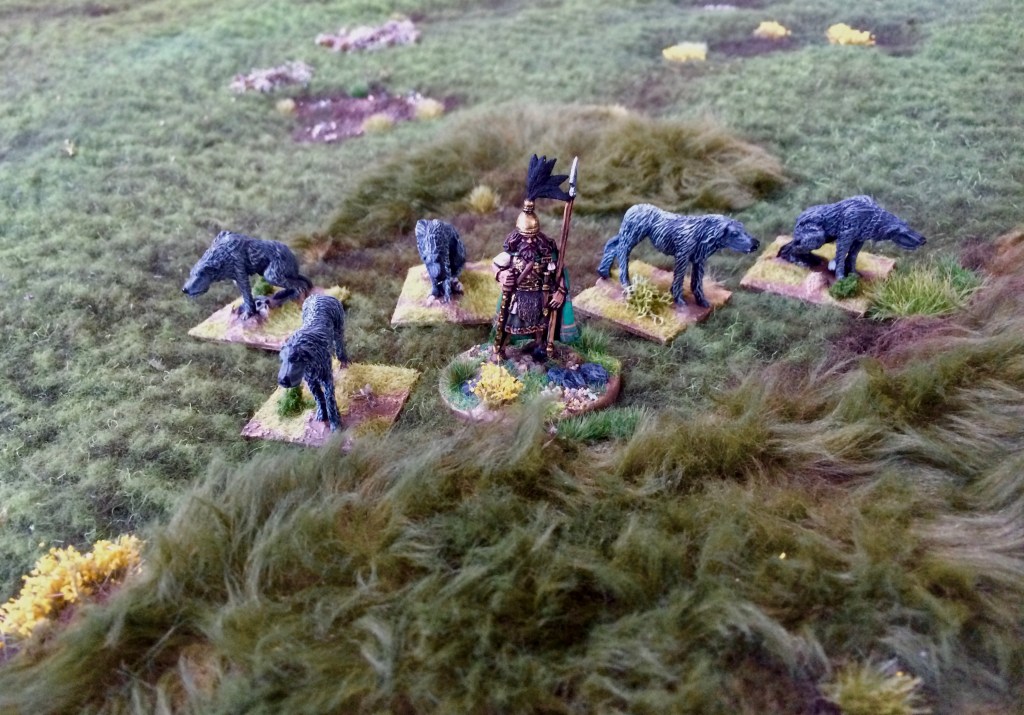
STEP 12: scatter material was glued on with more PVA glue at the side of the roads and around the exposed soil patches. Various tufts and flowers were also added (these are from Gamers Grass) to create interest and variety around the cloth.


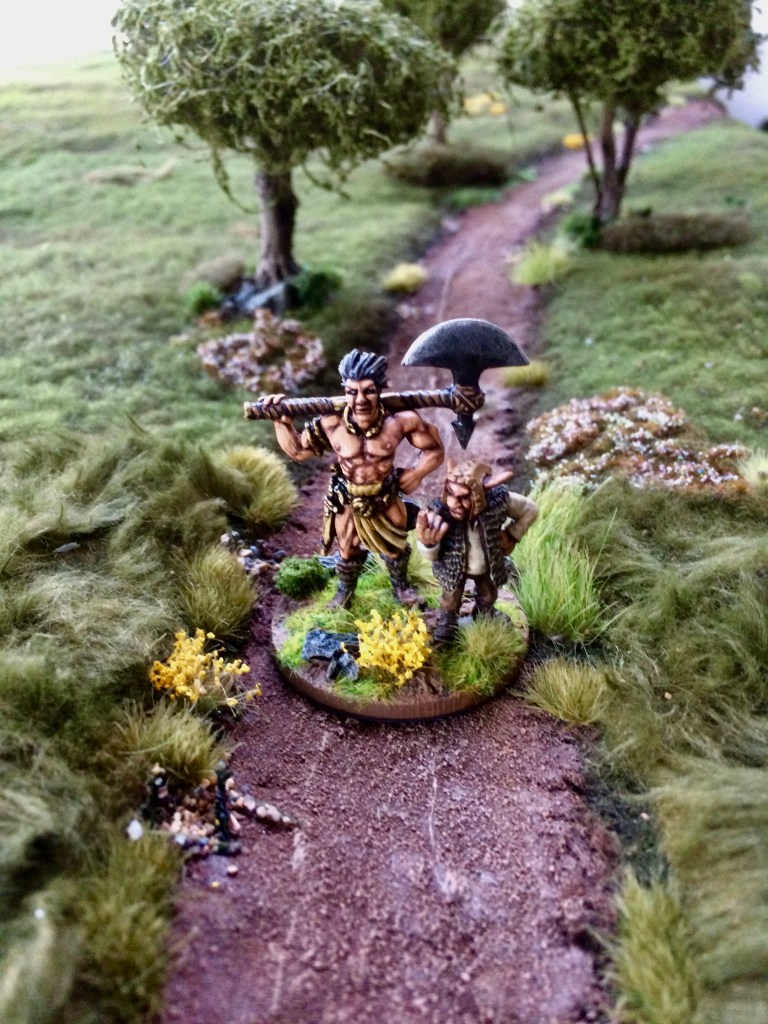
At this point, the cloth was pretty much finished. It was difficult laying the whole thing out at once on my kitchen table so I worked on sections at a time, adding tufts and scatter here and there until I was happy with it.


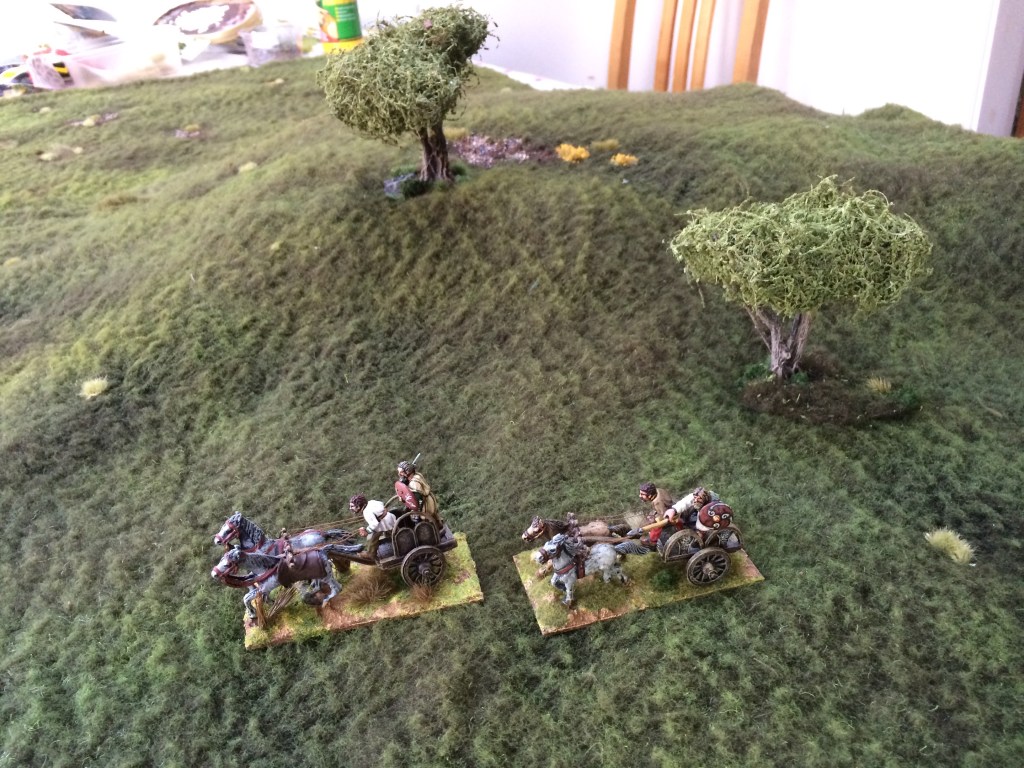
I rebased my Last Valley trees to fit with the table, adding matching tufts and cloth to the new bases, as well as some weighting underneath the base to help counteract the ‘bounciness’ of the sherpa fleece.


Brilliant brilliant work and I may pinch the idea. It looks perfect
LikeLiked by 1 person
Cheers. You’re welcome to pinch the idea, I’d be interested to see what someone else can do with it.
LikeLike
That worked out really well. Looks fantastic.
LikeLiked by 1 person
Excellent step by step James. It looks magnificent.
LikeLiked by 1 person
Thanks Carlo!
LikeLike
Thank you for the tutorial!
When you put hills under the mat, does it still cover a 5’x12′ area?
LikeLiked by 1 person
No problem. Yes, it still covers a 5 x 12′ area, the sherpa fleece has a little stretch in it and the hills underneath are fairly low (3-4″ high),
LikeLike