Sunday 22nd May saw an early start for the group as we all made our respective ways to the Newark Showground for the greatly-anticipated Partizan Show. I was reflecting that my first visit to Partizan was pretty much exactly 29 years ago; in 1993, my chum Jon and I caught a train to Newark Castle Station, followed by a leisurely two mile walk across the fields to get to Kelham Hall (the venue for much of Partizan’s history).

This day in ’93 was formative for me in many ways, but one memory sticks out: the Late Romans vs Picts affair being run on some of the Perry Twins’ stunning terrain boards by Jervis Johnson & co using a version of Warhammer rules – that later ended up in print as the much-loved Warhammer Ancient Battles. I remember being awed by the superbly-painted minis, the rocky crags and the ruined broch, thinking: “This is what I want to do!” (Being a skint student at the time, I bought three (individual) Foundry Picts from Dave Thomas, and that was it.)


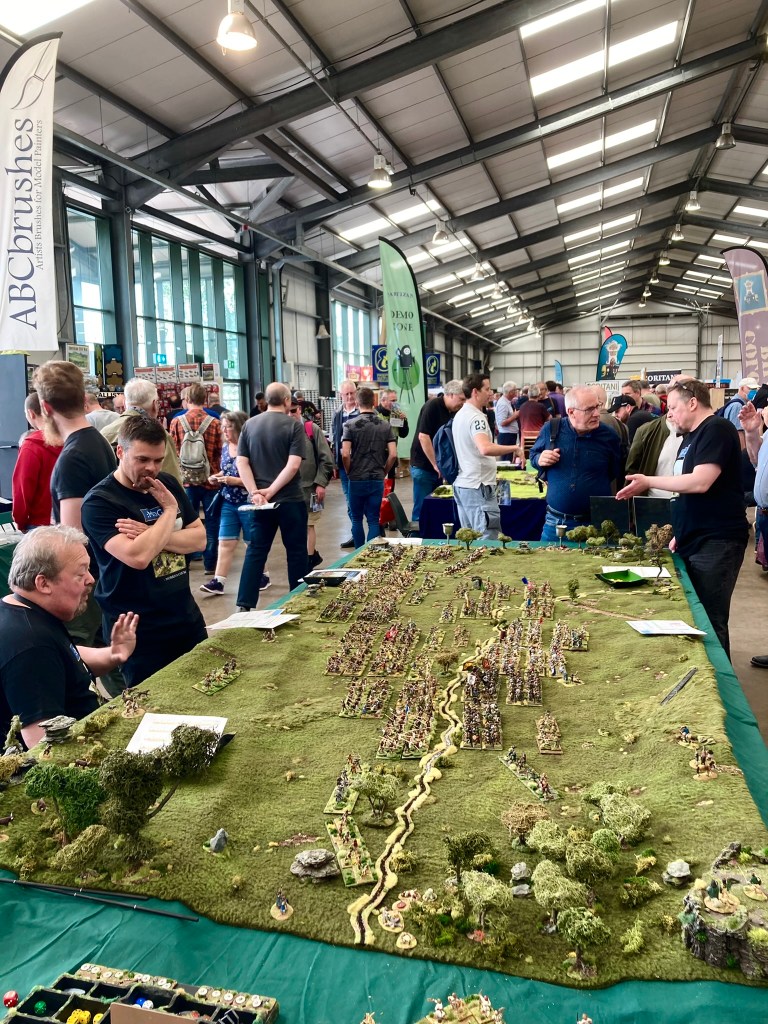
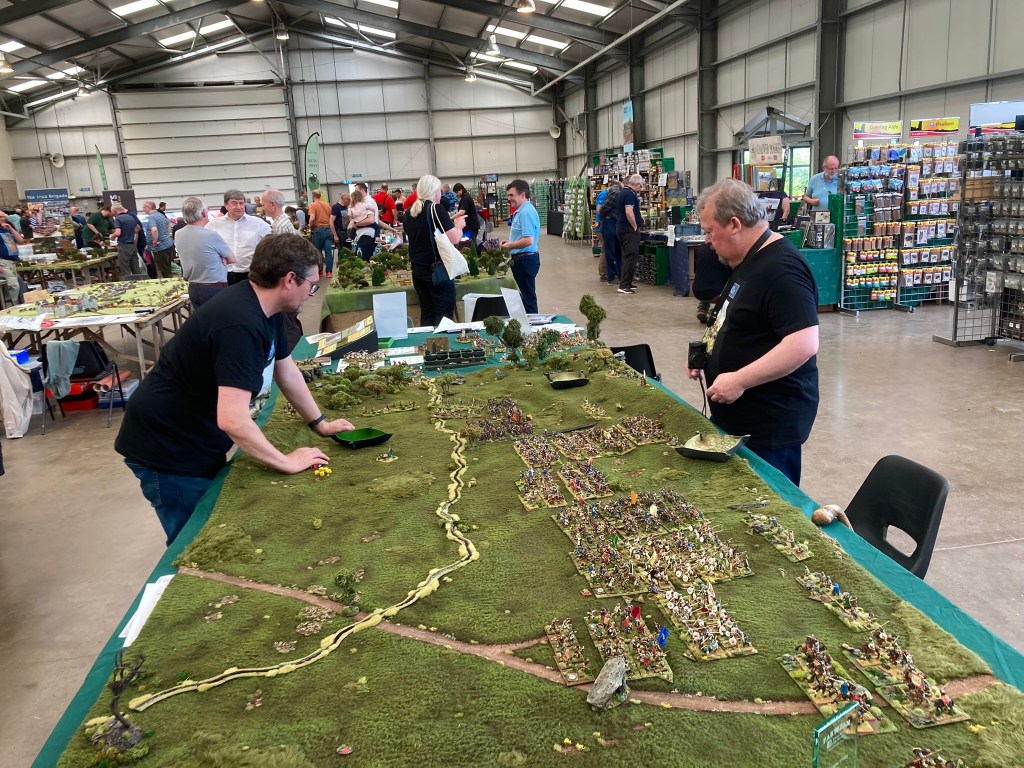
Fast-forward to a slightly older me with a slightly bigger figure collection, and that’s exactly what we were up to at Partizan 2022 – and literally next door to the Perrys running their Battle of Dorking game. As we were setting up, Michael Perry wandered in with a characteristic handshake and friendly greeting before we got on with the business of the day: toy soldiers!
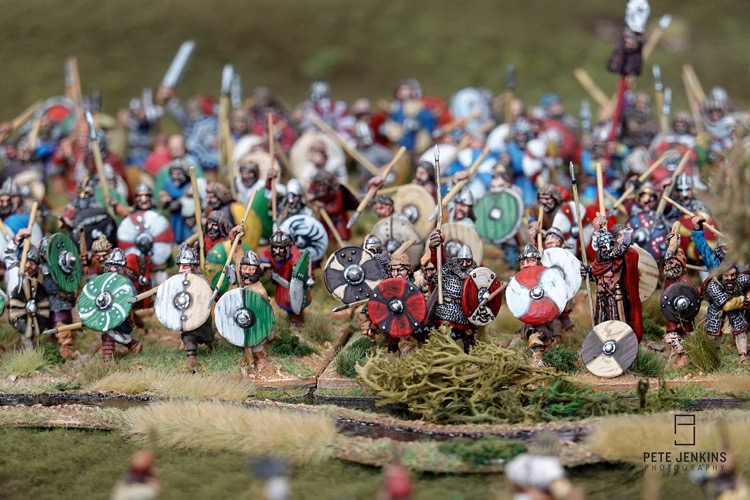
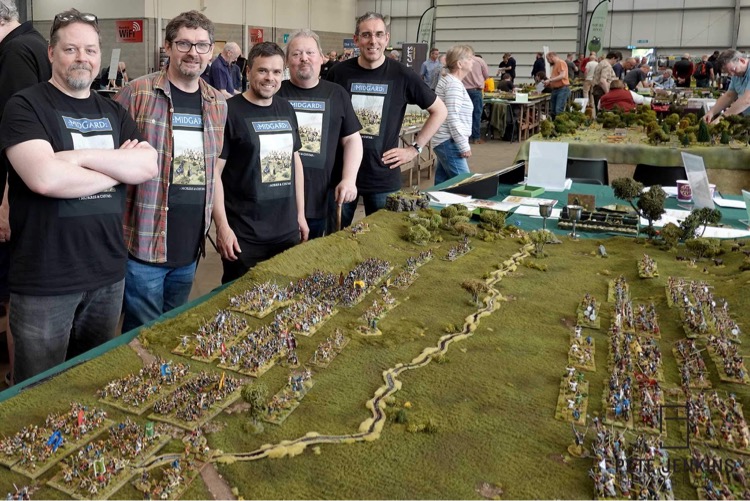
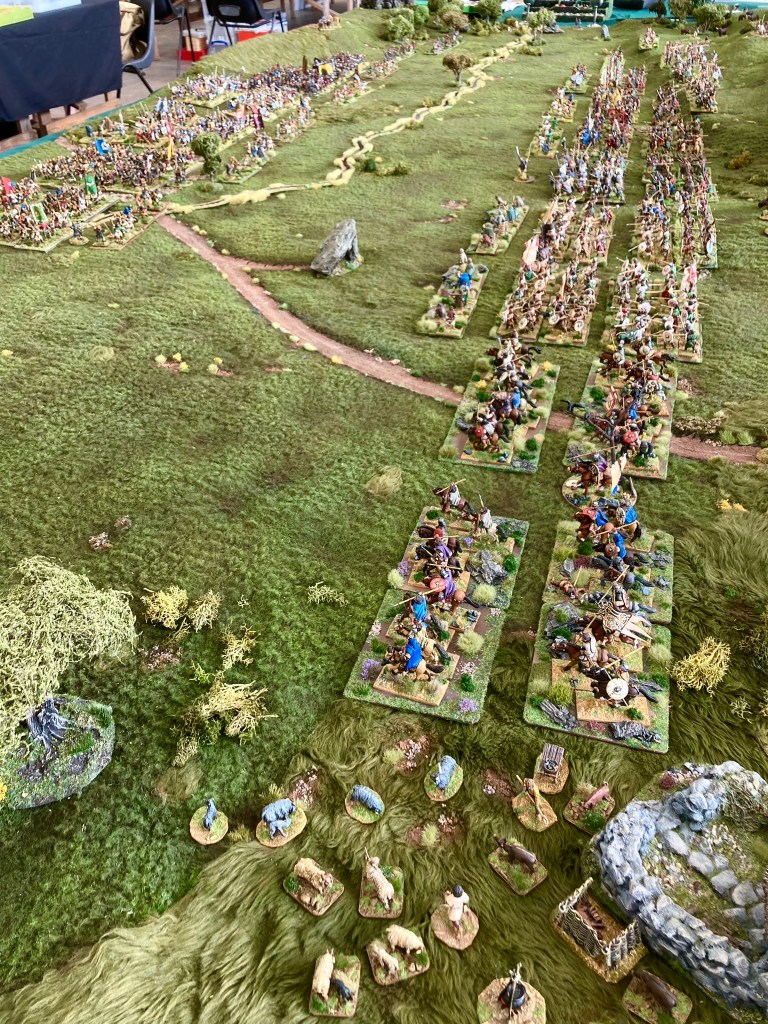
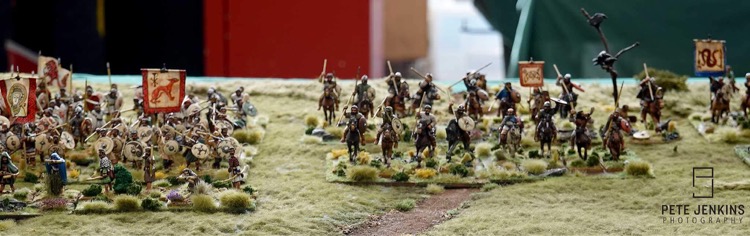
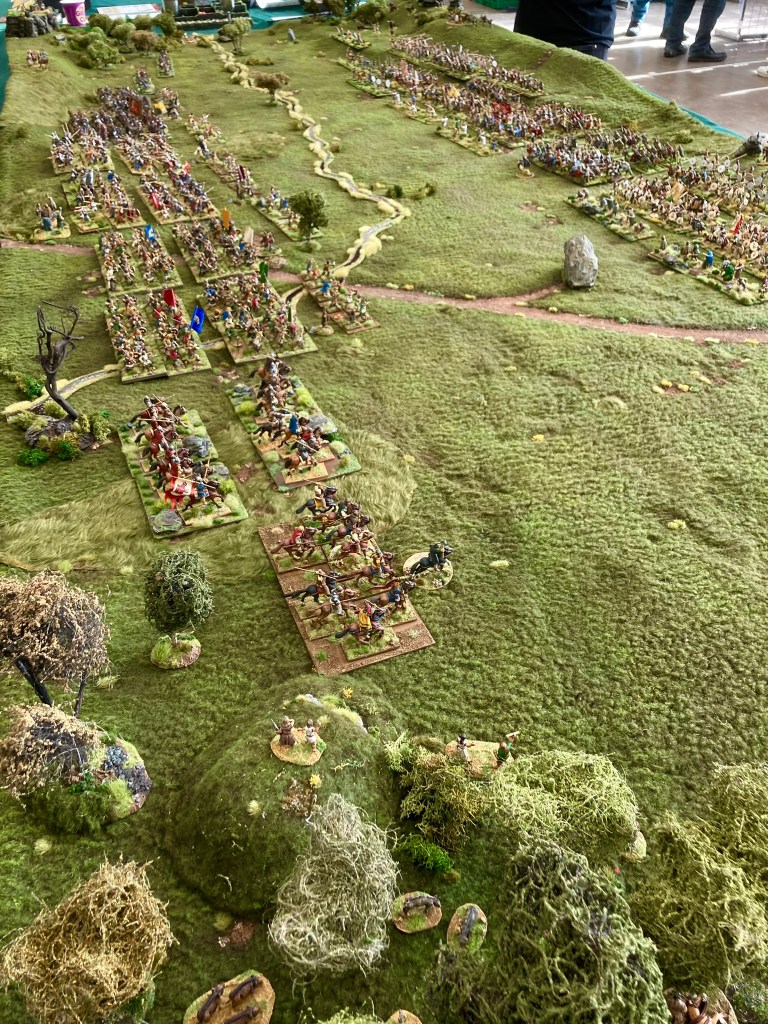
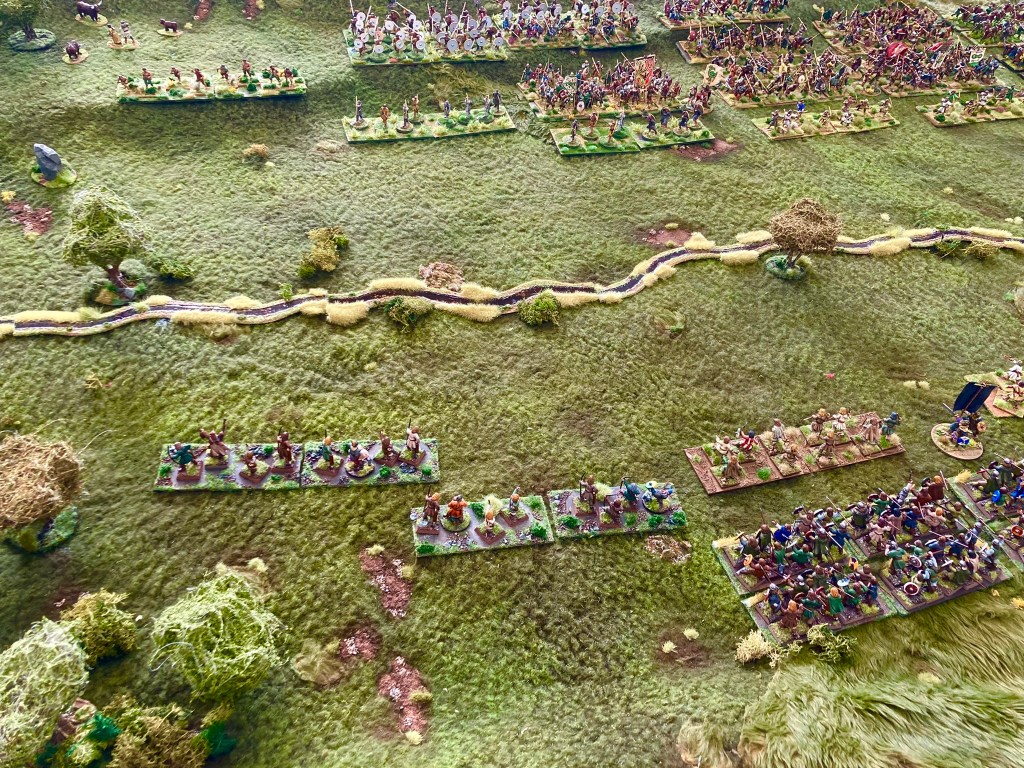
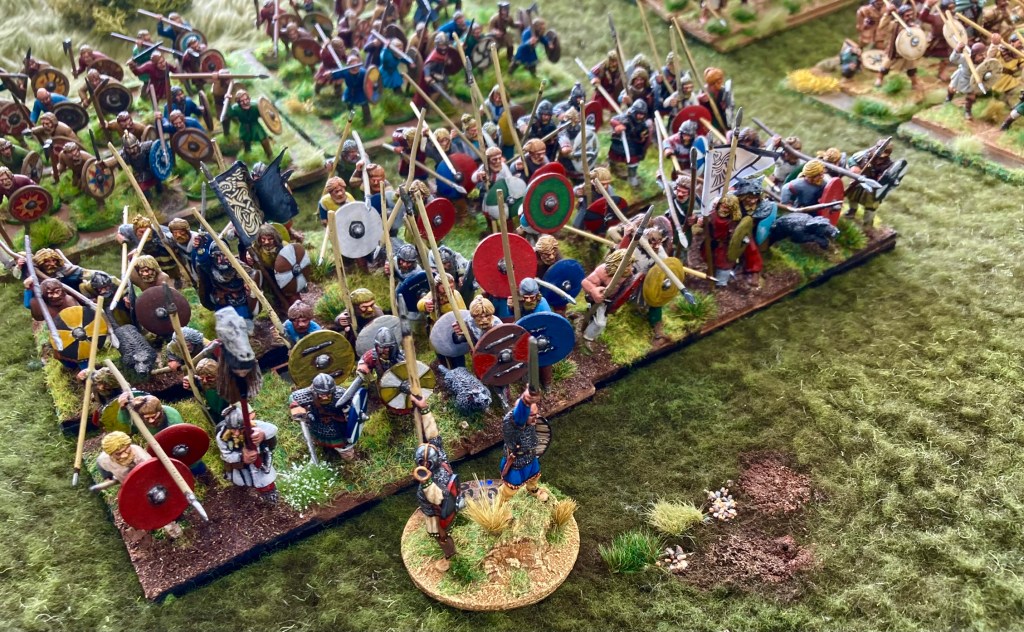
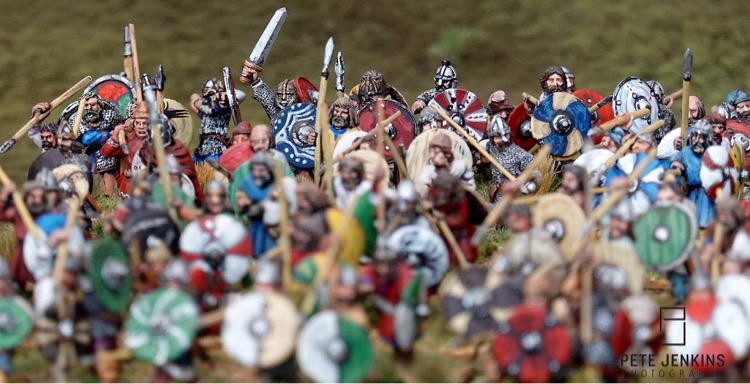
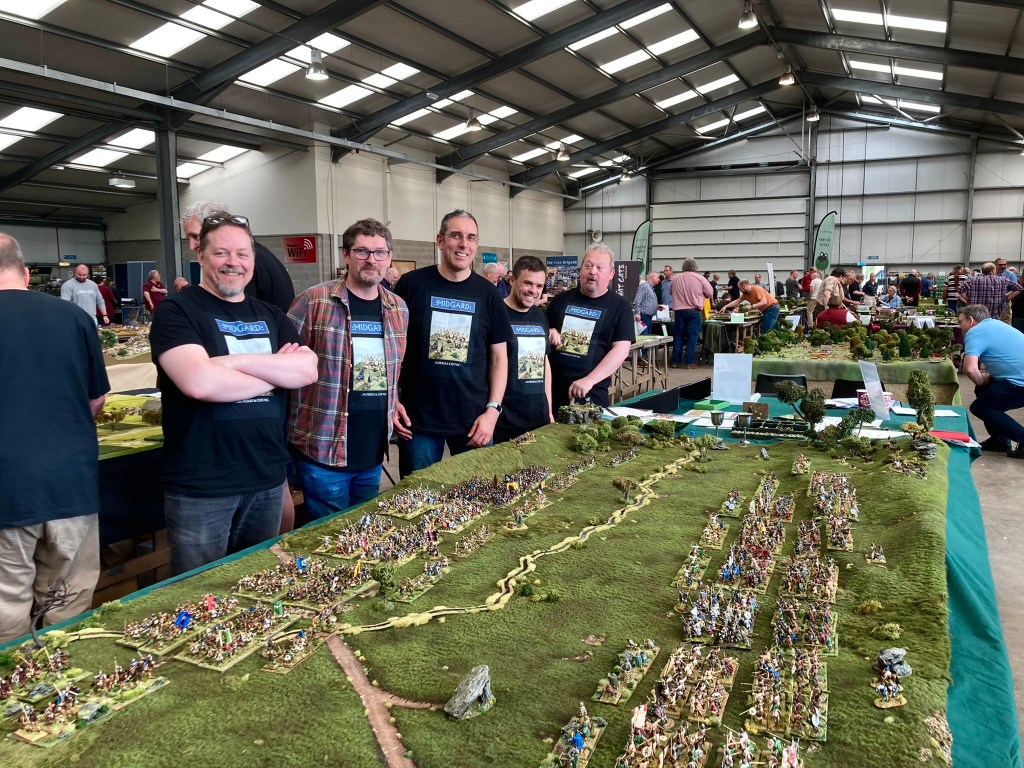
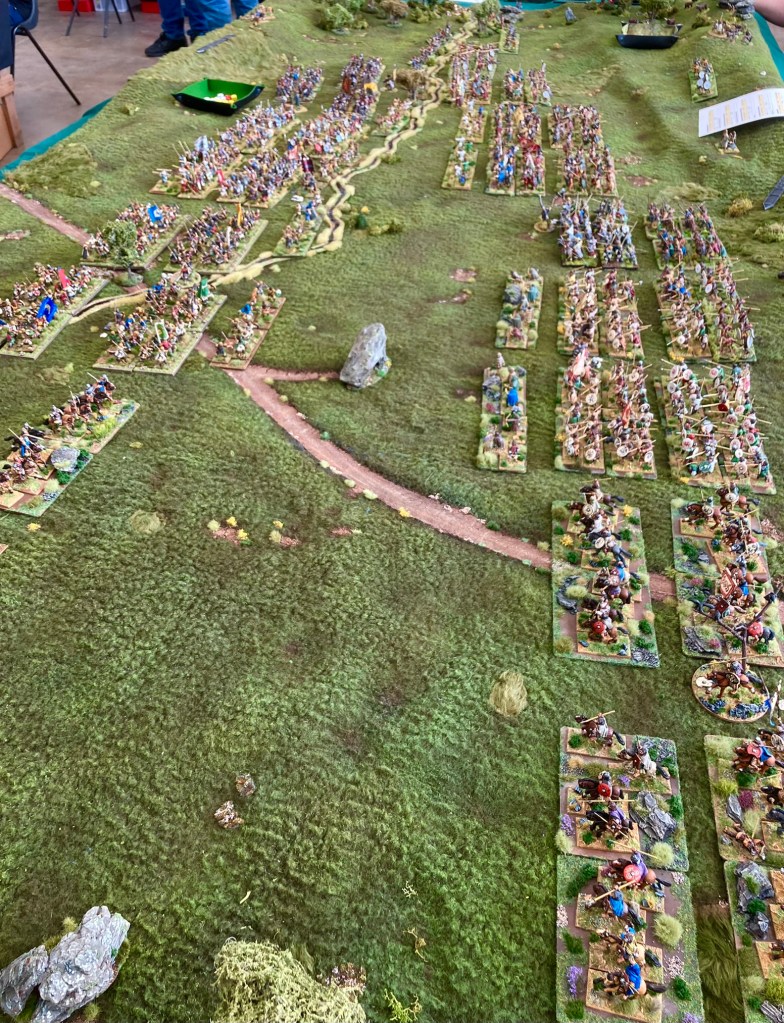
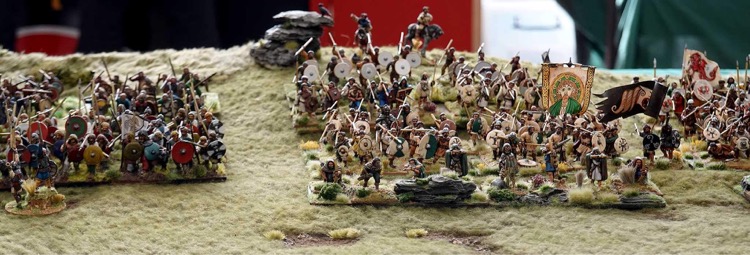
While I co-ordinate the games we run and usually sort the terrain, the actual running and set-up on a show day is most definitely a team effort. All five of us present – Paul, Chris, Pete, Martin and myself – had been busy re-organising and pooling our various Saxon and Celtic miniatures to create a spectacle involving around 1,000 figures on the table. (Not forgetting Tom, who put his lovely Footsore Saxon army into the pool despite getting double-booked and missing the show.) You can also read Martin’s blog on the game and the show here.
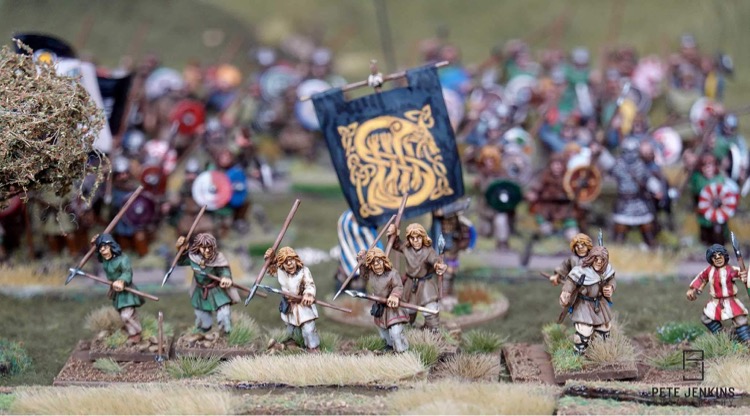
In addition, Martin did the graphics for the t-shirts and designed and printed the rather natty Midgard sticks that measure ‘Spear Throws’ in the game. But most importantly, everyone mucked in, talked to folk and kept the game running – unquestionably one of the hardest things to do at an incredibly busy show.


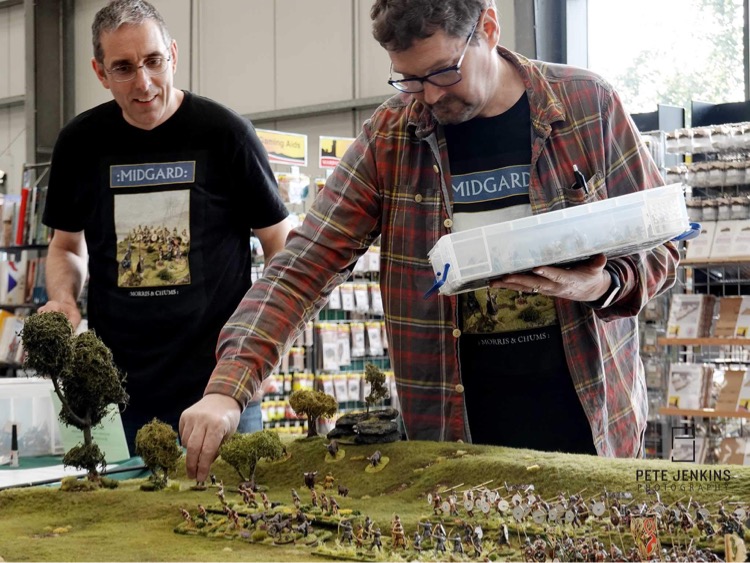
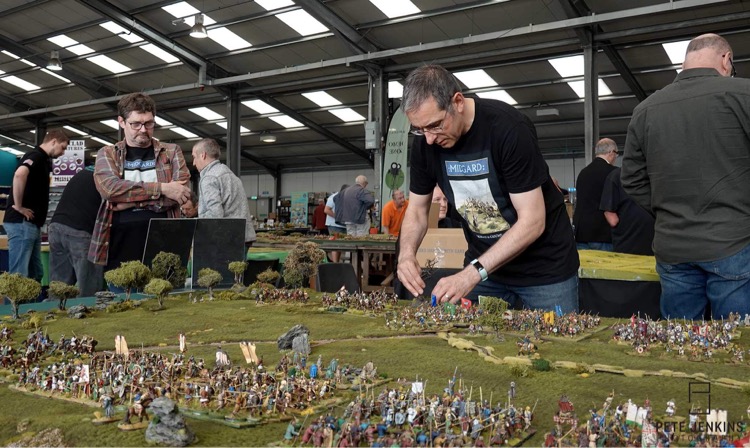
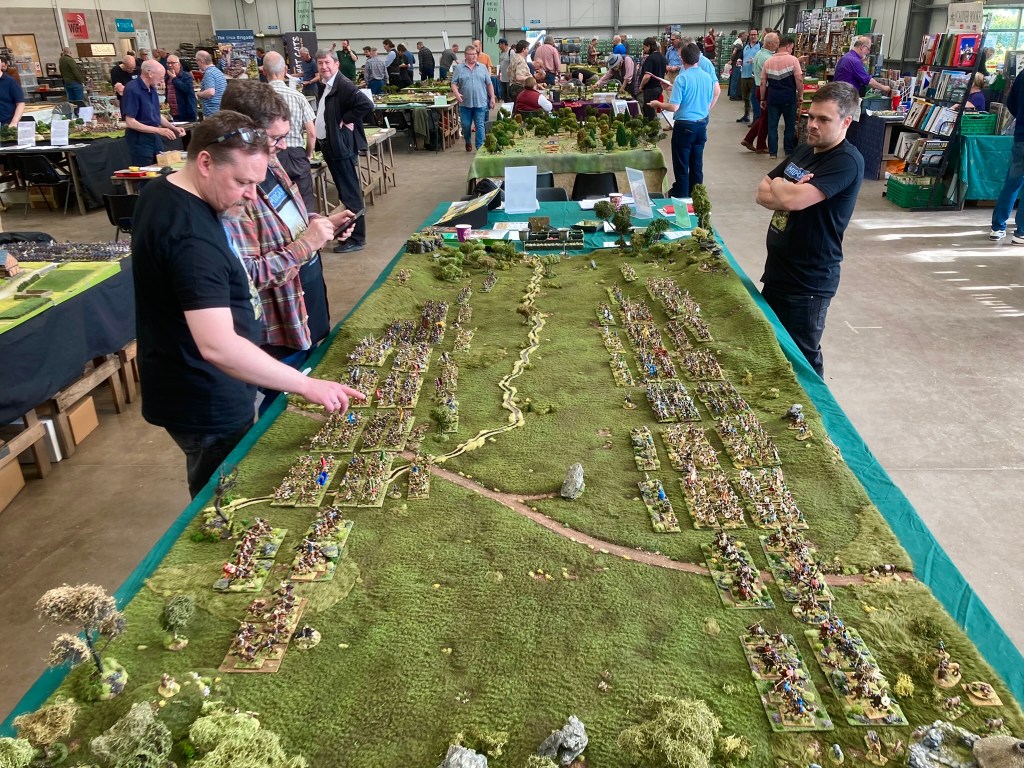
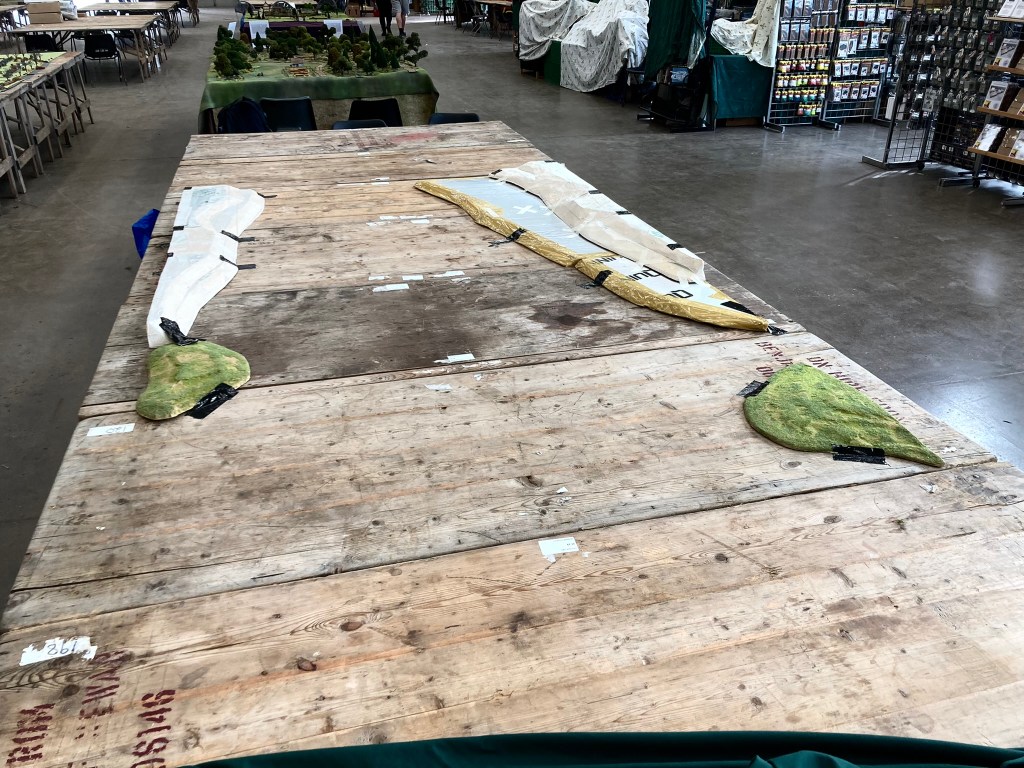
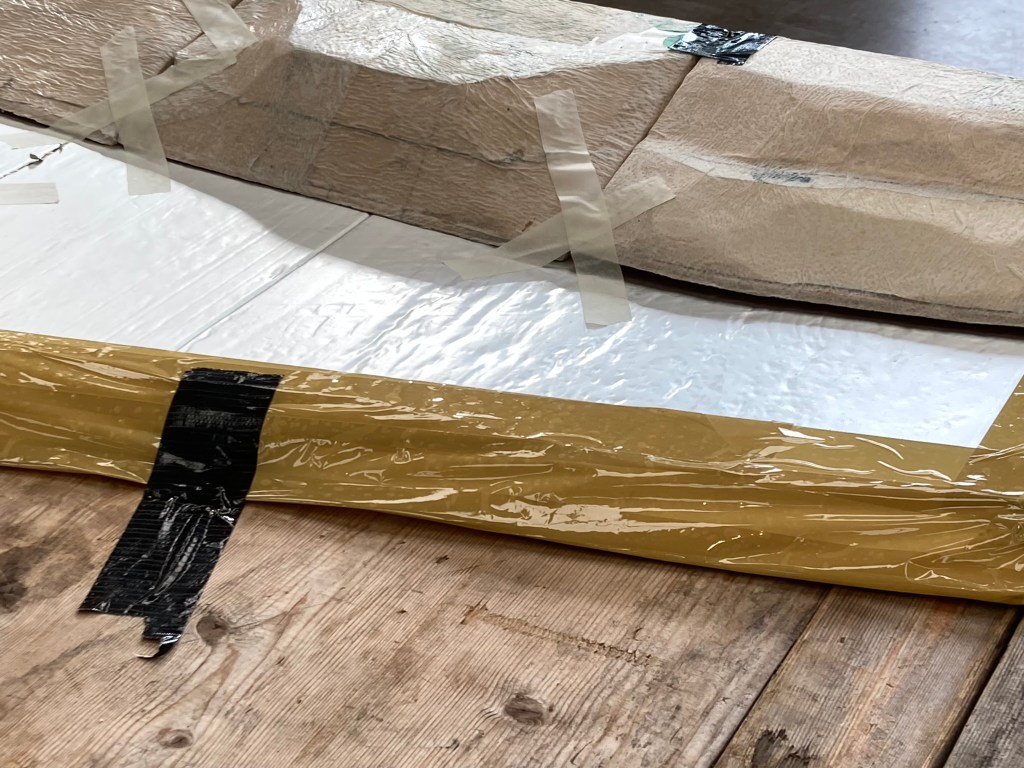
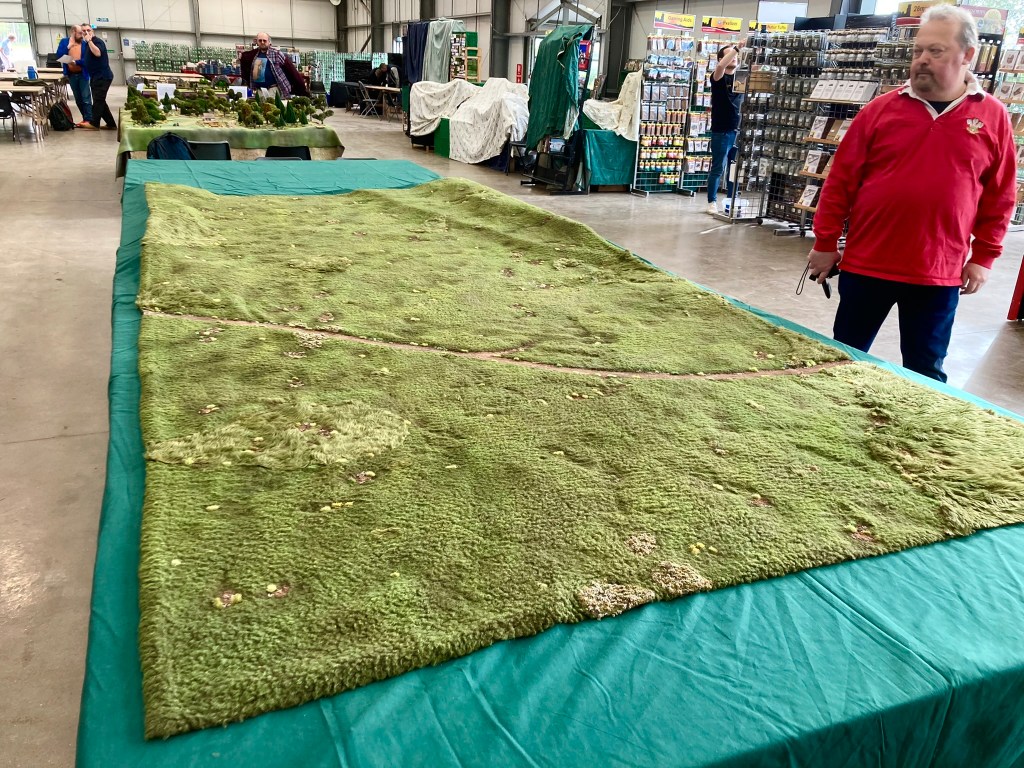
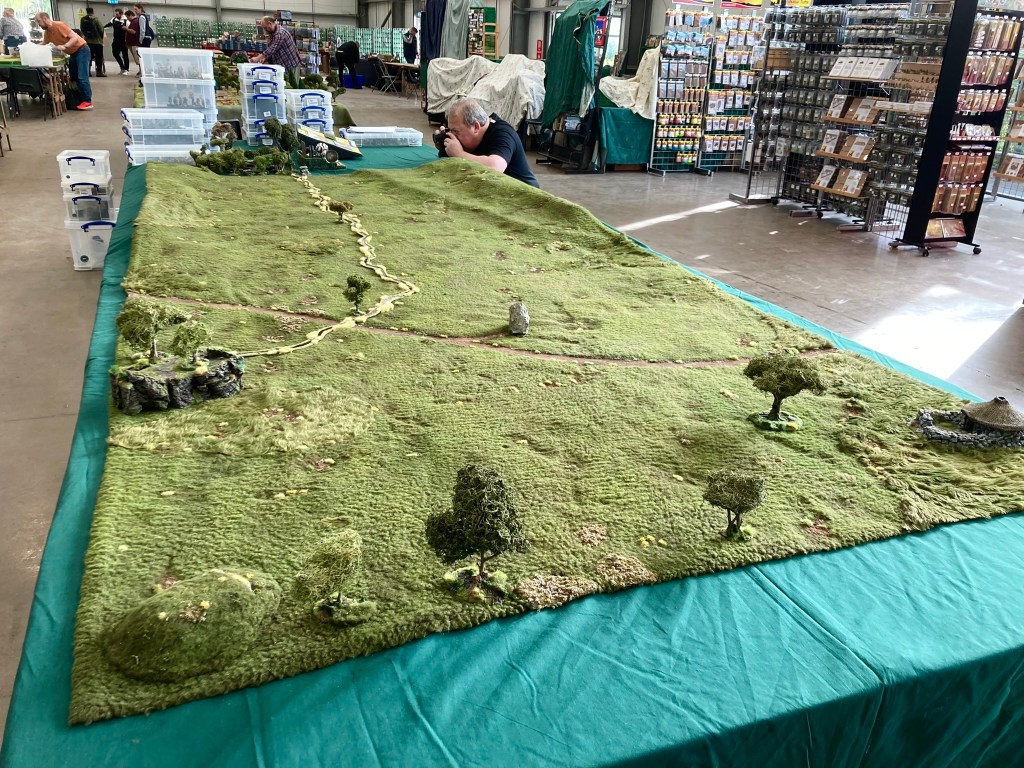
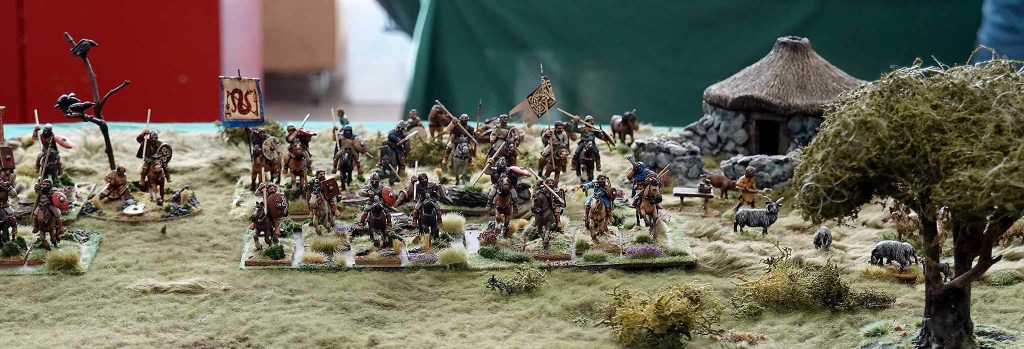
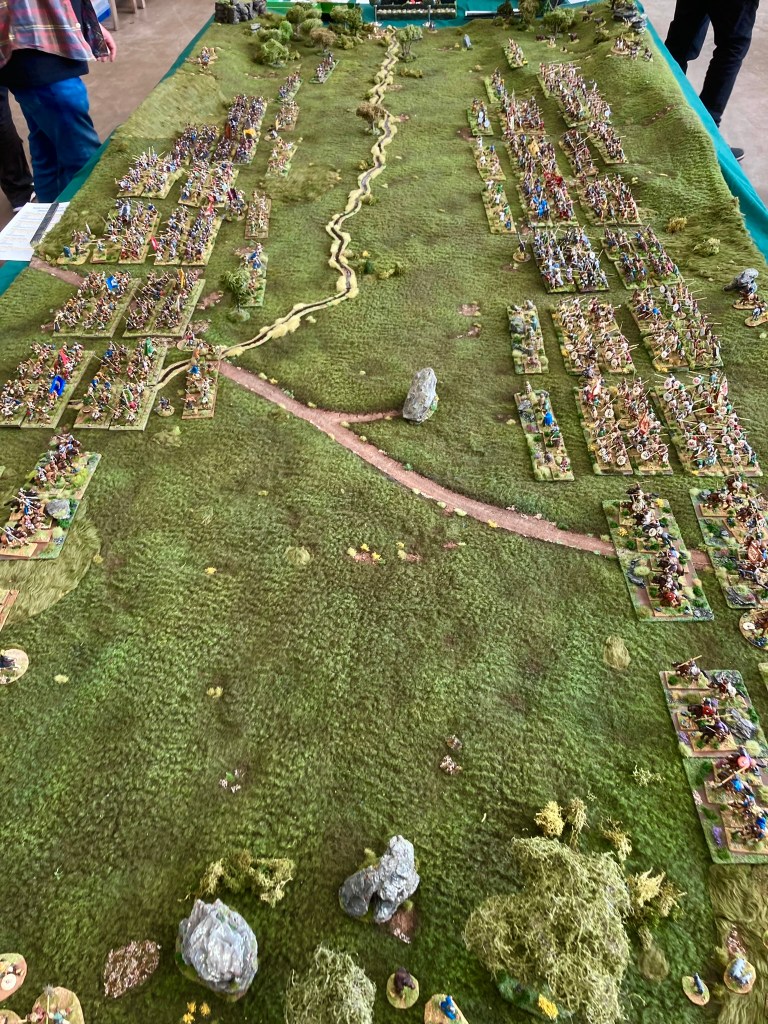
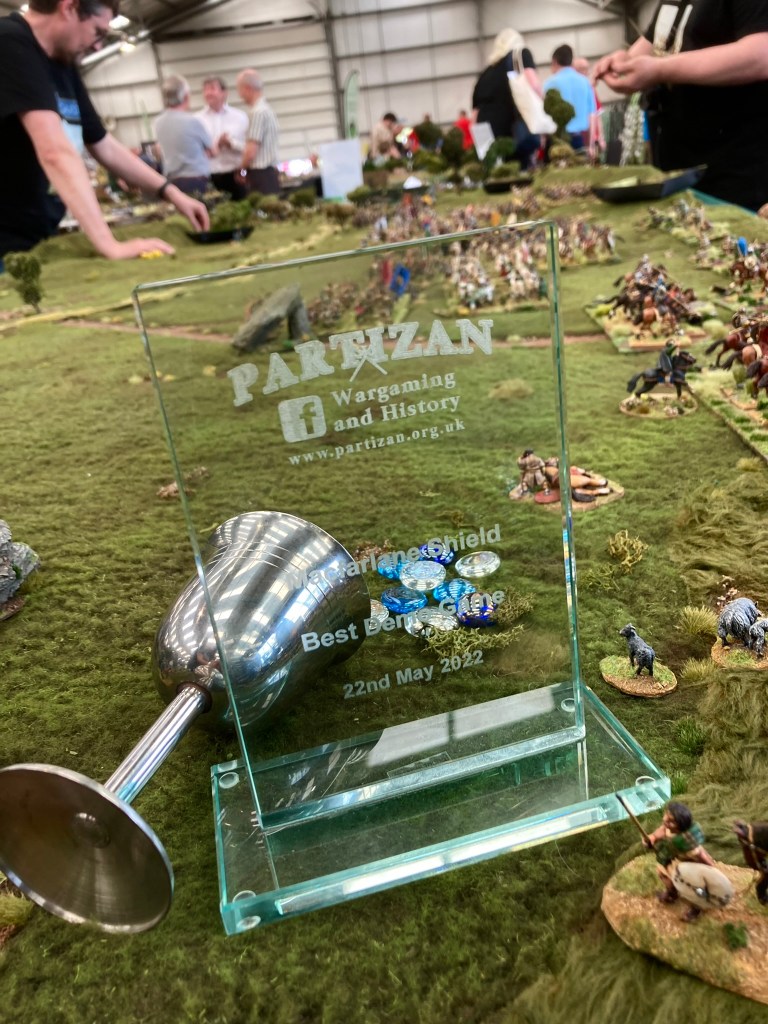
We were asked a few times about how we did the hills so here’s a few photos of the table set-up in progress. The cloth is home-made from a material called Sherpa Fleece – I may well do a blog article about this sometime if people would like to read it.

I’ve already written about the Degsastan scenario that we were playing and the forces used (see here if you want to know more), so I’ll cut to the action – as best as I can remember it! The very genial Alex from Storm of Steel dropped by and filmed a short interview about the Midgard rules, which you can see (about 3 minutes in) along with a full video report of the show – watch this here.
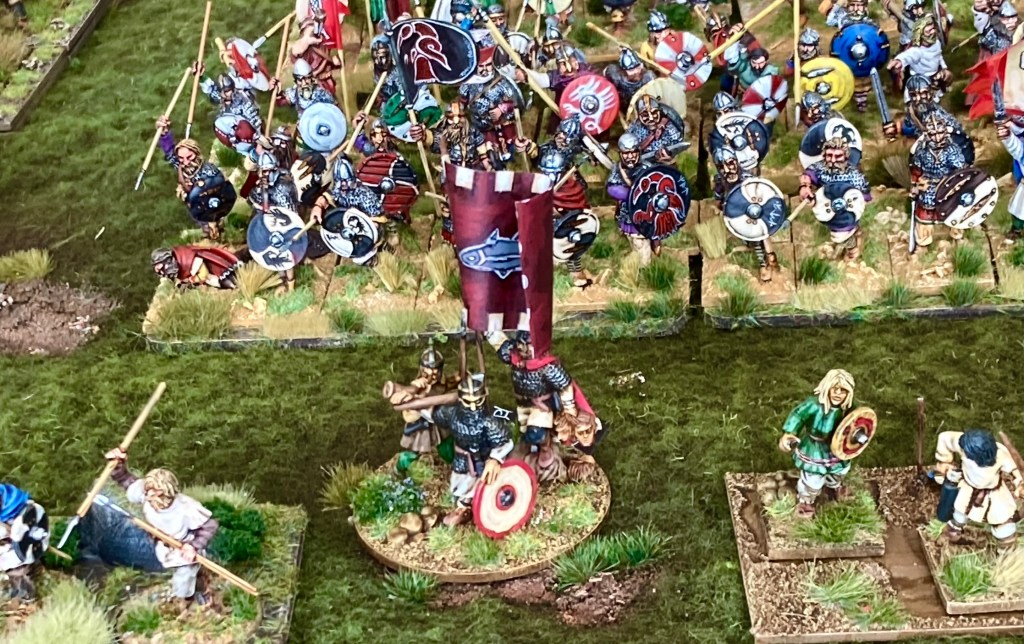
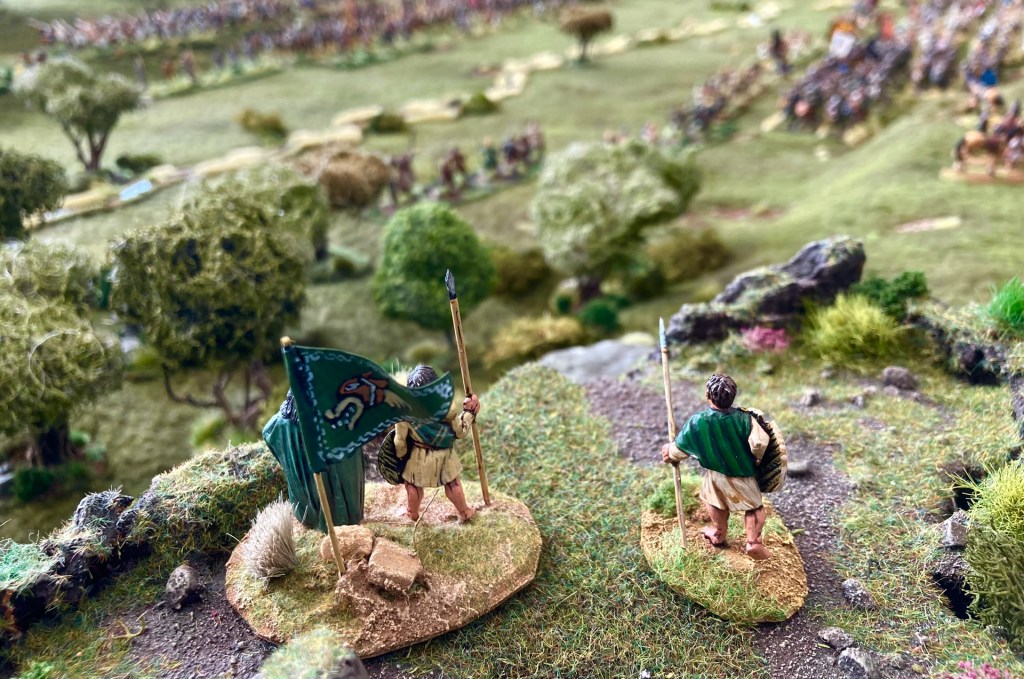
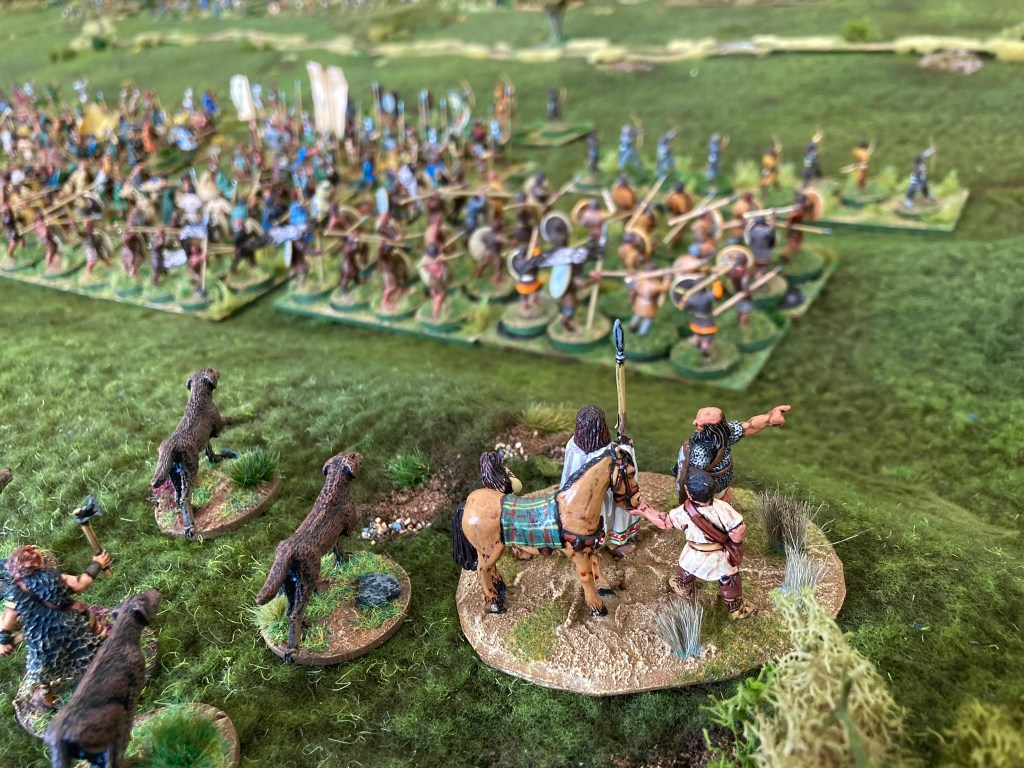
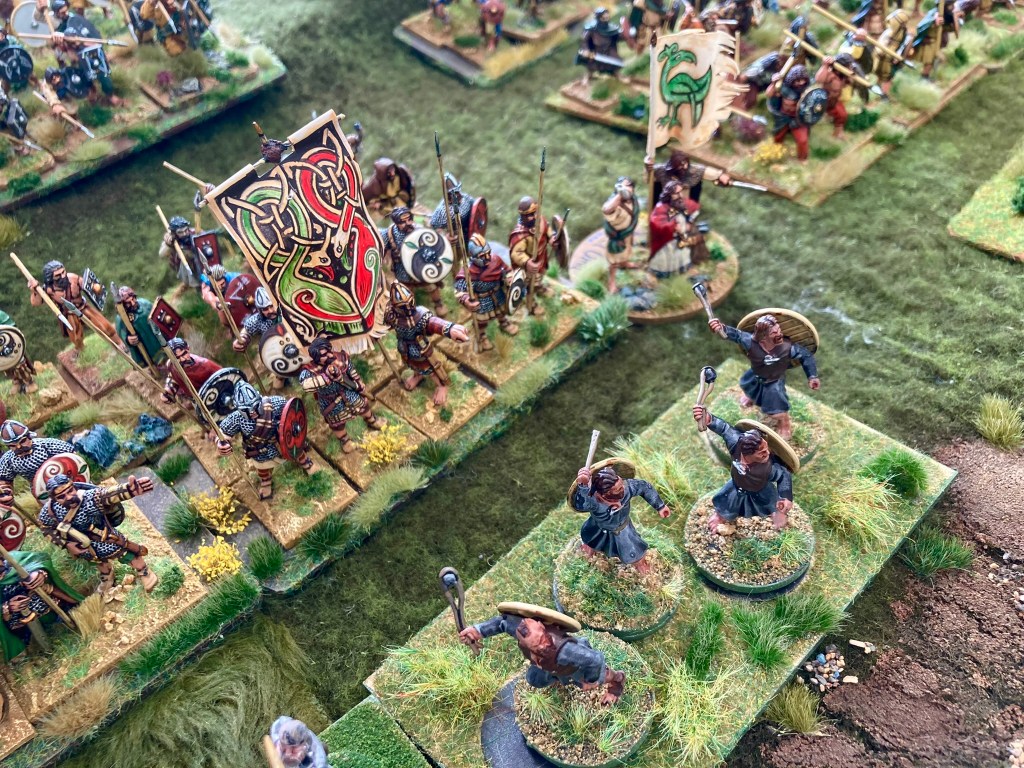
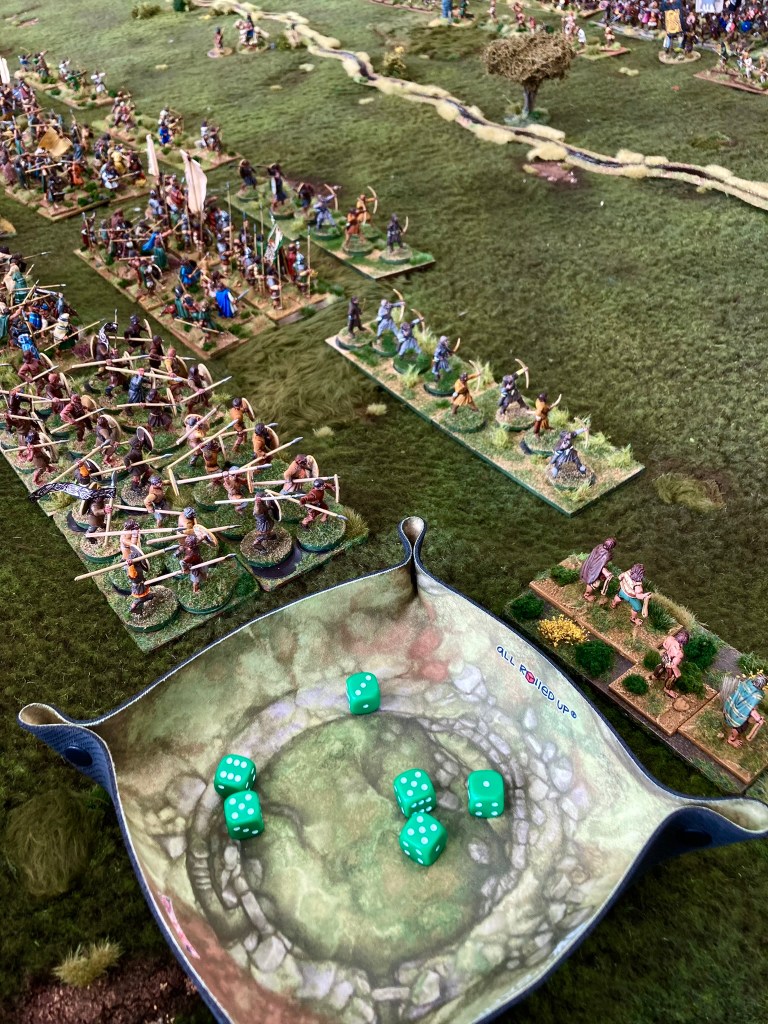
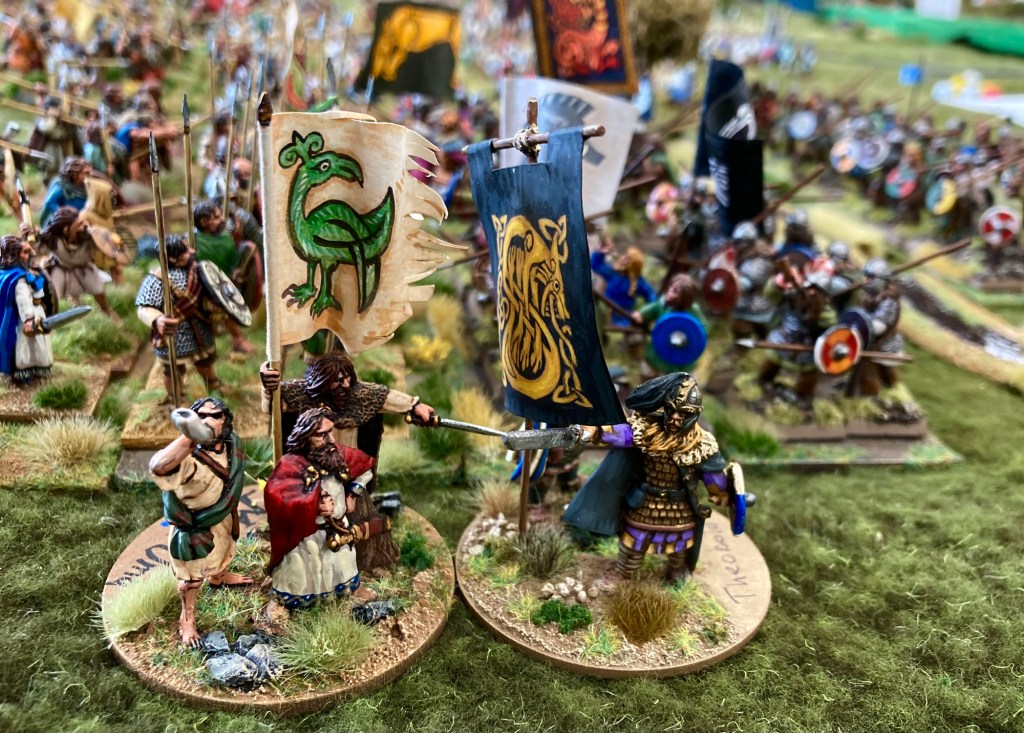
With both armies deployed for battle, the commanders carried out sacrifices in return for the favour of the gods (this is a special trait within Midgard that allows an ‘Omens’ roll at the start of the game with a random – hopefully favourable – result.) There were jeers as the Northumbrians’ sacrifed horse came up with a bunch of stinking entrails (rolling a one); across the dale, the Gaels cheered when a six was rolled and the goat sacrifice dictated a bonus of three Reputation tokens in Aedan’s goblet. Unfortunately, the priests also foretold that one of the Heroes would become Fated (this unfortunate trait means that a character is more likely to die, although hopefully in a heroic manner) – and that Fated hero was none other than Aedan himself, the King of Dal Riada.


With both forces deployed for battle across the Dawston Burn, Niall of the Swift Blade, champion of Dal Riada, was sent out to challenge the Northumbrians to single combat. Unwilling to lose any more face after the disastrous horse-sacrifice incident, Aethelfrith delegated Osric, one of his renowned thegns, to get out there and win some glory for Northumbria.
However, the Saxons ended up wincing as Niall lived up to his name and sliced a chunk out of Osric’s leg to the cheers of the Gaels. Both warriors circled the other, sparks and splinters flying from board and blade as each tried to gain the decisive blow. In the end, Niall thrust his blade over Osric’s shield, but not before the Saxon landed a mortal wound on his opponent; both ended up as food for ravens!
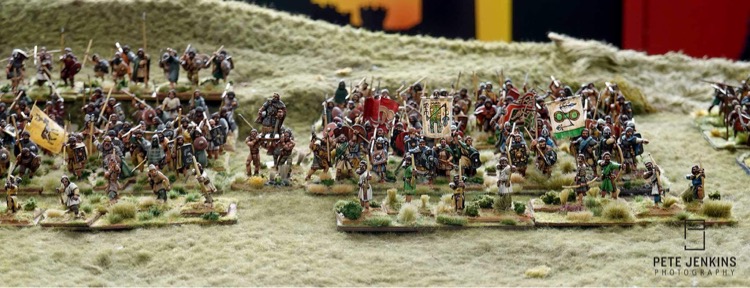
Nonetheless, this heroic challenge had stirred the blood of the watching armies and both sides advanced, hammering spear butts and sword pommels on their shields as they did so. On the Dal Riadan right, Mael Uma, a famous warlord from Ulster, saw an opportunity to strike the first blows of the battle and surged downhill towards the Dawston Burn (in Midgard, there is a reputation bonus for leading the first charge of the game.) Unfortunately, Mael Uma’s men couldn’t quite follow at the same speed, and he ended up fighting a losing battle against Theobald’s Saxons, despite the Irish skirmishers driving off a good number of Saxon archers.
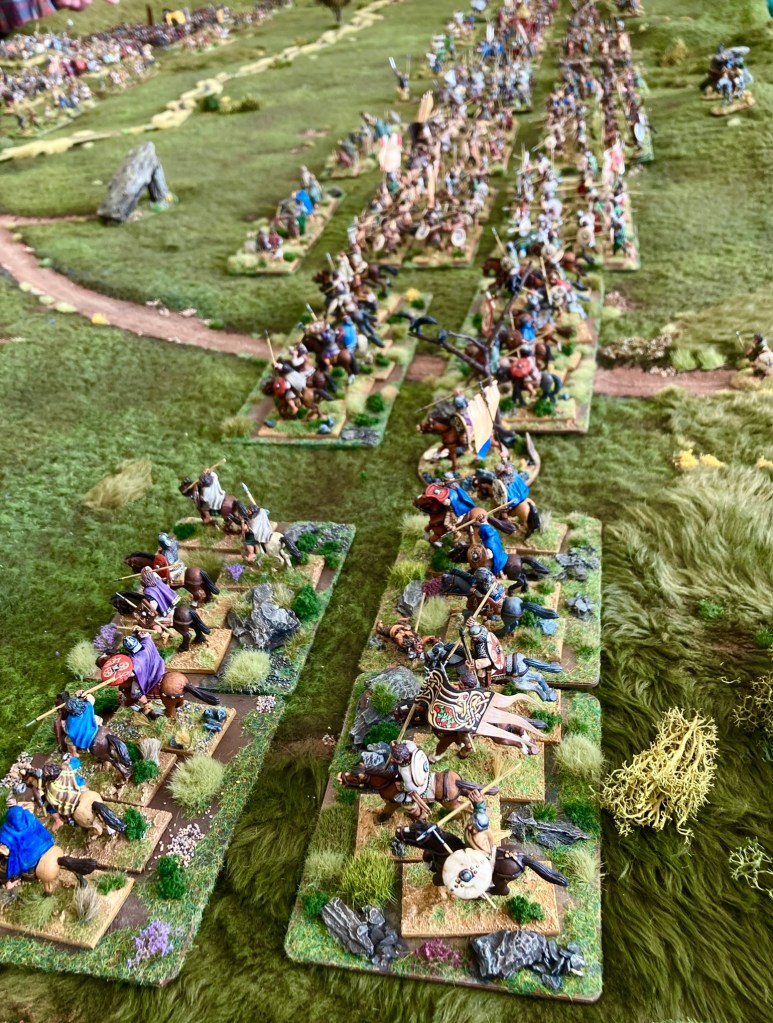

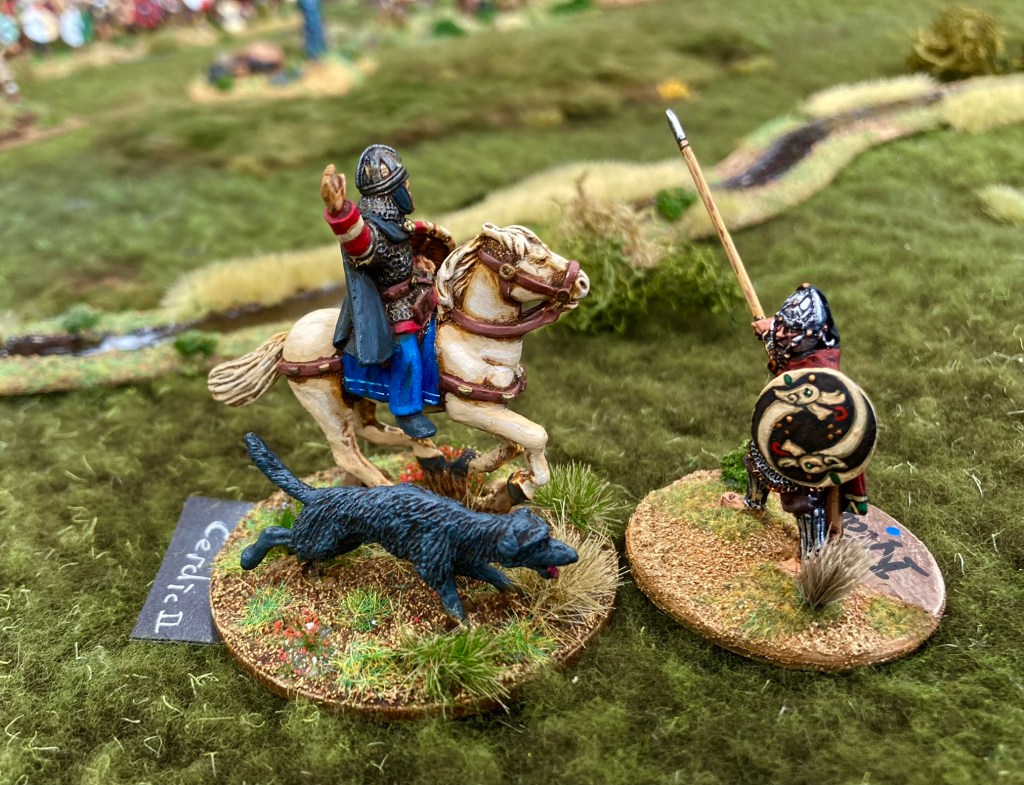
The Irish attack on the right prompted the Saxon horsemen on the left to put the various Pictish and British riders under pressure, which they did with some alacrity. (The Saxon cavalry drew some discussion, as expected. I believe that the warriors of this era did fight mounted sometimes, but probably not in full-scale battles like this one. My scenario excuse is that this contingent turned up late on their horses and just rode straight in; the truth is that we had some nice mounted units which looked good skirmishing on the end of the line, so on they went!)
I’ll confess that the course of the battle then flowed on in the background as I ended up chatting to many lovely folk who had come over to watch the game or ask about the rules. A bit like a bard with one horn of mead too many, I noted the key events but may have missed some of the details.
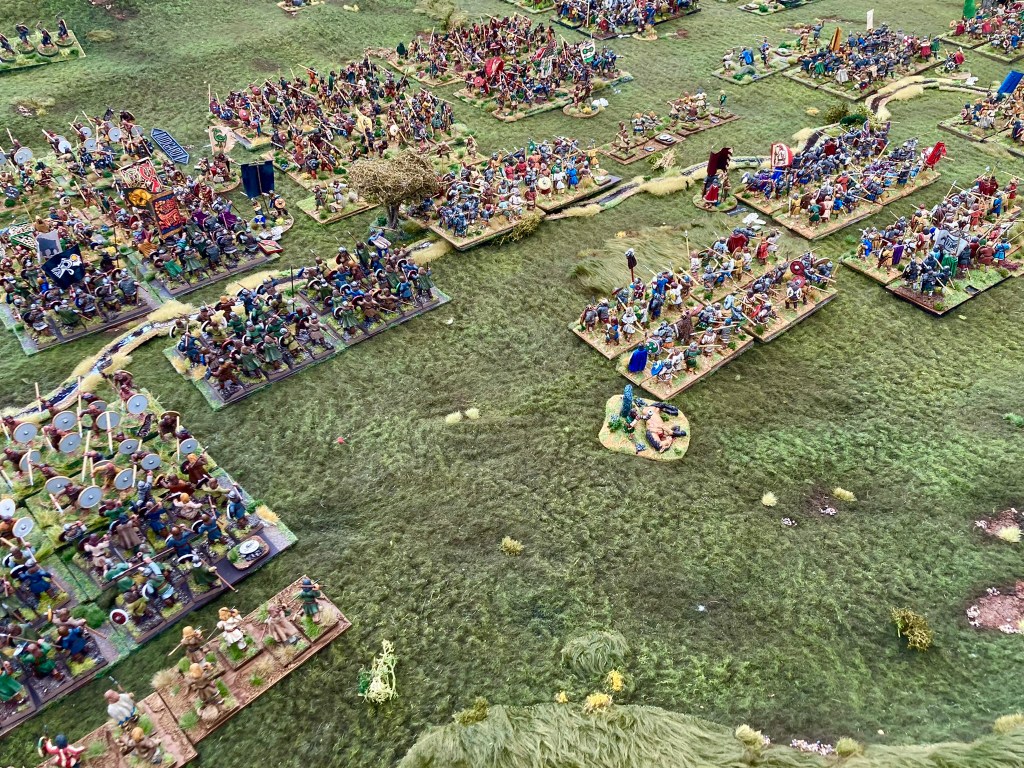
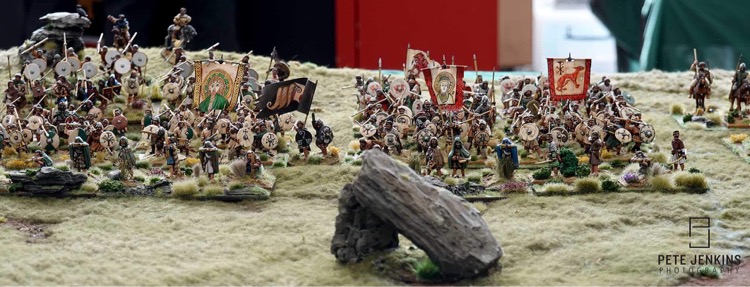
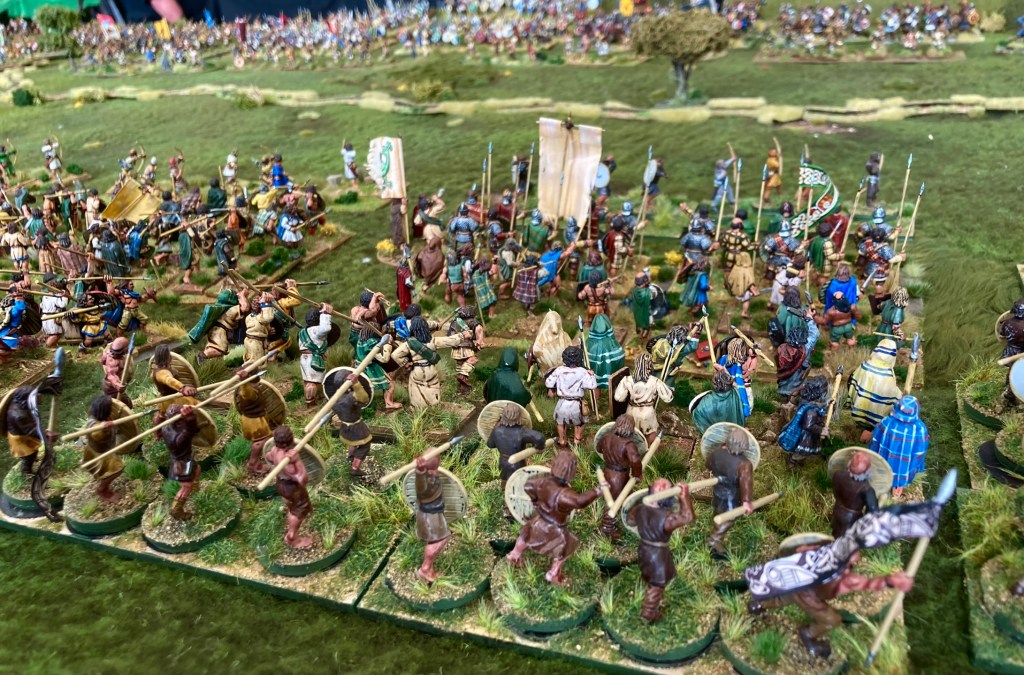
The Saxons pushed forwards all along the line; Mael Uma was wounded in a single combat and then killed along with most of his brave Ui Neill warriors. Hering, son of Hussa – Aethelfrith’s estranged cousin, exiled from Northumbria – died in the press of bodies in the centre. But the most dramatic event occurred when King Aedan led his household warriors in a savage charge against Aethelfrith himself.
Hoping to break the Saxons in the time-honoured way of killing their leader – as well as gaining Reputation for the heroic act of charging the enemy commander – the Dal Riadan king found himself facing a hail of javelins. Rolling dice with the aplomb of a 12-year old, Paul scored an outrageous seven hits (this is a lot in Midgard), resulting in a faltering unit of Gaels. Worse, the ‘Risk to Heroes’ roll that Aedan needed to make to avoid the javelins himself ended up with a classic double one – which he could do nothing about, being Fated! (It’s possible that it was entirely his own fault for being carried around the battlefield on a shield.) Crunch.
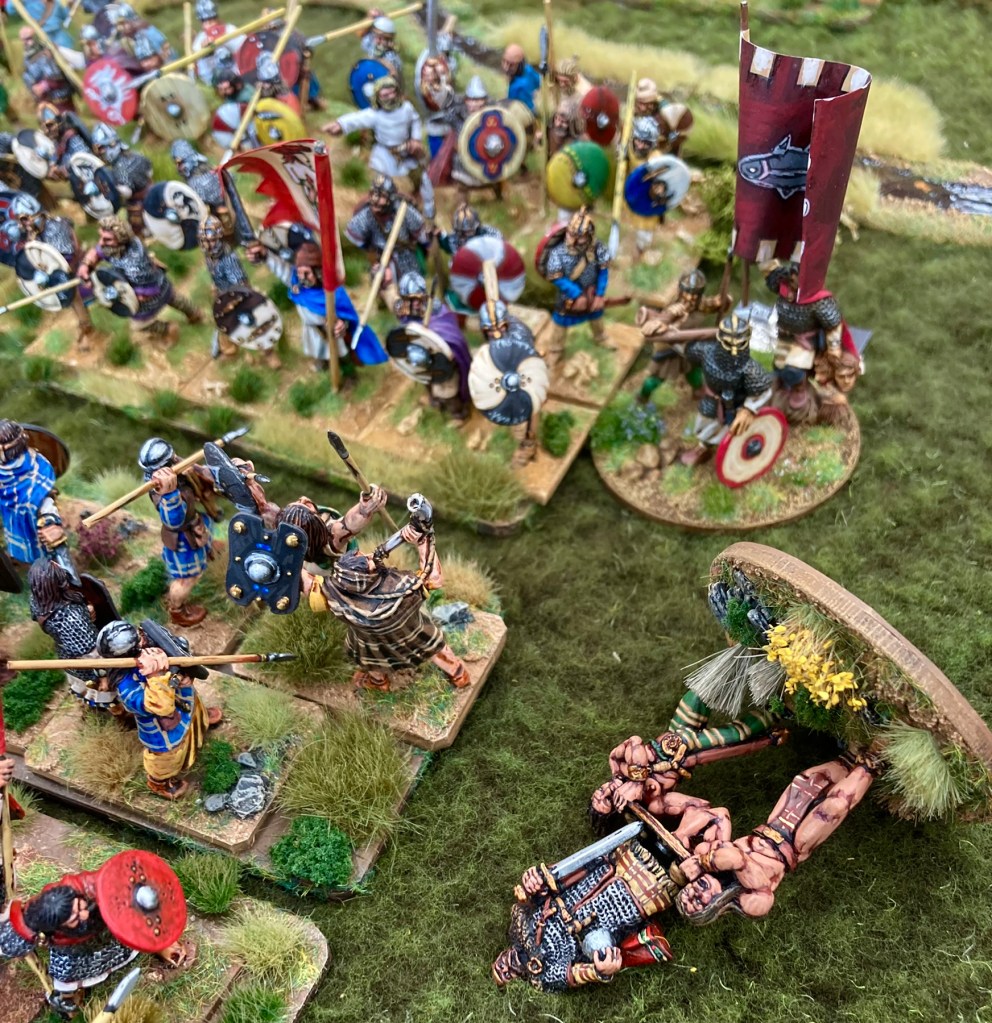
After this, it was all downhill for the Gaelic forces. The death of Aedan caused a major loss of Reputation from the goblet which was compounded by the Saxons rolling up the damaged Dal Riadan units in the centre. When the army finally broke – just twenty minutes before the end of the show – Aethelfrith had clearly won a great victory. Five of the six Gaelic commanders were dead and Aedan’s son Domingart sorely wounded.
It was a fitting result to what had been a glorious day out, albeit one that left all of the team with sore throats and aching arms and legs from reaching into the centre of the six foot table to move the minis! I’ll admit that I did consider running a skirmish game for the next show as I was repacking 19 boxes’ worth of figures and terrain, but I’ll probably forget that by October!
If you came along for a chat or to watch the game, thank you very much indeed.
And those three Foundry Picts that I bought from Dave Thomas at Kelham Hall in 1993? Well, they were on the table 29 years later.

Great report and an excellent game. I enjoyed our talk before the show opened and was disappointed I never got back. A brief on your Sherpa fleece would be useful as it would on your Midgard organiser 😁
LikeLiked by 1 person
No worries, I only saw your Culloden game on the Storm of Steel video, it looked superb! I’ll try to squeeze in a sherpa fleece article.
LikeLike
Great write up and a super looking game. I really must make the effort to s
LikeLiked by 1 person
What a wonderful set up. And such an amazing game!
I have to admit I was a bit taken aback by the sheer size of the game. For some reason I was expecting a lot fewer miniatures.
Well done for the Best Demo Game award too 🙂
LikeLiked by 2 people
Thanks Darrell! Six collections gave us around 1000 minis. There’s not a lot of terrain on the table but we managed to fill it.
LikeLike
A truly marvelous sight!
LikeLiked by 1 person
As a big fan of the period it was great to see such a lovely set up and the effort you went to is to be applauded. Unfortunately I only had time to breeze past as we were busy doing our own game, hopefully see you at a show when we’re not doing a game and can chat.
LikeLiked by 1 person
Thank you very much. Was yours the game with the large bridge? I had to use the Storm of Steel video to catch up on what was there. I greatly admired your Viking game from Oct.
LikeLike
What an awesome (literally!) looking game! You don’t see that many models in that scale very often. I’m sure you inspired the next generation of first time goers!
LikeLike
Many thanks! I hope so. It’s great to be a part of the show.
LikeLiked by 1 person
Sounds like you all had a blast, and the game looks terrific – keeps showing up in coverage, so clearly you made an impression.
LikeLiked by 1 person
Many thanks!
LikeLike
Superb game
LikeLiked by 1 person
Beautiful looking game! Will we see some tutorial videos on youtube for Midgard? For me at least, the youtube preview/tutorials for the last couple of Reisswitz Press releases really sold me on the rules.
LikeLiked by 1 person
Many thanks! There will be some Midgard videos with Reisswitz Press but not until nearer the time of release.
LikeLiked by 1 person
Thats great, ive enjoyed reading about Midgard on here and looking forward to getting my hands on it as well.
LikeLiked by 1 person
Also, i’d love to see a sherpa fleece tutorial!
LikeLiked by 1 person
OK, that’s enough votes, I’ll get onto it!
LikeLiked by 1 person
A great write up of a fabulous looking battle. I remember being inspired by those same Johnson/Perry Late Roman games as well 😁. Another vote for the sherpa fleece how-to please 👍
LikeLike
A fabulous looking game and great to read the overview. I also remember being inspired by the Johnson/Perry Late Roman games back in the early 90s. 😁 Another vote for the sherpa-fleece how-to, please 👍.
LikeLiked by 2 people
Epic and brilliant!
Enough figures you were pretty close to a 1:1 ratio!
LikeLiked by 2 people