At Salute and Partizan last year, my 15/18mm game of the Battle of Degsastan was surprisingly popular. Given the love shown for small soldiering, I thought I’d go down a couple of sizes for my next game and do the Trojan War in 6mm!
Massed Trojan spearmen screened by skirmishers and flanked by chariots (Baccus & Rapier Miniatures)
These little guys have some huge advantages – low cost and easy storage/ transport being well up there – but foremost, I feel, is the ability to create massed units that look impressive and can fit on a kitchen table. I’ve already covered the first few pieces painted in my blog entry here: https://mogsymakes.net/2024/02/01/teeny-tiny-trojan-wars/
Currently, I am working on producing two opposing forces and a small layout (4 x 3′) to represent the plain of Ilium for Trojan War purposes, which I’m hoping to have ready for the Partizan show at Newark on Trent on May 19th 2024.
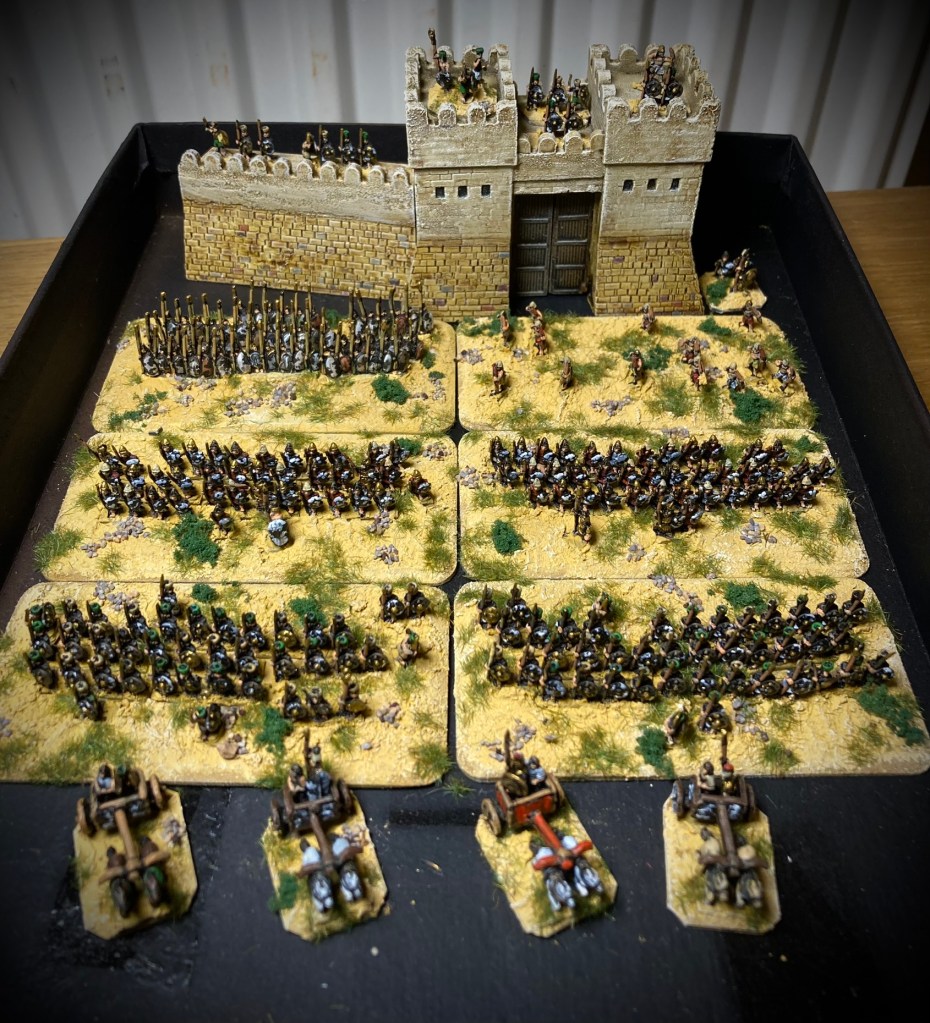
The start of April saw me taking all the unpainted units on holiday. Fortunately, 6mm being a much simpler paint job than my usual 28mms, I managed to get the remaining Achaeans and Trojans all painted within 7 days. Upon returning, I set to basing them all up. Each unit is on a 8 x 4cm magnetised base.
Massed painting! These are the Greeks, who I have themed with red and white for easy identificationUnits glued onto bases awaiting texture
I wanted a specific mat for the game which was created from a piece of polar fleece fabric bought from eBay.
Cut to a rectangle, this was then sprayed and flocked to match my figure bases, taking a total of about two hours.
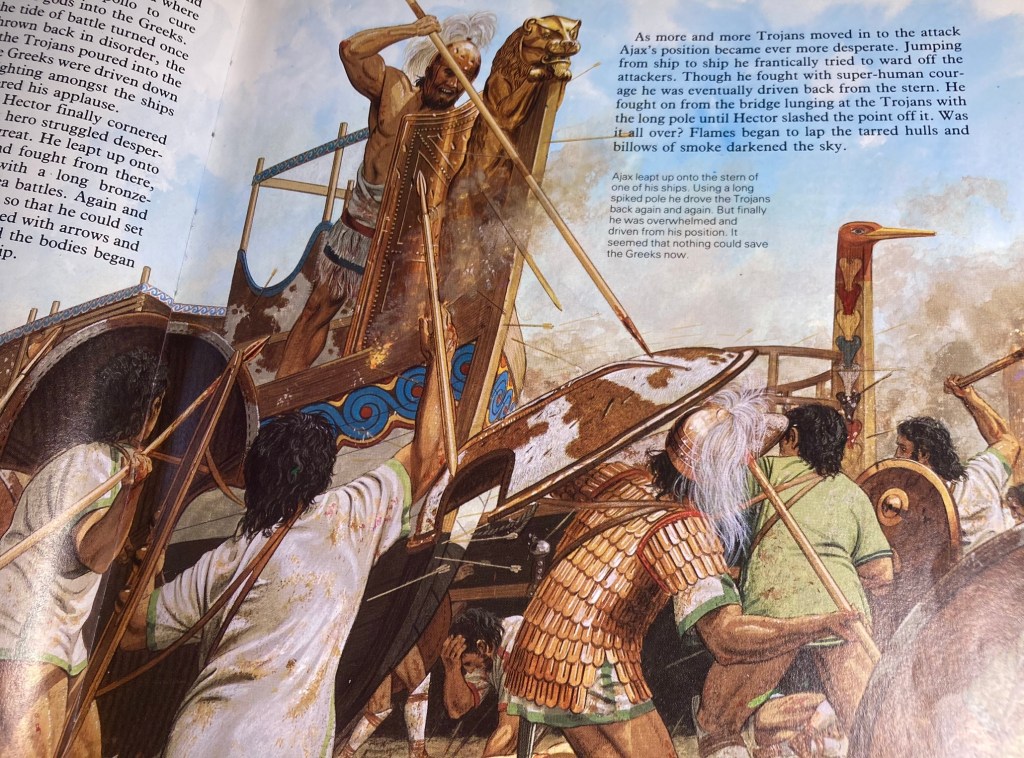
Much of the project is being based on the illustrations of Peter Connolly in his book The Legend of Odysseus (Oxford University Press, 1986).
Despite the title, the book covers the Trojan War as well as the Odyssey and is well worth finding a copy of.
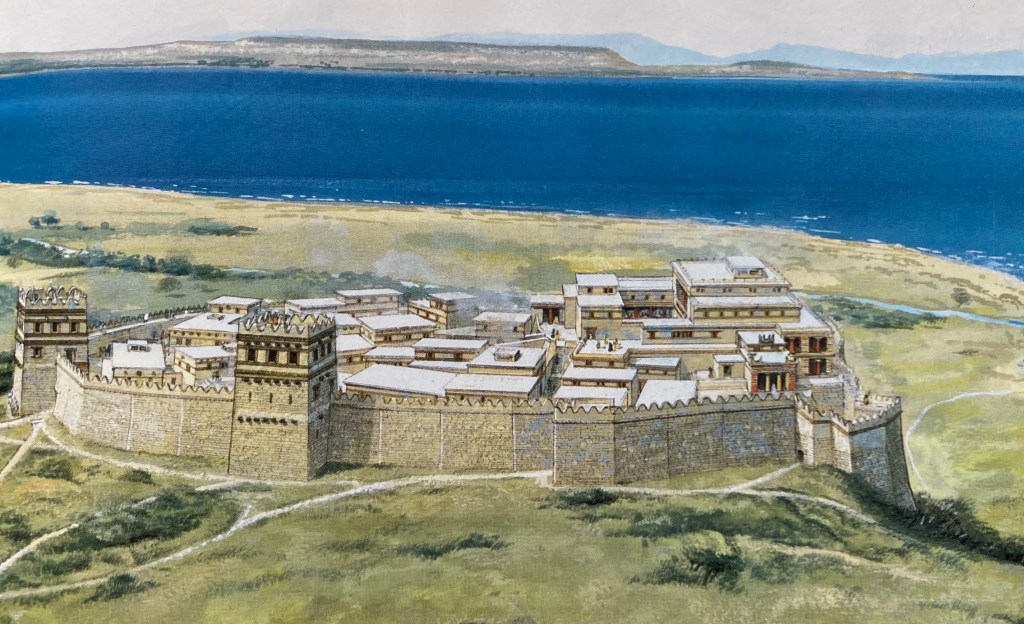
A section of Troy is going to be represented using the superb Leven Miniatures models which I’m mounting on a specific city base created from plastic card and Milliput.
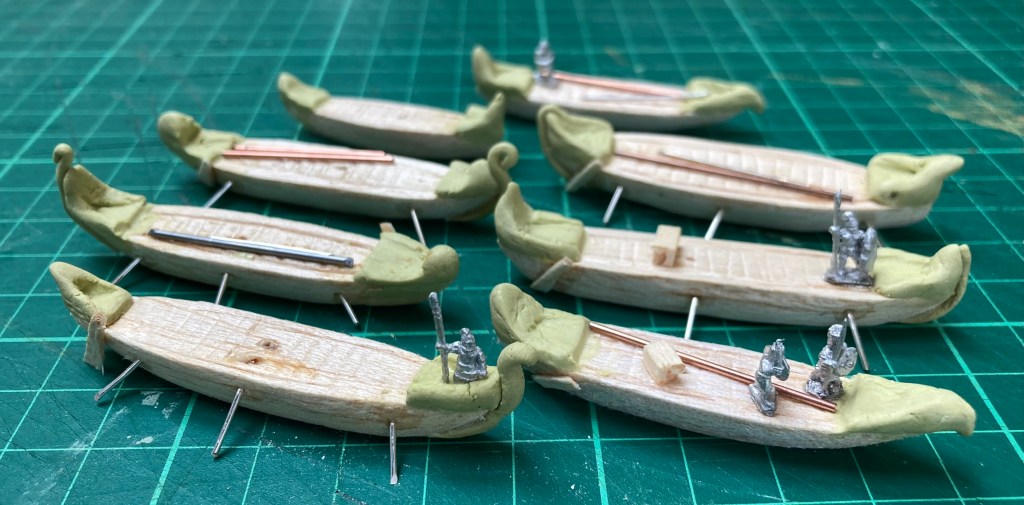
Also needed were a number of ‘black ships’ along the beach. After investigating various 3D printed and cast options, I decided to go old school and hand carve the ships from scraps of balsa wood.
This didn’t take too long although fudging together bows and sterns from Milliput was a more complex process! Anyway, I don’t think it;s going to matter once they’re painted.
In keeping with Connolly’s illustration of Ajax defending the ships, I modelled them with dropped masts and some stakes supporting the hulls on the beach.
Warbases’ very useful ‘pond bases’ came in handy once again – this time to make sections of Greek camp with tents (Leven Miniatures again), ships and a rough palisade (balsa wood).
The section of sea is just a piece of plasticard with a shoreline modelled on with sand. I’m currently in the process of painting the whole thing in multiple layers, then will add varnish.
That’s it for now. It’s all gradually coming together and I hope to have it ready by May! Thanks for following.
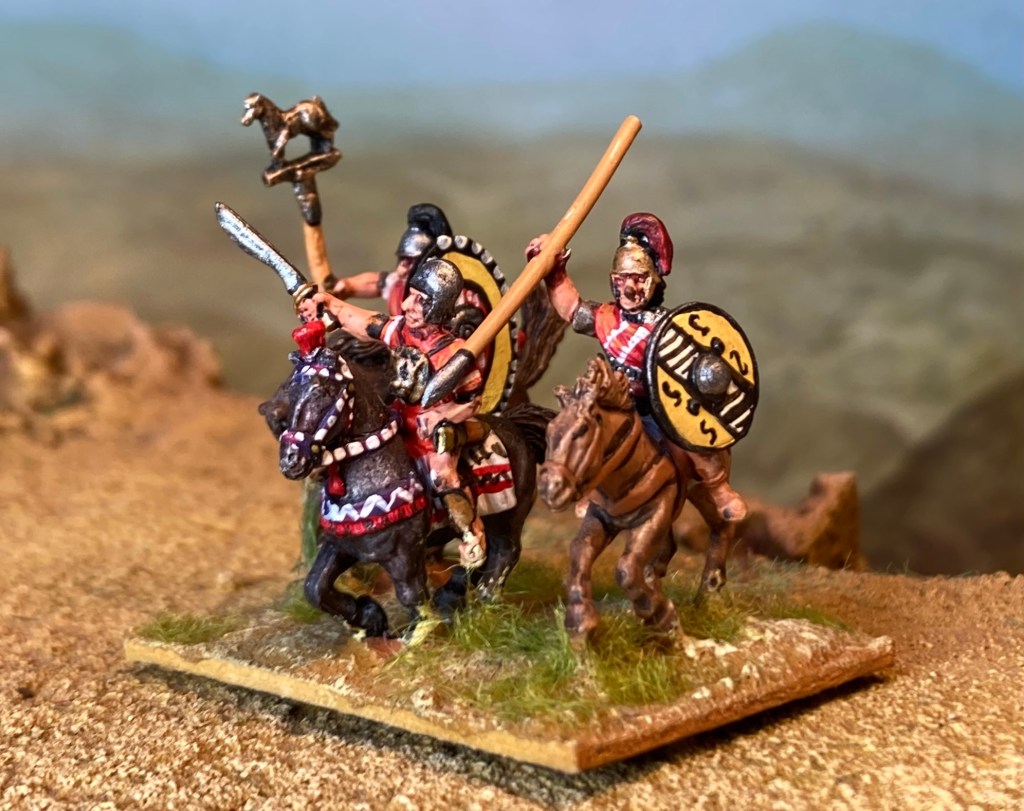
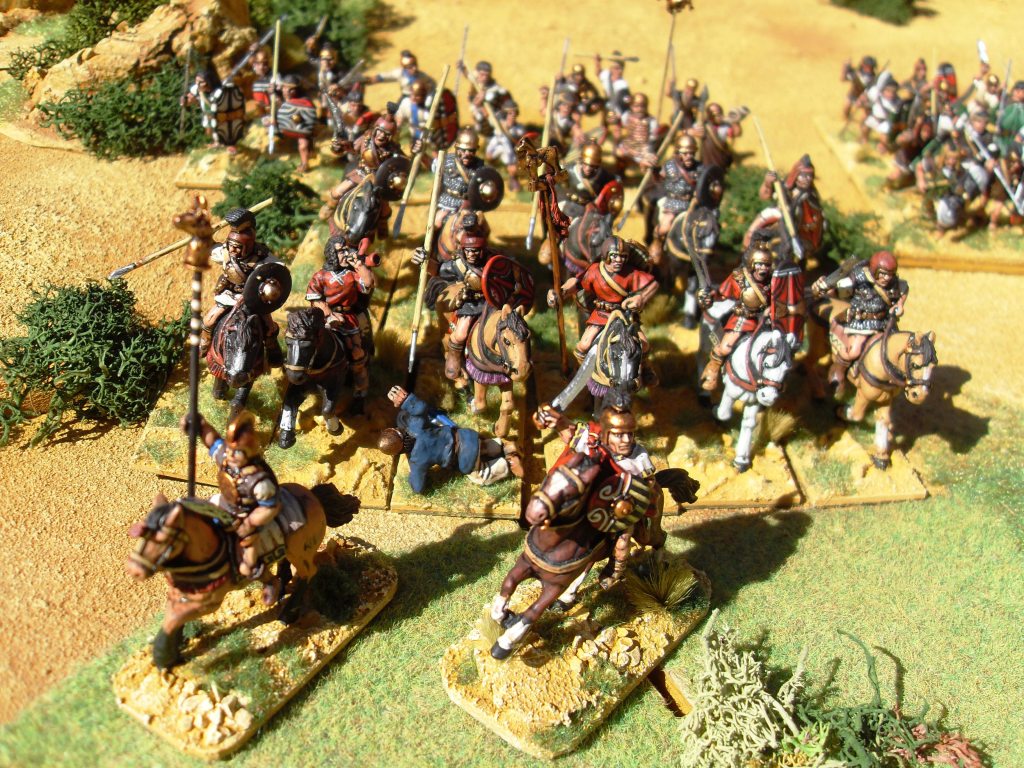
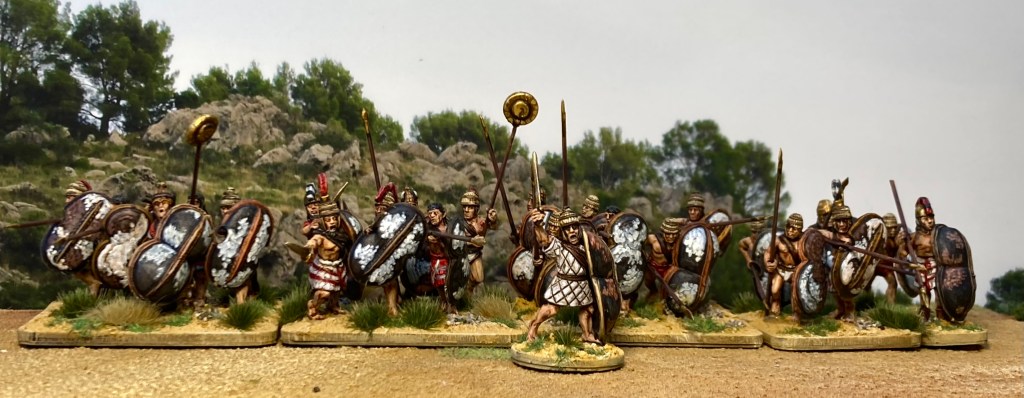
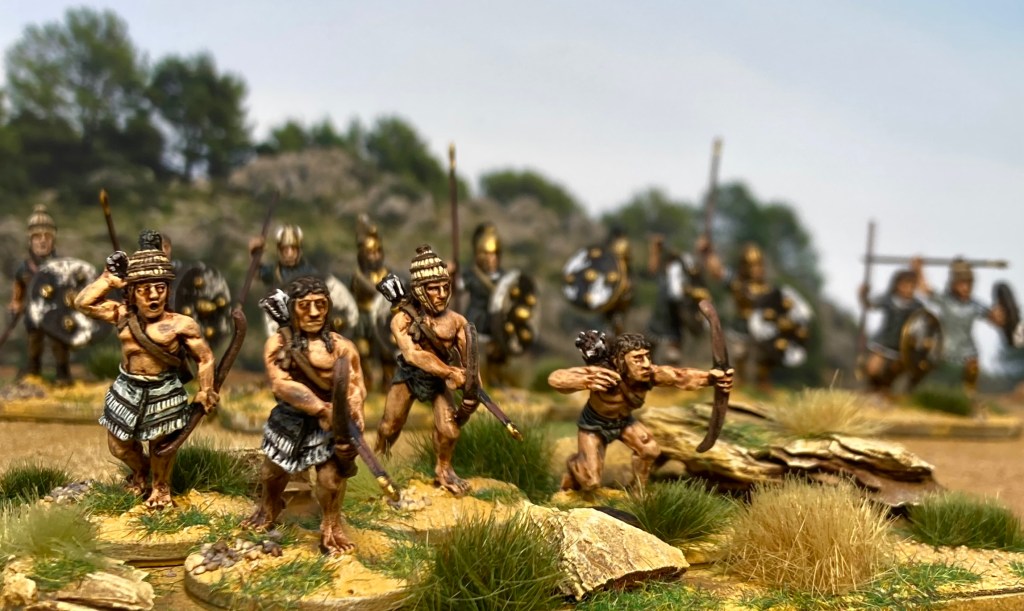
Ready for battle – 28mm Spanish warriors with a warrior leader. All backgrounds in these photos by Jon Hodgson Backdrops.
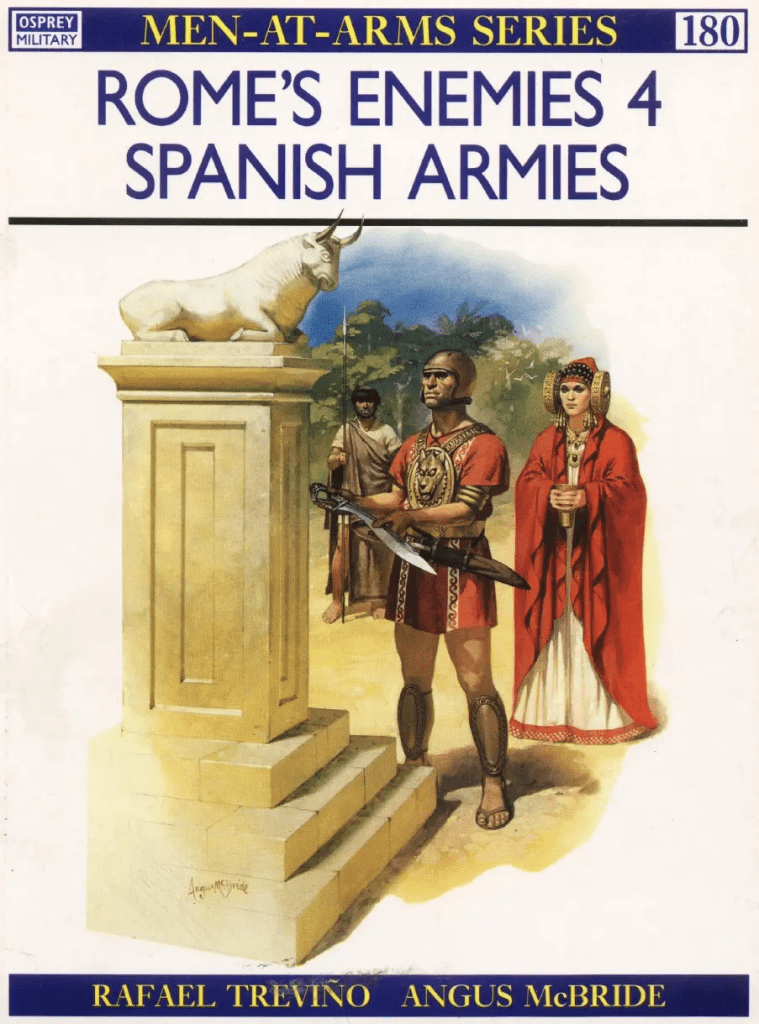
I’ve always had a longstanding interest in Spanish history, but the ancient Iberians really kicked off when I got a copy of the Osprey book Rome’s Enemies (4): Spanish Armies in the 1990s. Although it’s now dated in some areas, the colour plates by Angus McBride were an absolute inspiration – very quickly, I found myself buying and painting a 15mm DBA army from Donnington Miniatures before expanding it to a much larger force with Essex and Chariot Miniatures.
Rome’s Enemies (4): Spanish Armies with art by the late Angus McBride
The 15mm army was lovely but I also hankered after painting some 25/28mm miniatures. At the time, selection was limited – most 25mm manufacturers had a few Iberians tacked on as allies in their Carthaginian Punic Wars lists, but no full ranges. I had a handful of 25/28mm models from Newline Designs, Essex Miniatures and a few of the Spanish sculpted by Dave Gallagher for Foundry, but I needed some new releases to get the variety I wanted for a full force.
This is the sole surviving element of my DBA/M Spanish force in 15mm – one of my original command stands using Essex Miniatures.
This began to change with the release of Warhammer Ancient Battles which was a huge shot in the arm for 28mm ancients; in particular, Allen Curtis’ Hannibal & The Punic Wars WAB supplement featured lists for full Iberian armies which prompted a whole range of new releases. Gripping Beast, Foundry, Curteys/ First Corps, Crusader Miniatures and A & A Miniatures all came out with bigger ranges than we’d ever seen before.
Hannibal and the Punic Wars WAB supplement – written by Allen Curtis, cover art by Guiseppe Rava
At this point, I decided to expand my Ancient Spanish by dipping into everything that was out there. Here’s a visual guided tour through my 28mm metal warband.
This is an old shot of my WAB army from the mid-2000s – clearly taken on a very sunny day in the back garden!
LEADERS
28mm cavalry commander from Crusader MiniaturesWith the importance of battle standard bearers in WAB, I painted one mounted and one on foot. These are Gripping Beast minis.
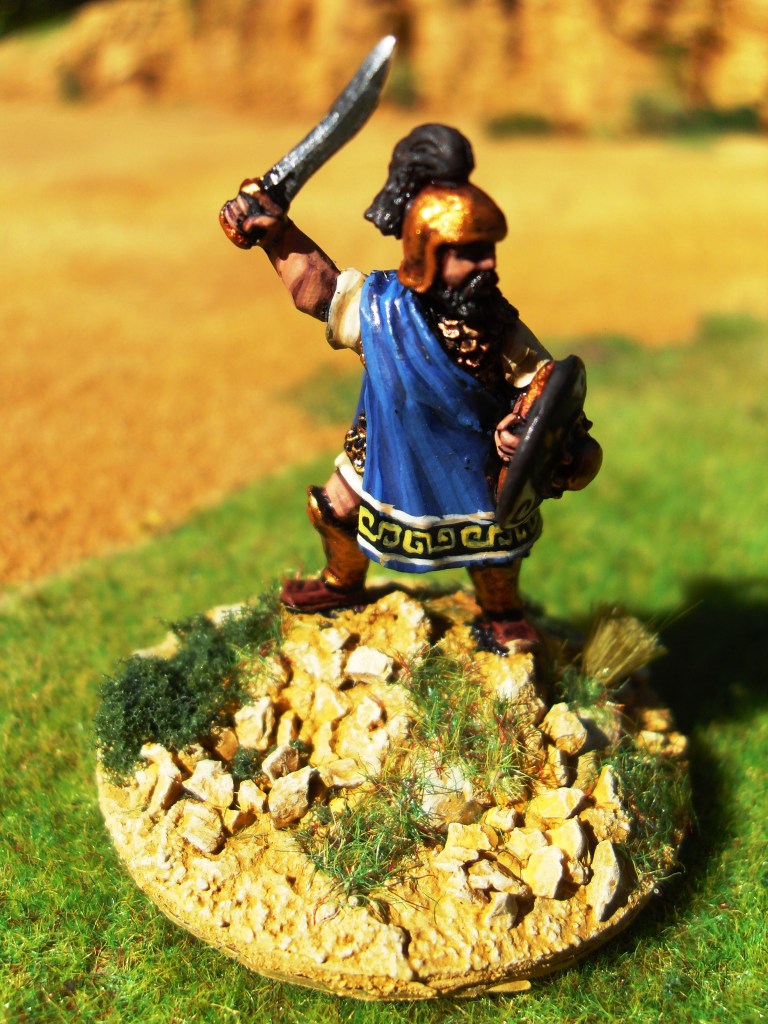
Here’s a few more hero shots that I dug out from that sunny garden photo session in the mid-2000s – models here are by Gripping Beast and Crusader. The GB models are from an early stage in Soapy’s sculpting career, so are not as polished as his later figures, but I rather like them. The female priestess (based on the famous La Dame de Elche sculpture as pictured on the front cover of the Osprey book) is one of my favourites.
WARRIORS
These chaps – often referred to as ‘scutarii’ by Roman sources – are the backbone of the army. I ended up collecting about 90 (organised into seven units of 12 in the pics below).
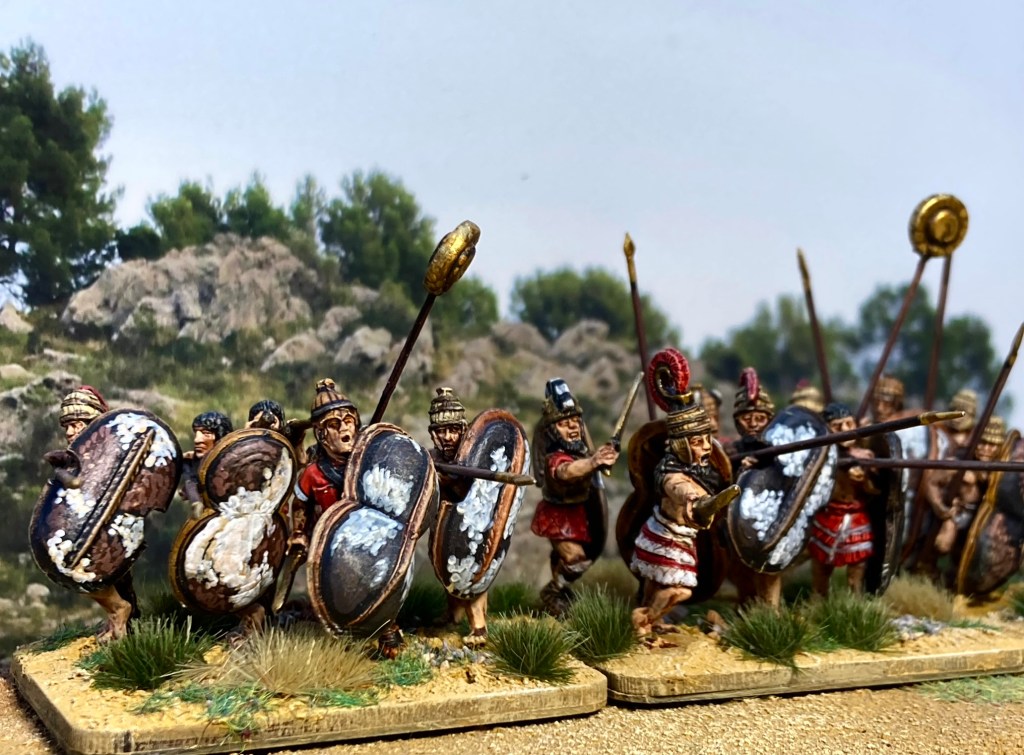
An especially mean-looking bunch of Iberians spoiling for a fight: these are mostly Crusader Miniatures with some First Corps/ Curteys and A & A Miniatures. I really enjoyed painting those shields!
This unit is mostly composed of the First Corps/ Curteys range which is full of charging warriors. I decided to do these with brown/ black/ white/ yellow shields.
Here’s a few close-ups including a couple of 40 x 50 mm vignettes that are built into my units. The shields are all based on pictorial evidence (painted pottery etc) with some artistic licence – I basically took the visual sources and used the design elements to create designs involving stripes, curved lines and spirals. Having practised on a whole 15mm army, it was definitely an easier process second time around.
HORSEMEN
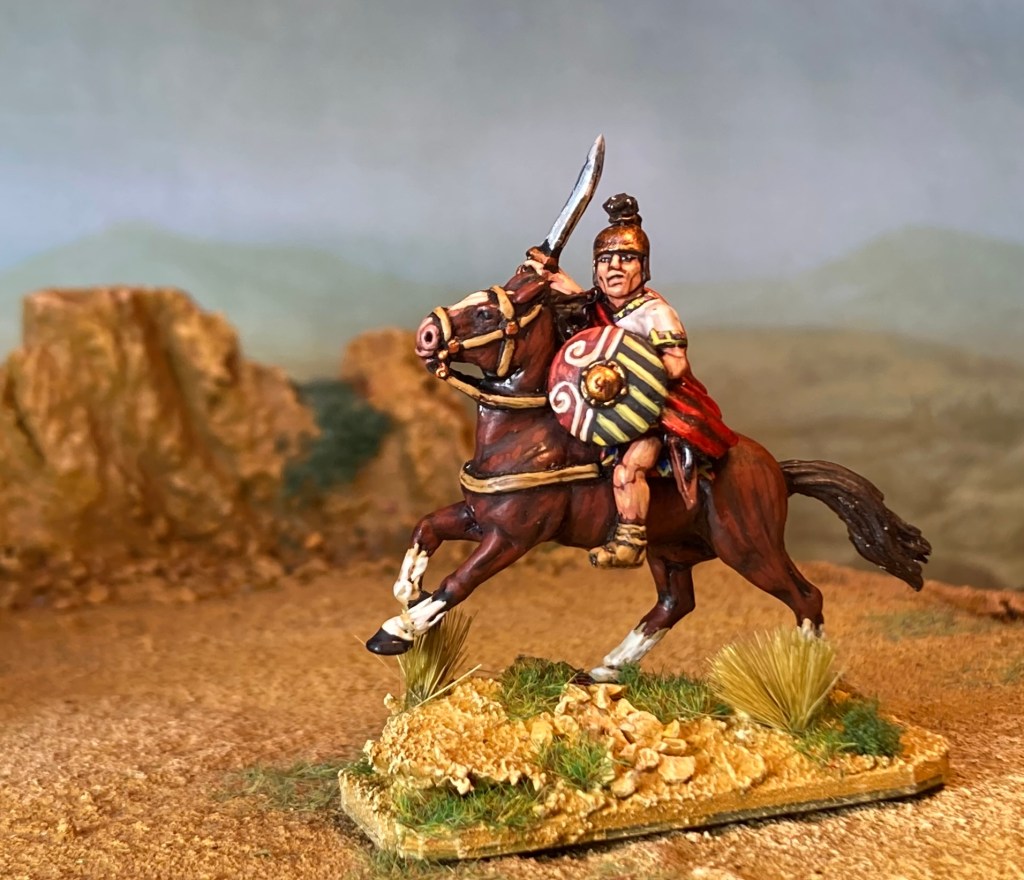
While this is many centuries before the rise of the Spanish caballero and jinete, it’s clear that horses were an important part of the Iberian culture in this period. There are many models available for these troops but – in my opinion – none finer than the Foundry range sculpted by Mark Copplestone.
Spanish heavy cavalry – all Foundry apart from the musician and fallen Celt (Gripping Beast)Another unit of Foundry horsemen with the Crusader Minis mounted general
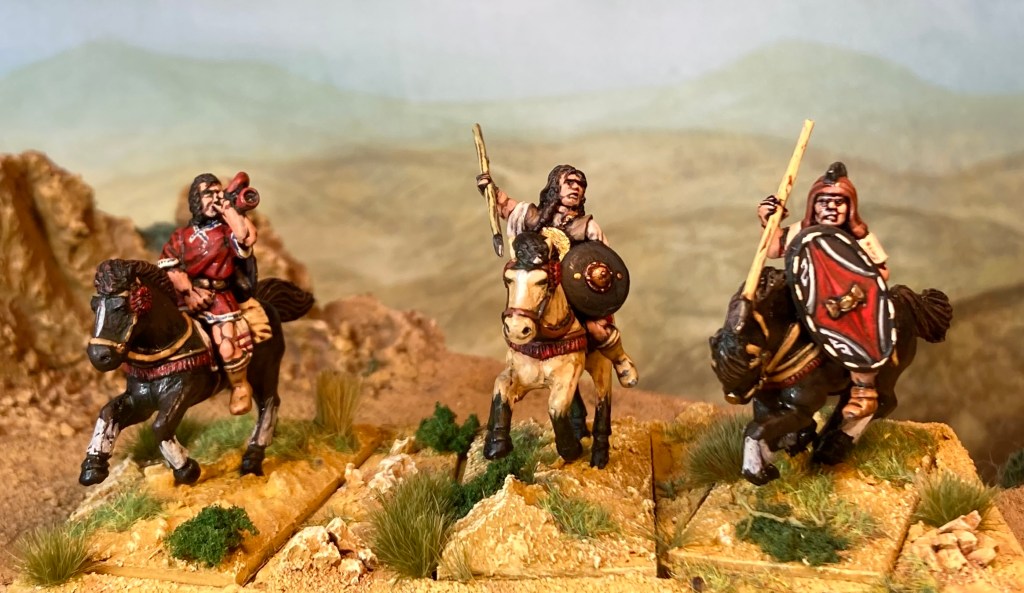
And here are the light cavalry, largely Gripping Beast with some appearances from A & A and Foundry. Some of these are based individually, others in groups on 12 x 6 cm bases.
Another old shot of the cavalry out in front of the warriors
SKIRMISHERS
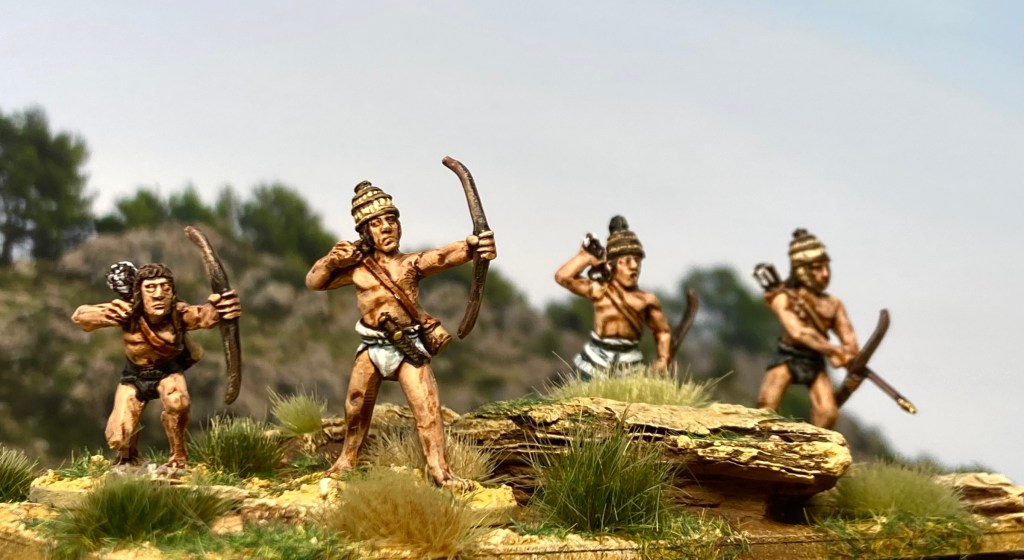
‘Caetrati’ from A&A Miniatures, Foundry, Cruasder and Gripping Beast
The Spanish were well-known for the quality of their skirmishers, ‘caetrati’ (armed with swords, javelins and round ‘caetra’ shields) and slingers (including the famous Balearic slingers who were employed by Roman and Carthaginian armies alike). Frustratingly, Mark Copplestone left Foundry before he had completed the range, but some of the dollies were used by Companion Miniatures to create some further Spanish variants, including Balearic slingers.
Slingers from Companion, Crusader and Newline Designs
I based all of these on 25mm round bases to give them a slightly different look to the warriors.
All Foundry in this pic sculpted by Mark Copplestone – you wouldn’t want to meet these on the ancient battlefield! The second figure from left has a soliferrum – a solid iron spear. Nasty!
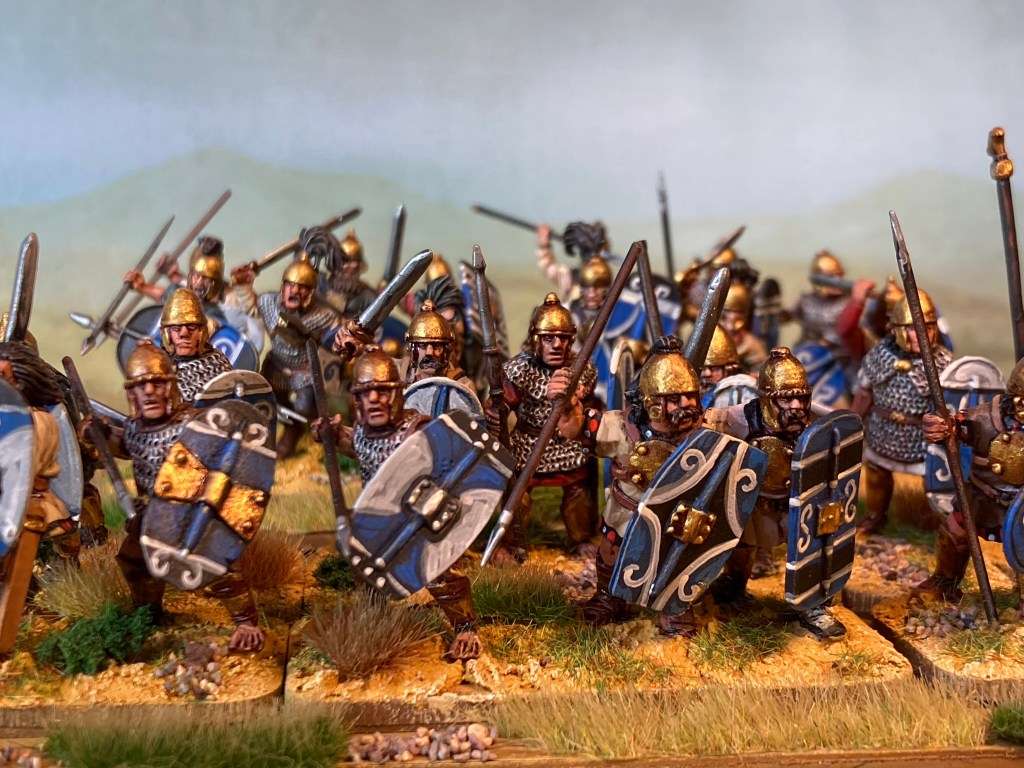
CELTIBERIANS
Celtiberians ready for battle – command vignette out front is by Crusader Miniatures
These units were a later addition to the force, reflecting warriors from tribes with a mixture of Celtic and Iberian influence. The Crusader Miniatures range was the basis for these troops although I mixed in a few other models for variety, including some plastics.
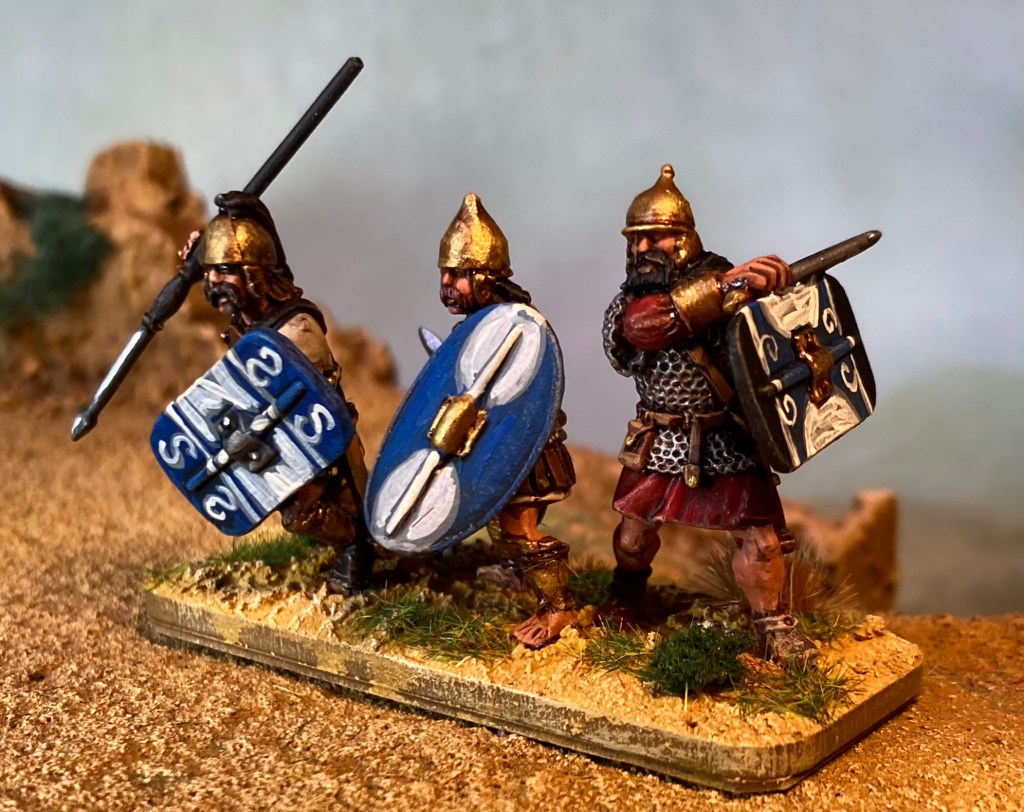
This unit has a largely plastic front rank, featuring models from Victrix and Warlord Games.
I used similar shield designs to the Iberians but following a blue/ black/ white colour scheme. I have no historical evidence for this (and indeed I’m sure that producing this shade of blue on a large scale would be an expensive and difficult undertaking for this period) but I think it provides a Celtic vibe to the warriors.
Unlike the Iberians, these units were painted with a red-brown spray undercoat which provided a good base colour for the skin and bronze metalwork.
It’s been fun to pull these guys out again for photos. Hopefully they will see the gaming table again soon!
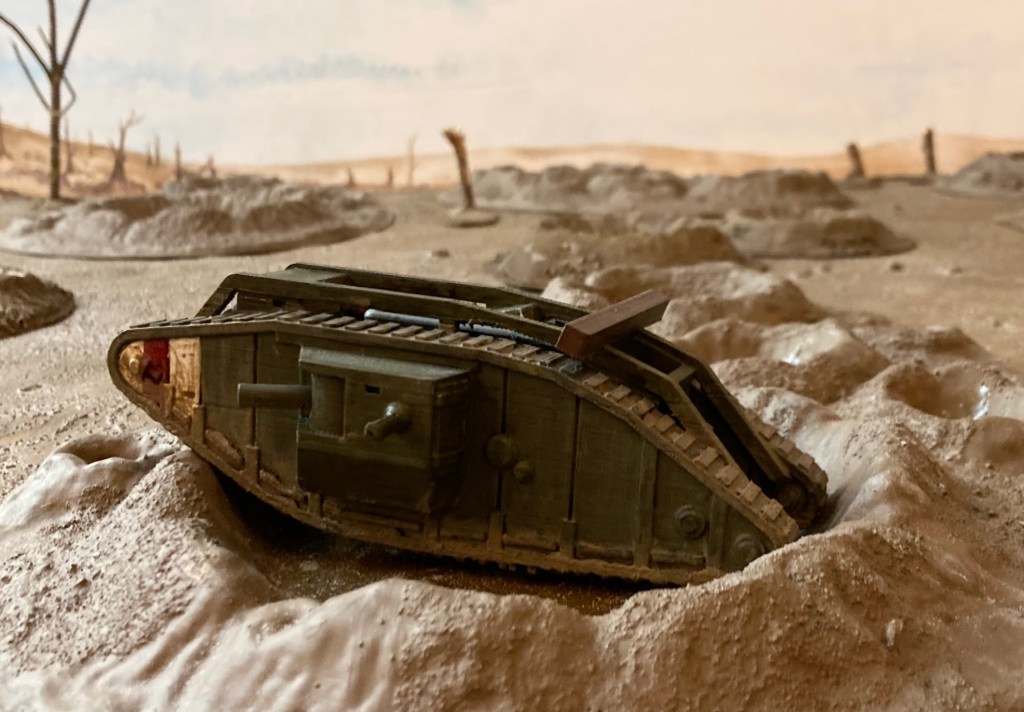
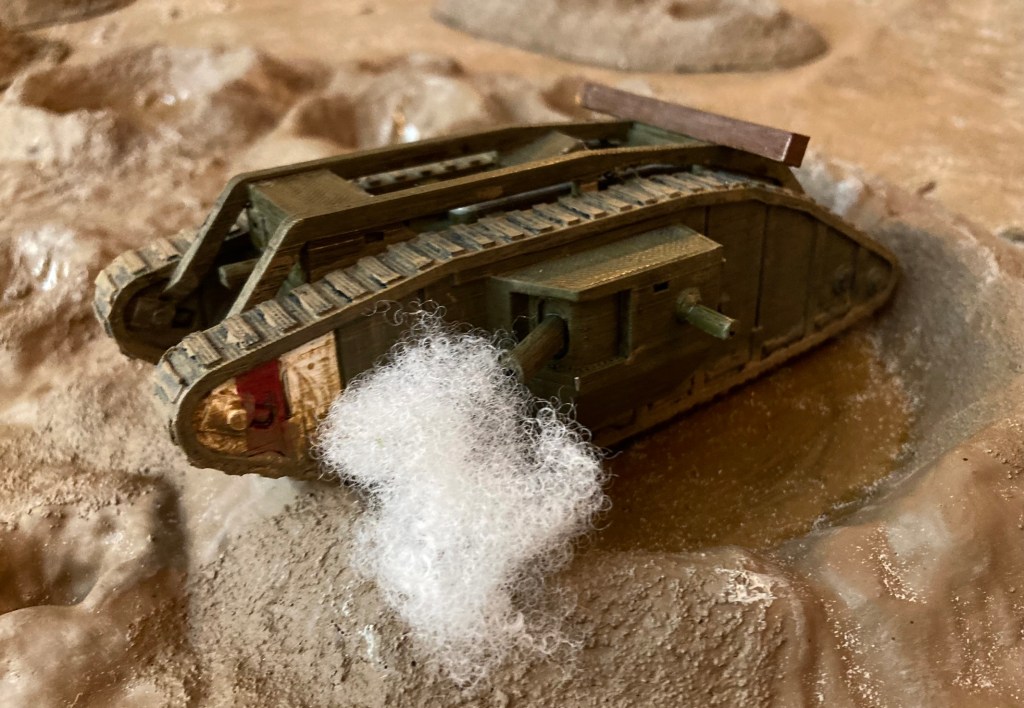
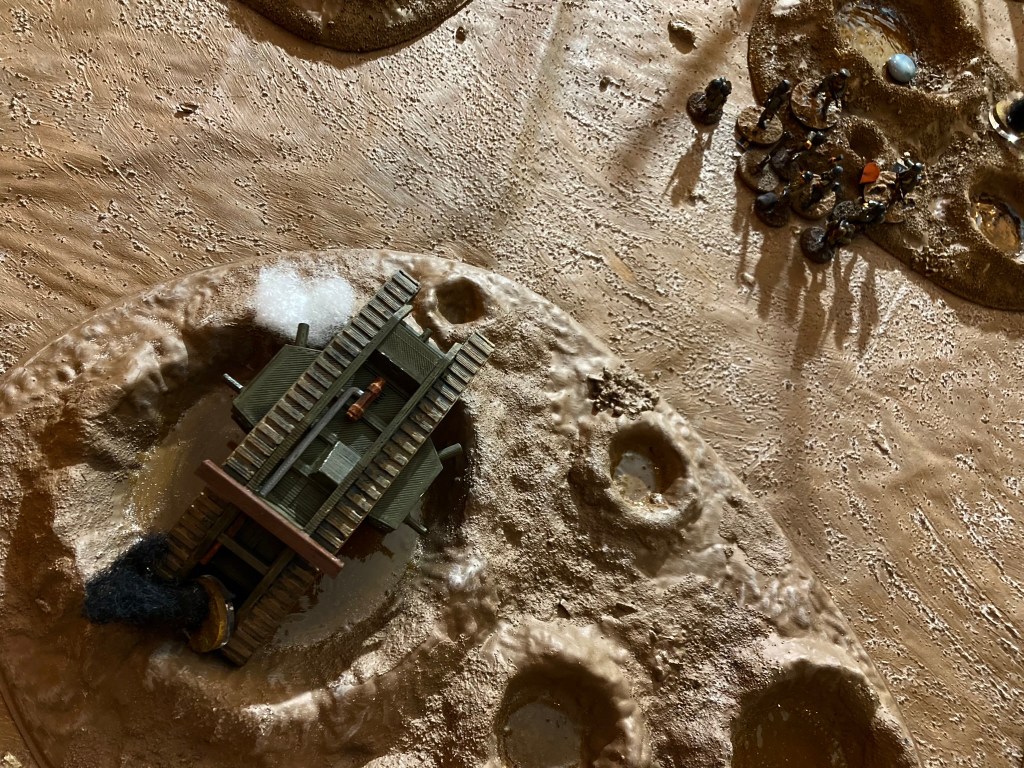
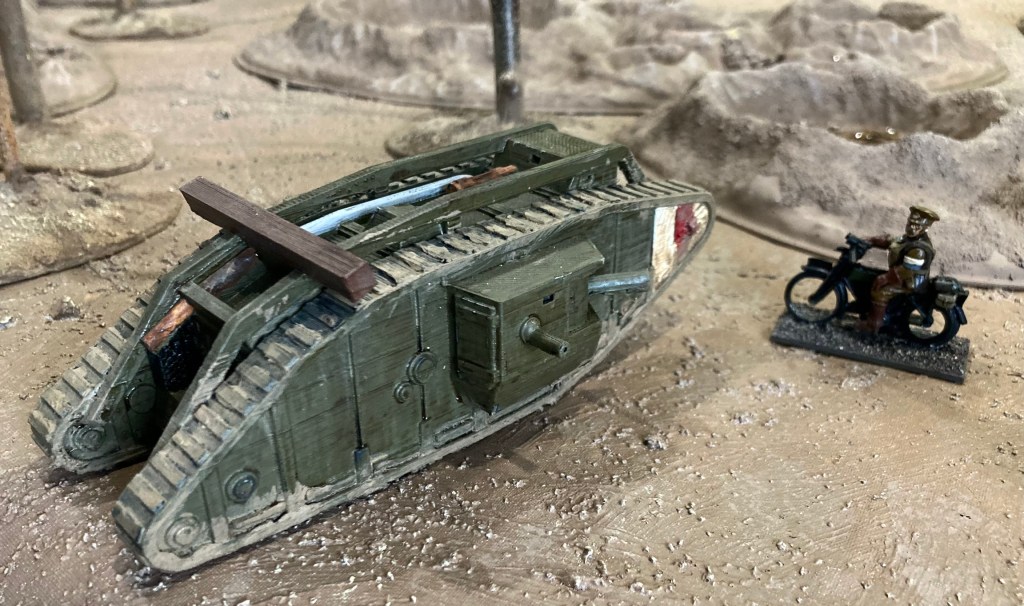
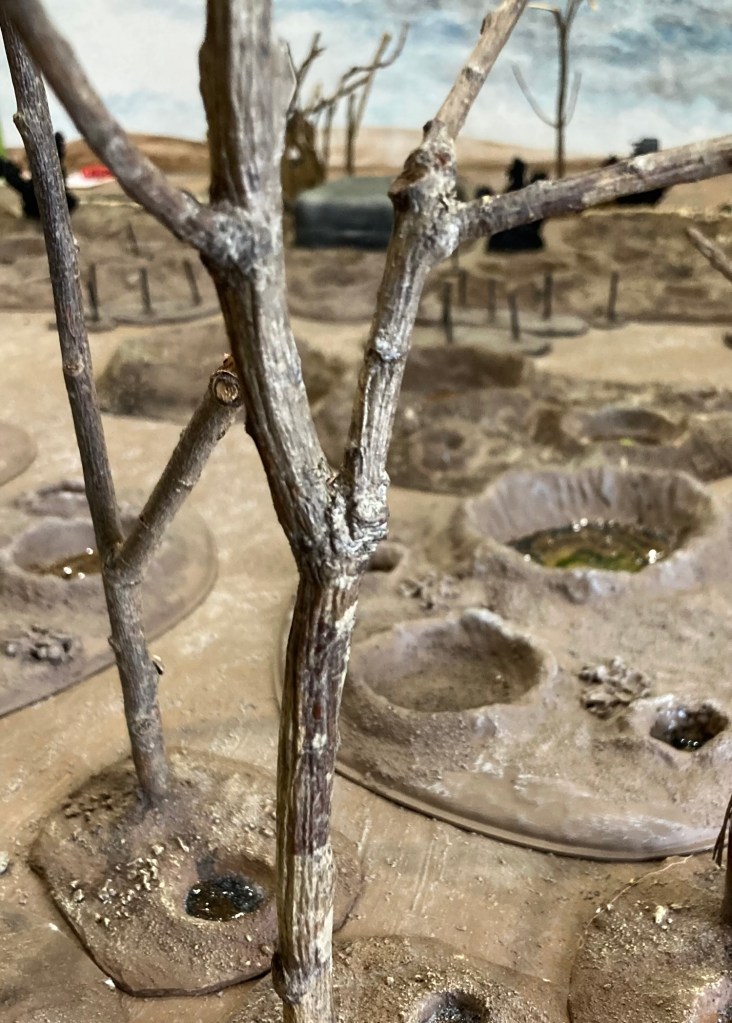
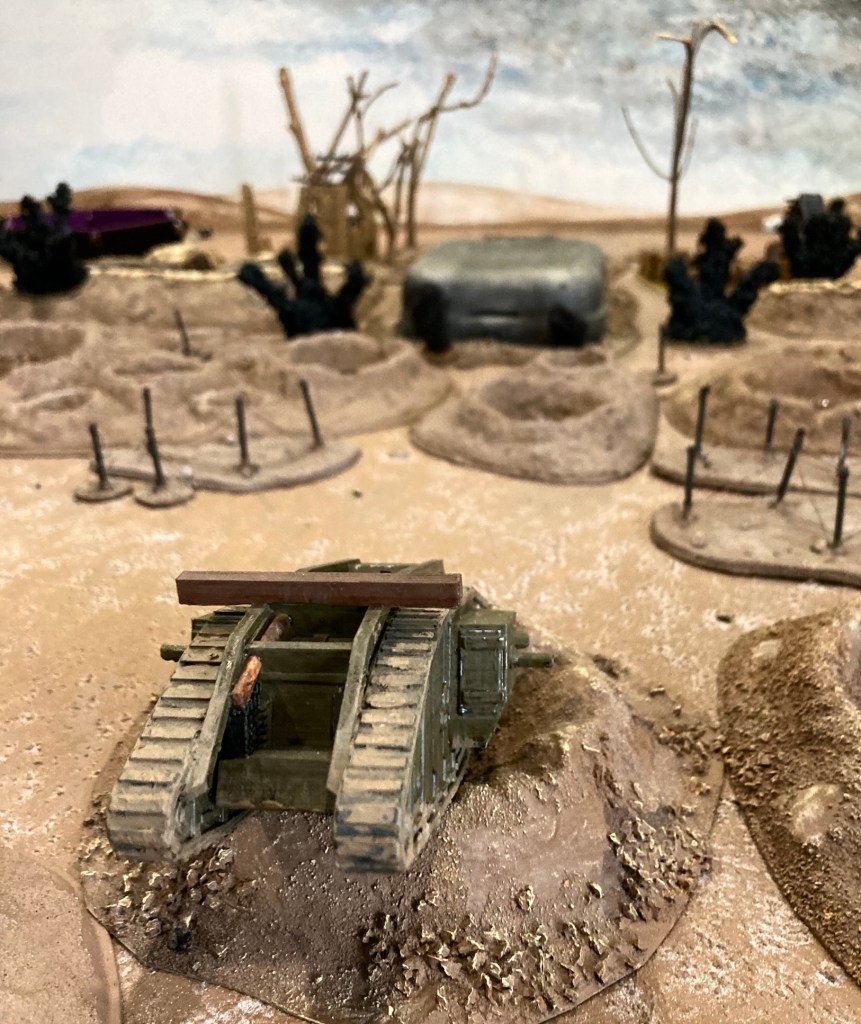
Fray Bentos sits ditched in a shell hole: 3d printed Mk IV male tank (unknown designer), craters by Kallistra, rest of terrain scratch built by myself and Scrivs.
Running into Andy S at the Hammerhead show in March, the discussion ran to this week’s gaming. Having just played Dave Stone’s Zero Hour on the Gripping Beast stand, how about some WW1? I said.
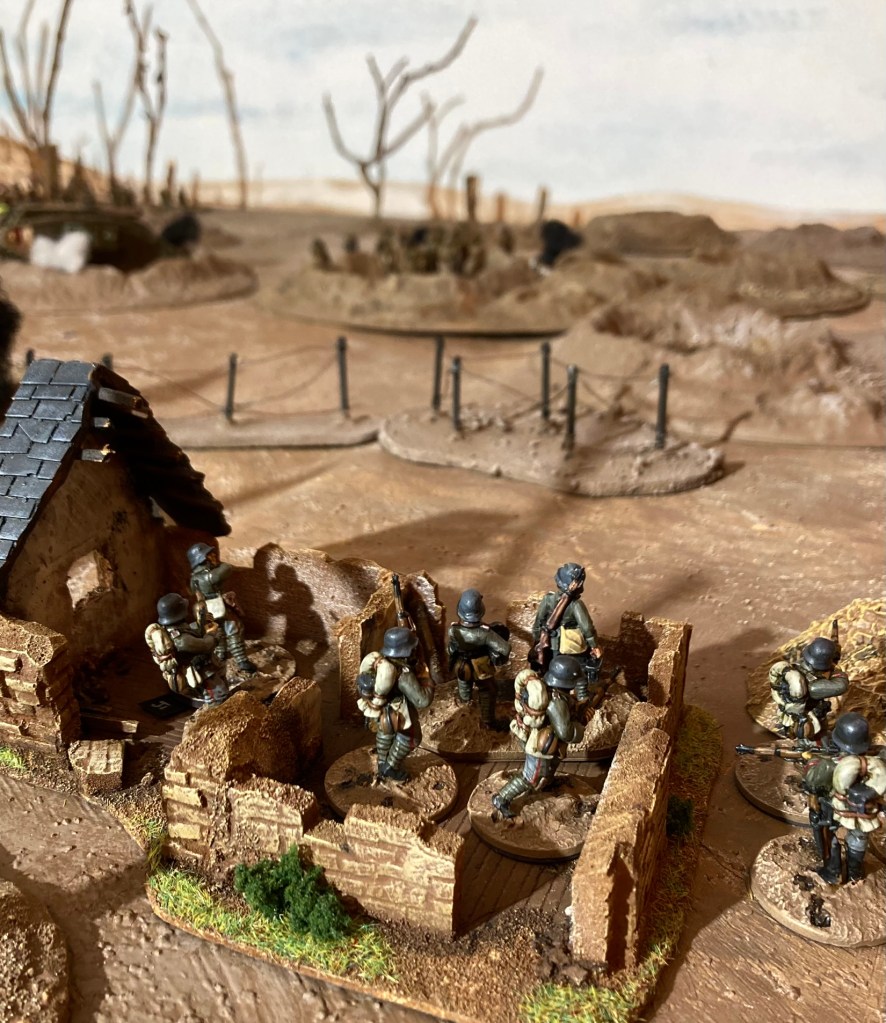
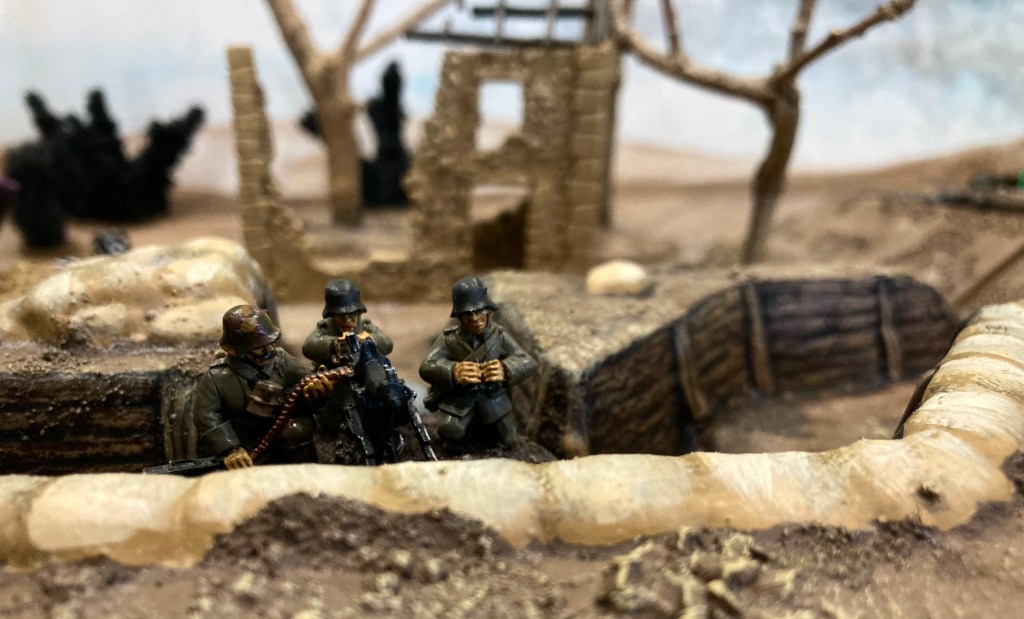
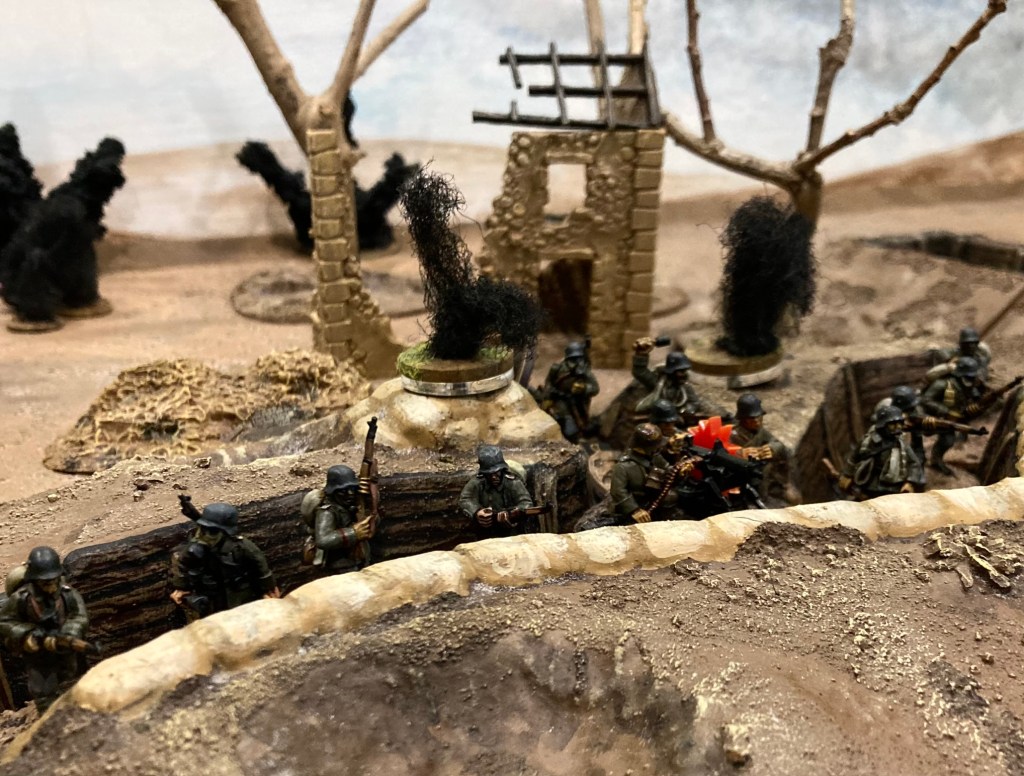
Germans appear at the ruined farm: 28mm Great War Miniatures painted by me and Scrivs, cottage scratch built
After enjoying our last game of Great War Chain of Command, I’d ordered a box of Amera plastic scenery sections so that I could field a whole trench line rather than odd dugouts. Unfortunately I hadn’t had time to paint them yet, so I needed a scenario without trenches. Then I remembered the story of Fray Bentos.
In August 1917, a British male Mk IV tank of ‘F’ Battalion got bogged down. F.41 -named ‘Fray Bentos’ after the famous pies – ran into trouble while attacking German strongpoints near Ypres. The crew, led by their Battalion Section Commander Captain Richardson, kept the tank firing and fought off several German attacks before abandoning the vehicle two days later.
You can read a fuller account of the Fray Bentos story on the Tank Museum’s page, and it also merits as a full chapter in Cameos of the Western Front: Salient Points Two by Tony Spagnoly and Ted Smith (1998, Pen & Sword Books). There is also a small private museum at Pond Farm which I was able to visit in 2018.
I knocked up a quick scenario for Chain of Command with pre-set jump off points to save time (just as well as many of us arrived late at the pub where we game and then had a long wait for food). Both Germans and British had a standard 1917 platoon each (with stats taken from the ‘CoCing up the Mud and Blood’ article from the Lard Winter Special 2014).
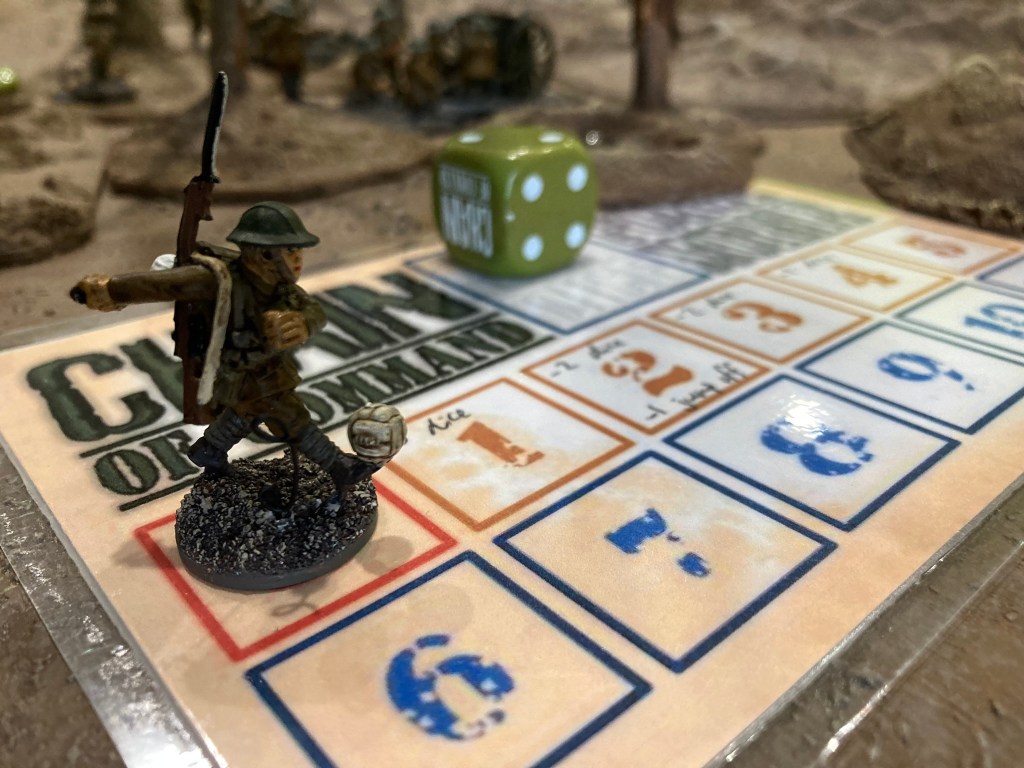
Fray Bentos was deployed stuck in a crater in the centre of the table, permanently immobilised for purposes of the game, but able to carry on shooting. I also gave the tank a Senior Leader to represent Capt Richardson and – somewhat impetuously- a red dice to reflect his leadership during the crisis of August 22-24 1917. (A red dice counts as an extra Command Dice in Chain of Command, but only for activation purposes. Scores of 5 and 6 are ignored).
The Germans had some anti-tank capability with an additional bomber section. Both bomber sections had bundles of stick grenades – but would have to get close to use them. I toyed with the idea of giving the Germans a tripod-mounted MMG as well, but decided against it, as I wanted the tank to come under attack at close quarters, as originally happened.
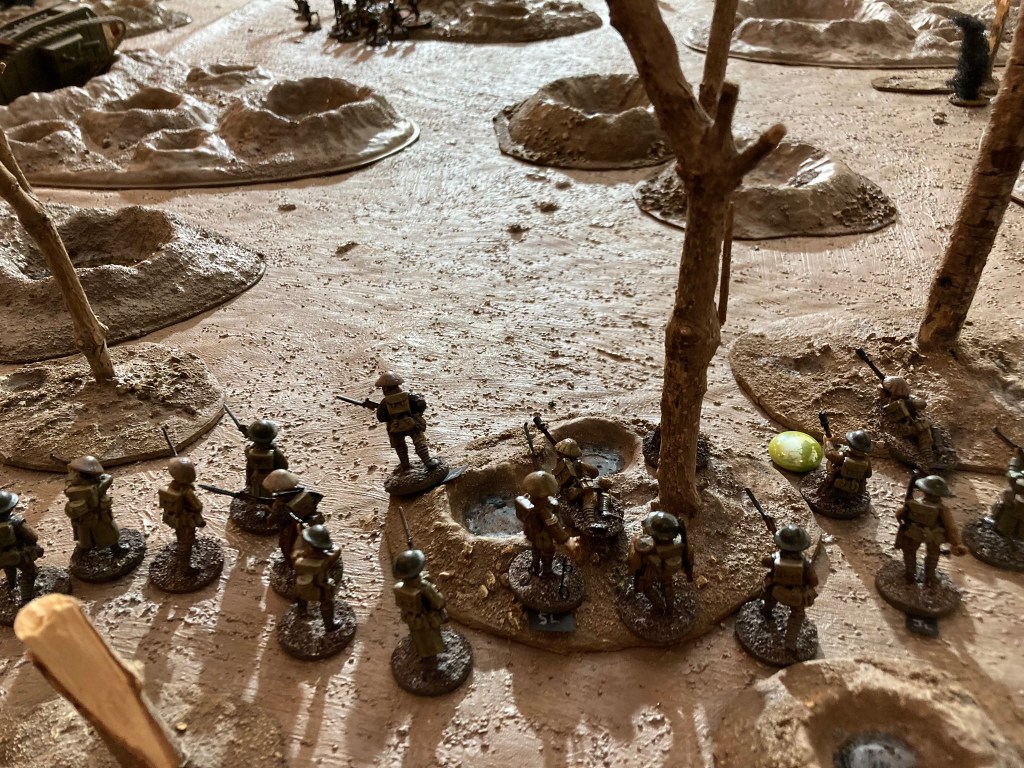
Commanding the Germans, Andy S went for the aggressive approach and sent both bomber teams creeping across the broken ground towards the tank. Unfortunately, the Fray Bentos crew was on high alert and opened fire with 6-pounders and Lewis guns.
This was then added to by the British rifle grenade section which popped up in a wood off to the British right. While under cover, they were able to bombard the German bombers out front.
Damage was light at first, but with the 6-pounders and rifle grenades reducing cover by one level, the German bombers started getting the worst of it. Increasing shock meant that the sections were struggling to crawl closer to the tank.
Andy decided to deal with this by deploying a rifle team opposite the British rifle grenadiers, which then approached as a distraction tactic. Unfortunately they fell foul of some very accurate British fire and were quickly dispatched.
If you don’t play CoC, this probably looks like a brilliant roll! Sadly, when rolling for hit effects, high = bad; in this case, the entire section was wiped out.German force morale drops with the loss of a section
Both Brits and Germans now engaged in a firefight with their LMG sections over on the British left flank. However, the real action was still happening in the middle. The Germans finally deployed their Leutnant who attempted to remove enough shock to crawl towards the tank.
The Leutnant arrives to attempt to remove shock and unpin the unit: 28mm Great War Miniatures painted by Scrivs, David H and myself.
Unfortunately, the continued British fire caused further casualties and wounded a junior leader, causing a further drop in Force Morale.
With the end fast approaching, a handful of German bombers rushed the tank and let loose a couple of volleys of stick grenades.
With some deft rolling, Fray Bentos sustained no damage and finished off the attackers with a burst of Lewis fire. German morale was reduced to 0 and the game was over!
In hindsight, my scenario made it far too easy for the tank to keep on blasting away at the Germans, which made it an uphill struggle for Andy as a player. While I think he could have got more out of his CoC dice, if I’m running this one again, I will certainly try to balance things up a bit.
I’d remove the red dice from the Brits and push their jump-off points much further back to make it slightly harder for them to support the tank. The Germans could possibly benefit from another bomber section too.
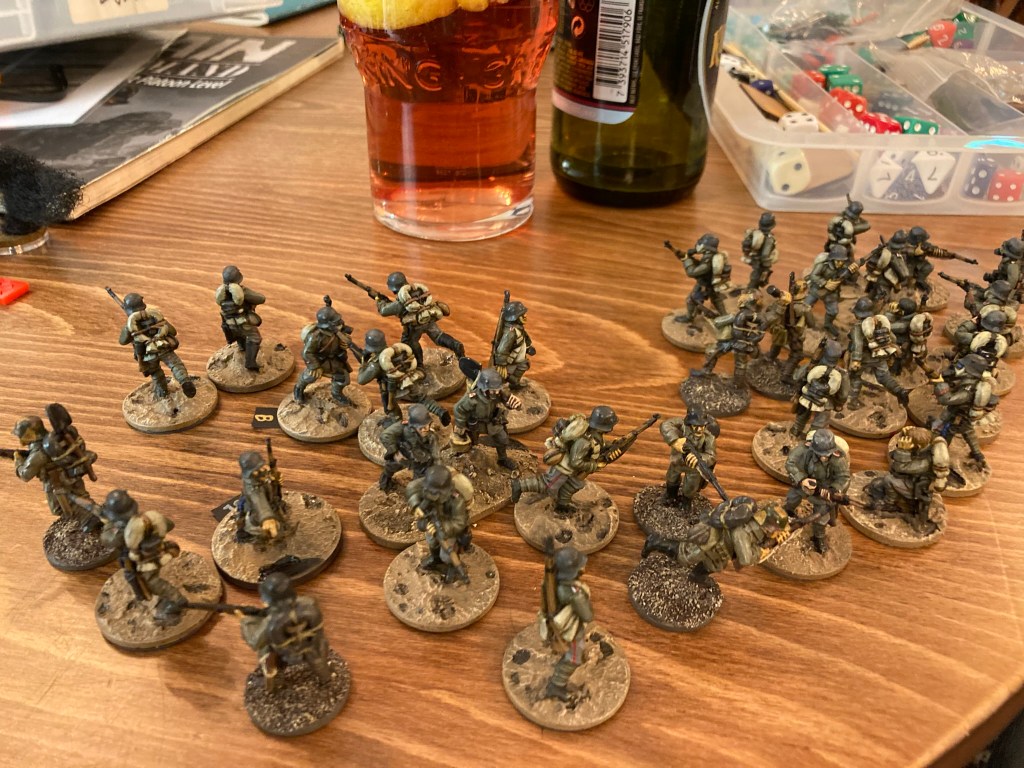
Yes, this pic is all the German casualties from the game!
In between getting distracted by World War One and 6mm Trojans, I’ve been pushing on with completing some more units and heroes for the 28mm Trojan War project. Having finished off my army of Lucid Eye Amazons last summer, the goal is to get a small force of Achaeans to go up against them.
Foundry Myceneans (left, Man U kit) vs Lucid Eye Amazons (right, City kit)
I’ve been fortunate in acquiring several lots of secondhand minis for the project so have a good stock of metal, mostly Foundry but including some Casting Room, Newline, Lucid Eye, Old Glory, Eureka and Redoubt as well! So I’ll be ending up with quite a mixed force, which suits me, as I like variety.
I finished off 24 Minoan style spearmen at the end of last year who I’m broadly envisaging as Greeks.
The Greek spearmen (Foundry, Newline armed with Northstar wire spears) in front of a Jon Hodgson backdrop.
They’ve been colour-coded to an extent with red tunics and plumes and I’m rather pleased with the cow-hide shields, which I’m finding incredibly therapeutic to paint!
Two Tone: the full Myrmidon line-up with Achilles and Patroclus to the fore.A Casting Room swordsman heads up a line of Myrmidons
The latest batch has been 24 warriors that I’m planning to use as Achilles’ Myrmidons; I’ve gone with grey and black tunics to suggest an ‘ant man’ theme with a nod to the Troy movie.
Shields have a strong black/white cow-hide design to fit in with this.
The figures are less Minoan than the spearmen and more ‘heroic’, with a good smattering of armoured and sword-armed warriors to suggest their success in battle.
Myrmidons (right) taking on King Memnon of Ethiopia and his warriors
For Achilles, I’ve gone for the named Foundry miniature – I’m not convinced about him yet and may transfer him to a more heroic base in the future!
Achilles (Foundry) vs Amazons (Lucid Eye). I snuck the 1/300 scale Leven Miniatures city walls into the background and I think they work OK!
Patroclus is another Foundry model.
Patroclus (mini by Foundry)
To screen the Myrmidons, I’ve painted up a couple of units of Foundry archers in the same colour scheme.
Ajax the Great was in one of the batches of secondhand Foundry minis that I acquired and he is a great sculpt – top work by the Perrys on that tower shield!
Heroes: Foundry – left and centre (Ajax the Great); right: ‘Brave Ulisse’ by Lucid Eye
Following January’s game, I had the urge to scratch the WW1 itch again and fixed up a game with fellow Great War enthusiast Tom WD. This time, I decided to run something very loosely based on the Ypres battlefield we had visited in November 2018, where the Mk IV tank ‘Fray Bentos’ broke down while attacking a series of farms that had been fortified by the Germans.
In the last Chain of Command game I ran, I hadn’t allowed enough support for the British (please note I am improvising my own scenarios here rather than using the templates, so all design errors are my own). This time around, I wanted to see whether a single British platoon would have a chance of taking a dug-in German position with a decent amount of support.
Final orders are delivered to Capt J. Hunt’s Mark IV
Using the supplement ‘CoCing Up Through The Mud And Blood’ from the 2014 Lard Christmas Special, I gave the British a 1917 platoon with the following additional support: Mk IV Tank (Male), 13 pdr gun with 5 crew and junior leader, Vickers MMG, pre-game bombardment (the standard one from CoC which inhibits deployment of enemy units during the first turn).
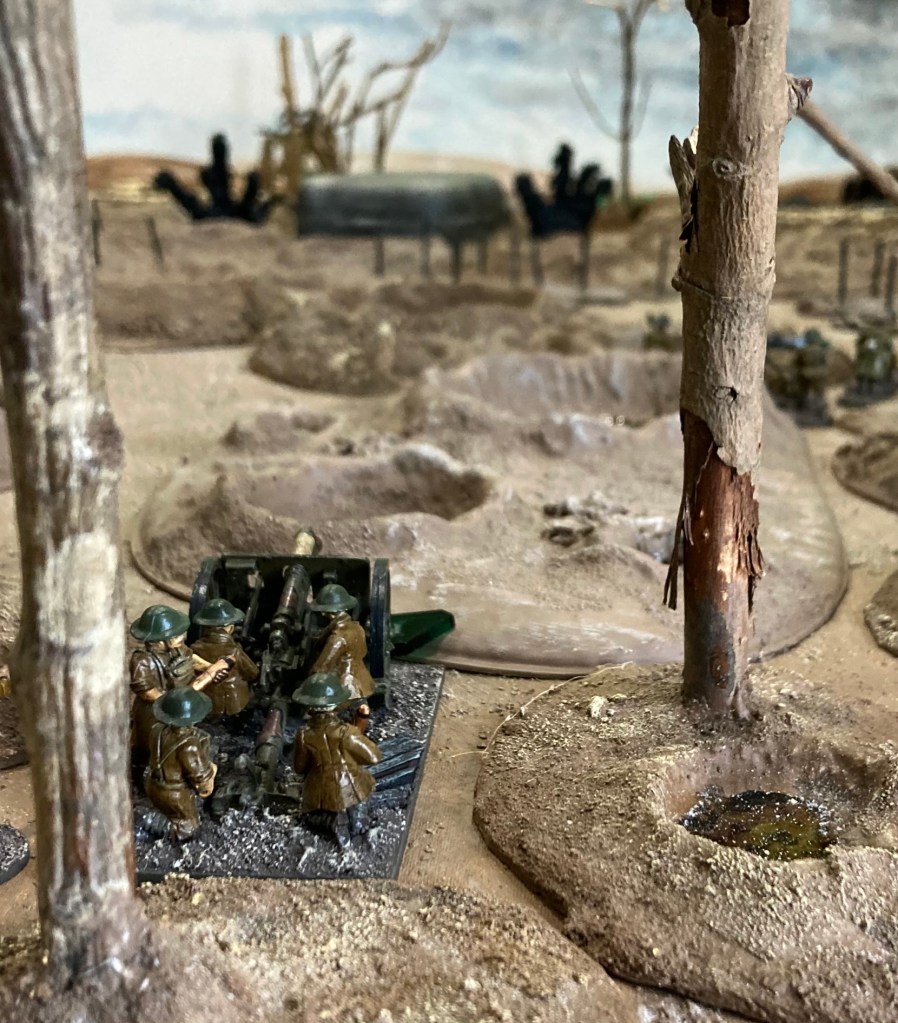
The field gun zeroes in on the fortified farm
The Germans had a standard platoon with the addition of a Maxim MMG with 5 crew.
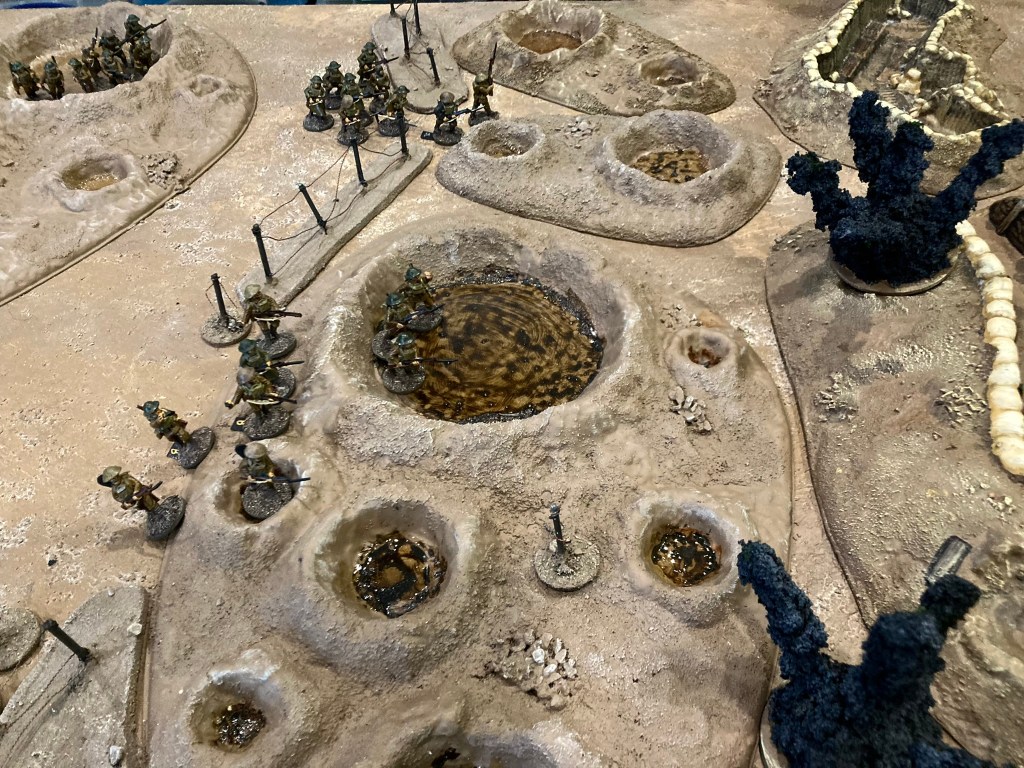
Terrain-wise, we were playing up the length of a 6 x 4′ table. The British deployment area was liberally scattered with craters and trees which we counted as Soft Cover, Broken Ground (and Soft Ground for the purposes of the tank bogging down). The area in front of the German-held farm was partially blocked with barbed wire and designated as ‘Abysmal Terrain’ (using a set of modifications to CoC from Storm of Steel‘s Alex Sotheran; the net effect of Abysmal Terrain is that a dice roll is made when units move into it, giving random hindrances to movement. As it happened, the British barely made it into this area of the table, so it was a moot point).
German-held farm on the right, British will be approaching from the left. Caulk gaming mat made by my chum Scrivs, vac-formed plastic terrain by Kallistra and Amera Plastics. Explosions and wire sections scratch built by Tom.
I decided to pre-set jump-off points given the nature of the scenario; Germans and British both had four each. Following this, we rolled for Force Morale, getting an average 9 for the Brits and below-average 8 for the Germans.
Englanders 9, Huns 8
I took the first phase as the attacking player. Traditionally, my favourite tactic is ‘charge’, but recently I’ve been reading Mark Bretherton’s blog and Len Tracey’s ‘Fire and Manoeuvre’ article in the 2023 Lard Magazine which have both encouraged me to take a less hasty approach! I had several good command dice rolls right at the start and decided to make best use of these to get my support units onto the table. With the tank’s slow movement – and having to deploy on the rear table edge – I brought this on first, closely followed by the field gun (on Overwatch) and Vickers MMG.
Tom rolled multiple 5s for the Germans and was content to sit back racking up the CoC points while I got on with it. However, I’d decided that I needed to push forwards while the German deployment was restricted by the barrage.
Next up, my ‘fire’ units – Lewis gun and rifle grenade sections – came out in cover to the left and right of the German position.
With no action from the Germans, I was possibly over-hasty in deploying my bombers and finally my rifle section and Sergeant well forwards, albeit on tactical.
Then it all went a bit Pete Tong!
And…stuck
Firstly, my tank rolled a double 6 and bogged down in a shell hole, needing to wait until the end of the turn to attempt to free itself. This also neatly blocked the line of fire for the field gun in the meantime. With all my units deployed, Tom decided to spend his first CoC dice to end the turn, meaning that my barrage ended just as the first Germans started to appear. While I was now free to try to get my tank out of the shell hole, it also meant that all the tactical and overwatch markers I had placed on my units were lost.
This, of course, was followed by the Germans rolling a double phase and getting their machine guns into action….
Despite a few good saving throws from the Brits, casualties and shock began to mount for the forward assault units; the bombers in particular took an absolute hiding, had their junior leader killed, and then broke and fled, causing the first hole in the Force Morale. I hastily used my only CoC dice to avoid a morale test for the junior leader getting wounded (rather than the more serious setbacks that followed) and was left on the back foot.
The bombers take a pasting and their corporal is felled by machine gun fire
Fortunately, Capt J. Hunt (in command of the Mark IV) was able to get his driver on the case and revved his way out of the shell hole. The tank’s 6-pounder then caused some consternation amongst the Germans, followed up by fire from the field gun and Vickers at the back of the field being commanded by Lt M. Walker.
Full speed ahead!
Unfortunately for me, the Brits were on the back foot having lost enough Force Morale to lose a command dice. My troops were stretched too thin and a few duff command dice rolls meant that the Germans were soon having a field day. The rifle section found itself trapped just in front of the German trenches, and both attached leaders were wounded. In a triumph of awful dice rolling, Sgt J. Clark was hit twice in succession, then rolling the maximum -2 Force Morale for ‘senior leader wounded’ each time. We were now down to 1 Force Morale (compared to the Germans’ 7) and the end was inevitable. Despite bold attempts to shell and bomb the German MMG, which was pinned and came close to breaking, the continual fire on the rifle team eventually broke it and ended the game.
Lots of fun, albeit a game of two halves, and a good couple of hours with decent banter with Tom in between. I felt that I probably should have held my assault units back slightly longer than I did, but overall this scenario might have been better suited to Big CoC with two attacking platoons rather than one. Certainly, the fact that the support options did not come with any additional command dice meant that it was hard to activate them once the front units were engaged, but that’s how CoC is – it forces you to manage your resources very carefully.
Time to go and root out the unpainted Great War Miniatures and plan another game!
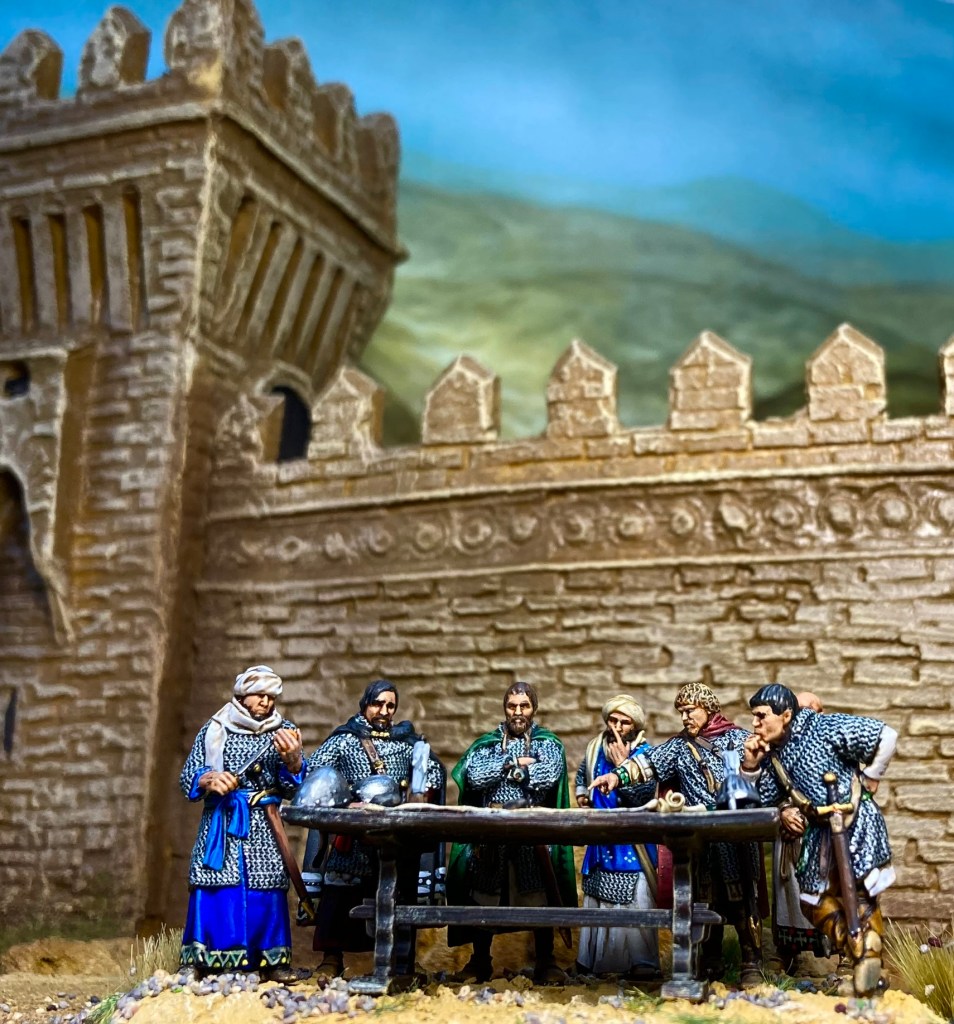
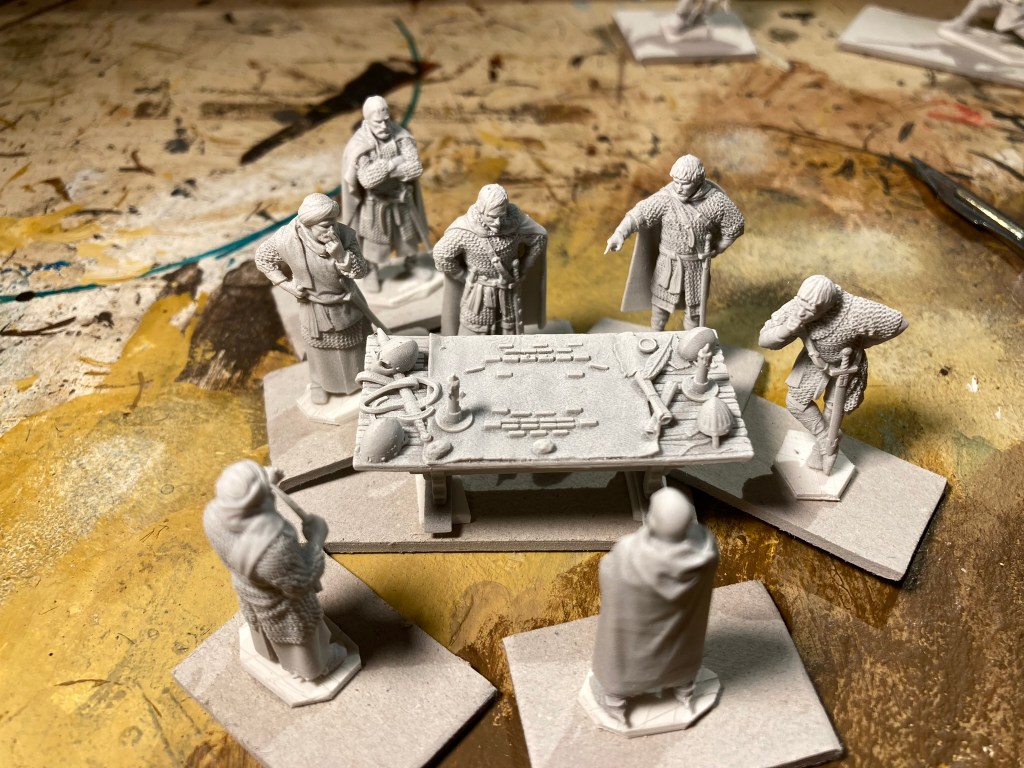
‘The Duel’ – vignette by Reconquer Designs. Gateway converted from an old Ian Weekley models casting.El Cid’s Battle Council: miniature magnificence from Reconquer Designs, printed by Iron Gate Scenery. Background by Jon Hodgson Backdrops.
‘That looks like The Last Supper,’ remarked my wife as she passed the painting table, looking at ‘El Cid’s Battle Council’ from Reconquer Designs. Well, I don’t actually think that she’s too far wrong given the level of artistry in the sculpting!
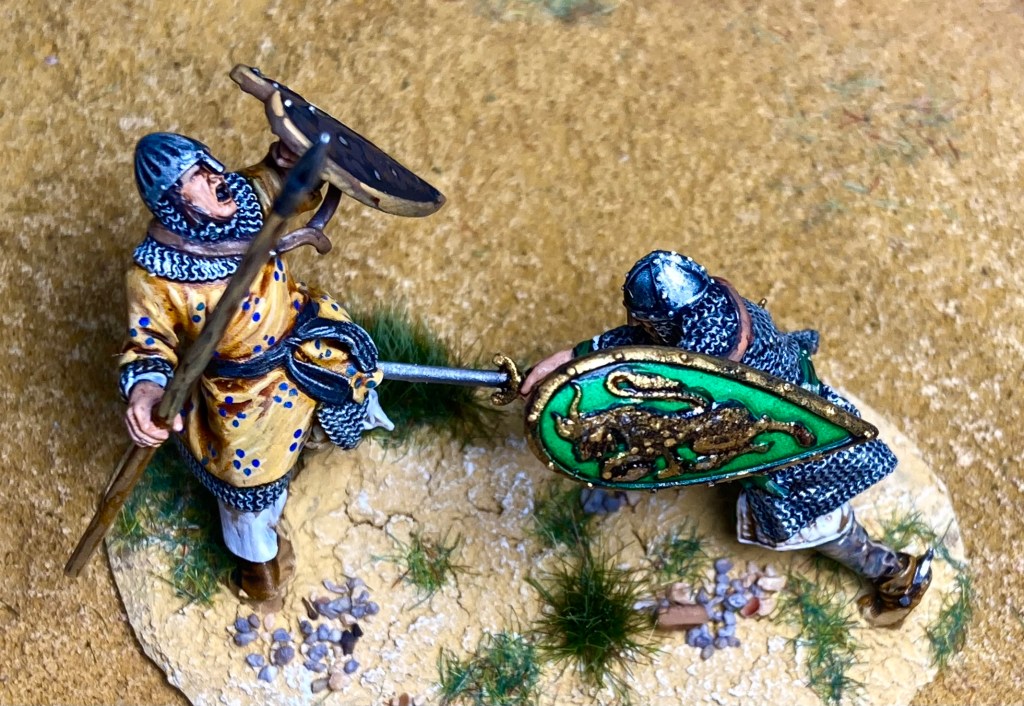
‘The Duel’ from Reconquer Designs, printed by Iron Gate Scenery
I regret that I have only painted a few pieces by Reconquer Designs – having collected a substantial El Cid force in metal back in the 2000s, I don’t really need any of these 3D printed wonders – but these are just too good. It’s easy to tout STLs and 3D printed miniatures as the next big thing, though I think it’s fair to say that the technology is still being learned and that great historical sculpts are not yet widely available; however, Reconquer Designs sculptor Marcos is absolutely nailing it for medieval Spain.
Marcos is a fan of realistically-proportioned models, so Reconquer Designs minis follow this aesthetic. You can buy the STLs to print yourself although I purchased ready-printed models from Iron Gate Scenery in the UK; these were very fine prints with excellent detail and nearly all the supports removed (there were a couple of tiny supports I needed to trim away, but preparation was incredibly quick).
Care has to be taken with the finer parts – El Cid’s sword (from The Duel vignette), for example, is quite vulnerable to damage. His opponent was provided with a resin spear but I quickly replaced it with a metal one from Northstar – a very easy process, as the hand is printed open and required no drilling out.
Primed and laid out with possible positions.
Each figure was then superglued onto a small piece of plasticard (the models come without bases) and undercoated with matt white primer.
Base layers going on. Characters have their names and colour schemes scrawled on their bases in imitation of having a plan.
I shan’t bore you with the details of painting, but everything was done with a mix of GW Contrast Paints, traditional acrylics and inks. The detail on the minis is quite extraordinary and with realistic gaps cut away that would be filled in on a traditional metal model (for example, straps hang away from the body and stirrups have gaps above the foot), they reward some careful painting.
I’m no Kev Dallimore but spent a little bit of extra time adding details where I could, though I still draw the line at painting eyes!
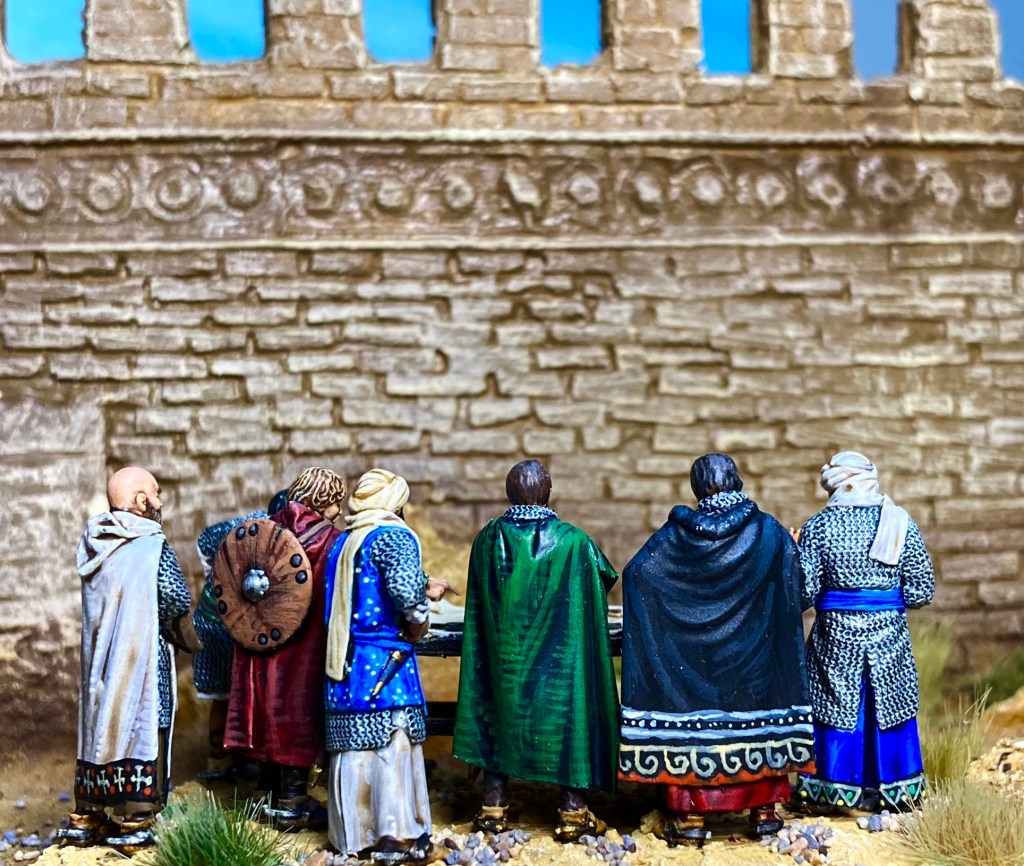
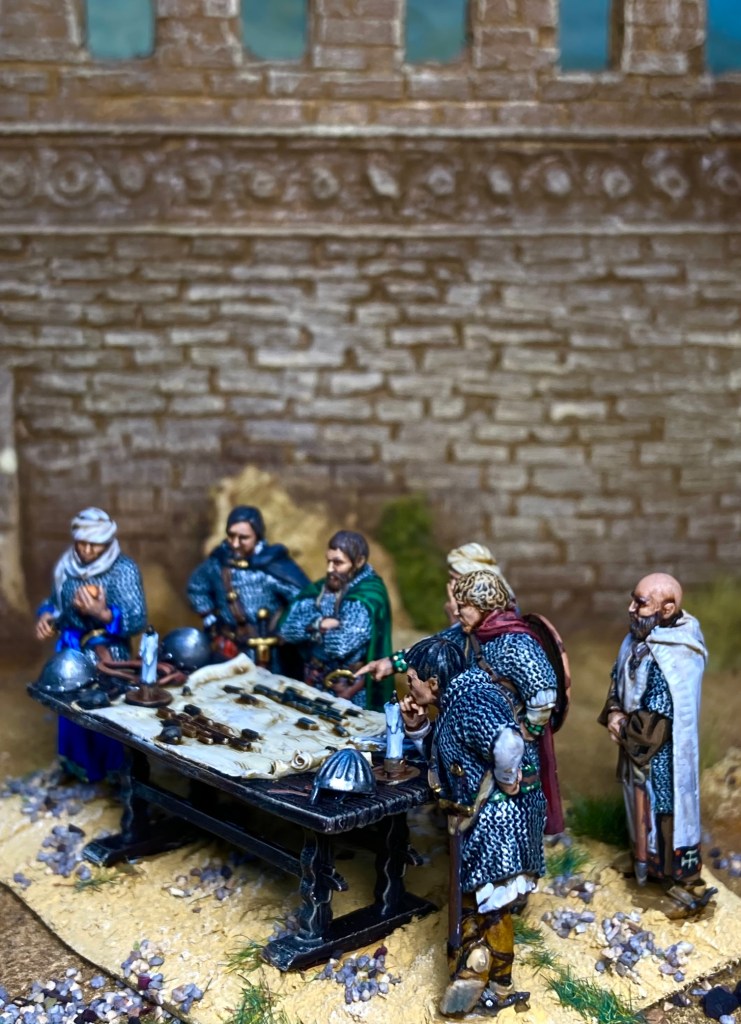
Wonky close up of El Cid (right), King Pedro of Aragon (centre) and an Andalusian commander peeling an orange. Such a brilliant model!I had fun painting some patterns on the clothing although you can’t see most of it from the front!
Once all the painting was complete and models varnished, I assembled both vignettes on irregular MDF bases with chamferred edges.
Aerial view. Reminds me of many wargames down the club!
I decided to arrange all the figures in El Cid’s Battle Council to all face in one direction – slightly contrived but great for photo opportunities!
I can’t recommend these models highly enough and will probably be back for more in the future. The range continues to expand with some very interesting models for the 12th and 13th centuries, as well as plenty of characterful vignettes.
Photo set up – daylight lamp, castle and a Jon Hodgson A3 backdrop
Rapier Miniatures chariot with Rapier and Baccus 6mm in the background
It’s a little-known fact that, when I got back into historical wargaming 30 years ago, I kicked off with some armies in 6mm.
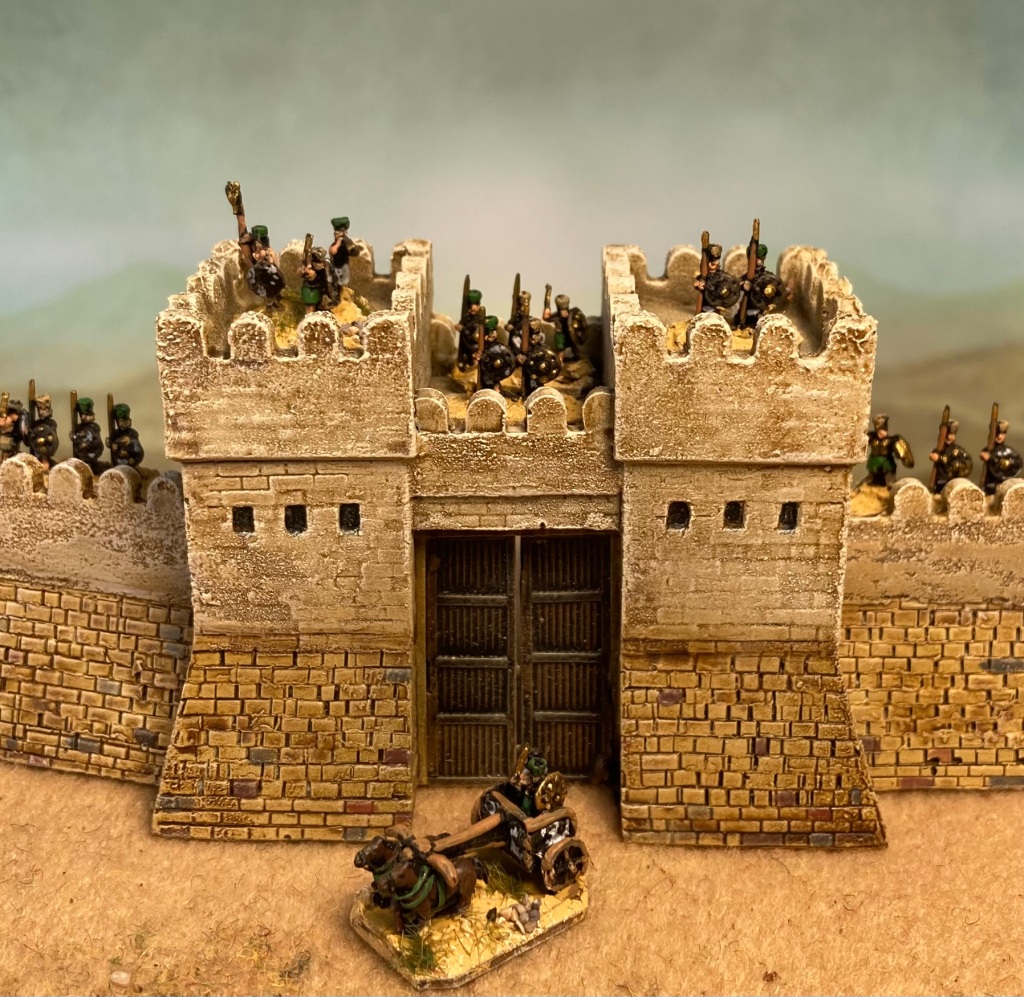
6mm Sea Peoples by Baccus and Rapier Miniatures in front of the Leven Miniatures walls
Despite always having loved 28s, 6mm allowed me to create something that looked like an army – on a budget. Irregular Miniatures and Heroics & Ros provided me with a pretty spectacular force of Romans and Ancient Britons which took to the field for many a game using the DBM rules.
After recent tinkering with 15mm Saxons and 12mm Great War, I’d been considering a smaller scale diversion for my ongoing Trojan Wars project. 10mm was a distinct possibility, but the biggest selling point for 6mm was the incredible resin walls available from Leven Miniatures. These would remove me from the insanity of trying to make a wall section in 28mm at a fraction of the cost and hassle!
Walls by Leven MiniaturesMelee! Heroes are on 15 x 20 mm bases, units on 40 x 80mm
With some of these ordered, I started laying in samples of 6mm minis. I went back to old favourites Irregular Miniatures for some Minoan spearmen. 6mm guru Daniel Hodgson kindly advised me to have a look at Baccus, who don’t have a specific Trojan Wars range but have several ‘Biblical’ codes that could be pressed into service, so I ordered up some sample units of Hittites and Sea Peoples. Last but not least was the 6mm range from Rapier Miniatures which includes specific Trojan Wars models including chariots and a Trojan Horse!
Battle scene with Irregular Minis (bottom left), Baccus Minis (bottom right) and Rapier Minis beyond.
Here’s the Irregular Miniatures Minoan spear block. I like the fact that these are cast in strips with multiple variants, making them ideal for massed units.
Irregular Miniatures spearmen next to a Rapier Miniatures chariot
The downside was that the bases had a lot of flash so required quite a bit of cleaning up to get them to sit flat. The minis are ‘true’ 6mm and therefore a bit smaller than Baccus and Rapier, but none the worse for that.
Rapier Miniatures archers
Rapier Miniatures are a ‘big’ 6mm (more like 8mm) and full of character. The models are cast singly, which is good for heroes and skirmisher bases, but less so for ranking up big units, for which I prefer figures cast in strips.
Chariots: 6mm Rapier Miniatures, slightly modified. These are based singly to be used as individual heroes in my games.
The moment I opened the box from Baccus, I could see why they came so highly recommended. Very neatly cast minis in strips with minimal flash meant that I was able to get them undercoated and ready to paint in short order.
Although the minis were cast in strips of four, I cut a few of these up and added some Rapier Minis for variety. Some minis also made it into separate hero bases or thin strips of spearmen to stand on the walls of Troy.
Baccus Hittite spearmen were subbed as Mycenean warriors with a few extras added from Rapier Miniatures.
Mostly Baccus Hittites with some heroes and chariot added from Rapier Minis
I’ll definitely be getting some more units added to this project in the very near future and it would be good to source some beached ships for the Achaean camp. Anyone know of any good STLs (without oars)?
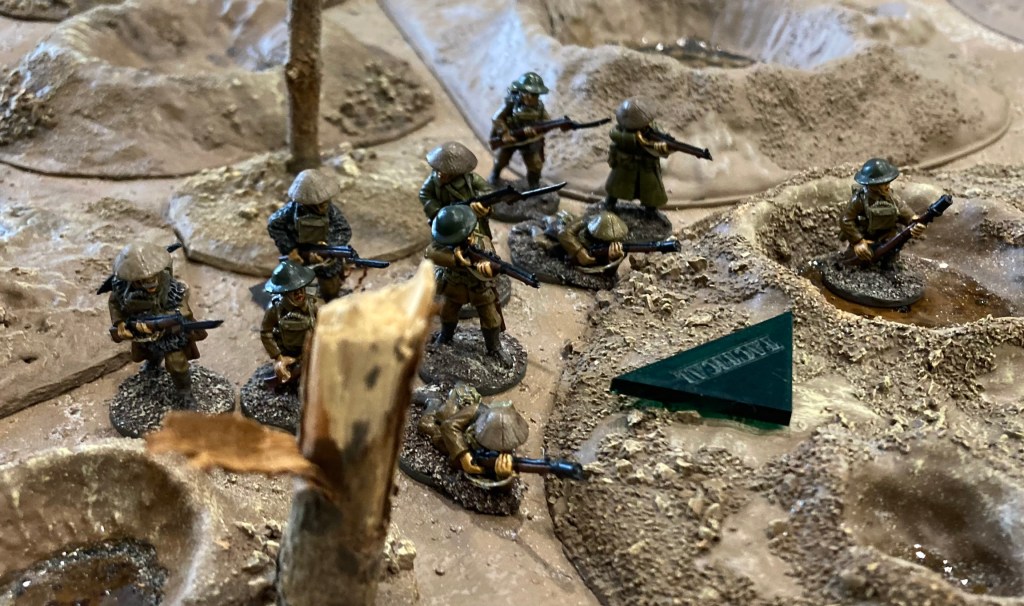
Great War Miniatures’ British on scratch-built terrain. Models painted by David H
I’ve been meaning to get back to some WW1 gaming and a couple of chance incidents in December gave me the gentle nudge I needed. First, David H very kindly sold me his 28mm British and German platoons to add to my collection; then, the Too Fat Lardies 2023 Lard Magazine was released with an excellent article about using fire and manoeuvre tactics in Chain of Command. These two things conspired to get me a game sorted for the first week back at the club.
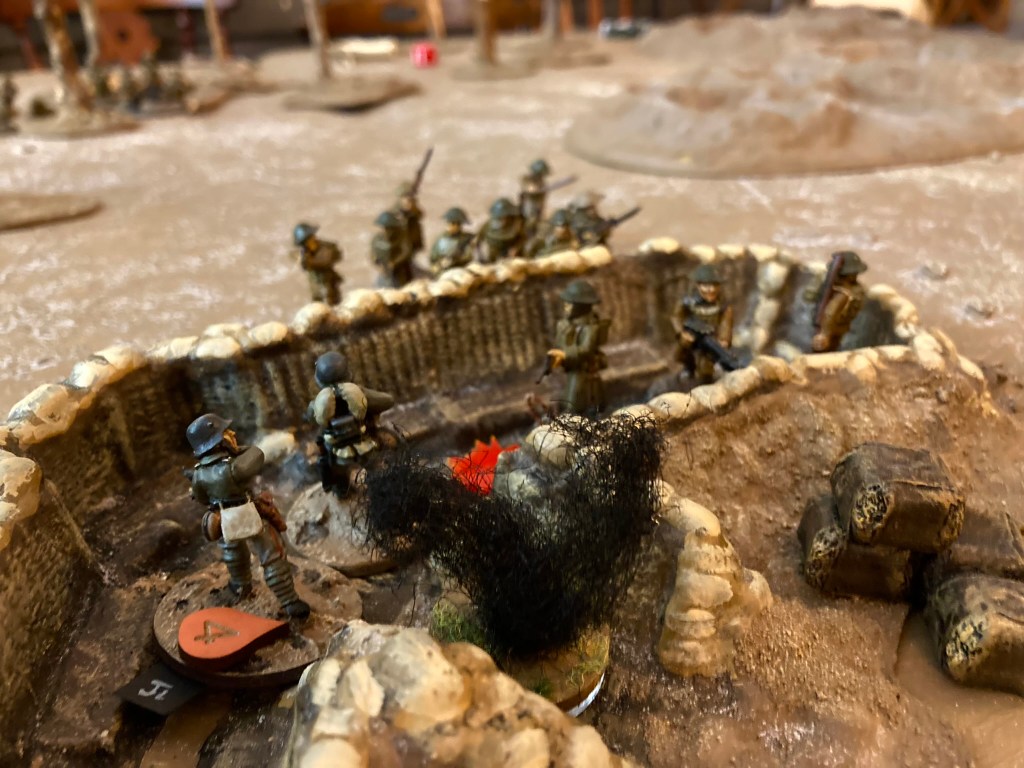
The Germans take up position in their dug out (a vac form model from Early War Miniatures). All the miniatures are 28mm Great War Minis painted by myself and Scrivs
Two Fat Lardies have a long history with WW1, having released If The Lord Spares Us (a large scale set of rules for WW1 in the Middle East) and then Through The Mud And Blood (rules for 28mm large skirmishes that provided the stepping stone for WW2 Chain of Command). However, having played a fair bit of Chain of Command in the past, I decided to go for the hybrid known as ‘CoC-ing up Through The Mud and Blood’ that appeared in the 2014 Lard Christmas Special.
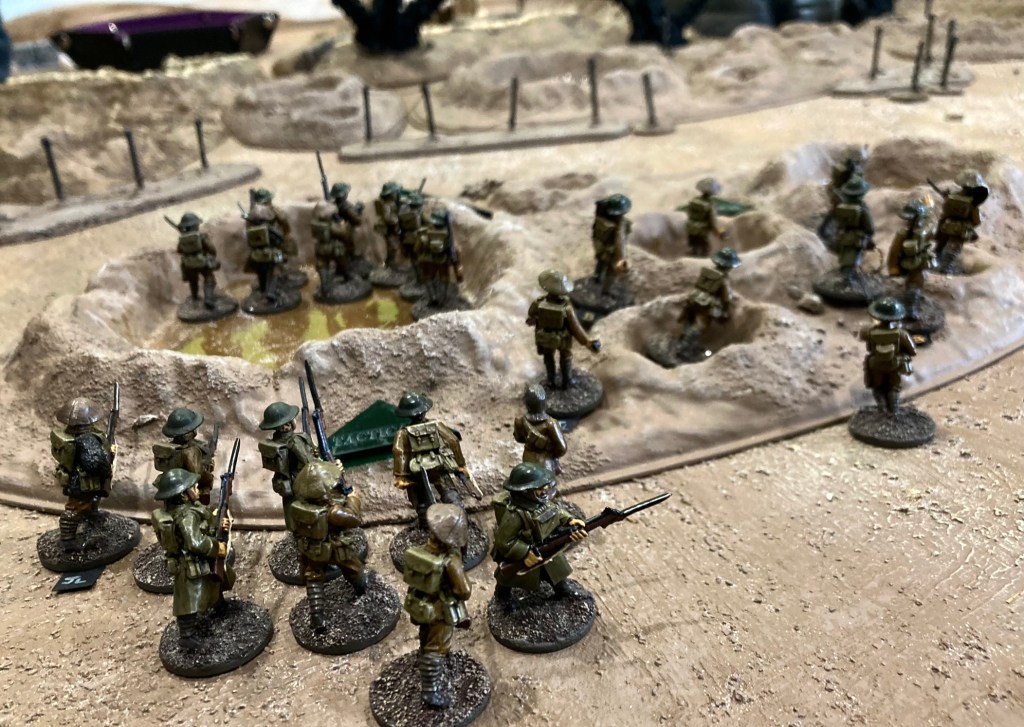
A wider view of the battlefield near the start of the game – British on the left, Germans on the right. The big craters are vac form pieces by Kallistra.
This article by Rich Clarke provides some rules to convert CoC to work with Great War games from 1917-18, platoon lists and scenario ideas. While I know that there are further developments afoot (WW1 afficionado Alex from Storm of Steel is working away on his own ideas and was kind enough to send me a copy, although I wasn’t able to include them in our first game. Cheers Alex!)
With four of us playing (mostly for the first time in several years), I decided to dispense with the patrol phase and provide a scenario with pre-set jump-off points. A British platoon was sent out to capture and bring back a German prisoner from their positions in four dug-outs on the edge of a shattered wood.
We used the standard 1917 platoons, with the British having six points of support to help them achieve their goal (a Vickers HMG, 4 trench brooms and a pre-game bombardment to keep the Germans’ heads down). The British had three jump-off points spread around the edges of the wood, whereas the Germans had one just behind each dug-out position. Both sides rolled an 8 for Force Morale and we were off, with the Brits taking the first phase.
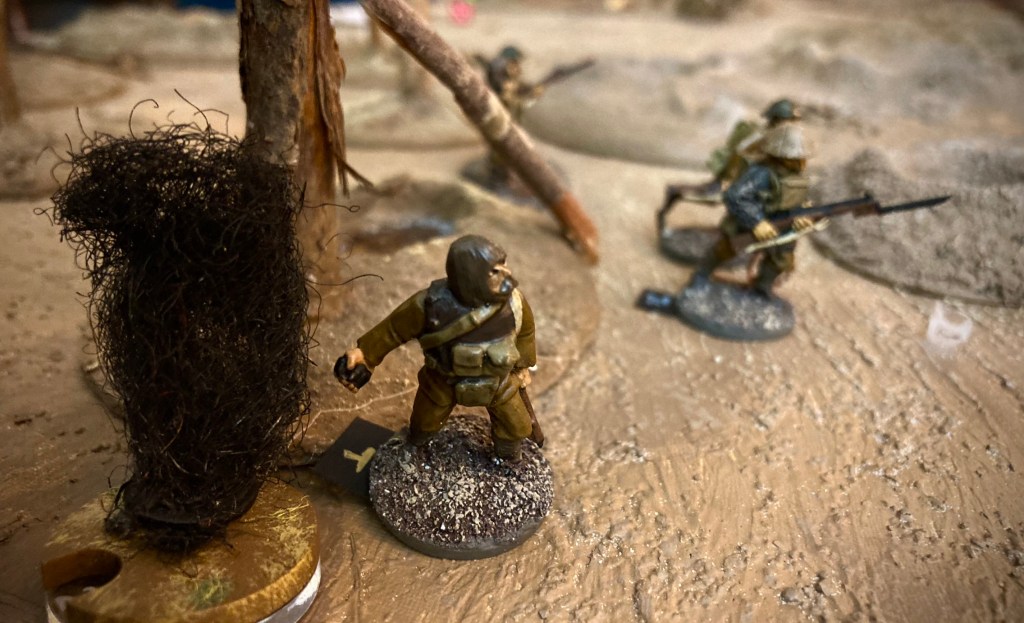
The British bomber section rushes forward into a hail of fire
Andy (playing the Brits) decided to go aggressive and quickly deployed his bombers and a rifle section right on the edge of the woods. Unfortunately for them, the pre-game barrage did little to keep the Huns’ heads down and a couple of MG-08 sections appeared right in the dug-outs.
Another bomb falls short, dammit!
The Brits crept within grenade range but found their first bombs falling short, while all the time they were being whittled by German fire. A bomb did eventually make it into the trench (I managed to roll a double 6 at exactly the wrong time, inflicting two kills on my Germans) but the Brits weren’t going to be getting much further.
Bomber section in dire straits
At this point, Andy and Nick sensibly deployed their rifle bombers back in the treeline. These chaps quickly made their presence felt and poured fire onto the Germans in the dug out.
Rifle bombers get to work
The fated bomber section was now broken, leading to a drop in British Force Morale, and it looked like there was nothing the Brits could do. However, it was all yet to happen. On came two British sections led by the platoon sergeant and lieutenant.
With the Vickers and the Lewis gun focused on suppressing the Germans in the dug out (remembering to use the excellent ‘covering fire’ rule in CoC for once), the fresh British rifle section stormed forwards and broke into the improvised fortification. Only two Germans were left – the private was swiftly despatched in the melee, while the NCO was bundled off for interrogation.
This was not the end of the tale, however, as the final German section leapt out from a nearby sandbagged position. Seeing their man being carried off, they launched themselves at the Brits with a hail of stick grenades using the ‘Handgranaten’ special rule.
Handgranaten!
With fresher troops, the Germans came out triumphant, rescuing their lightly-wounded comrade and heading back to their lines with the British lieutenant as their honoured guest.
At this point, British Force Morale also dropped to zero and the rest of the platoon pulled back to submit their report: ‘Lt Jolly boldly led a charge into the German trench, single-handedly captured a prisoner and was last seen fighting off a dozen ferocious-looking Germans with his walking cane and revolver. Reported missing. Please send replacement.’
‘For you Tommy, …’
It was great to see that none of us had forgotten how to play – even if we were all a bit rash with the tactics! In terms of my scenario design, the British needed some jump-off points a little closer to the German lines, and possibly some more support. Alternatively, it would probably be a really interesting game with two British platoons against a German one, and probably more realistic in terms of odds.
Once we’re back into it, I’ll introduce more of the rules from CoCking up the Mud and Blood and probably try out Alex’s ideas as well. There is definitely some more WW1 gaming due in 2024.
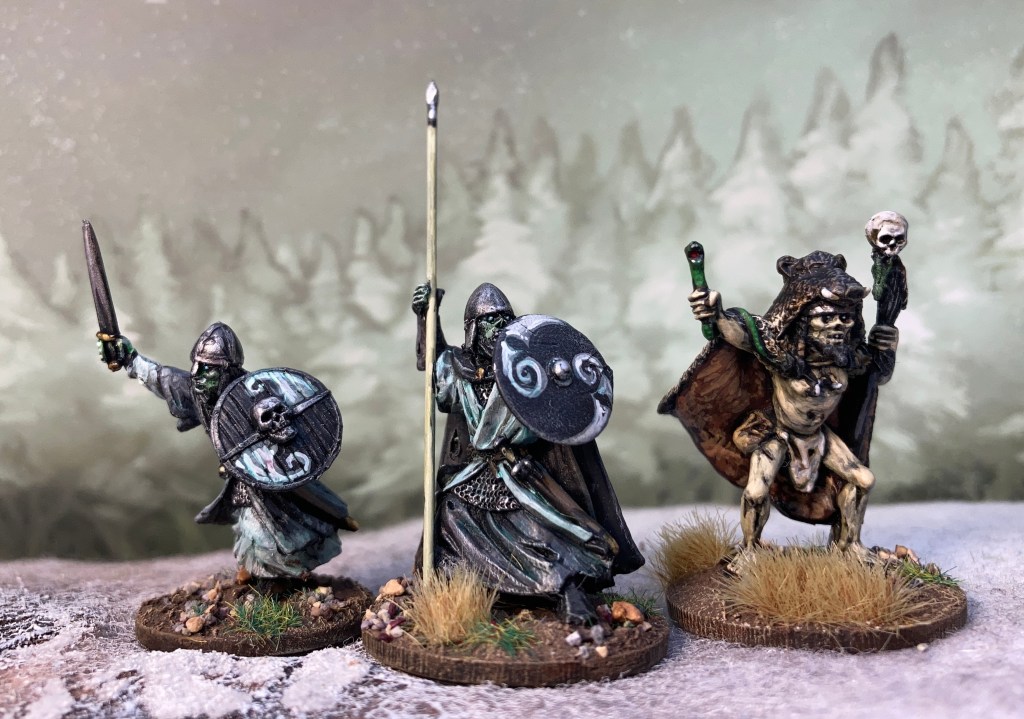
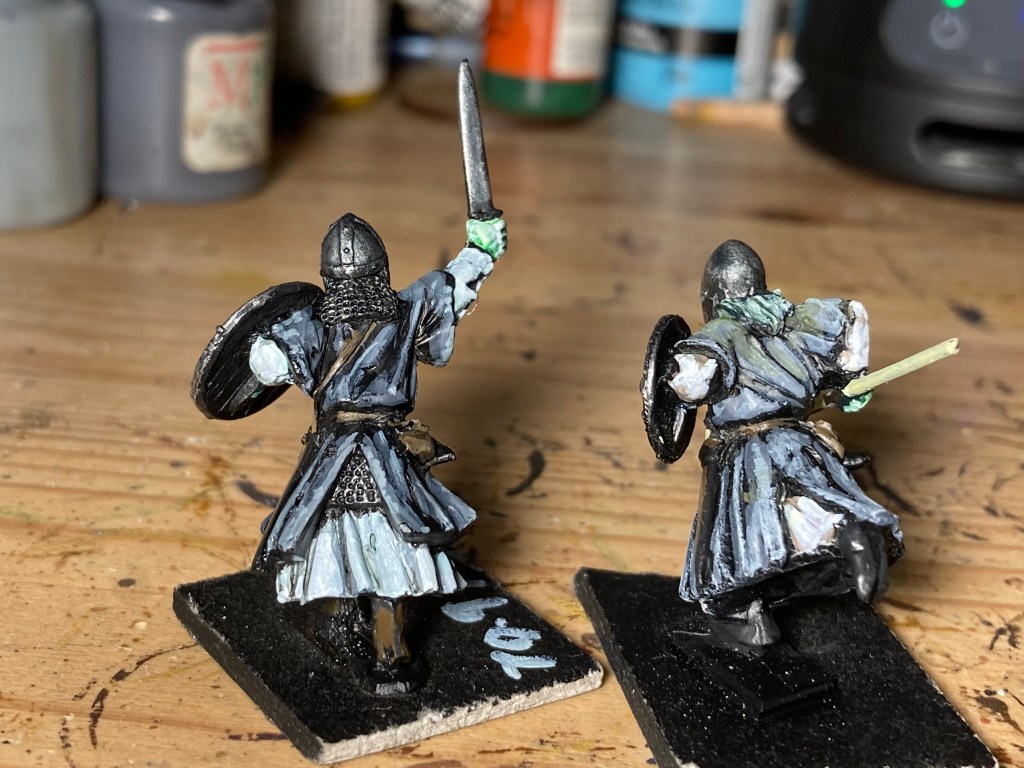
L-R: Draugr Heathguard in tattered robes, Draugr Lieutenant 2, Draugr Necromancer Warlord from Ragnarok Miniatures. Photographed in front of a Jon Hodgson Backdrop.
Seeing as it’s the festive season, it’s probably time for the pics of the Draugr from Ragnarok Miniatures. I’ve never been a massive fan of undead but the current crop of outstanding miniatures has been slowly crumbling my resolve; the rather wonderful Oathmark Revenants, alongside skeletons from Reaper, Oathmark and Wargames Atlantic have all found their way onto my painting table in recent years.
These ten minis are the Draugr Hearthguard in tattered robes, led by a Draugr Lieutenant and a Necromancer Warlord. Coincidentally, one of the sample force lists that I’ve written for Midgard Heroic Battles is an undead horde under to command of a necromancer by the name of Ulric Deathwhisperer, and I’m wondering whether this is the mini for the job.
These are chunky 28mm sculpts from Colin Patten and very compatible with most of GB’s other ranges. After painting a fair bit of plastic and resin recently, it was fun feeling the heft of a metal mini again. The castings I received were very clean and required only minimal clean up, quickly pushing their way to the front of the painting queue! Plastic bases for Saga and cast metal weapons are provided, though I used Northstar wire spears alongside the metal swords and axes.
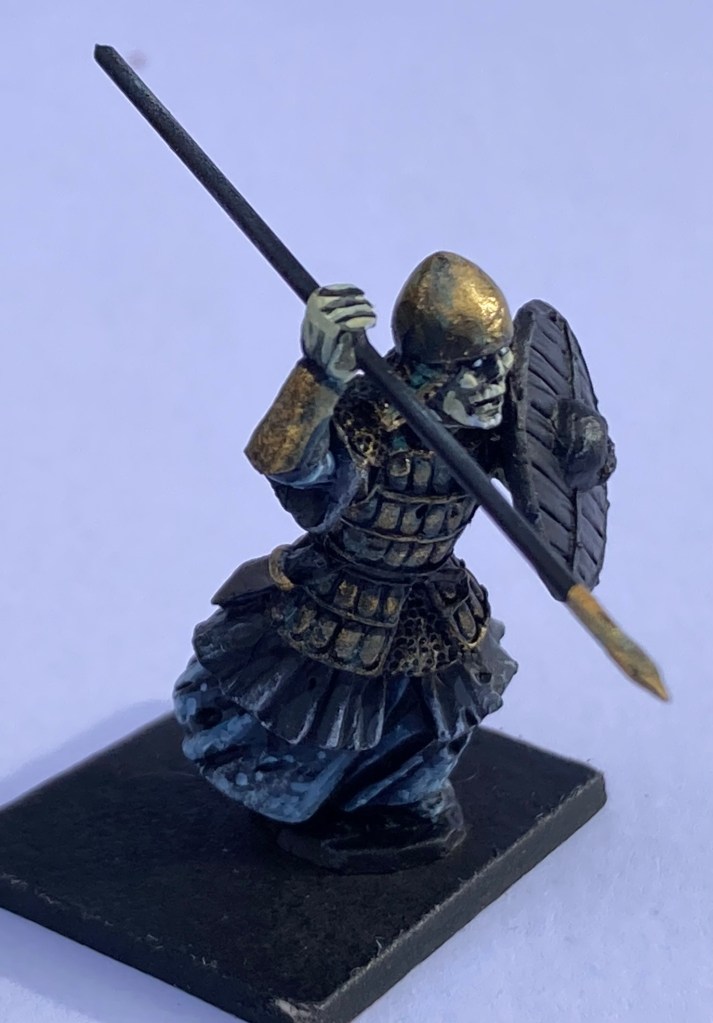
I hemmed and hawed about whether to go with GW Contrast Paints on these (requiring a white undercoat or black with white dry brushing) or traditional acrylics over black. Eventually I went with the latter, but then spent some time being slightly unsure of what I was after. Colin Patten’s painted examples are incredibly good but I wanted something with a little more colour. However, my first attempt probably had too much bronze and blue.
After taking some advice from chums on social media, I revised the bronze armour idea (which doesn’t really work as they’re meant to be Viking age) and went for a lighter skin tone.
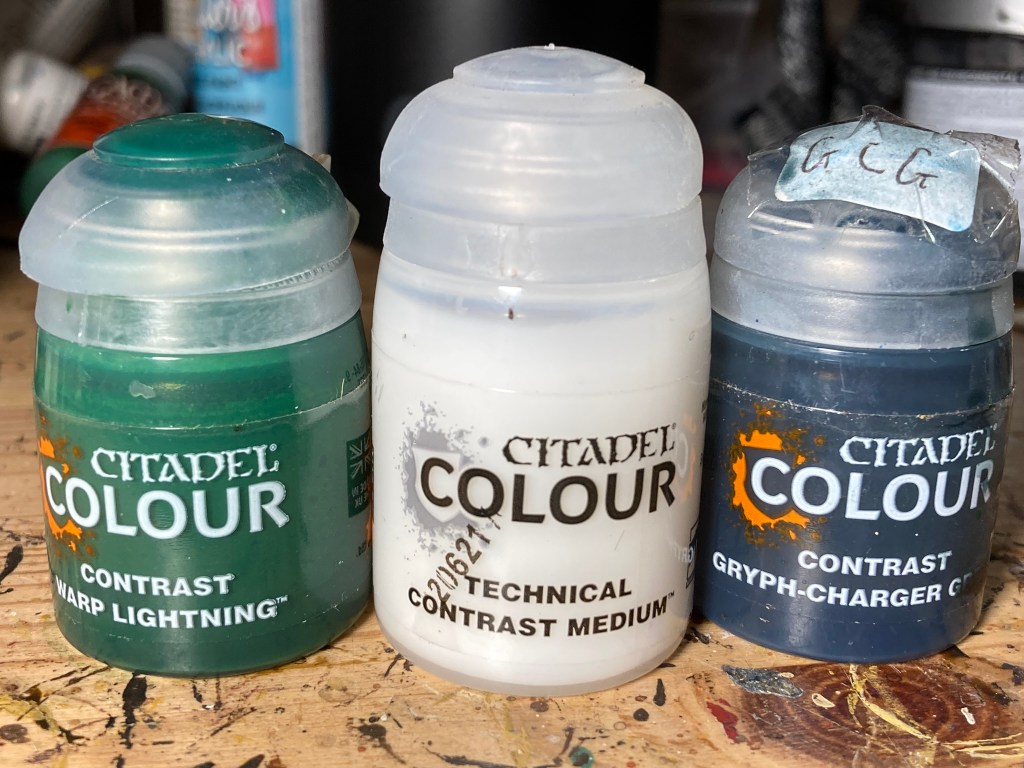
Having used a dry brush of Army Painter Gunmetal as the basic armour layer on all the models, I tidied up the undercoat and then used a base layer of white acrylic on all the skin. When dry, I used some GW Contrast Paints to pick out the skin, followed by a thinnned-down highlight of acrylic white. This gave me a stronger contrast between skin and clothing. I cut down on the blue clothing of the test mini and went with black, grey, blue-grey and off-white instead.
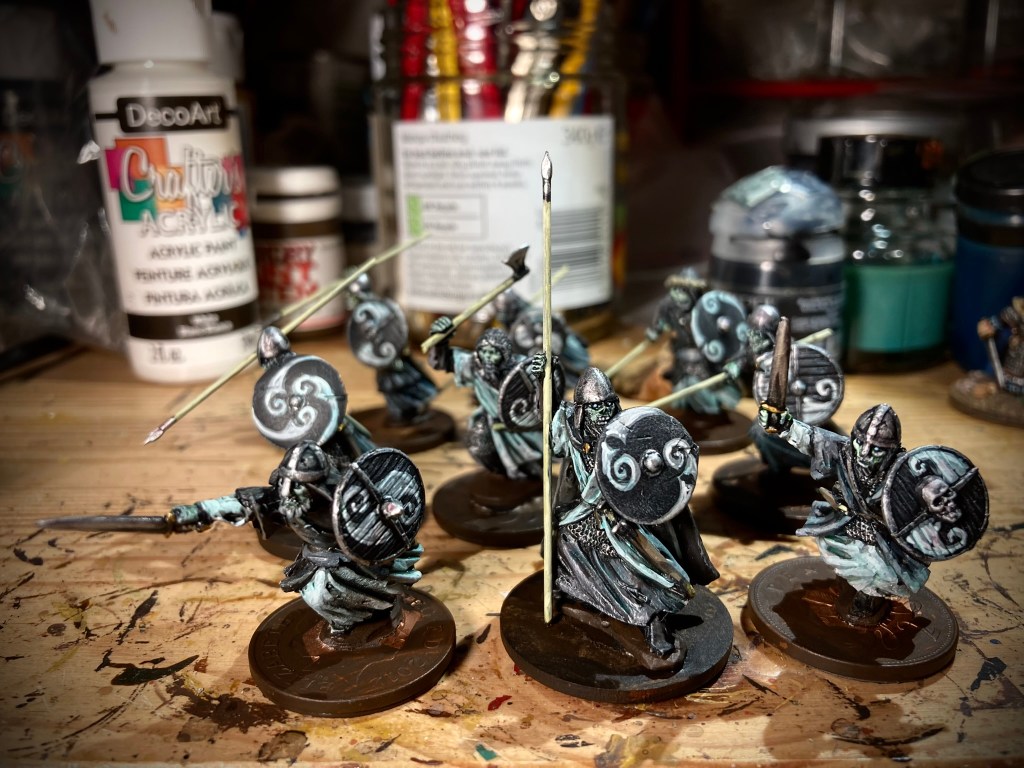
I found dug out some elderly bottles of ink: Oldhammer fans will recognise the venerable example on the left and I suspect the right hand one dates back to my student days. Both were still perfectly serviceable!
You can see the green tinge of the inks here, especially on the centre mini.
Some thinned-down washes of the green ink really did the trick, tying the models together and giving an unnatural tinge to proceedings. I also weathered the armour with a little brown ink to suggest rust and age.
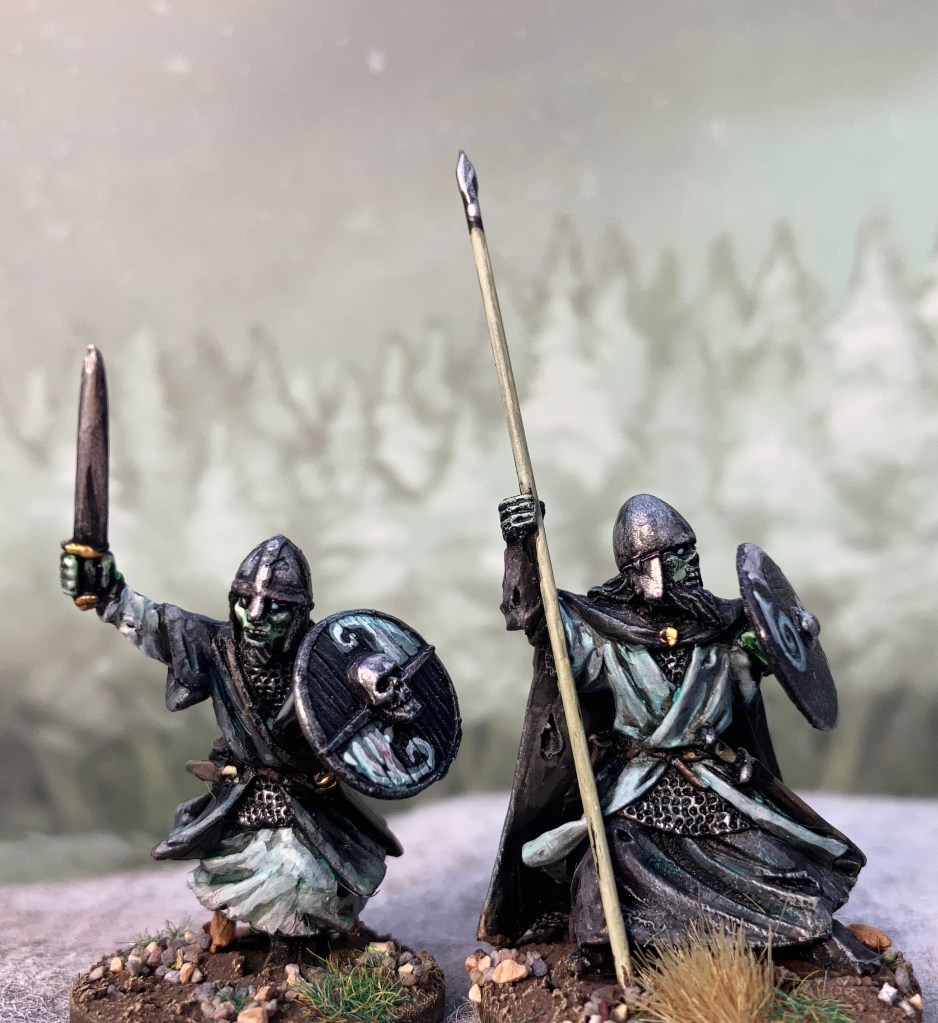
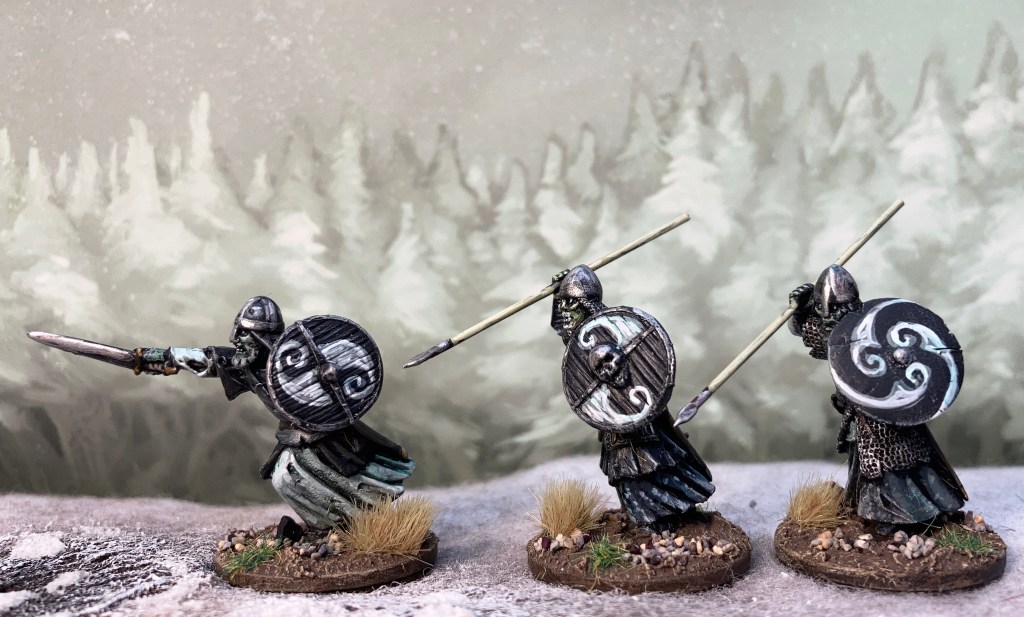
Shields received some Celtic-inspired spirals painted in light grey and then highlighted in white. It’ll sound crazy to some of you, but I really enjoy hand painting shield designs – it’s challenging at the start of a session, but once I get into it, I find it very therapeutic.
The eye sockets were shaded in black before I dotted in the eyeball with a light blue and a final highlight of white for that ‘restless undead’ look. After a coast of matt varnish, I added a few extra highlights and then based them up in a fairly neutral scheme that should work both on grass and snow mats for gaming.
After the initial prevarication, I’m pretty pleased with these and am sorely tempted to knock up an undead horde! One for 2024 maybe? Season’s greetings to you all!
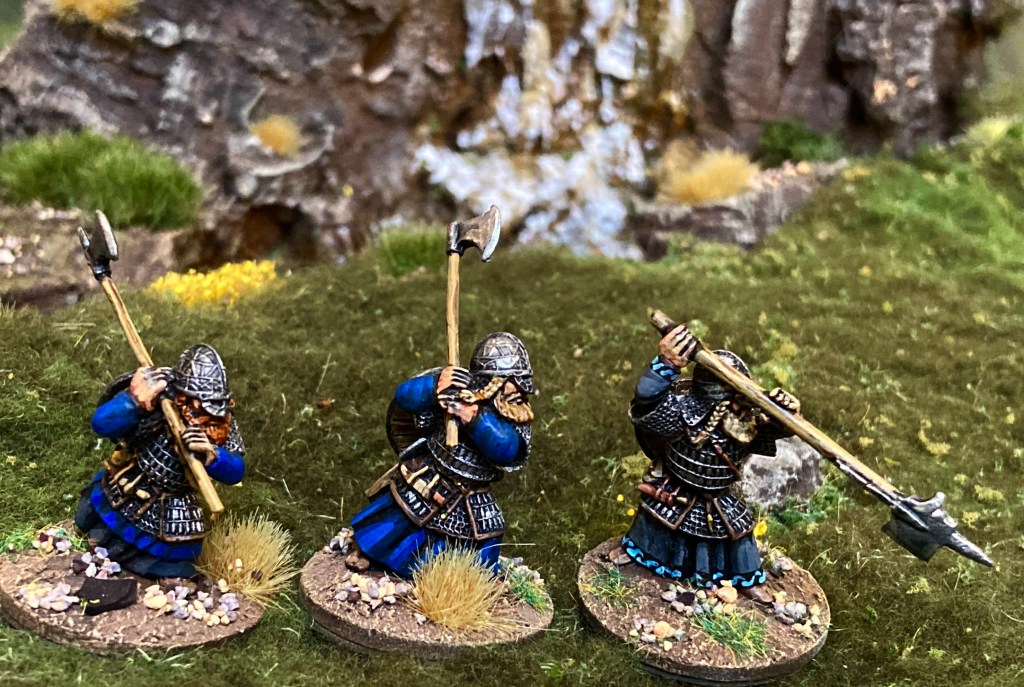
I was delighted when old chums Gripping Beast became the distributors for the Ragnarok range of Norse fantasy minis, sculpted by GB co-founder Colin Patten. I already have a number of Colin’s Dwarves from various companies, so while I didn’t really *need* any more longbeards, the Durinn’s Folk range had to be sampled!
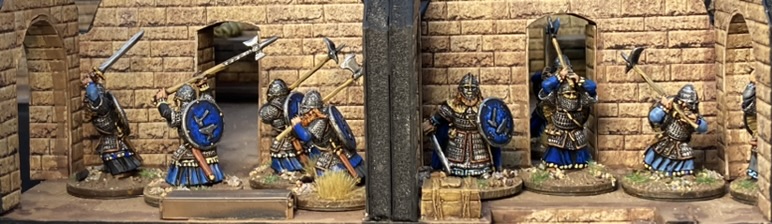
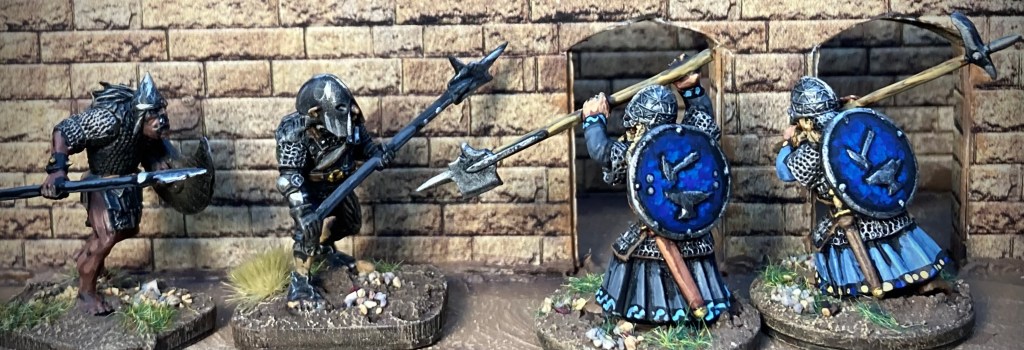
In the pictures, you can see a collector’s pack of Hearthguard Attacking With Heavy Weapons plus a Warlord. The hearthguard are supplied with separate mattocks (very Tolkien) and double-handed axes, but I couldn’t resist replacing a few of the weapons with a sword and a pair of halberds borrowed from Front Rank medieval weapons packs (also available from Gripping Beast).
As I already have a Dwarf army painted in a blue/ grey colour scheme, I didn’t want to deviate from that. With the armour and helmets on these chaps – heavily influenced by the early medieval Vendel culture – I went for a black undercoat, drybrushed all the metalwork with silver, and then built up layers for the main colours.
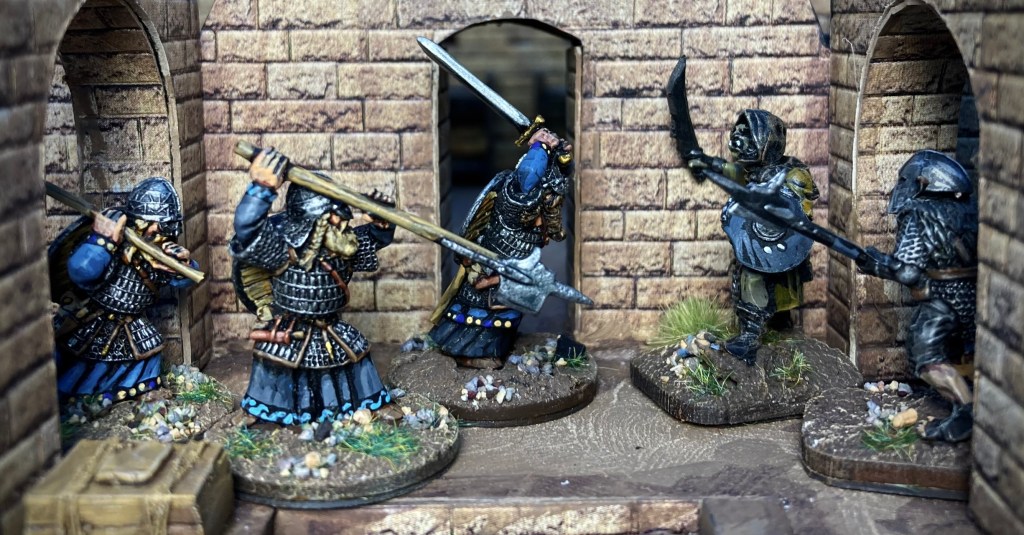
Corridor combat: Durinn’s Folk vs Goblins deep in the mines. Plastic goblins made from Oathmark, Wargames Atlantic and Perry Miniatures parts
The shields come with a nice moulded hammer and anvil design which I highlighted in various shades of blue before blocking in the metalwork and adding a few rivets for variety.
The shield recipe, layering up from Royal Blue to Mid Blue to Voidshield Blue and a little white.
Mid-painting over a black undercoat
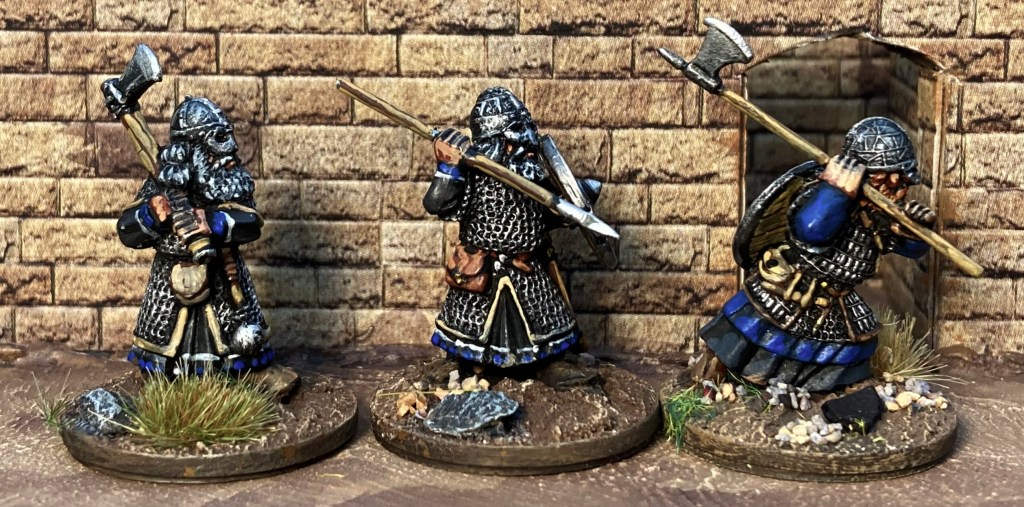
These are cracking models and entirely compatible with all of Colin’s previous work for different companies.
Posh shields!Three generations of Patten Dwarves: LEFT – Thistle & Rose (ex Vendel Miniatures); CENTRE – Conqueror Models; RIGHT – Ragnarok Miniatures
An Orc from Knucklebones Miniatures about to get a headache – assuming the ceiling is high enough to swing that halberd!