Bookings for Midgard Moot 2 will open on Friday 9th January at 1700 GMT.

The event will take place on Saturday 25th April 2026 at Boards And Swords Hobbies, Derby, UK. Full details of the event are here: https://mogsymakes.net/midgard-moot-ii-25th/
Bookings for Midgard Moot 2 will open on Friday 9th January at 1700 GMT.
The event will take place on Saturday 25th April 2026 at Boards And Swords Hobbies, Derby, UK. Full details of the event are here: https://mogsymakes.net/midgard-moot-ii-25th/
Hi everyone, just a heads up! I’ve been getting the line up confirmed for the second Midgard Moot event which is due to take place at Boards And Swords Hobbies in Derby, UK on Saturday 25th April 2026. This event was terrific fun last April and we’re looking to make it even better in 2026!

Bookings don’t open till January but click here to see the details of the games and campaigns.
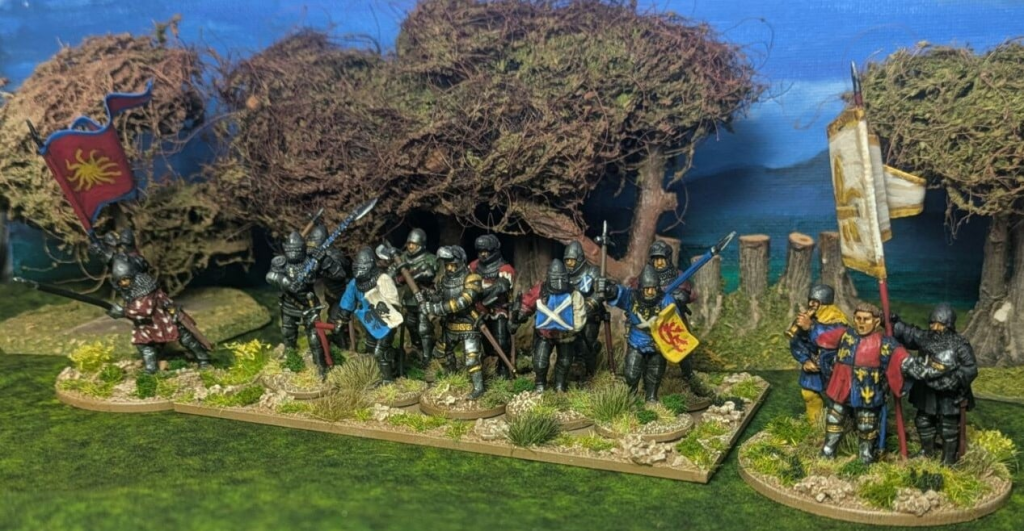
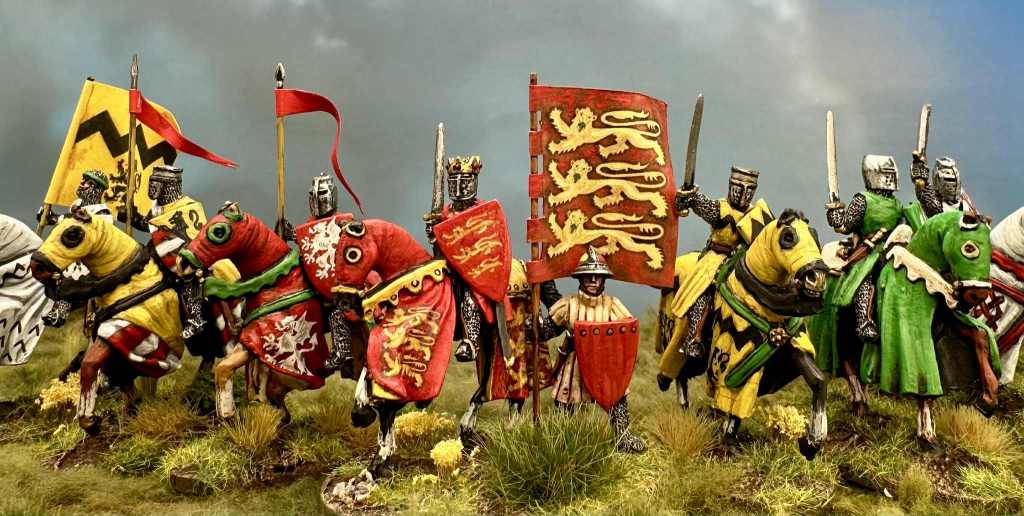
I’ve been busy painting and basing more commanders for one of the campaigns I’m currently play testing for Midgard Heroic Battles. Here we have Simon de Montfort and his sons, plus a number of royalist supporters as well.
The campaign will be published as a PDF sometime in 2026.
Click here for the full update!

I’ve taken this week to add two more videos to the Mogsymakes YouTube channel – a report of our Agincourt game from The Other Partizan (complete with a quick making-of the terrain cloth) and also my second 10mm painting video. This one focuses on the Wargames Atlantic plastic 10mm Dwarves which I’m building up into a Midgard Heroic Battles Force.


If you haven’t already, please do have a look, and of course like, subscribe and comment if you enjoyed the videos. I know we’re all short of time nowadays so I try to keep the running time down – Agincourt comes in at under 10 minutes, with the Dwarf painting at 25 mins.

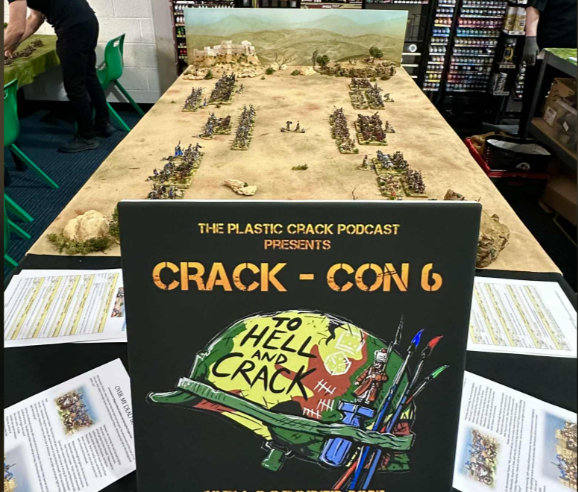
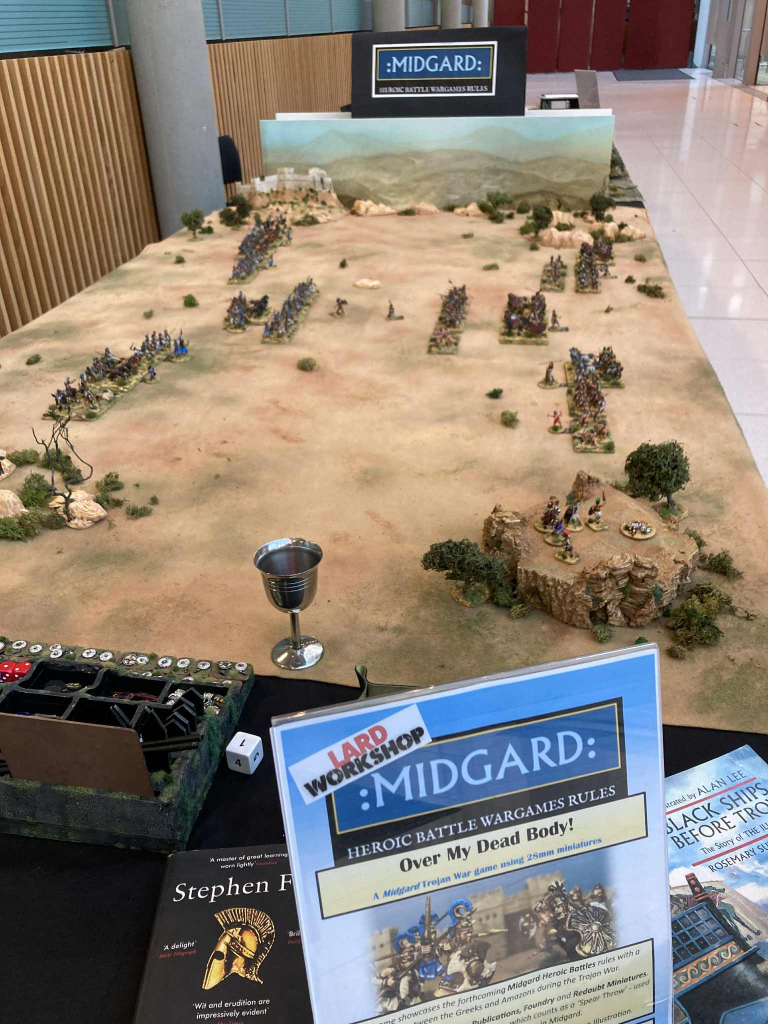
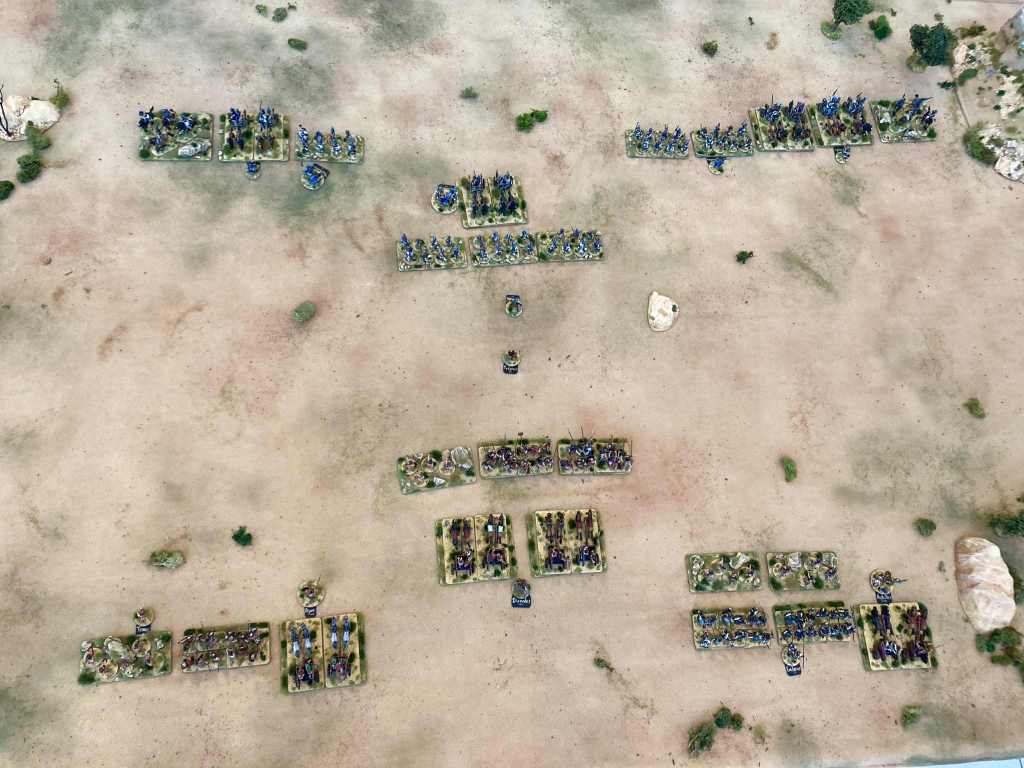
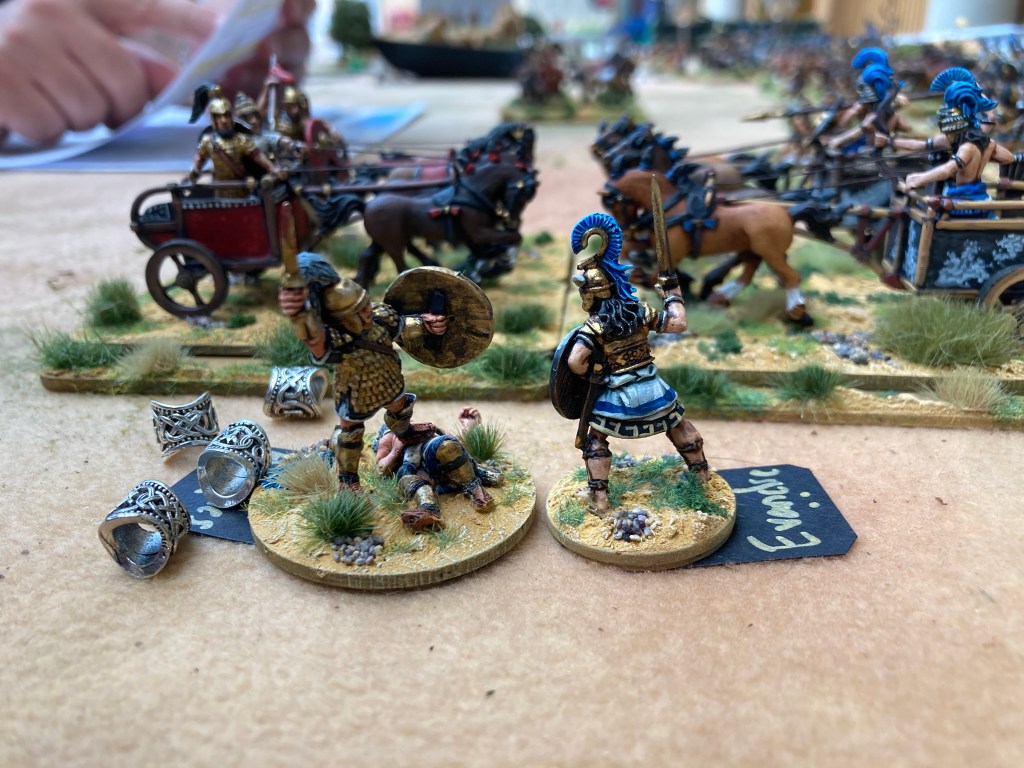
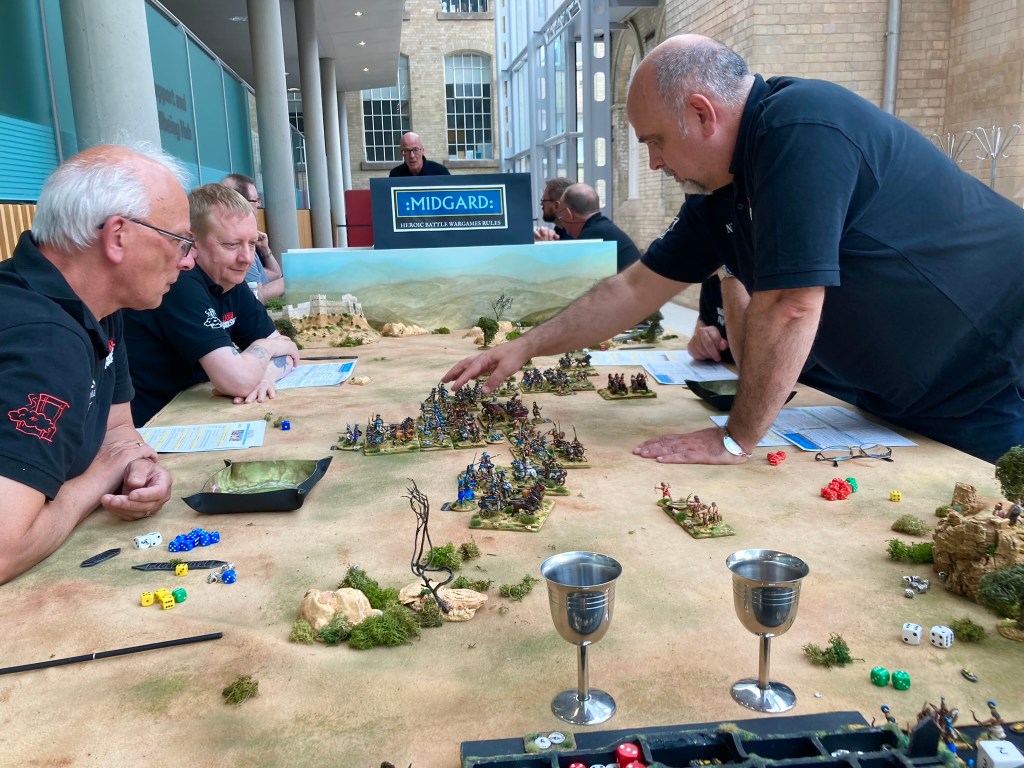
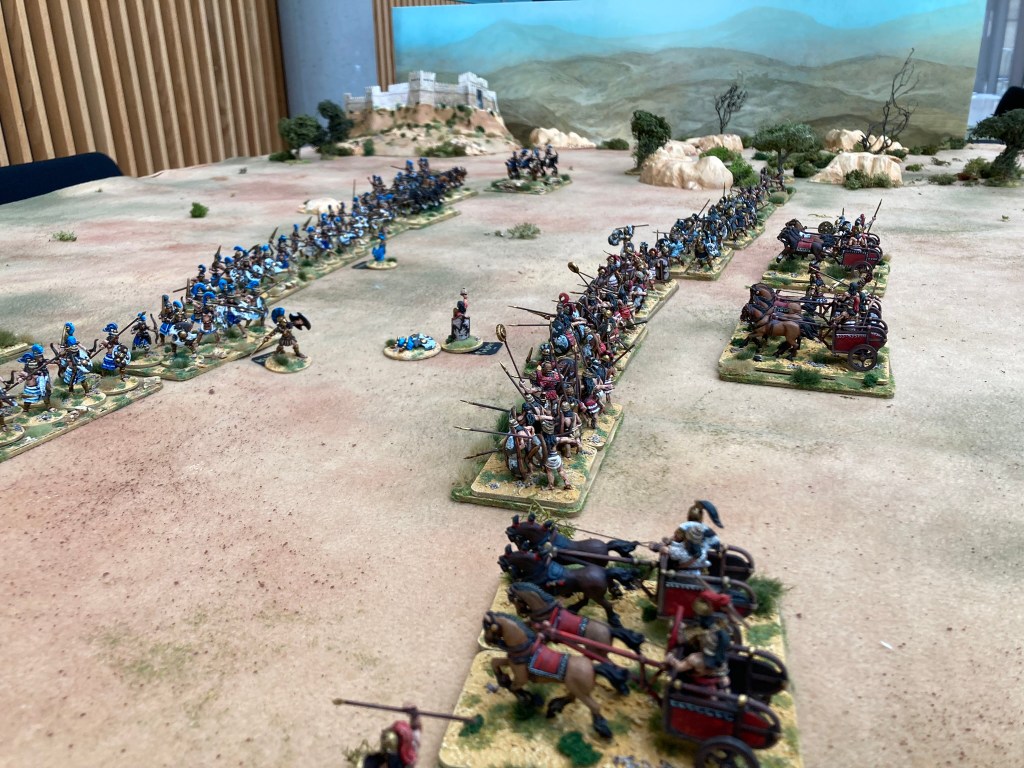
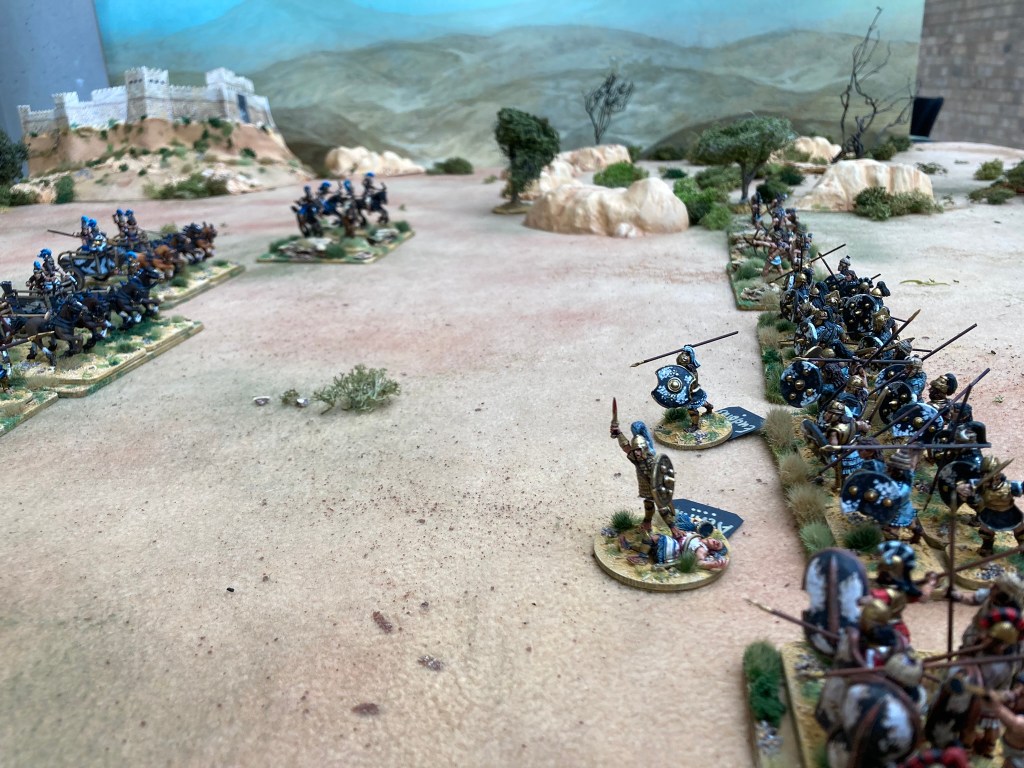
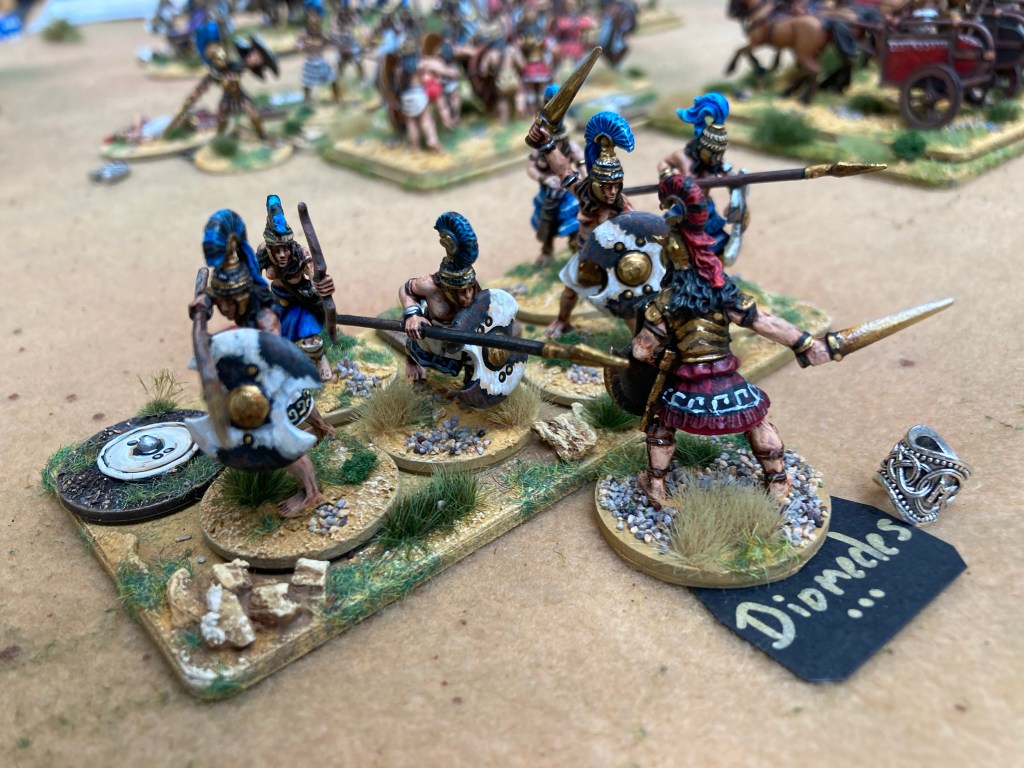
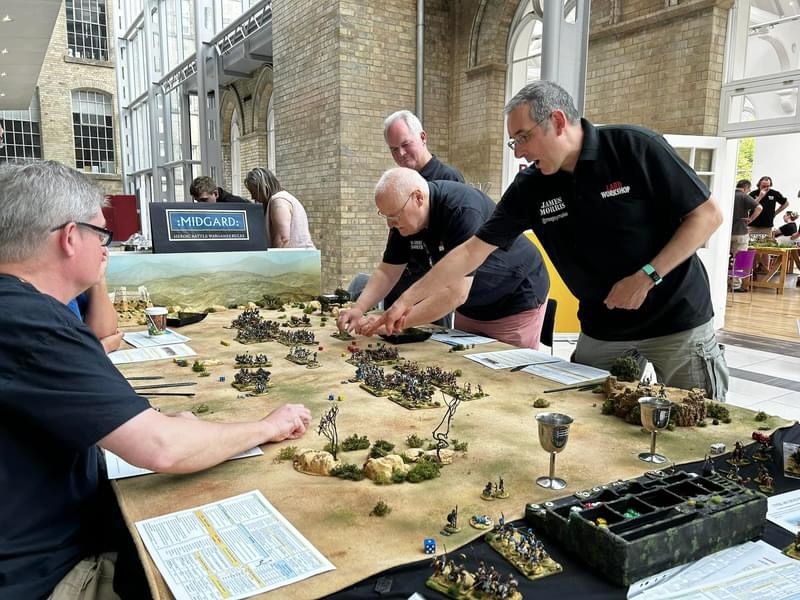
Crackcon 6 – the annual convention of the Plastic Crack Podcast – was thoroughly enjoyable as Pete and I ran two back-to-back games of ‘Over My Dead Body’, a Trojan War scenario for Midgard.

The venue (Boards and Swords Hobbies in Derby) was rammed with quality games, all being played in a great atmosphere.
The charity raffle and merchandise also raised £2000 for the Brain Tumour Trust in memory of Paul Sawyer – a wonderful gesture.

Behind the scenes, the Chronicles of Midgard supplement is currently in layout, but no news on format or release date yet – all this will follow! I’m also beavering away on various PDF ‘goblet-size campaigns’ that should see release as soon as Chronicles makes it out of the door.
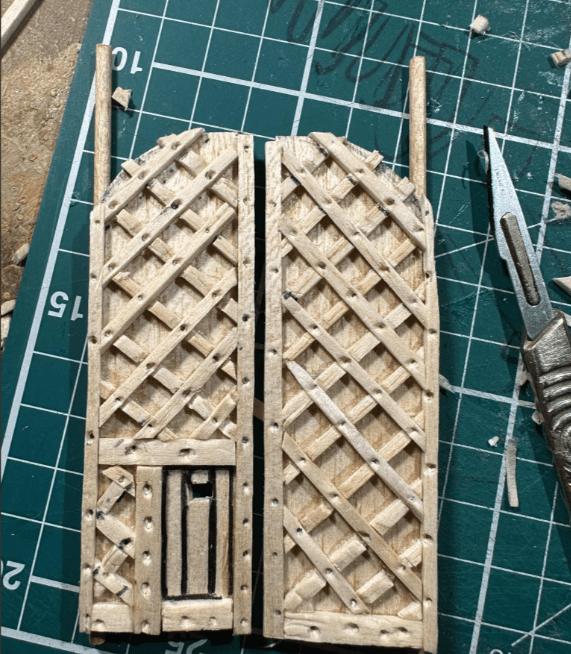
Oh, and I finished the castle gates I’ve been working on – apparently I need a mini cat now to make use of the cat flap!

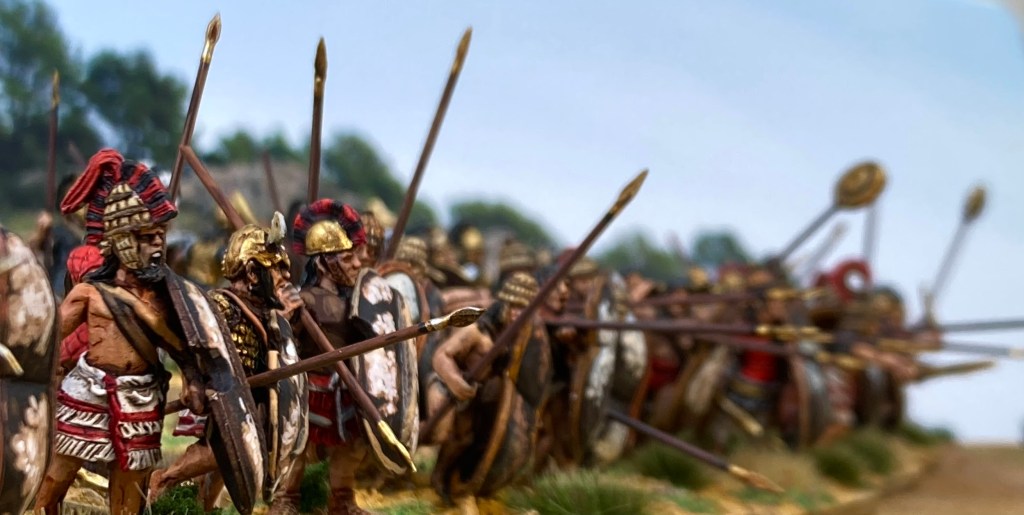
I ran this scenario for the first time at Britcon in August 2024 just as Midgard Heroic Battles was about to head to press for eventual release in November.
It was a big event, definitely one of the top Lardy Days on the UK circuit, and slightly nerve-wracking as I would be introducing some of the regular Lard gaming veterans to Midgard for the first time.
I needn’t have worried – it was a blast – and the response was excellent. However, on the eve of pulling the game out again for the Crackcon 6 event, I realised that I’d never shared most of these photos. So here you go!
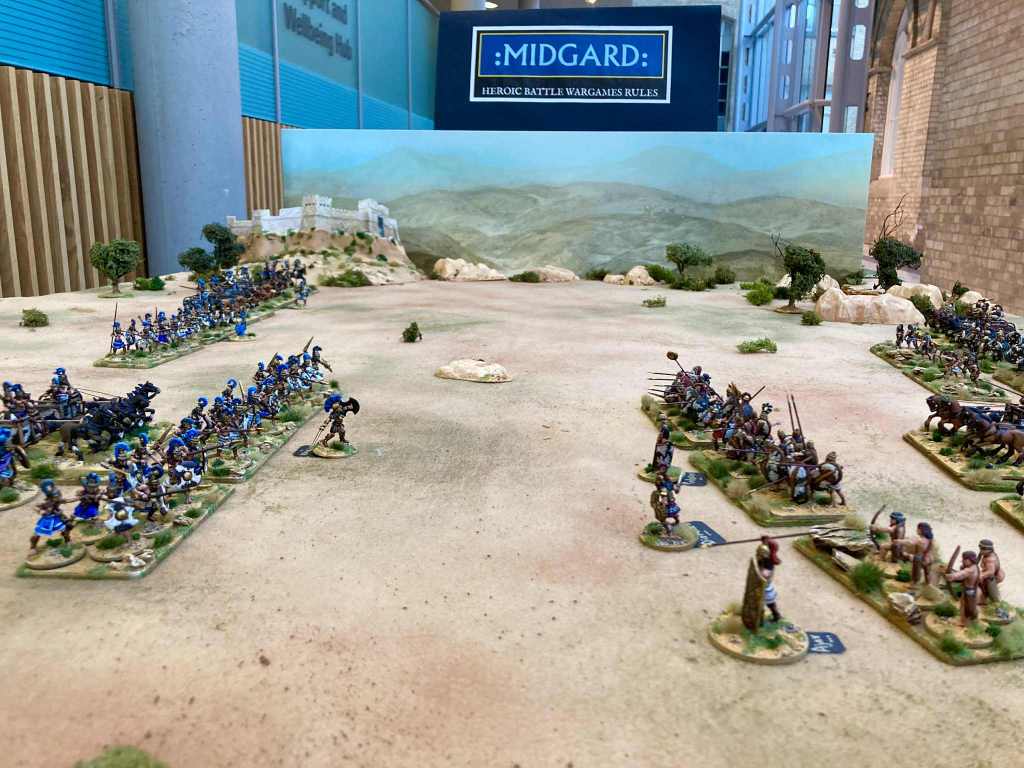
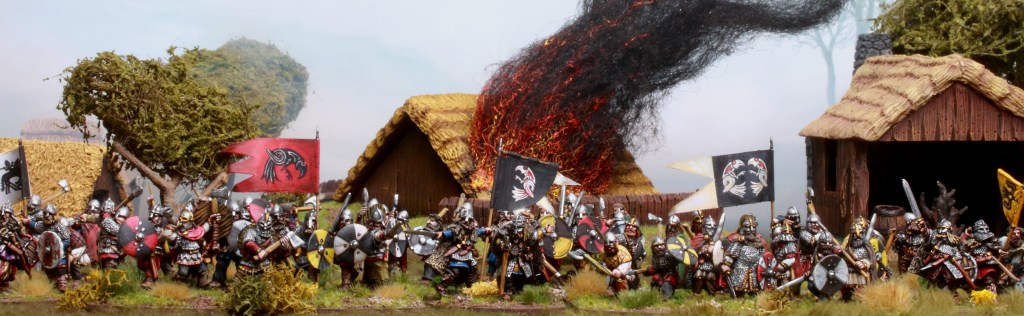
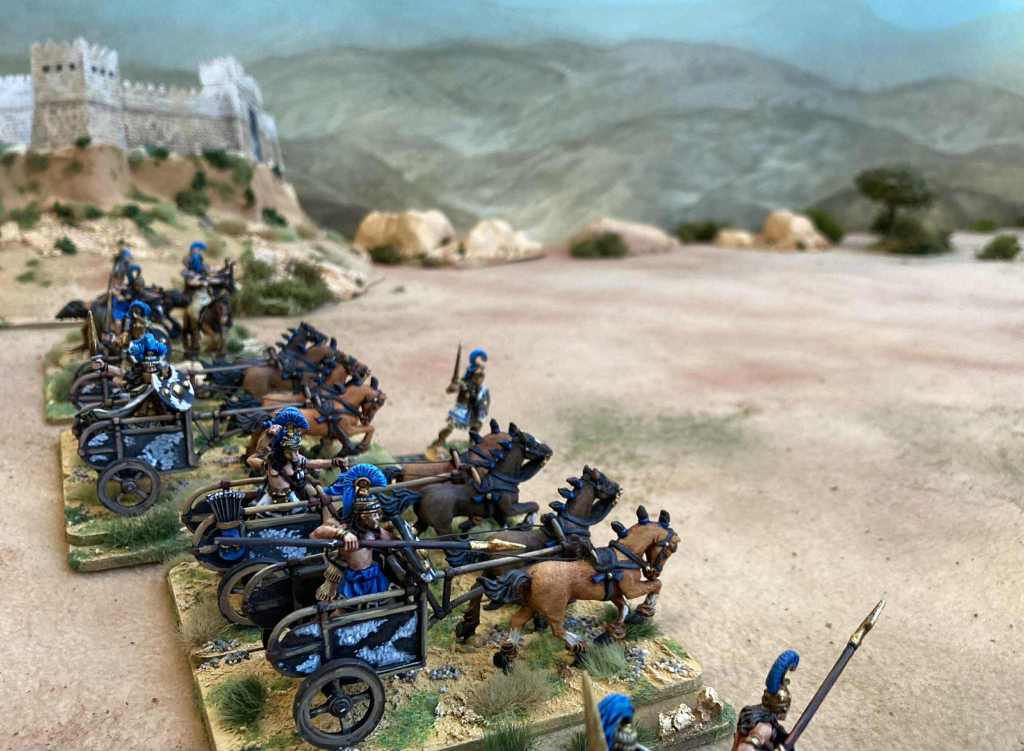
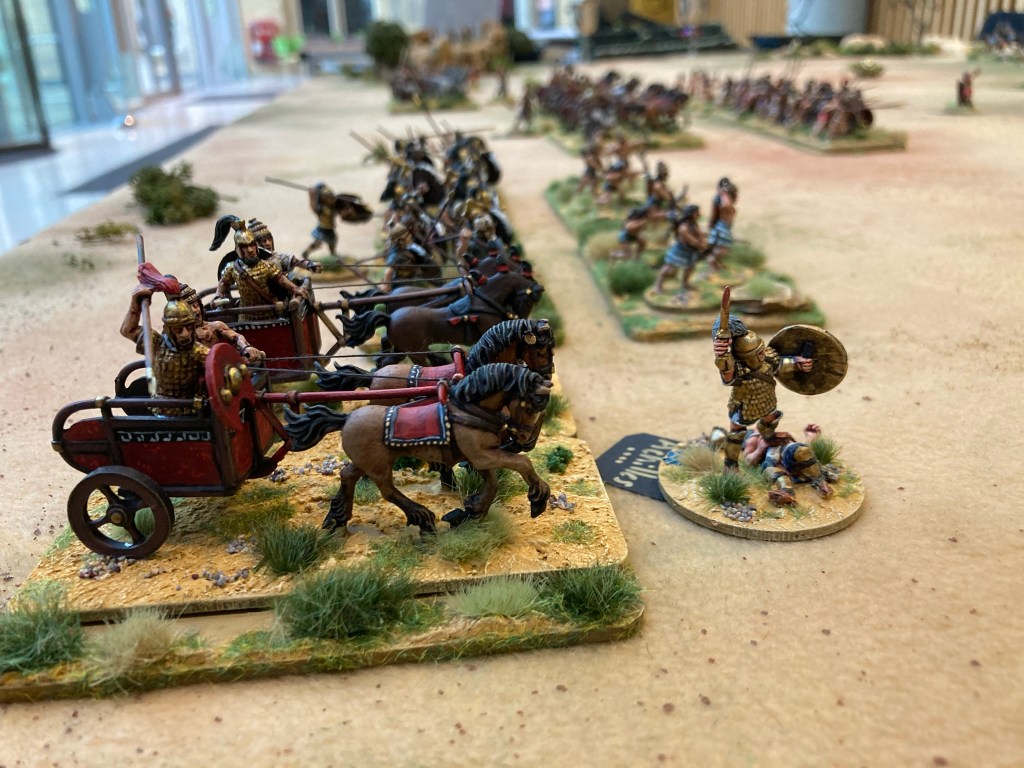
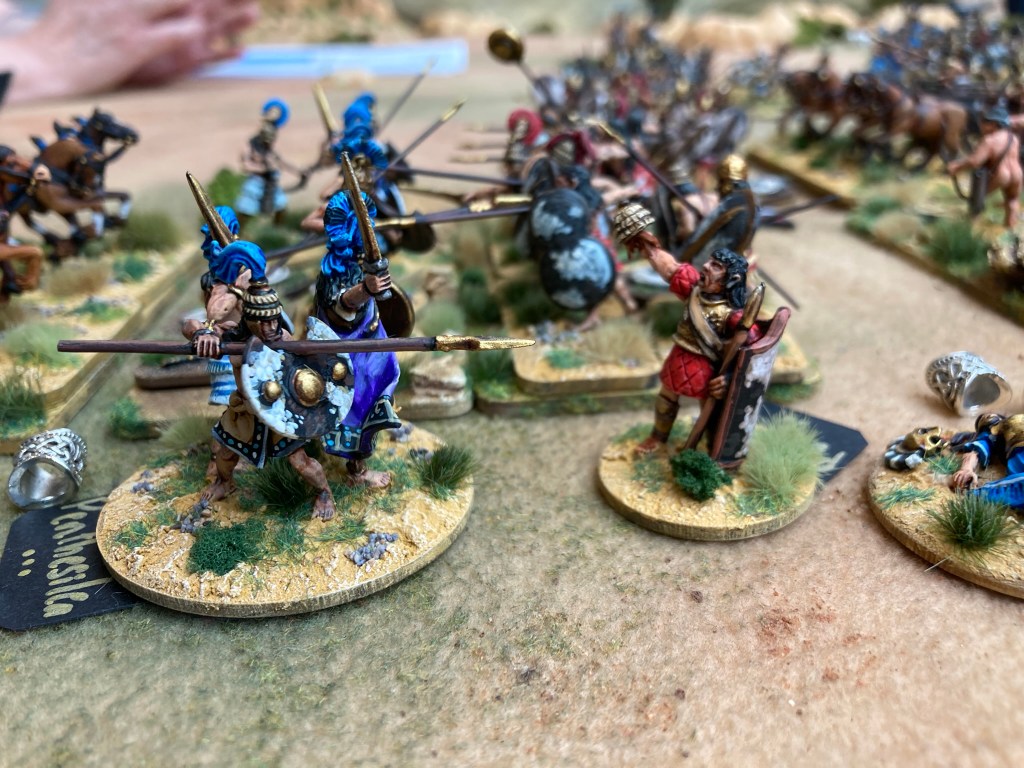
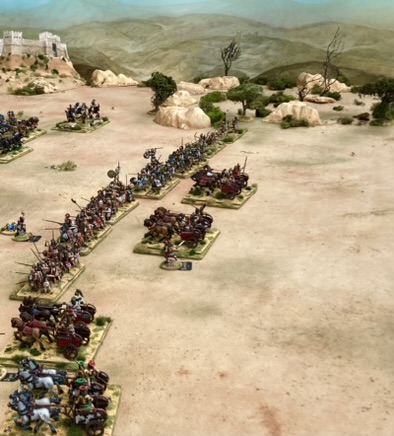
With the death of Hector, many Trojans felt that their last hope had gone. The stone known as the Luck of Troy had been stolen away in the night by the cunning Odysseus of Ithaca. What hope was left for the beleaguered golden city?
However, one morning, the sun burned brighter than usual; a column of armoured warriors arrived, guided by Paris himself. These were no ordinary soldiers but Amazons, the famed warrior women who lived far away near the River Thermodon. Bred for battle, they carried bronze spears and swords, but also shot arrows from both chariots and horseback.
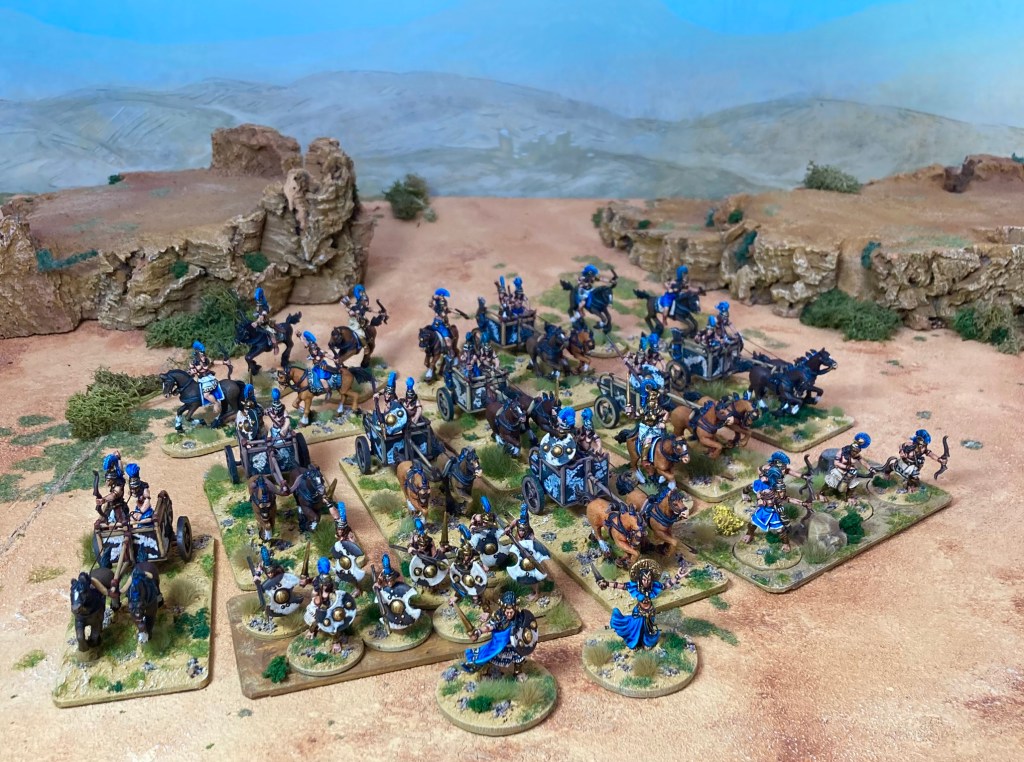
Welcomed through the gates, the Amazons were feasted and celebrated with the best provisions that Troy could muster. Priam himself presented their Queen with a silver-hilted sword, and Penthesilea told her tale to the astonished Trojans. “We are here to aid you in your noble cause of driving off the Achaean locusts. I, Penthesilia, daughter of Ares, will use this sword to slay Achilles himself! Since accidentally killing my beloved sister, Hippolyta, I have no wish to live in dishonour. Let us take up arms and fight to free Troy and gain eternal glory!”
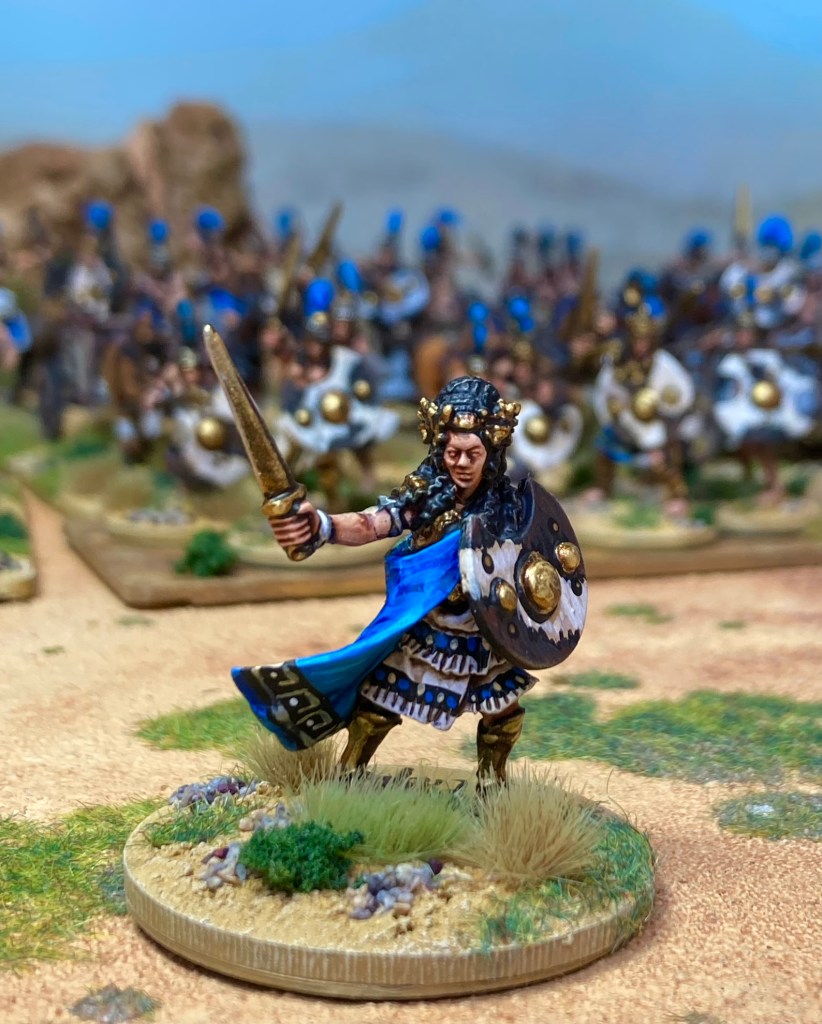
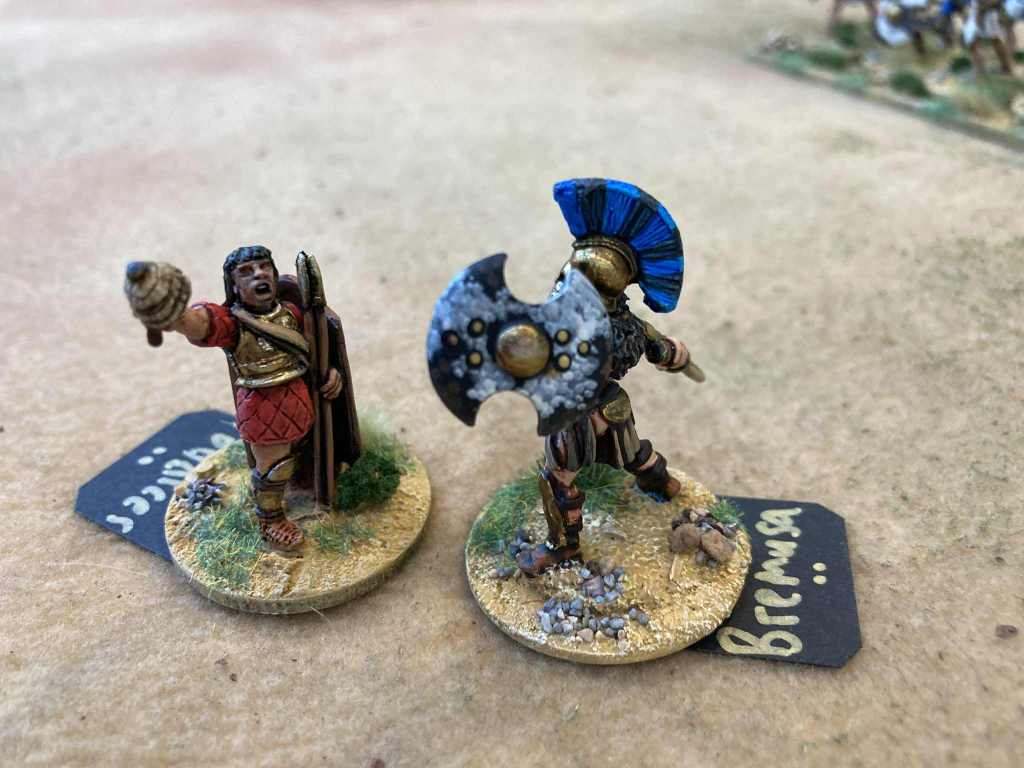
And so, the following morning, with a blast of bronze trumpets, the Scaean Gate opened and disgorged a horde of Amazons. Sun glinting on their helms and arrow-tips, Penthesilea led her warriors to meet Diomedes of Argos, first out of the Greek camp. A single combat was agreed between Podarces, brother of Prothesilaus (the first Achaean to be slain in the campaign) and the Amazon champion Bremusa as the others rushed to battle.
The chariots of Achilles and Ajax the Great could be seen in the distance. The women of Troy watched spellbound from the towers of Ilium: who would triumph?


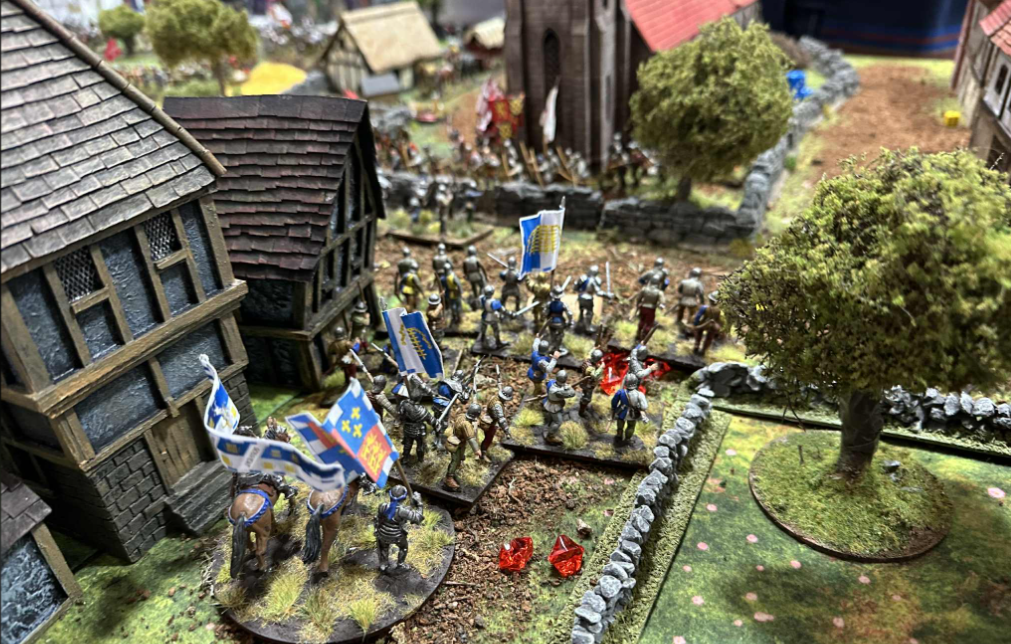
Having seen the floor plan for The Other Partizan show yesterday, I think everyone’s in for a treat if you can make it to Newark Showground on October 12th! We have managed to shoehorn three Midgard Heroic Battles games into the hall this time around.

On DG14 you’ll find our 6mm Gloranthan battle (as seen at the Joy of Six in July) with miniatures by Matt Moran and Tom Webster-Deakin.
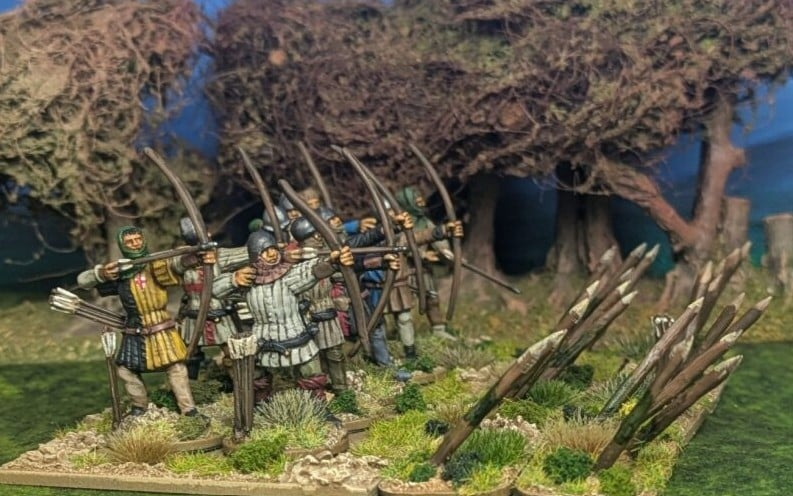
This mini extravaganza is back-to-back with a 28mm version of the Battle of Agincourt, just in time for the 610th anniversary and featuring Paul Scrivens-Smith’s colourful collection of Perry Miniatures, on their first show outing following their return from the USA.
I’ve spent several days recently making a heavily-ploughed field with puddles, which is considerably less glamorous…

Next door to us at DG18 we have Mr Peter Dennis of Peter’s Paperboys who will be using Midgard to introduce an exciting new project – beautifully-drawn as ever! We are bordering on the Lard Zone, where there will be three fabulous games showcasing some of the other Too Fat Lardies/ Reisswitz Press rules. And, of course, the TFL stall where you will be able to buy your copies of Midgard or whatever takes your fancy.
Really looking forward to seeing you there!
And while I’m at it, let’s see some Dwarves!
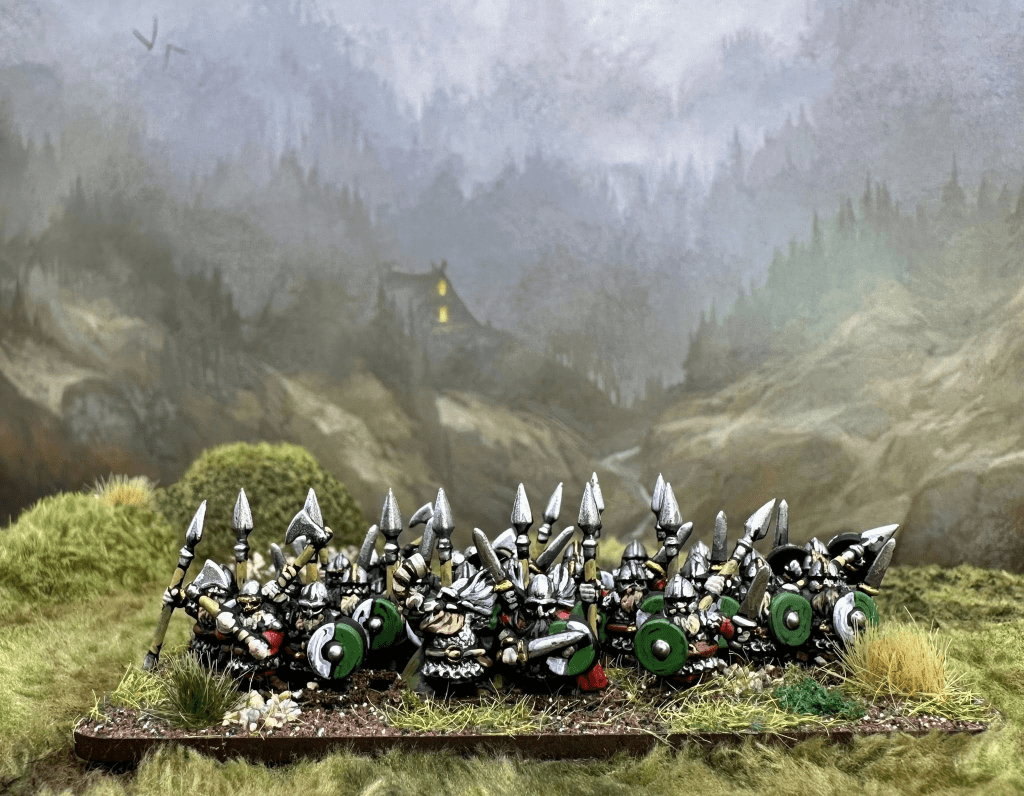
These are the new ‘Classic Fantasy Battles Grand Scale’ range from Wargames Atlantic of which you get 246 minis in a box for £32.50! I really enjoyed the previous Orc release (see my painting video on these here) and have immediately bought a couple of boxes of the Dwarven Host for Midgard Heroic Battles.

I’m basing these on 80 x 40mm bases for Midgard – you can see the process in the Orc video. I shall undoubtedly get a Dwarf painting video put together at some point in the next few weeks.

Photo backgrounds are Jon Hodgson Backdrops, in this case from the A3 original backdrops book.

A few weeks ago, I was lucky enough to be invited by Tamworth Wargames Club to run a Battle of Bosworth 1485 game in Tamworth Castle’s great hall. This was quite an experience and I’ve put together a 15 minute video about it which you can see on the Mogsymakes YouTube channel – please do have a look, and like and subscribe if that’s your thing. We used Midgard Heroic Battles for the rules with a custom scenario (which I’ll hopefully publish at some point in the future after some further play testing).

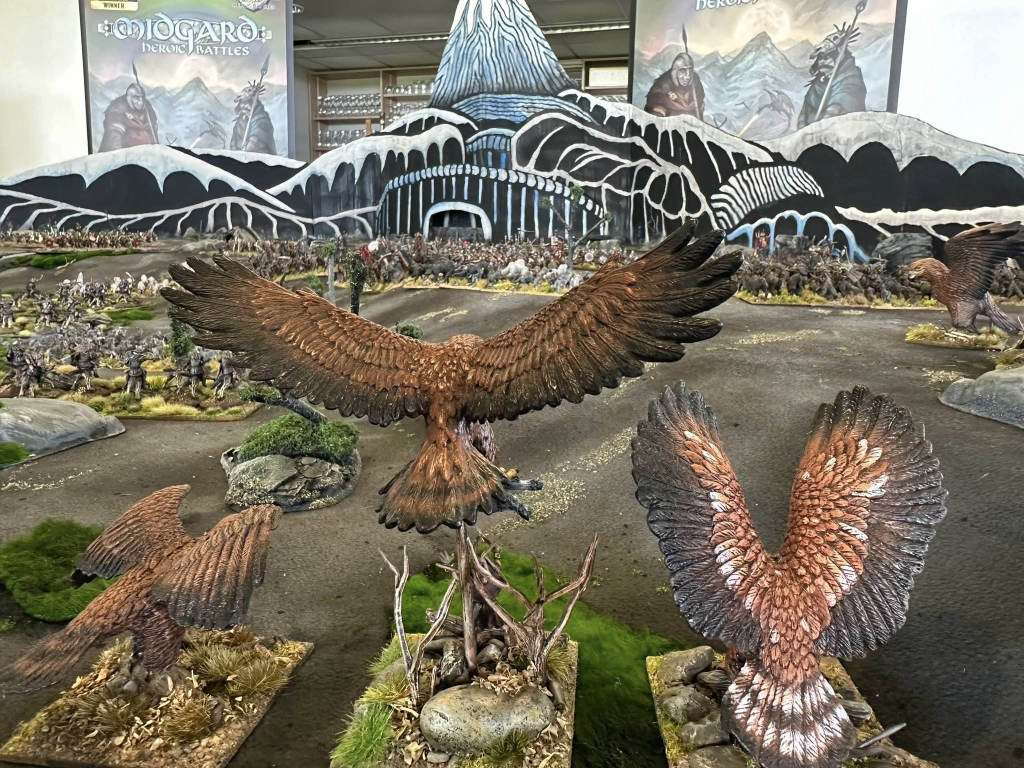
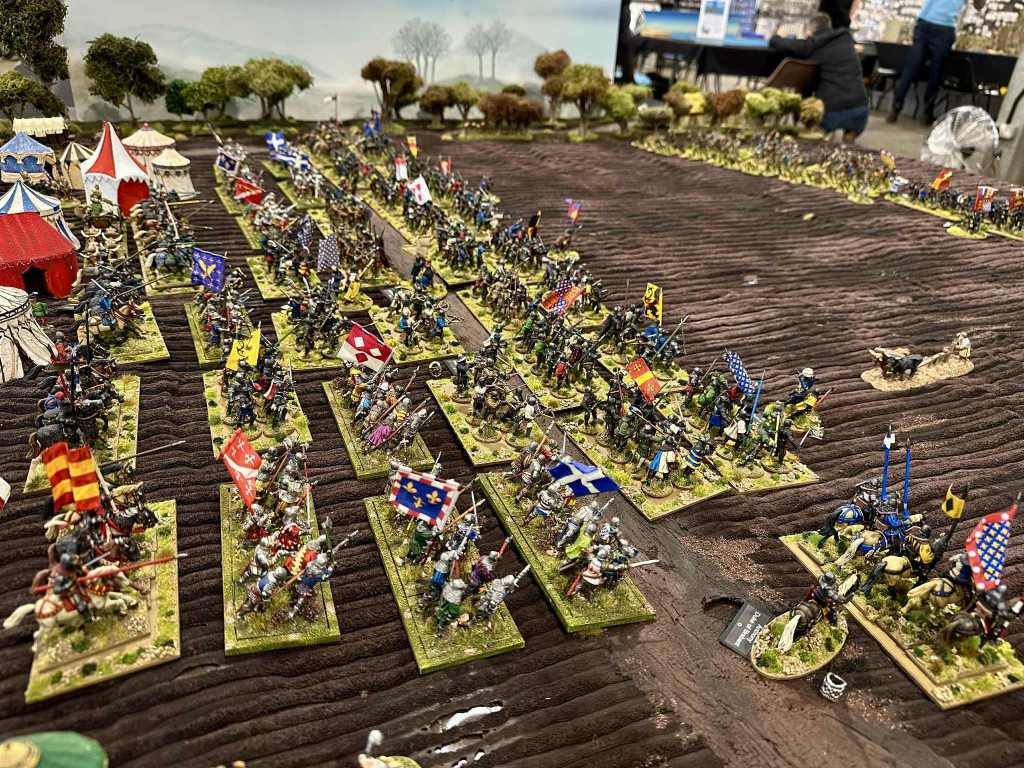
The chums & I took our Battle of Five Armies game for its second outing to the Colours Wargames Show in Newbury, UK, last weekend. It was a brilliant day out and a pleasure to see everyone to chat about Midgard Heroic Battles and Tolkien.
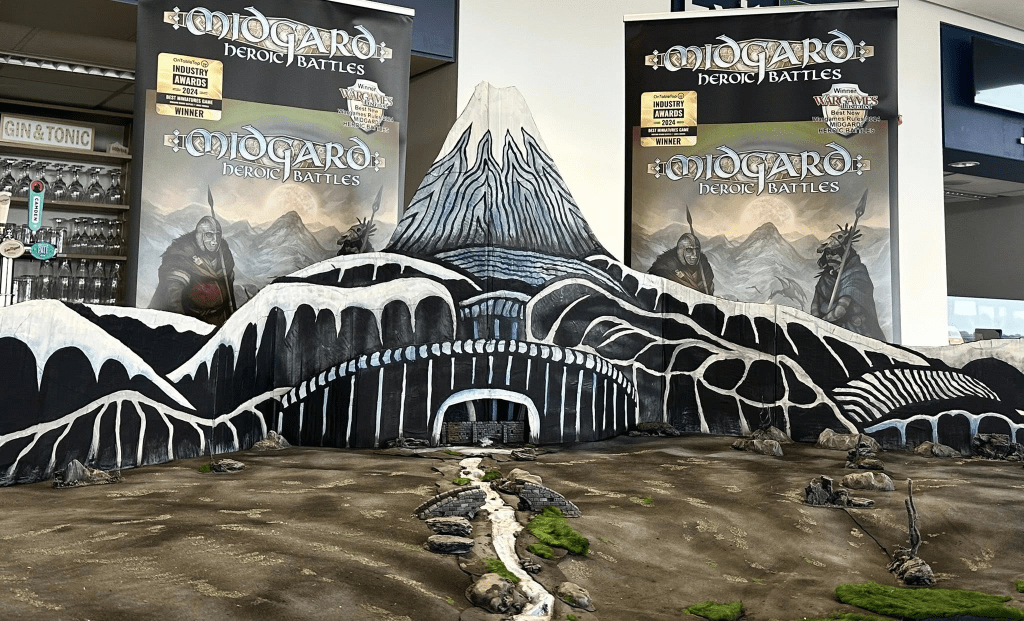
I’ve used the footage and pictures from the weekend to create a video of the game for the YouTube channel. Please do have a look and let me know what you think! Views and subscriptions are greatly appreciated.

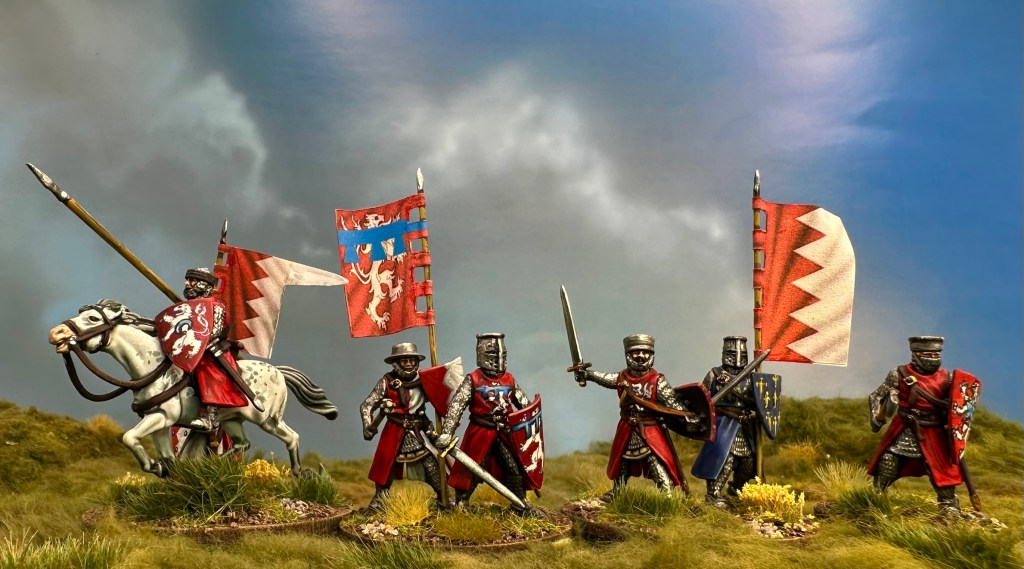
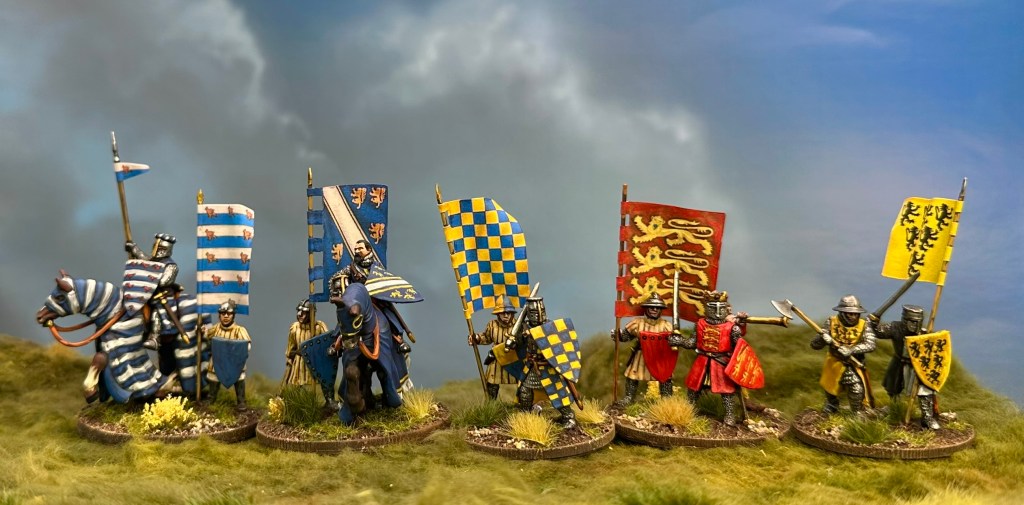
As this project is now officially underway, I’ve created a new page for it in the Late Medieval section of the website. You can see my first units here – many more to come!
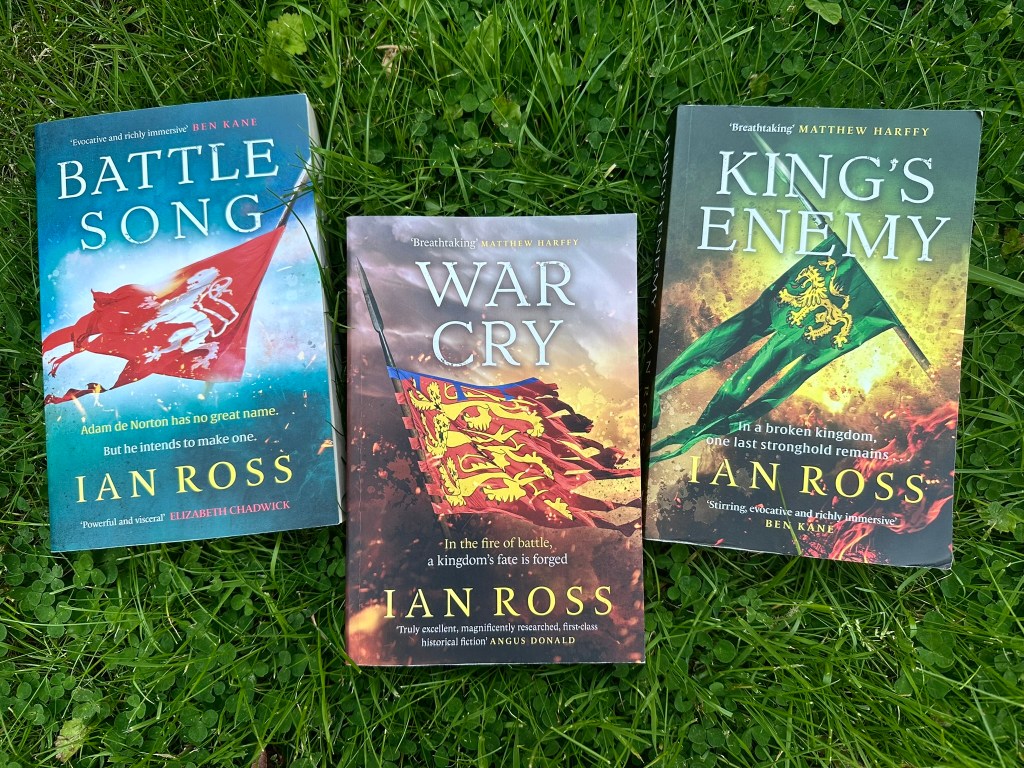
I recently read this wonderful series of historical novels by Ian Ross which really kick started the project. These are very well researched and highly recommended!