This year’s game for Salute 50 at Excel in London (22.4.23) is going to be a double-header to promote my forthcoming Midgard Heroic Battles rules, currently in editing and pre-production with Reisswitz Press. As Midgard can be played in multiple settings with any scale miniatures, we’re going to have an 15mm Dark Ages (early medieval) historical game next to a 28mm Norse myth one.

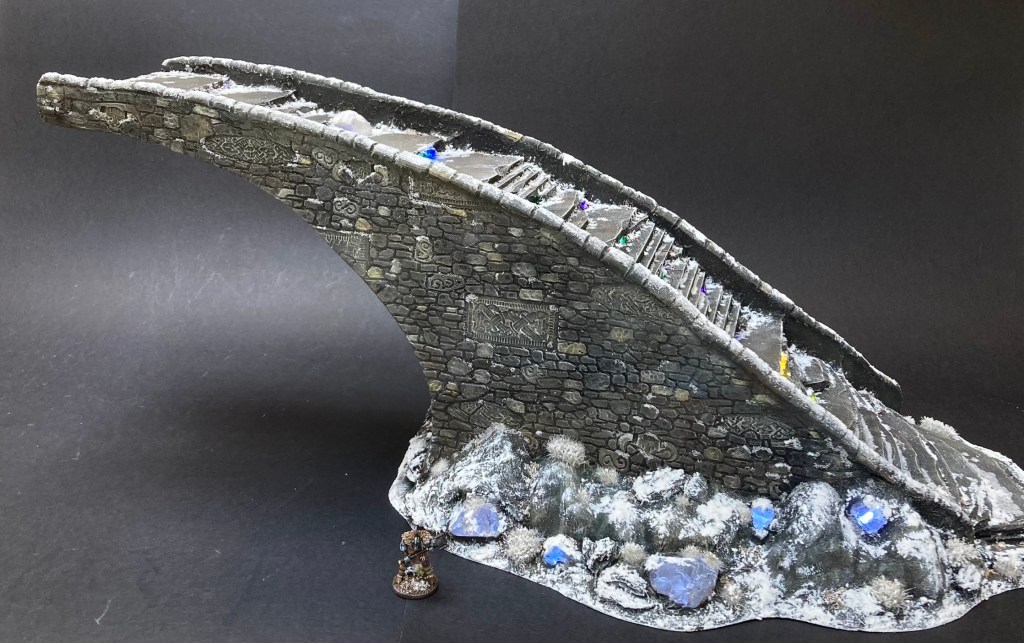
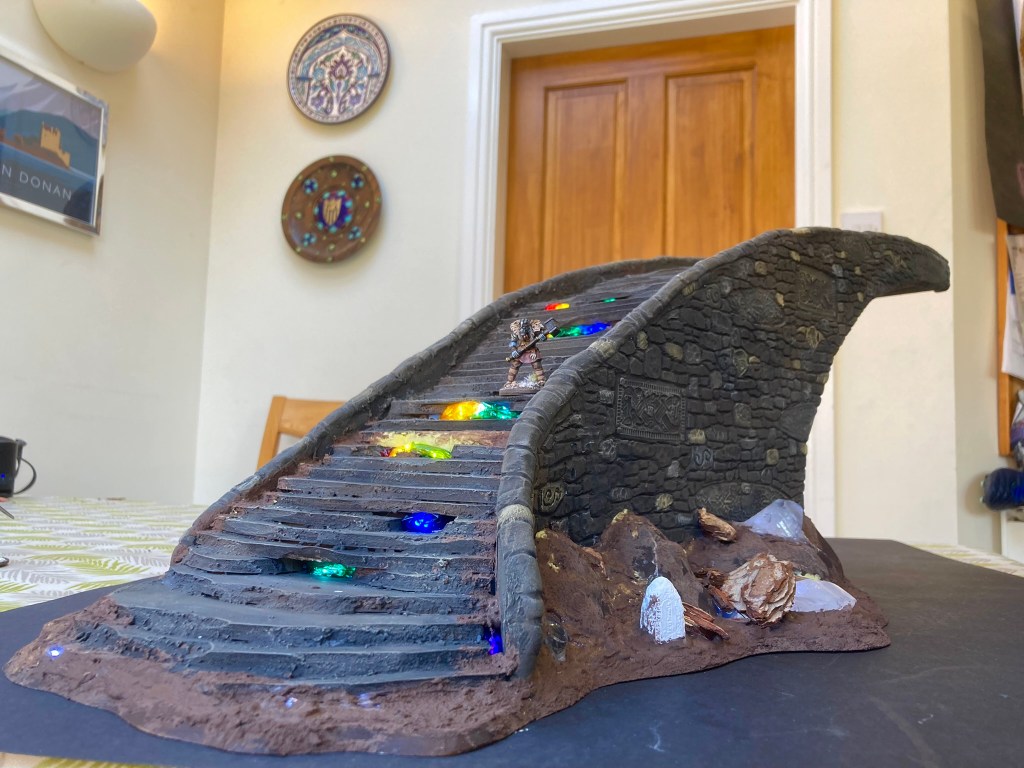
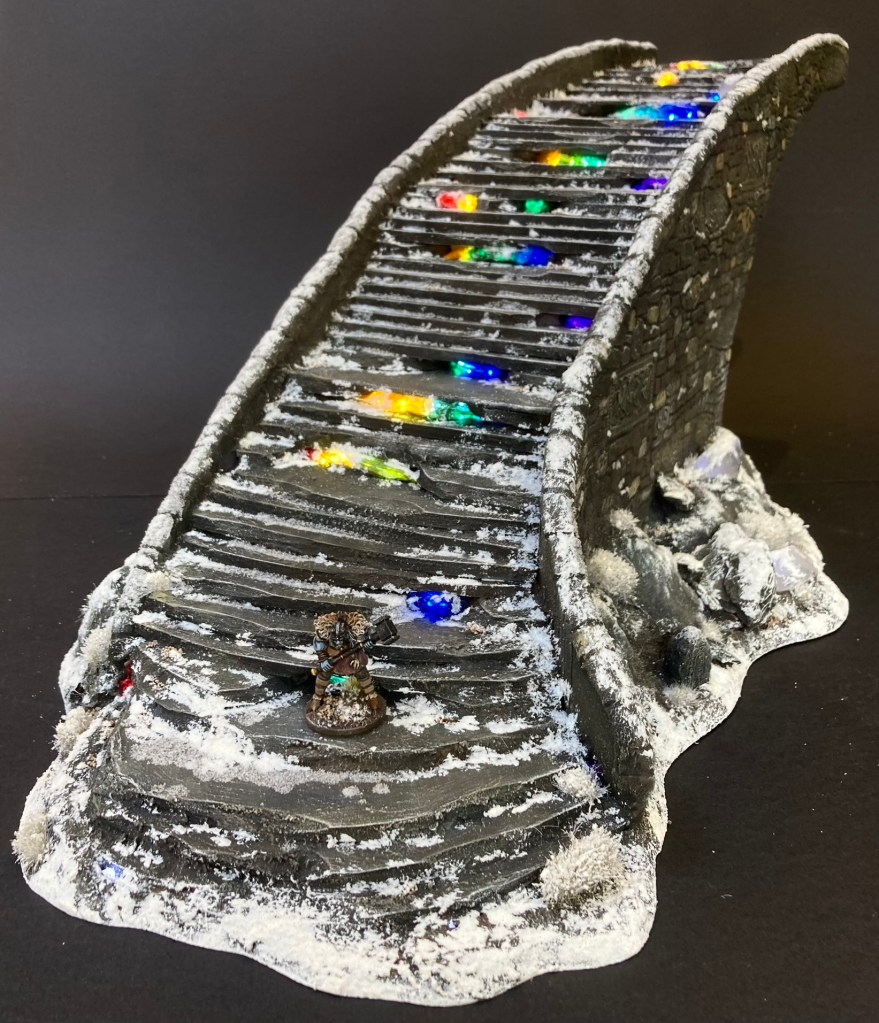
The Norse myth game is entitled ‘Against the Frost Giants’ and depicts an attempt by Loki and his minions to storm Bifrost, the rainbow bridge of Norse mythology that connects Midgard to Asgard.

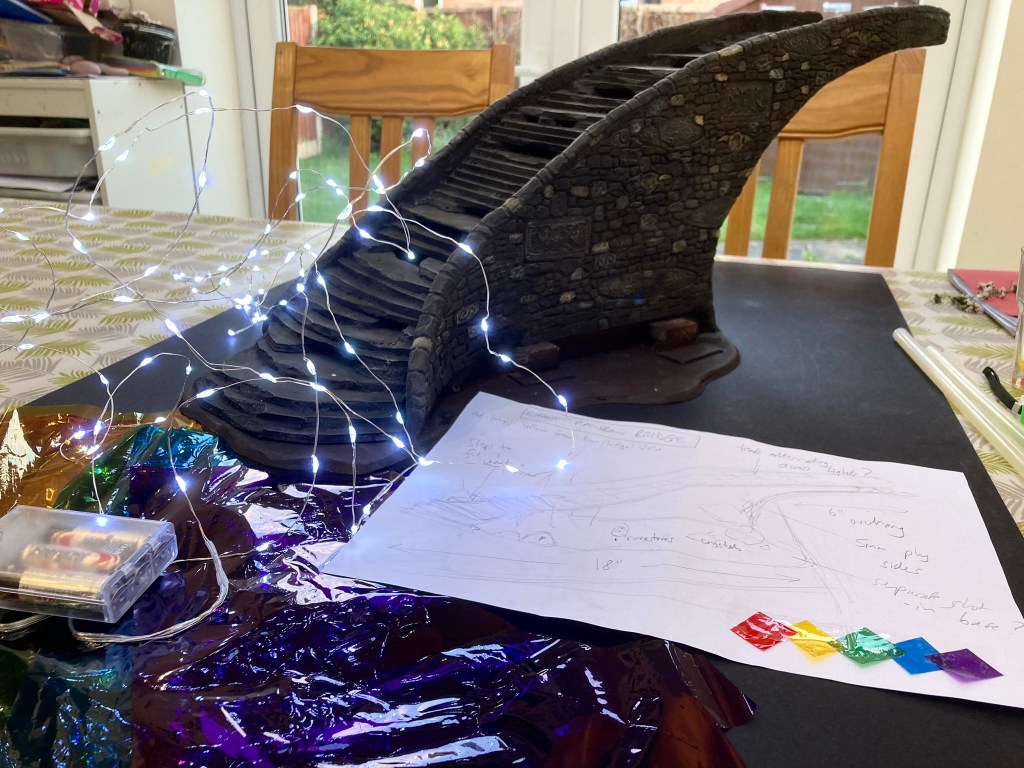
Obviously, pretty much everyone’s seen the Marvel films, in which the rainbow bridge looks something like multiple strands of optic fibre. I decided that I wanted something a little more down to earth, but with some added lighting to suggest its magical qualities.

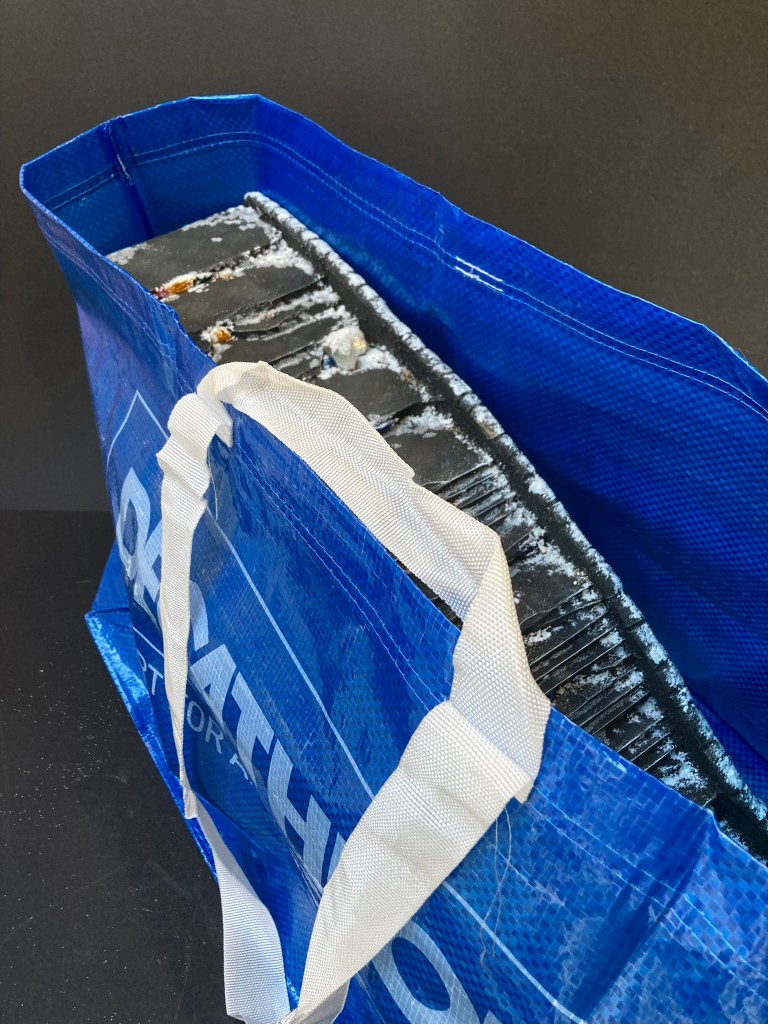
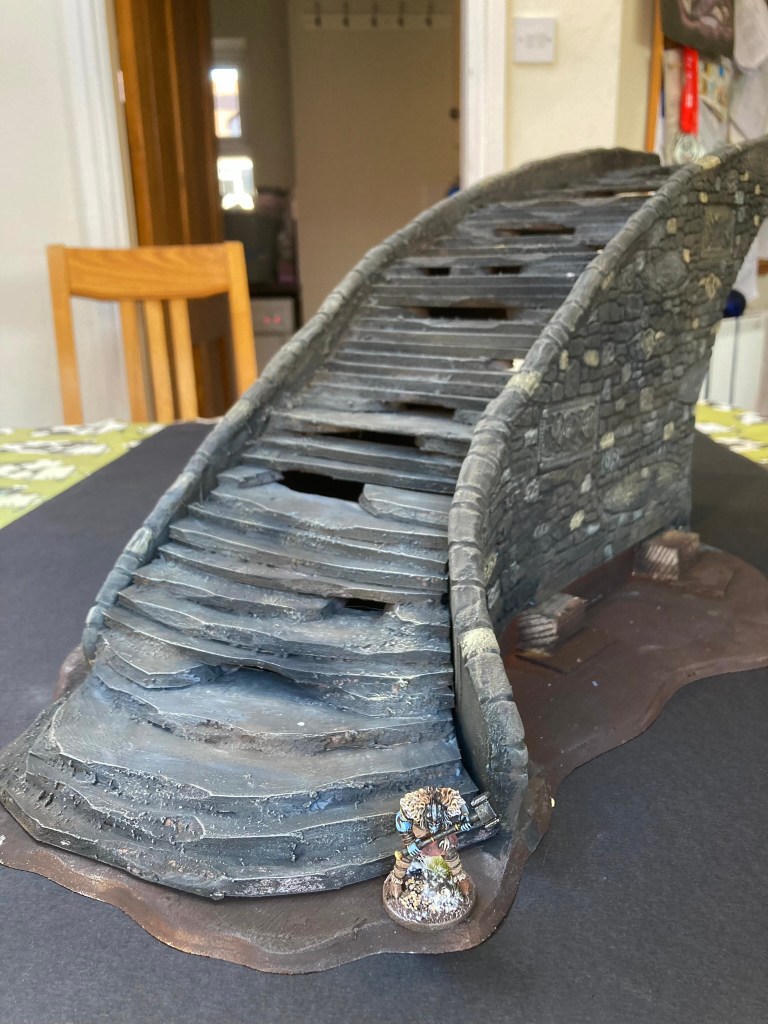
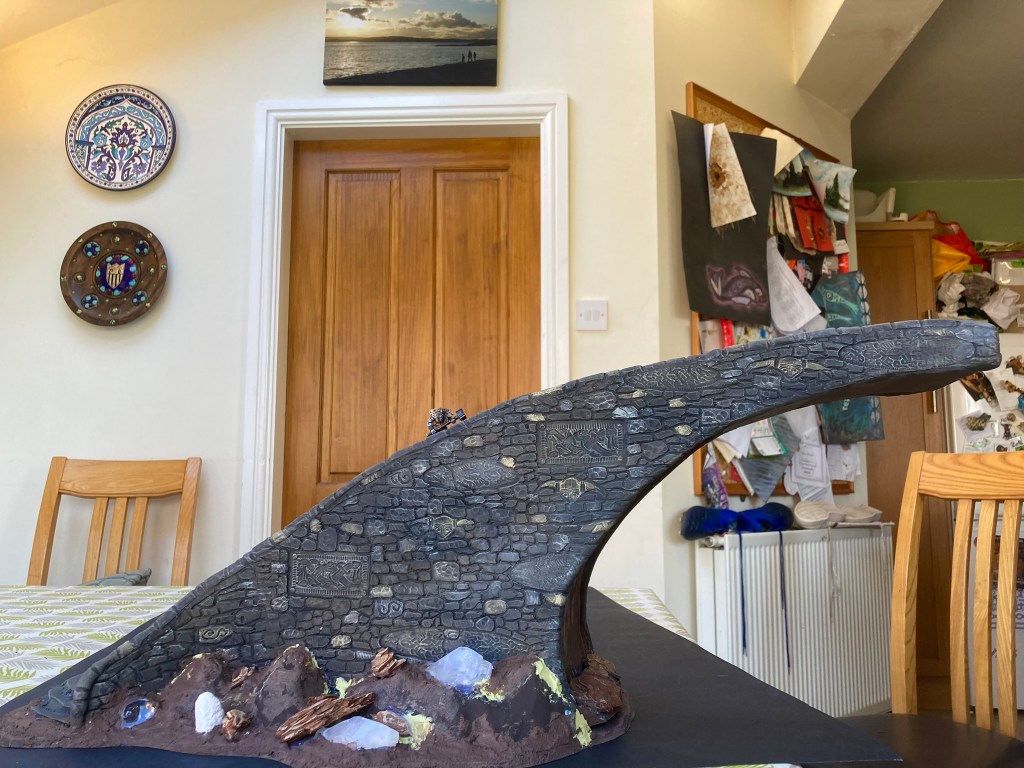
Practicality was also a consideration (what! I hear you cry) – as the battle was going to be fought around the foot of the bridge – rather than across it – so it would need to be easily transportable. This led me to sketch up a design with a definite arch but not one that would extend 4 feet into the air, fun as that might have been! The final design was sized to be carried in a large shopping bag.
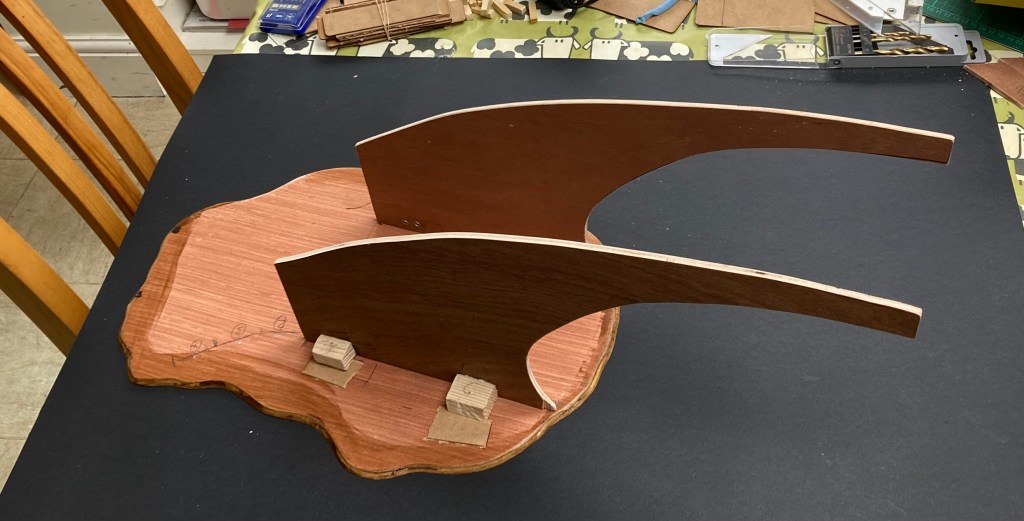
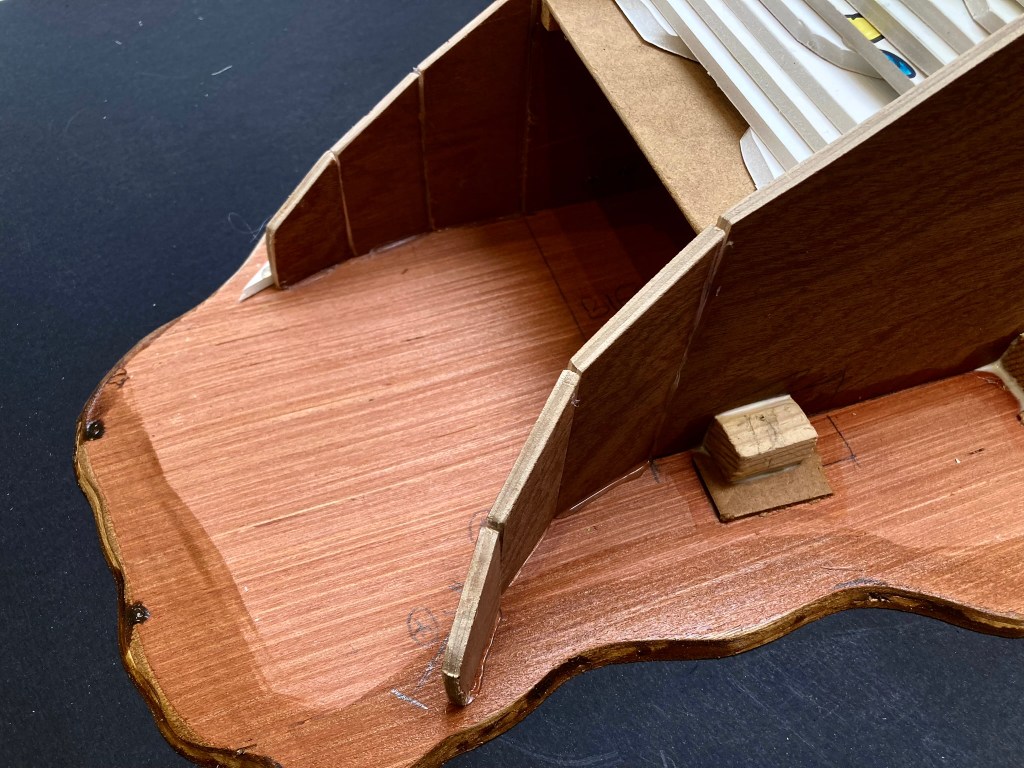
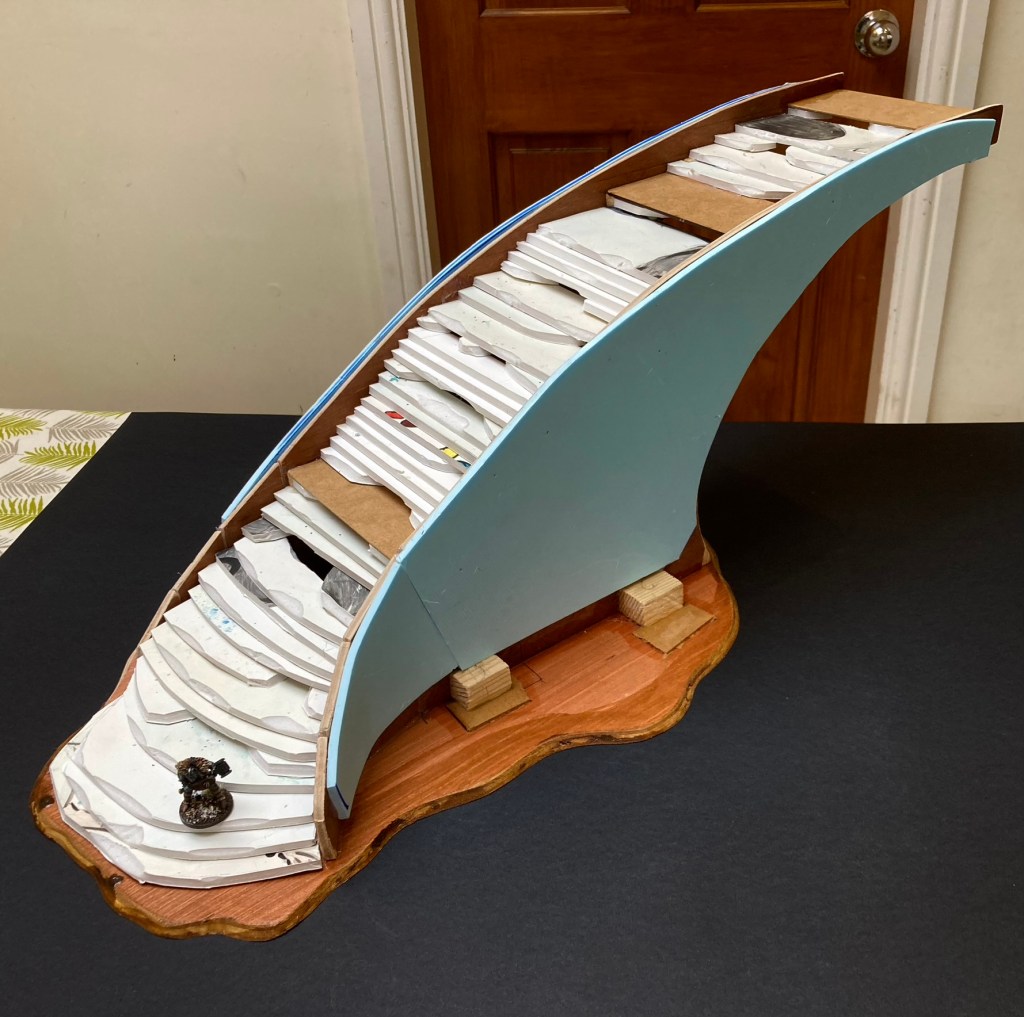
Once I was happy with the shape of the piece, I put together cardboard templates and then cut the three main pieces out of 5mm plywood using an electric jigsaw. The two bridge sides were then split vertically where they join the board in order to be able to create a curved base.
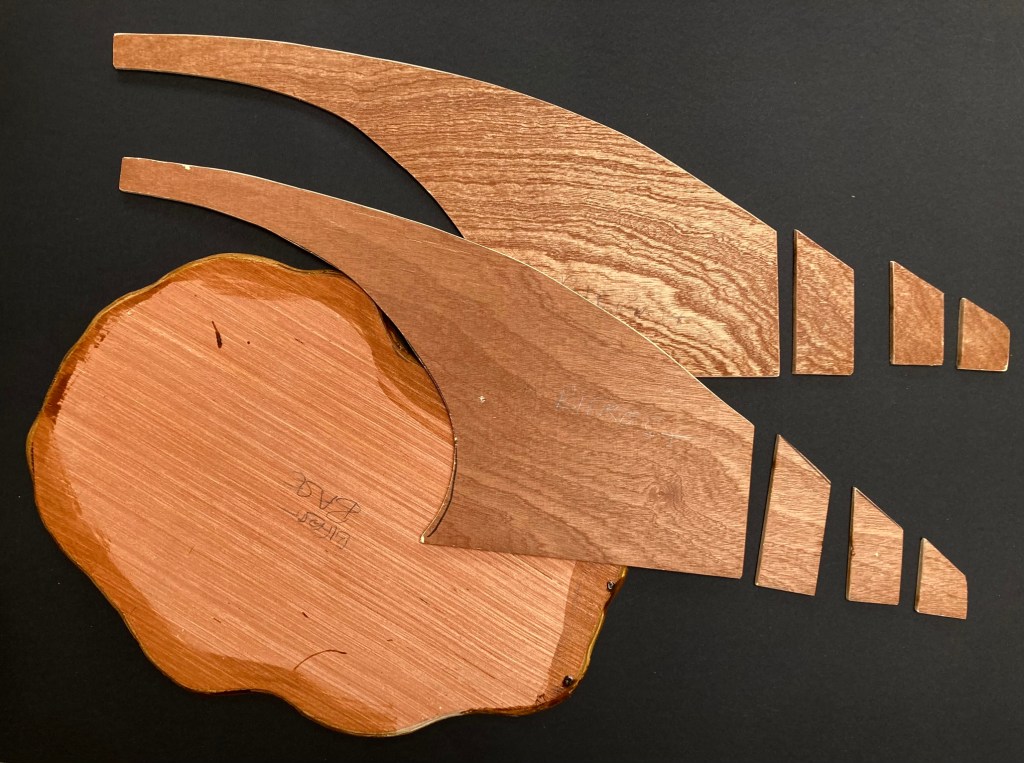
The base was painted with varnish to discourage warping, then I used my rudimentary carpentry skills to assemble the bridge uprights with screws and wood glue. While I could just have glued the whole thing together, I would hate for it to fall apart in transit at some point this year!
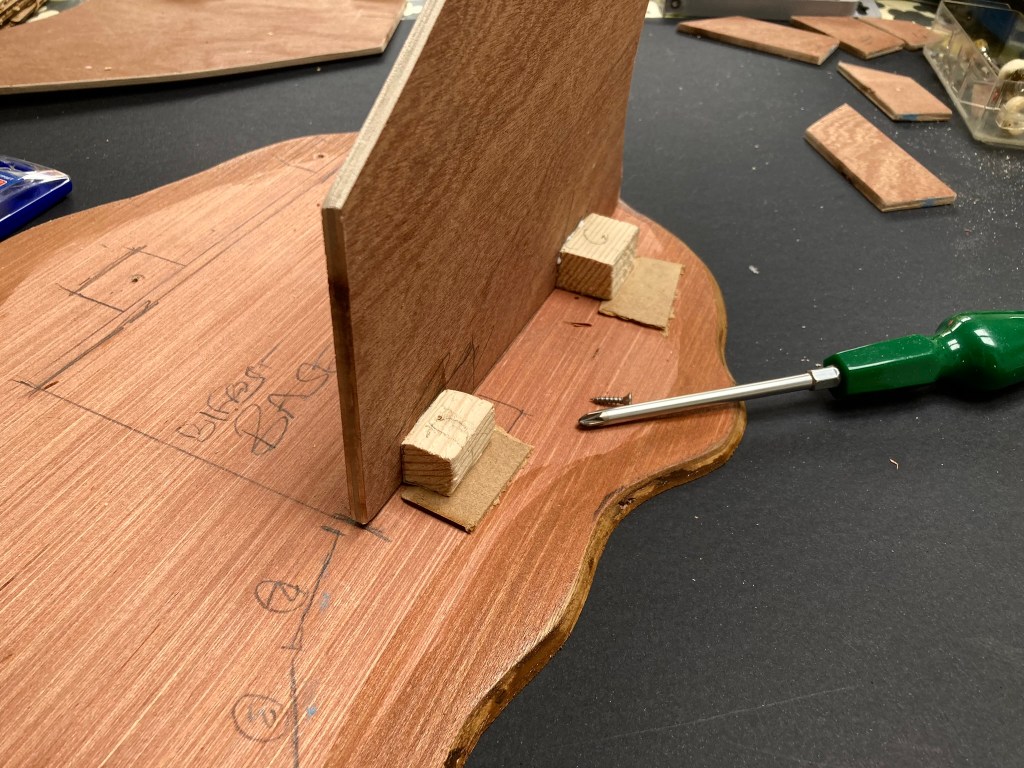
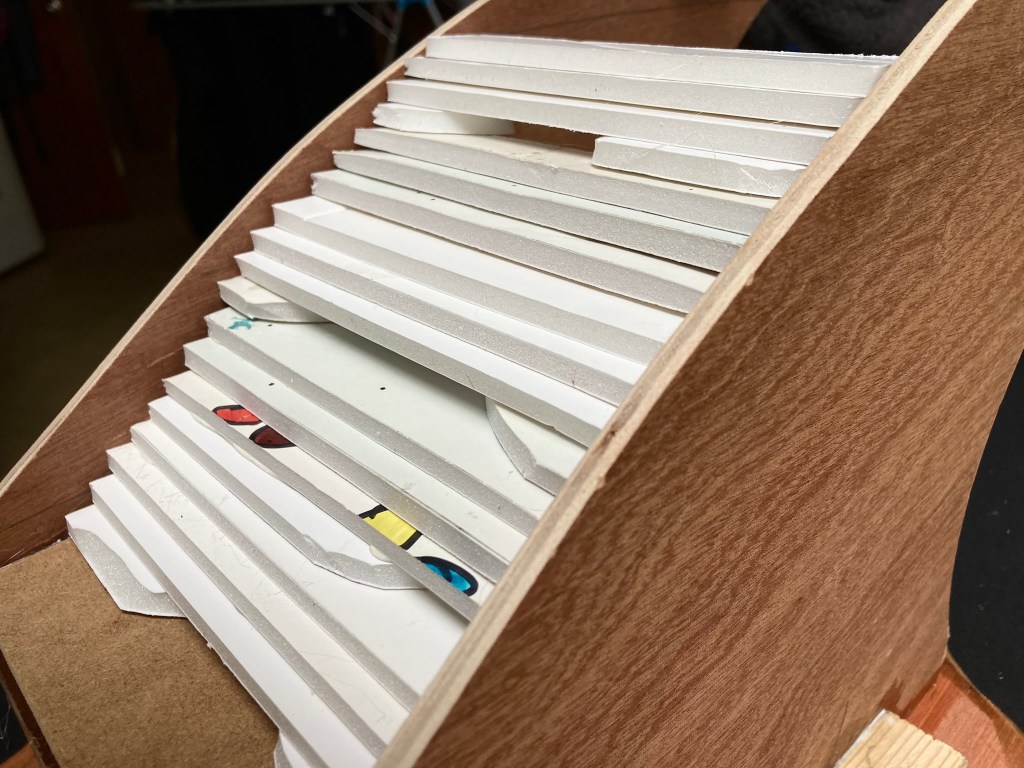
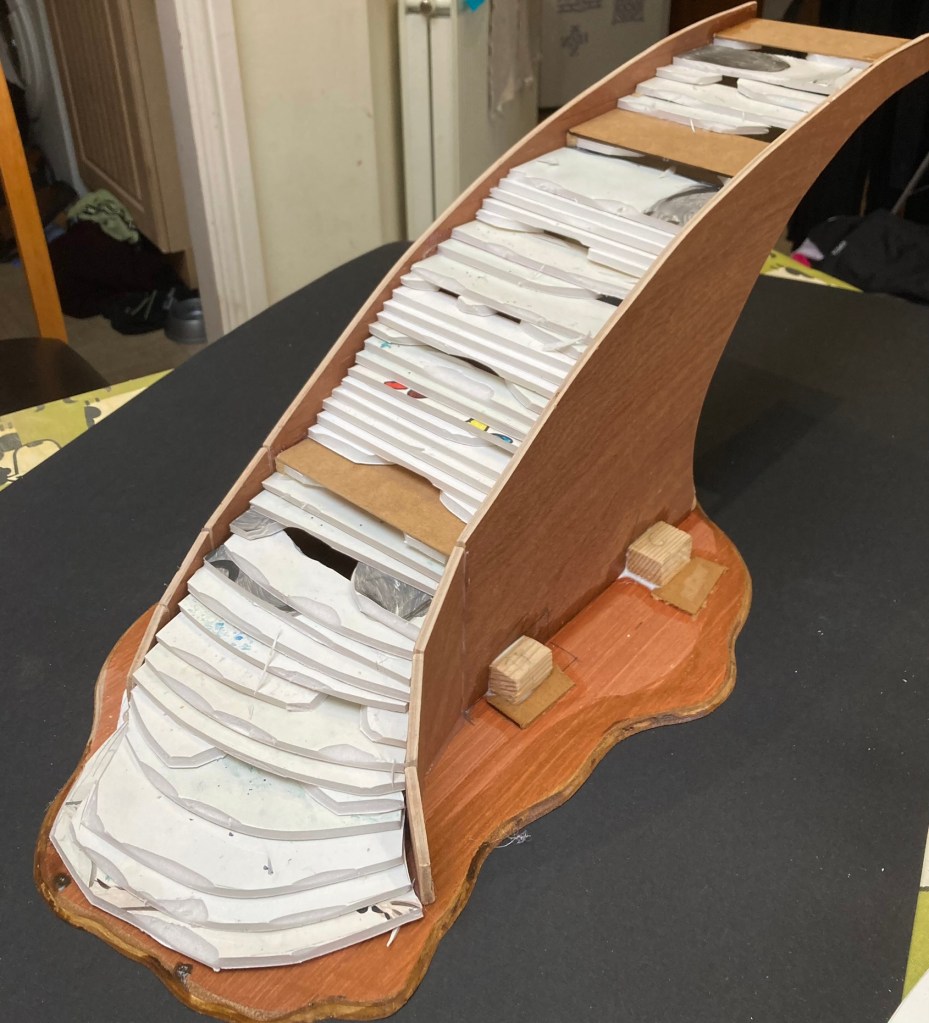
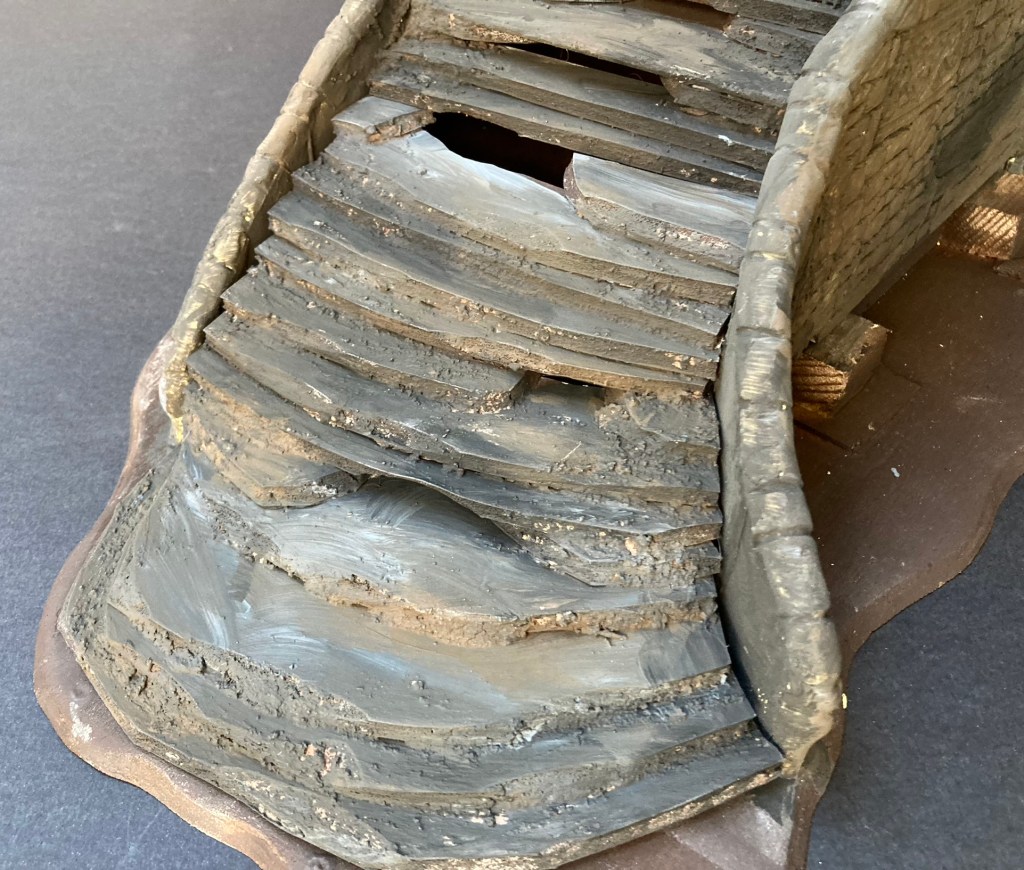
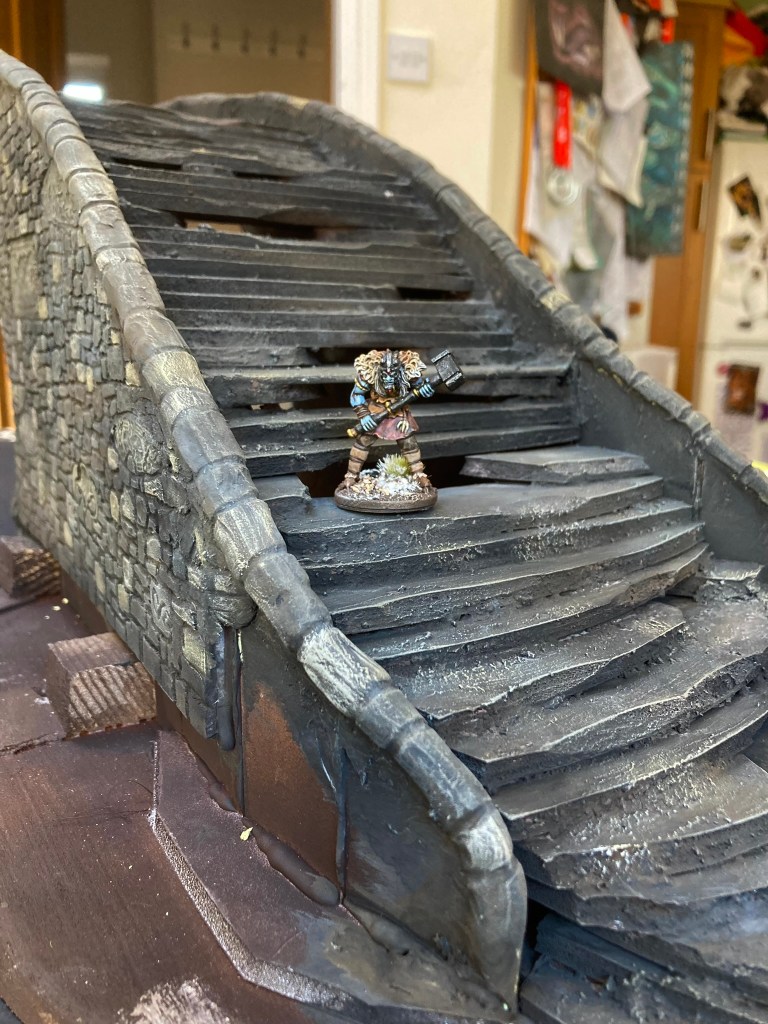
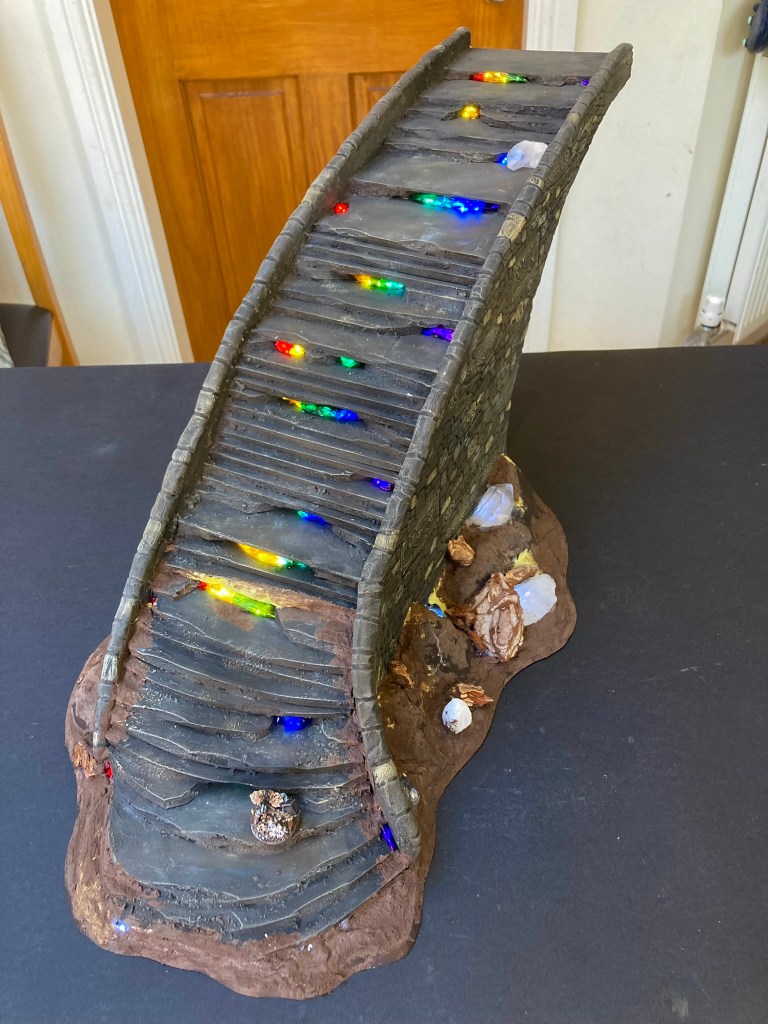
The uprights were deliberately positioned 13cm apart – this meant that, on some sections, I could place a wide step that would fit a 12cm wide Midgard unit base or a Hero model. The bulk of the steps were filled in with scraps of 5mm foam board to create an irregular staircase with some gaps in between to accommodate the lights.
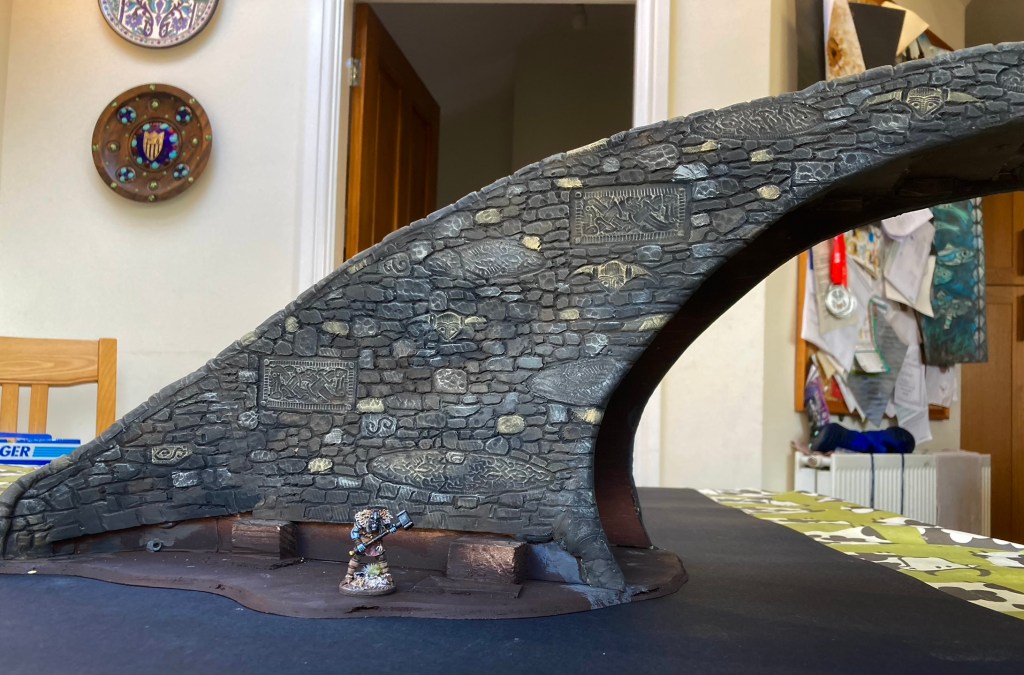
I planned to texture the bridge sides using the same techniques from my Elf Tower build, so glued a couple of sheets of 5mm styrofoam to the wooden sides. This stuff is expensive but well worth it for the effect I was after.
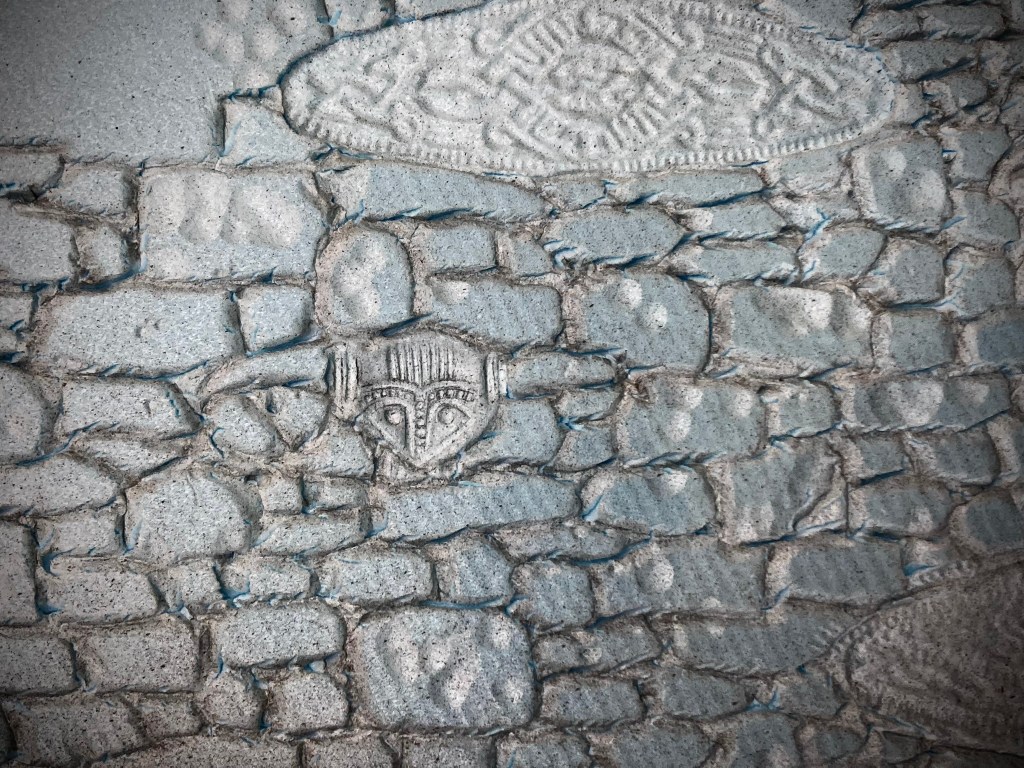
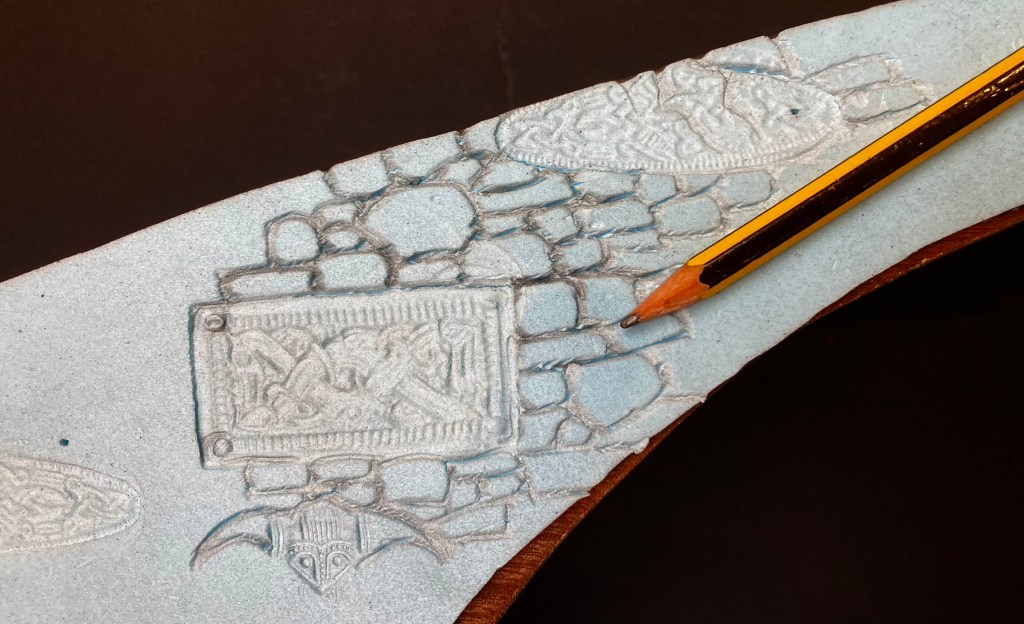
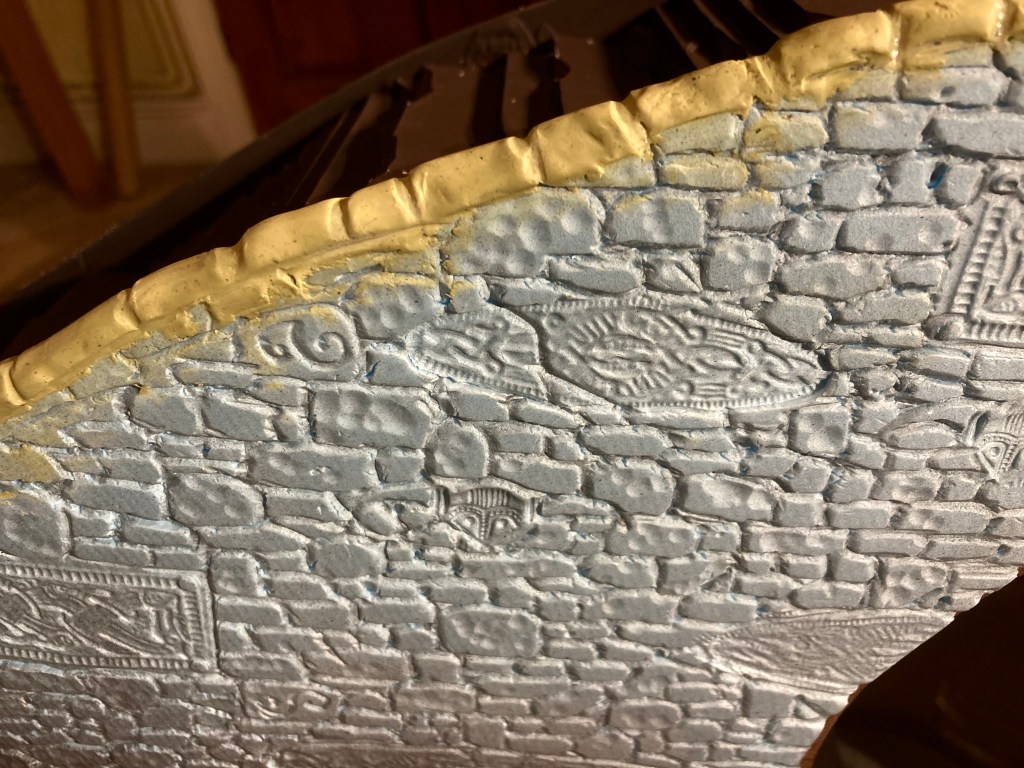
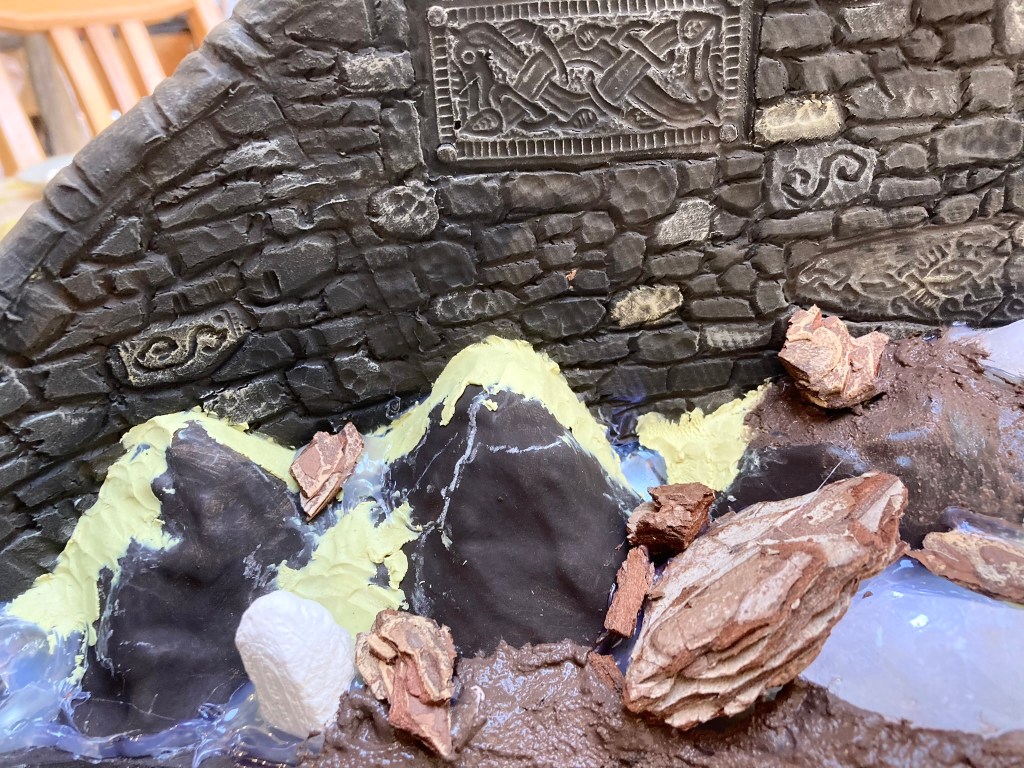
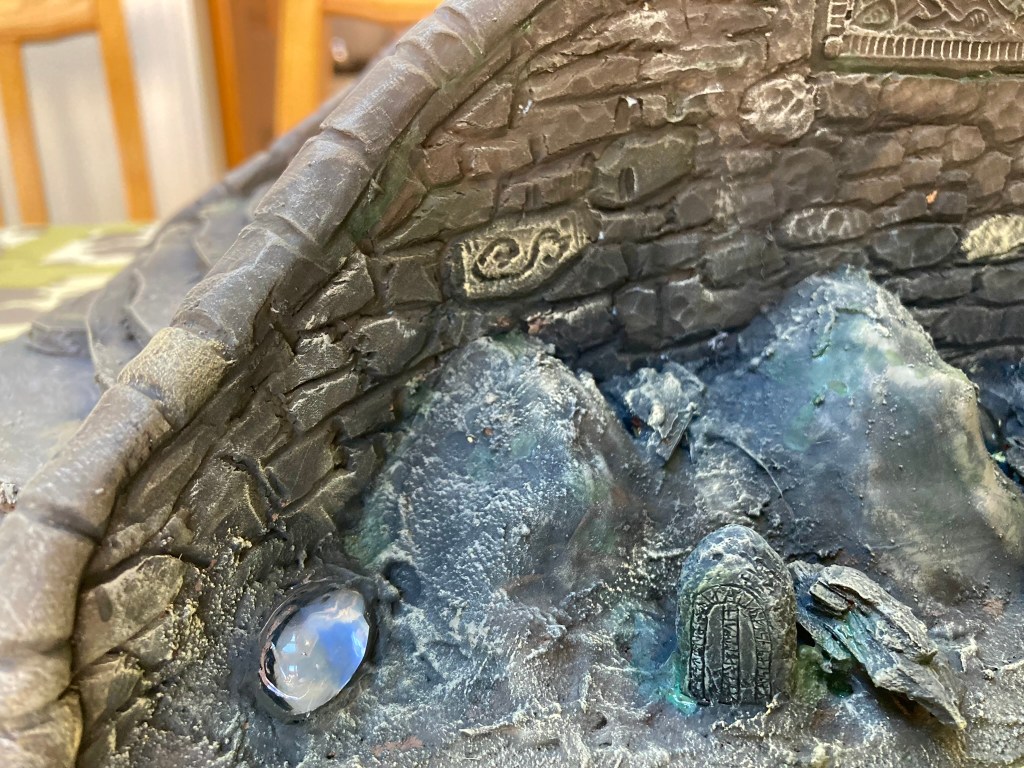
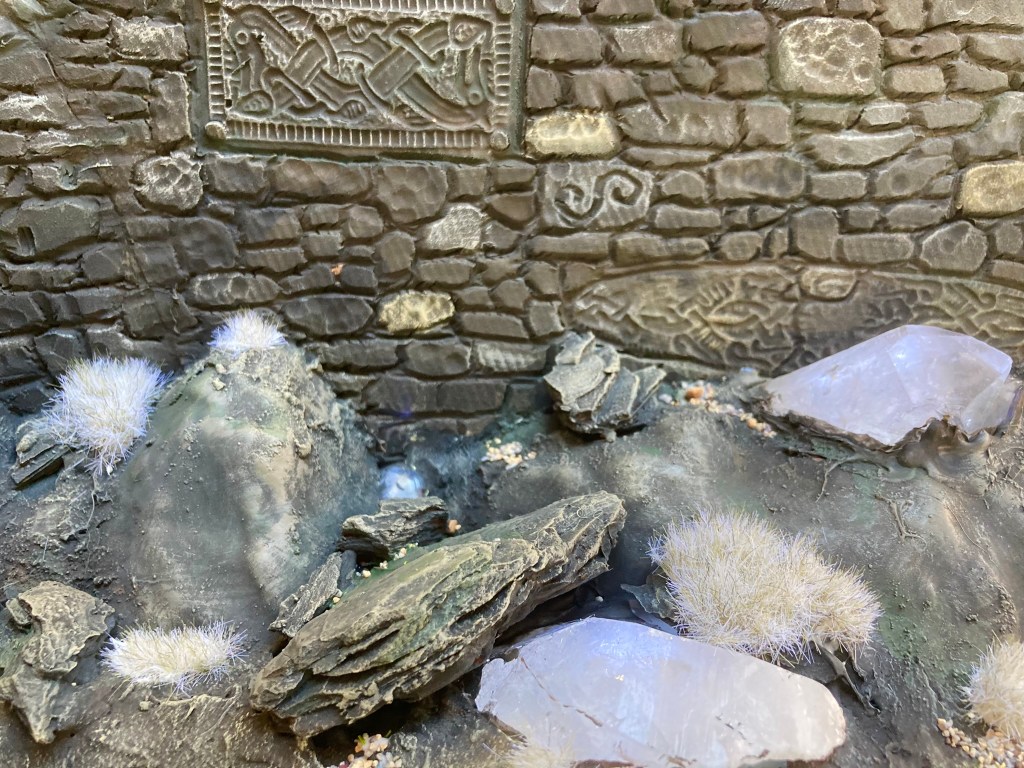
With the glue dry, it was time to create the stonework design. Using some Viking/ Saxon metalwork from the loft, I pressed these into the foam to suggest large blocks that had been placed by gods with the areas around filled in with smaller stones. Additional texture was added with a pencil. Once completed, I modelled the edges of the stonework using standard yellow/green Milliput epoxy putty. I could have used more foam, but wanted the edges to be able to resist knocks in transit, so Milliput was the correct tool for the job.

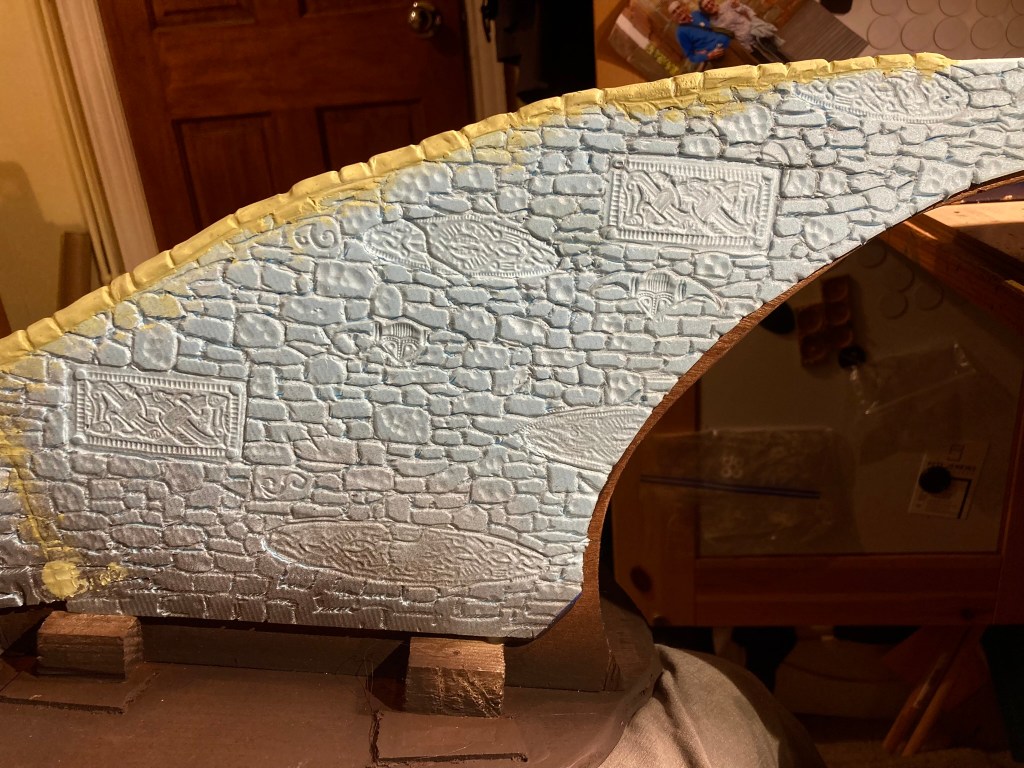
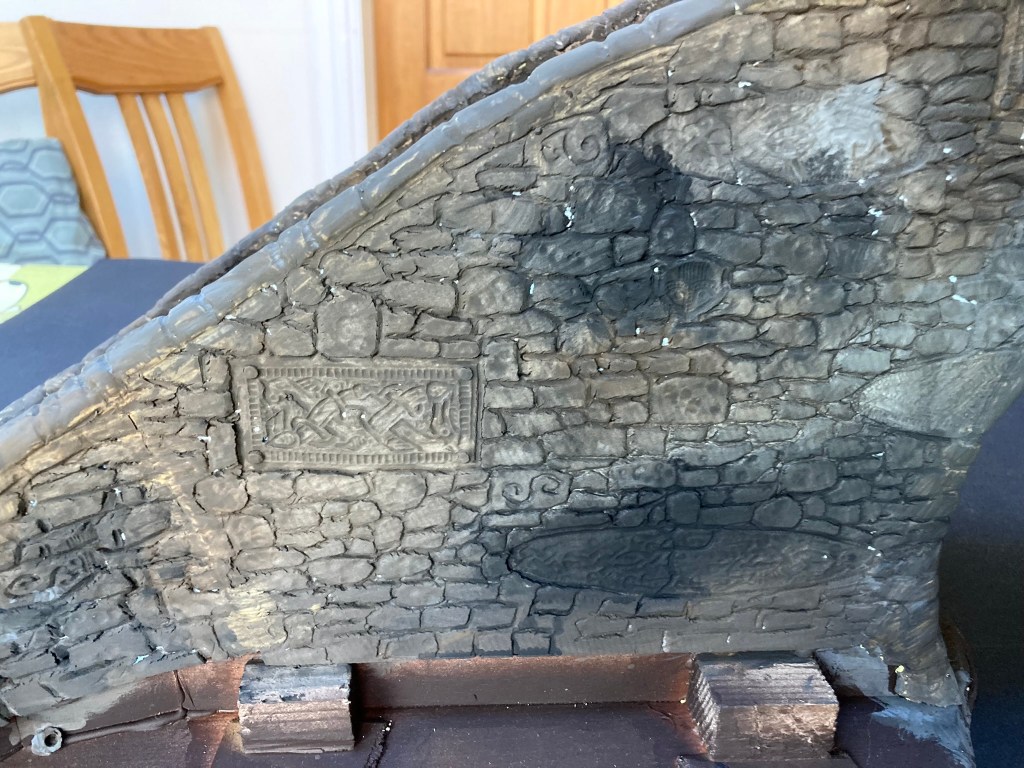
With the bridge walls complete, it was time for an initial coat of paint. A mix of sand, filler and PVA glue helped to blend the steps together, which was followed up by a coat of craft acrylic applied in patches (Deco Art Acrylics, using a blend of Raw Umber, Slate Grey and Black).
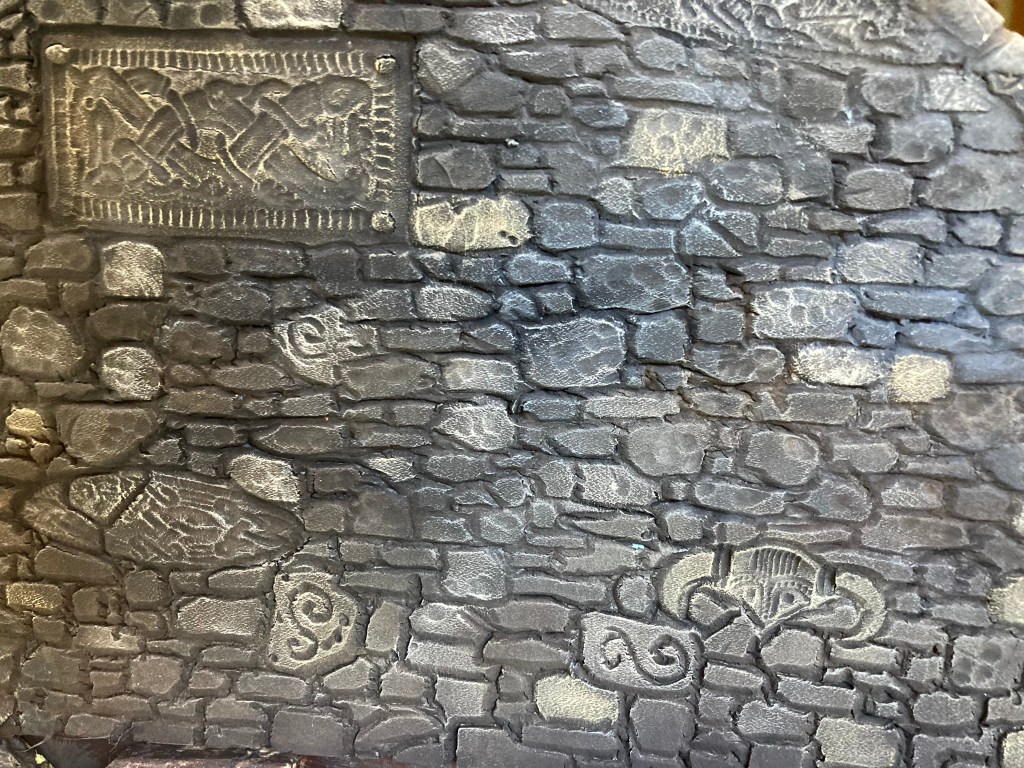
Once dry, the whole thing was given a black wash and then lightly dry brushed with lighter versions the original acrylics. Individual stones were picked out in different shades of brown, grey and khaki.
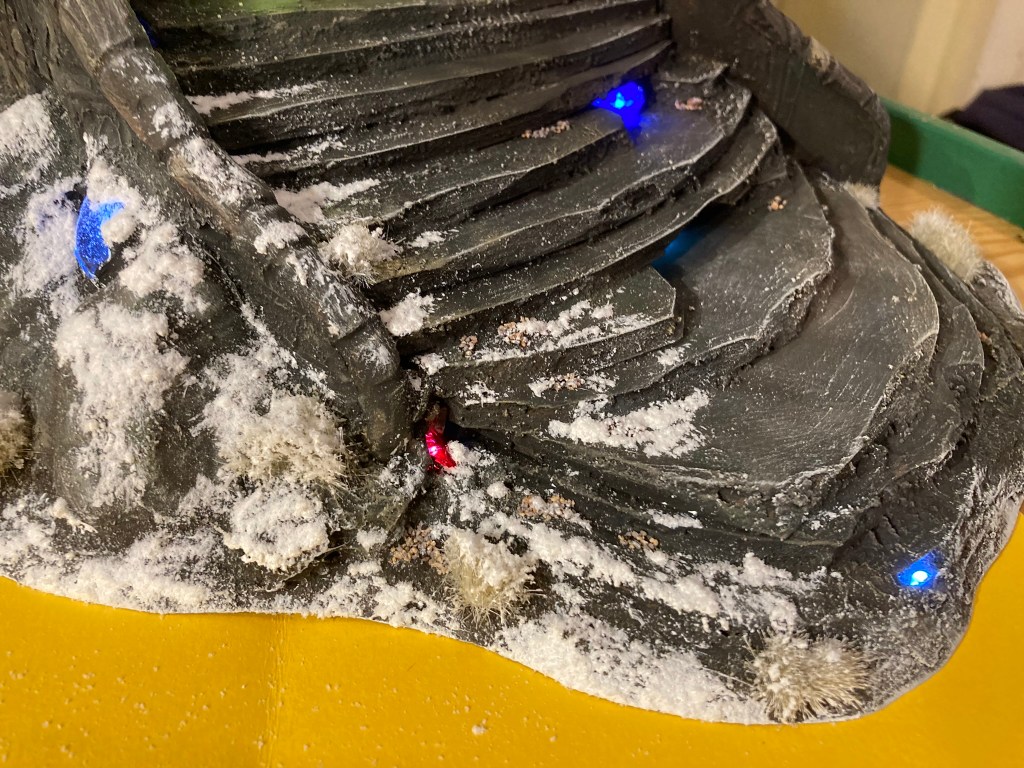
Now the fun really started – time for the lights! I had initially ordered some programmable LEDs from eBay, but these turned out to be incredibly bright and a bit too disco for what I was after. Instead I bought a couple of sets of simple white LEDs and found some coloured cellophane in the bits draw – these would form the basis of my rainbow scheme.
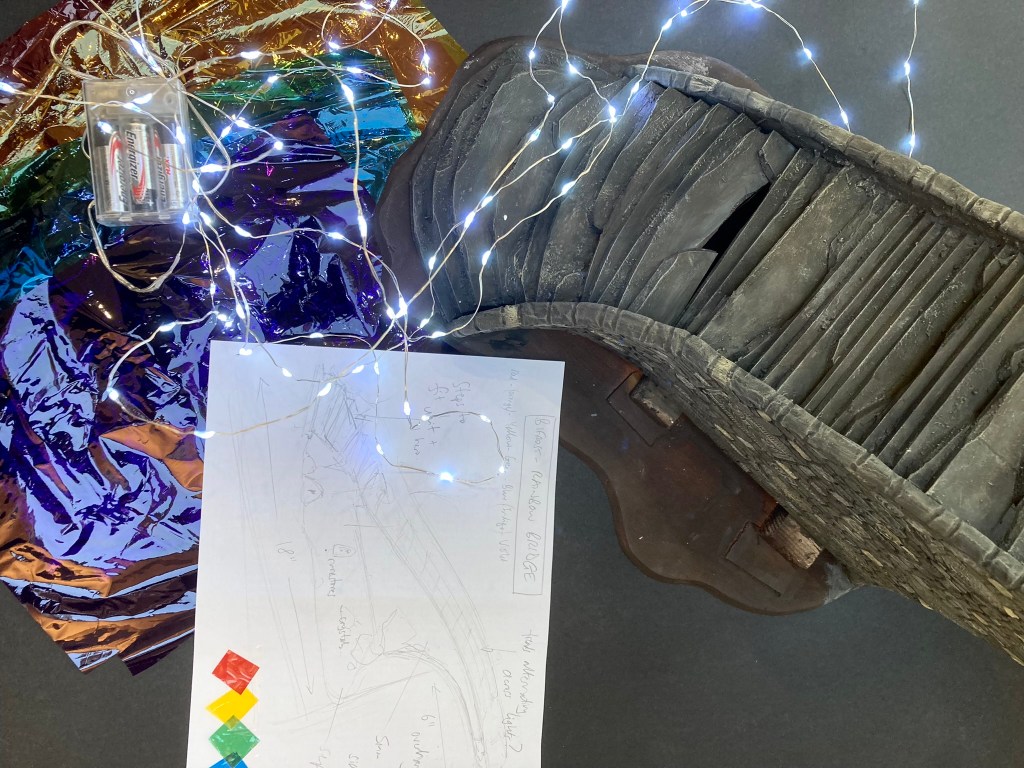
I’d left the inside of the bridge hollow with a pull-out section to allow me to hide the lighting circuit – bundles of LEDs were wrapped up together in sections of cellophane and then pushed into the gaps between the steps. Once I was happy with the lights, I then glued, taped and pinned everything into position.
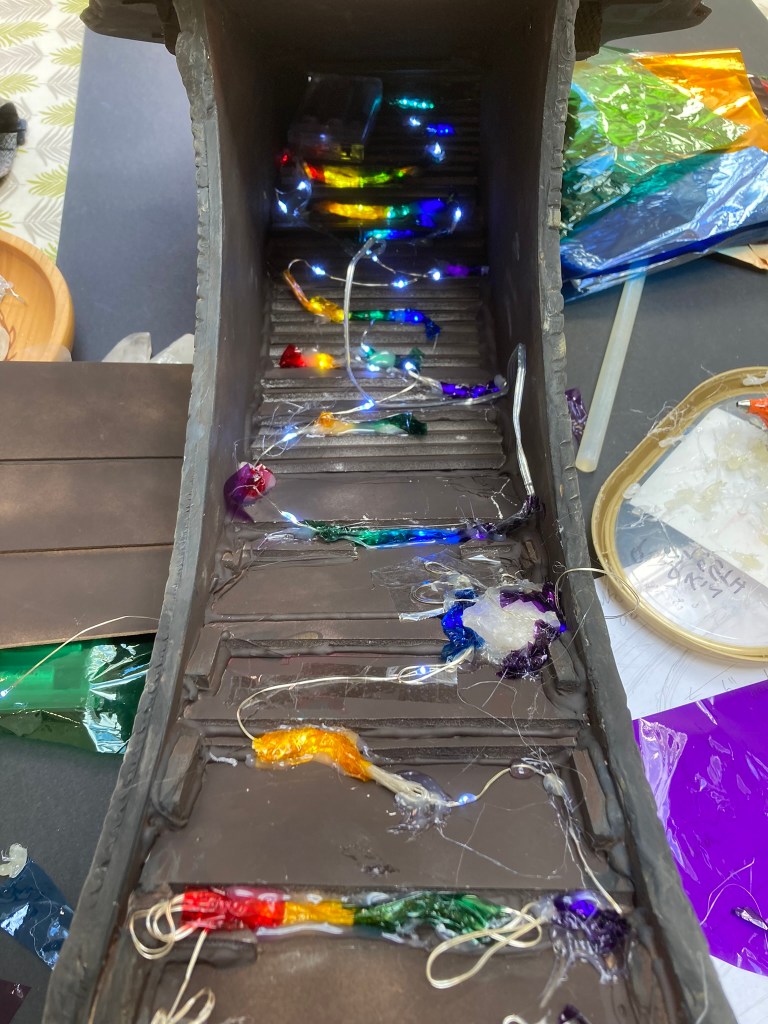
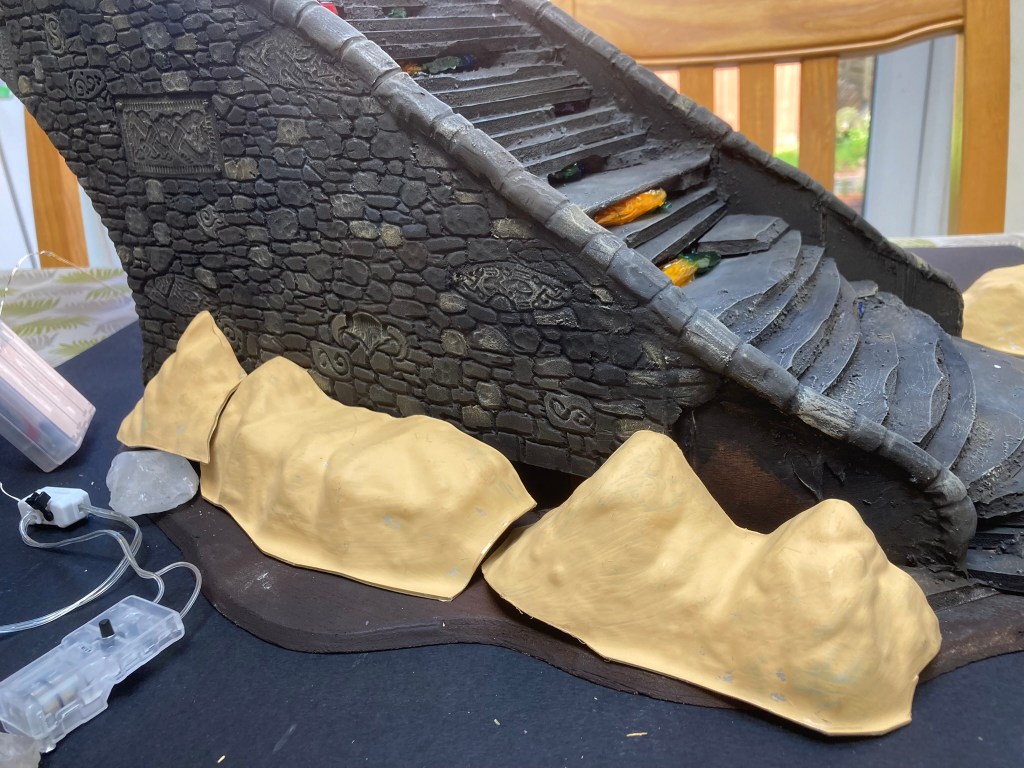
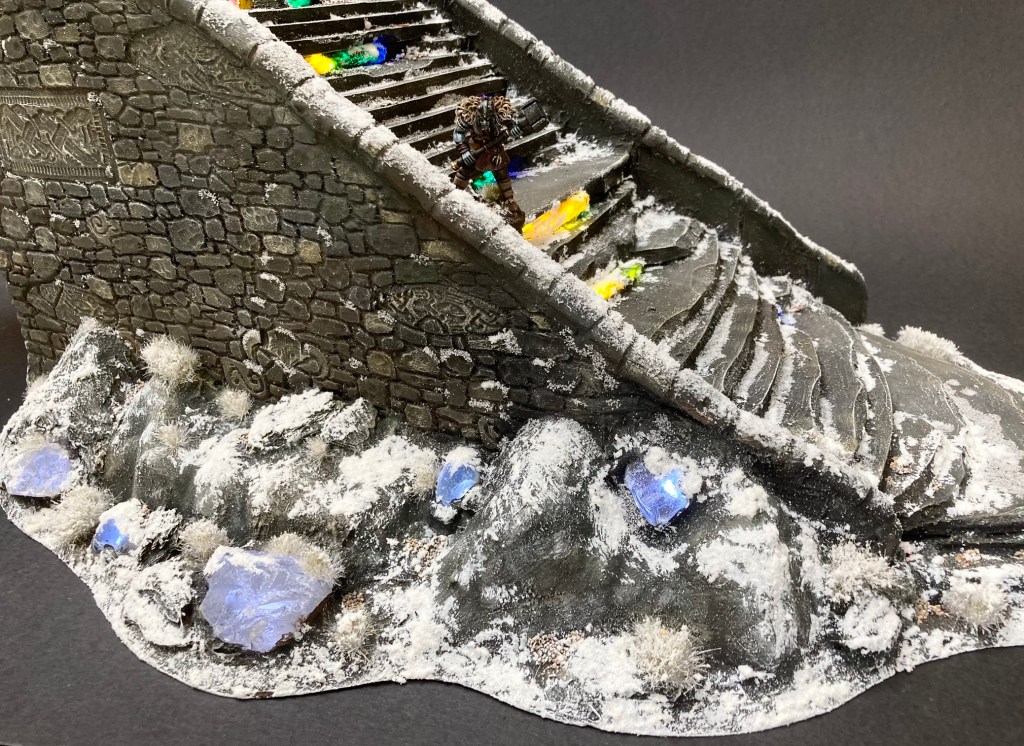
An entire set of 100 LEDs was used to light the staircase, with another set round the outside of the bridge. I built up a set of rocks using various vac-formed left overs from a previous project, then modelled in glass pebbles and pieces of quartz crystal to give the impression of the area being generally enchanted. Hot glue and Milliput were again used to hold everything together and hide the cracks!

The final steps involved tidying up the groundwork and adding some grass tufts – I used the Gamers Grass winter ones.
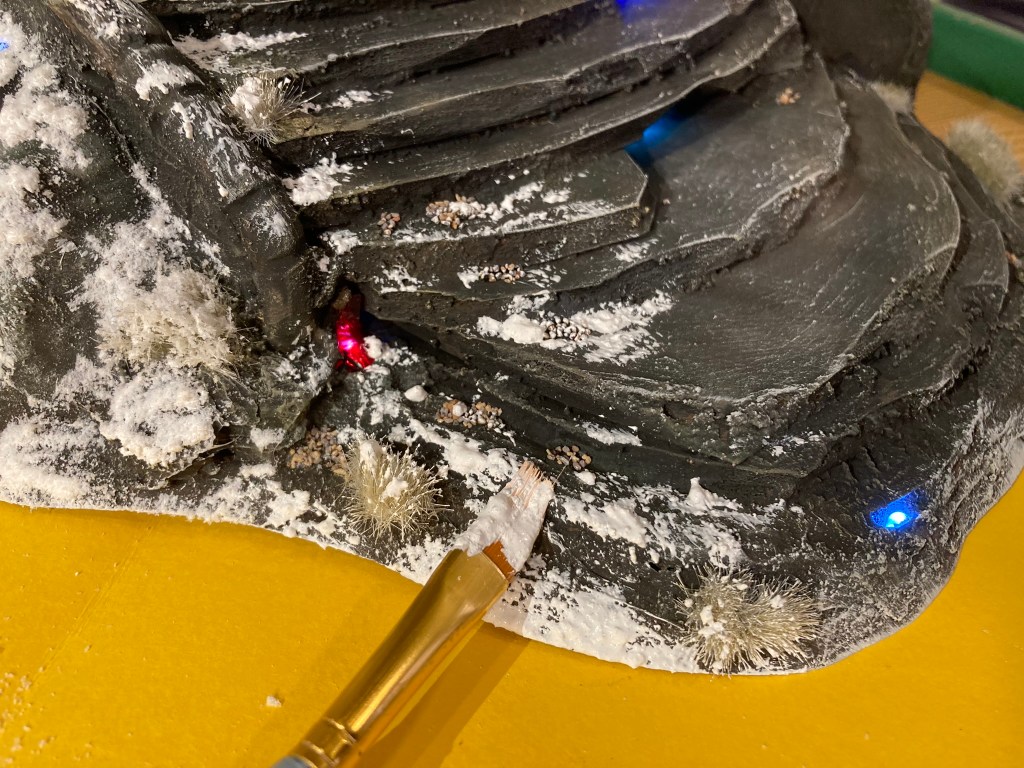
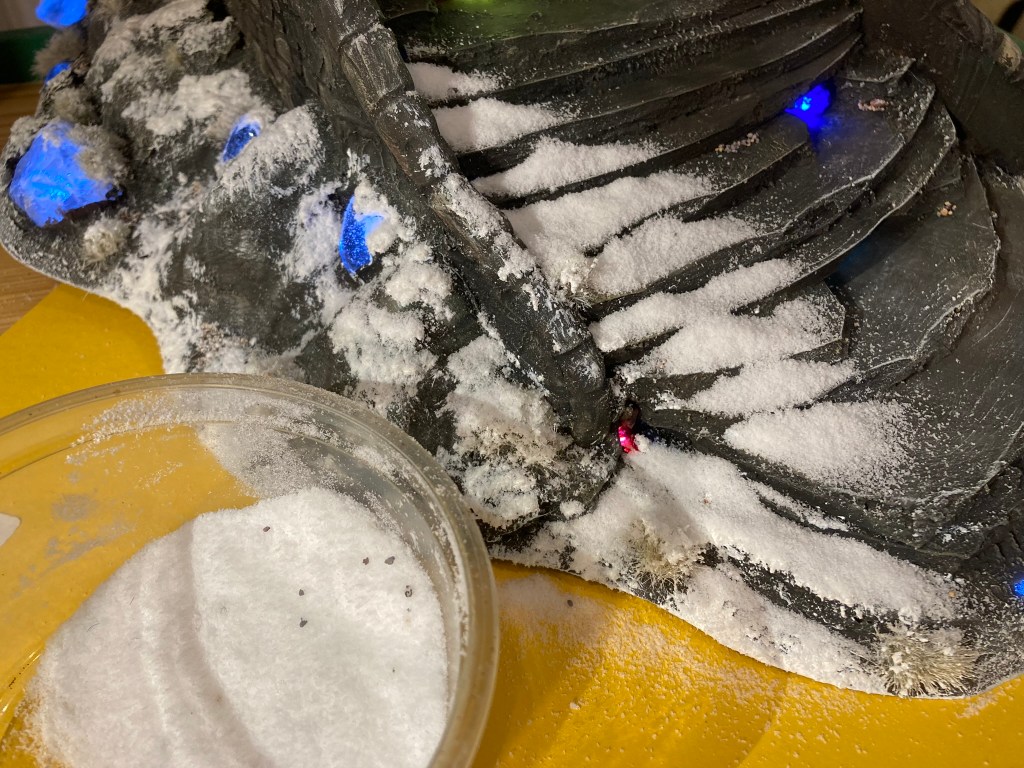
It all looked pretty good at this point, but now it was time to add the snow (the bridge is going to be used on a snowy table so I needed it to blend in). This was my usual mix of white acrylic paint, PVA glue and Woodland Scenics snow flock – I added extra paint as the flock comes out translucent if you apply it with just glue. The pictures show the three stages – apply snow mix with a brush, scatter extra snow flock on top, then shake off.

An additional frosty effect was added to areas of the stonework using a tiny amount of PVA and some snow flock.


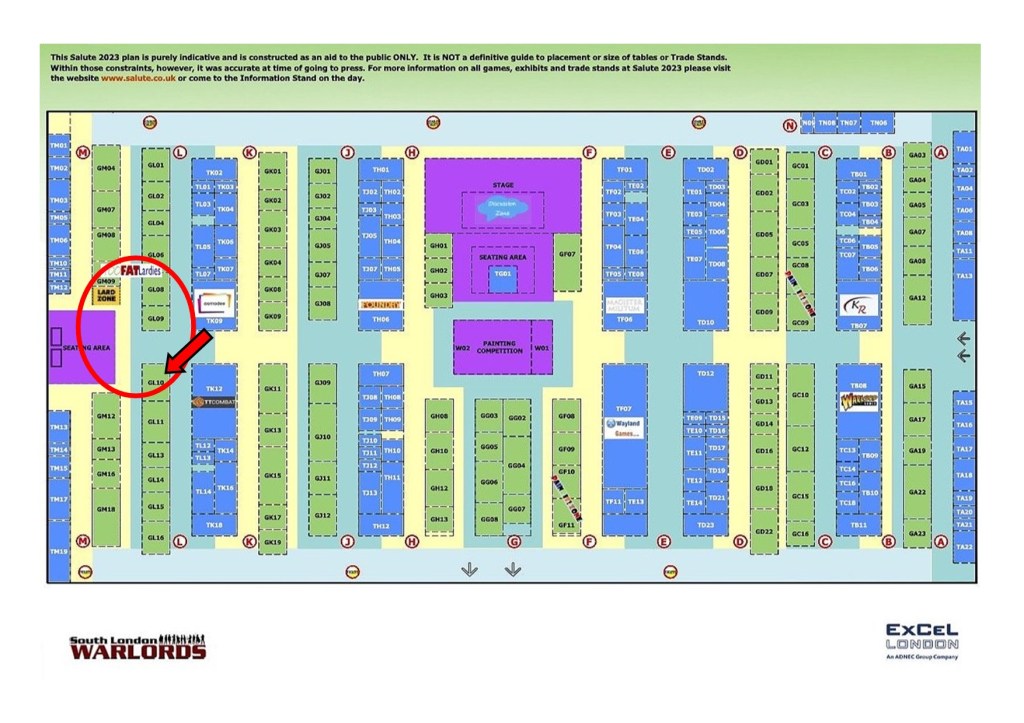
And finally, it was all done! I can’t wait to see what it looks like on the gaming table at Salute 50. If you’re at the show, you can find us in the Lard Zone at the far end of the hall (marked in red on this floor plan).

Wow, that is a fantastic piece of terrain. Really informative step by step template for anyone else wishing to emulate it.
LikeLiked by 1 person
Many thanks – glad it was useful.
LikeLike
Wow, that bridge looks fantastic
LikeLiked by 1 person
Cheers! It went down well at Salute yesterday.
LikeLike
This is brilliant! It looks like something I would have tried before I got a 3-D printer. I’m impressed and inspired, thank you.
LikeLiked by 1 person
Thanks very much, Kenny! Someone commented at Salute yesterday that it would have taken 3 days to print. 🙂
LikeLiked by 1 person
Printing it would be the easy bit, I would think.
LikeLiked by 1 person
Genius!
LikeLiked by 1 person