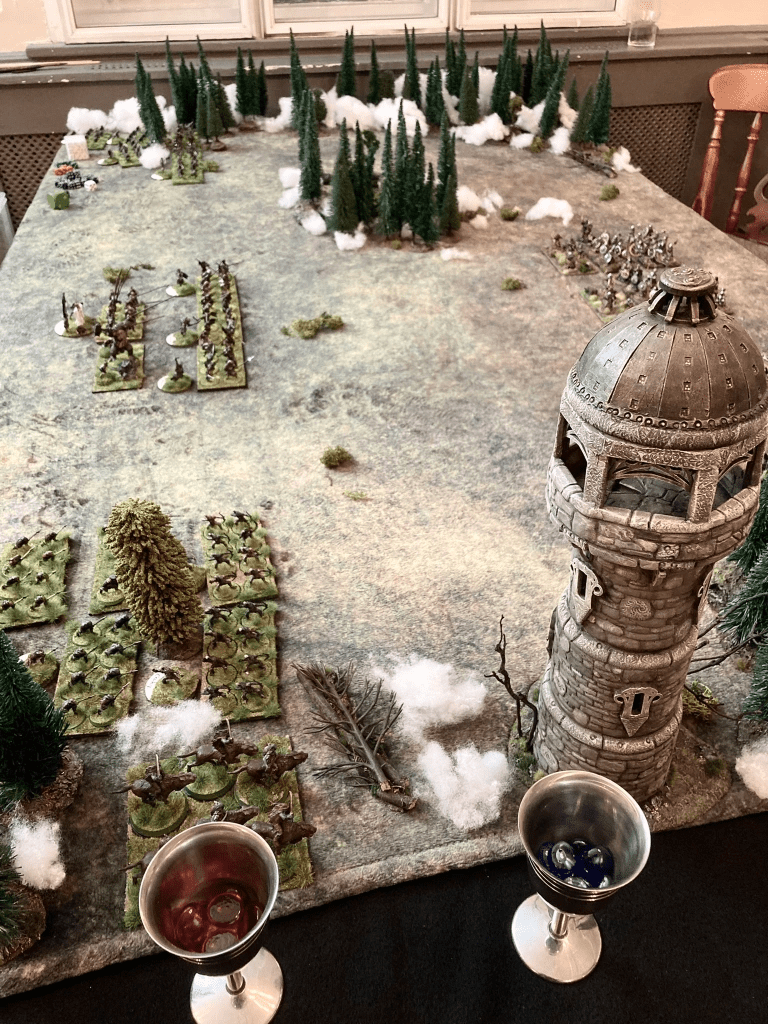
Every so often, I love to build a terrain piece for gaming. Sometimes this gets a little out of control (the 7 foot long Fort Vaux model or perhaps the mountainside of Keren leap to mind), but this time I went for something more restrained.

I originally built this is March/April 2020, during the first big UK lockdown, but have never posted the whole thing on the blog, so here goes!

There’s something wholly therapeutic about terrain building. I enjoy working less precisely than I have to when painting the faces of minis, but there’s also the pure joy of creation – making something out of bits and pieces to enhance the gaming table. Terrain sets the scene in the miniature battles that we play out, so getting a few hours to spend time on it is a real treat.
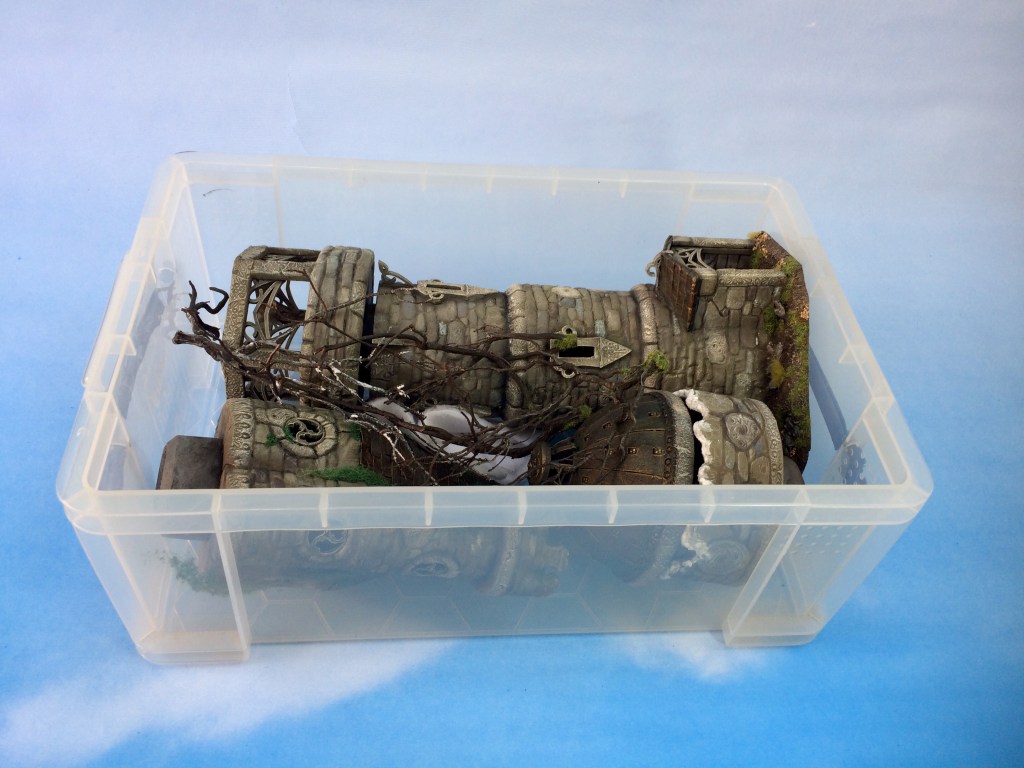
As a teenager, I often built things that I couldn’t store…there was a complete castle -built to the floorplans of the McDeath Warhammer scenario pack out of expanded polystyrene ceiling tiles – with nothing to keep it in. Some big old cliff sections, again made from white (easily chipped) polystyrene, suffered every time they moved house or were brought out for a game. The last few years have seen me transferring my whole collection into the ubiquitous Really Useful Boxes, so I decided to make the elf tower to fit into one of these.
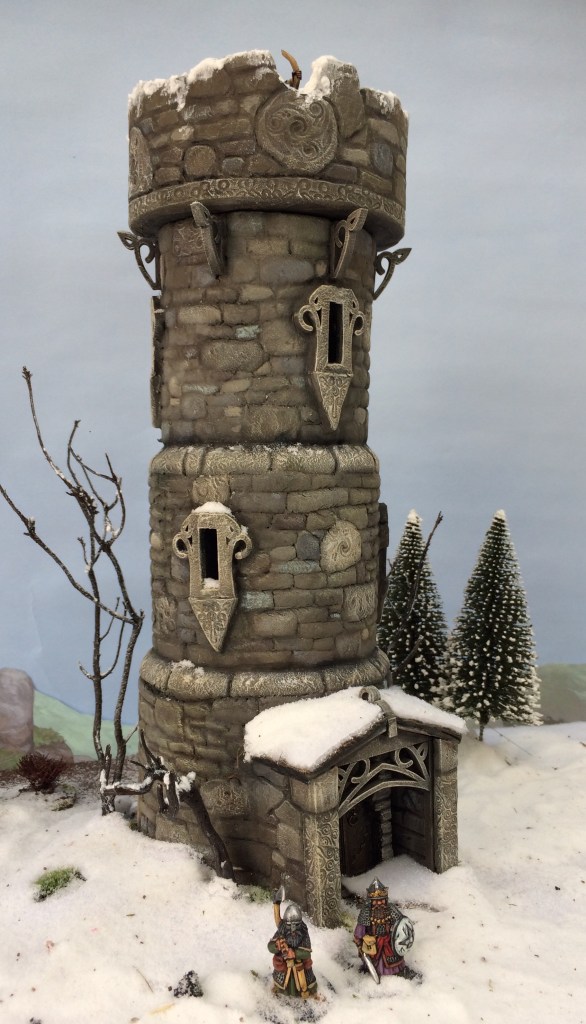
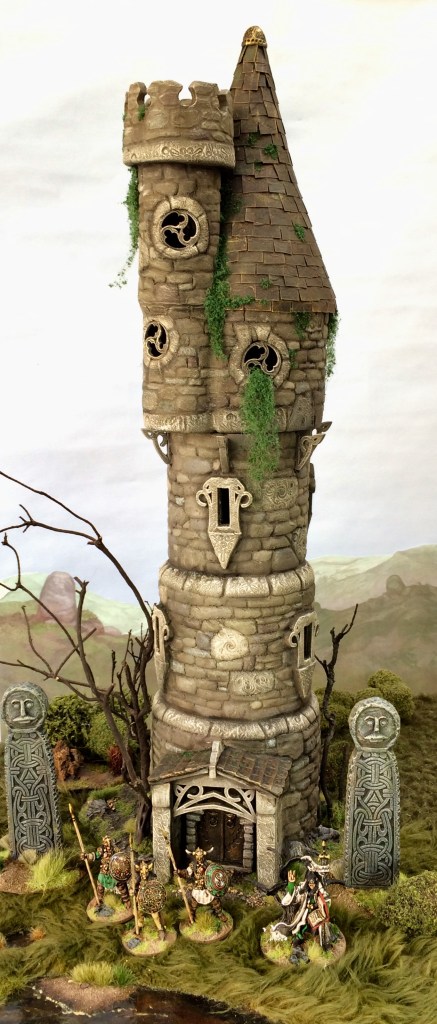
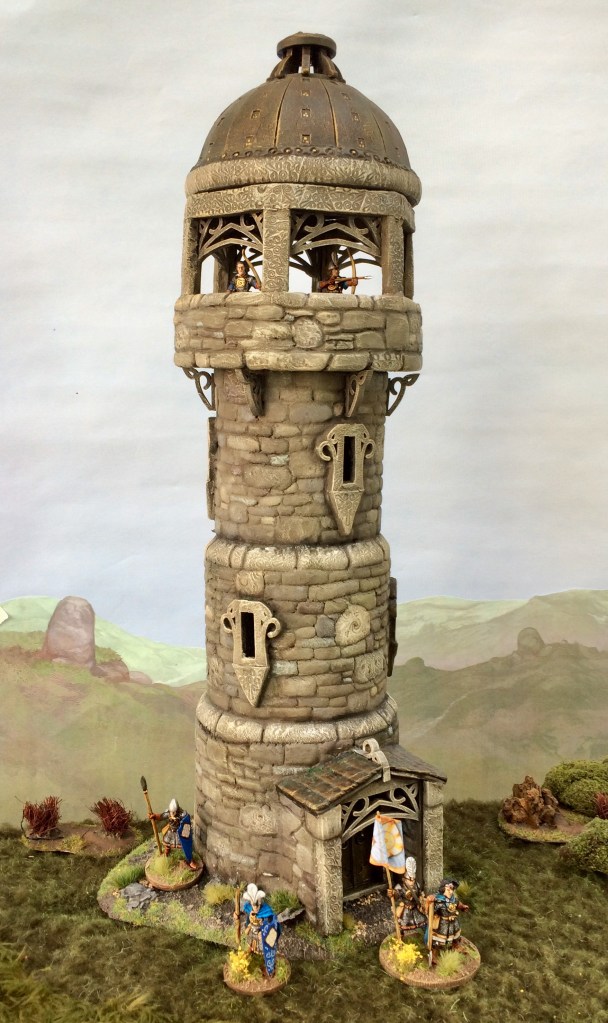
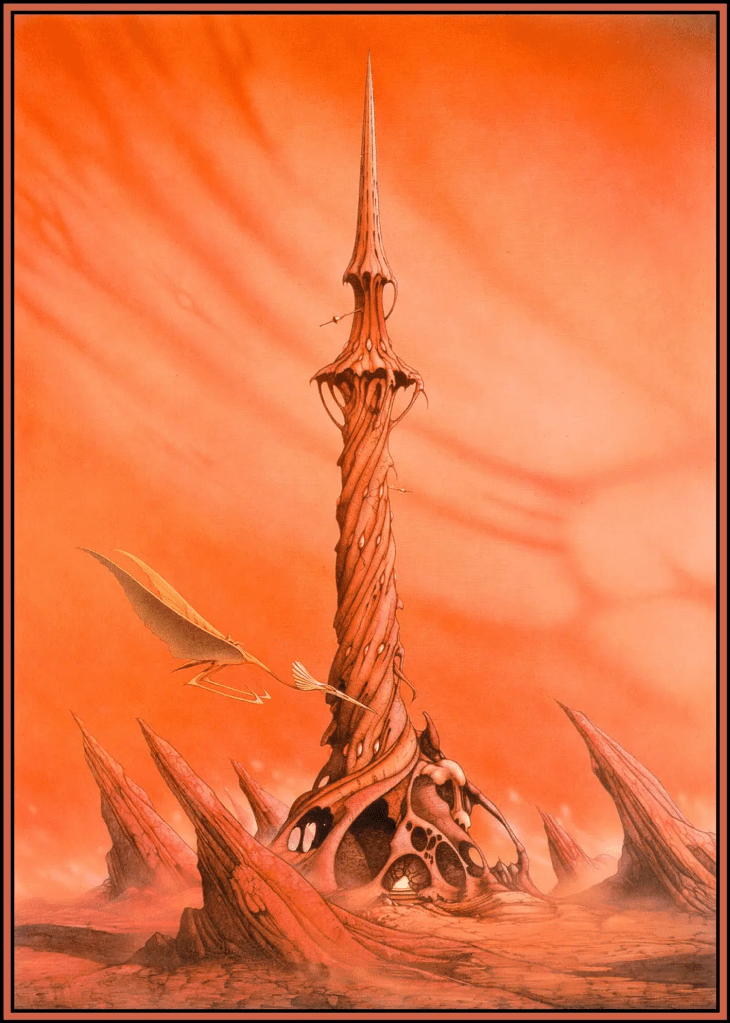
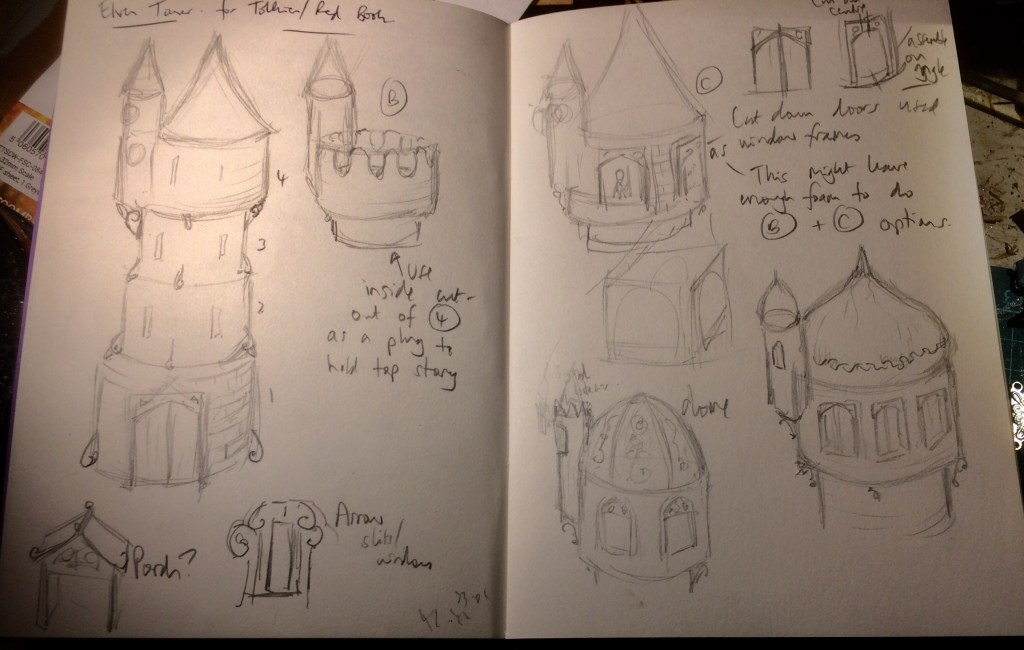
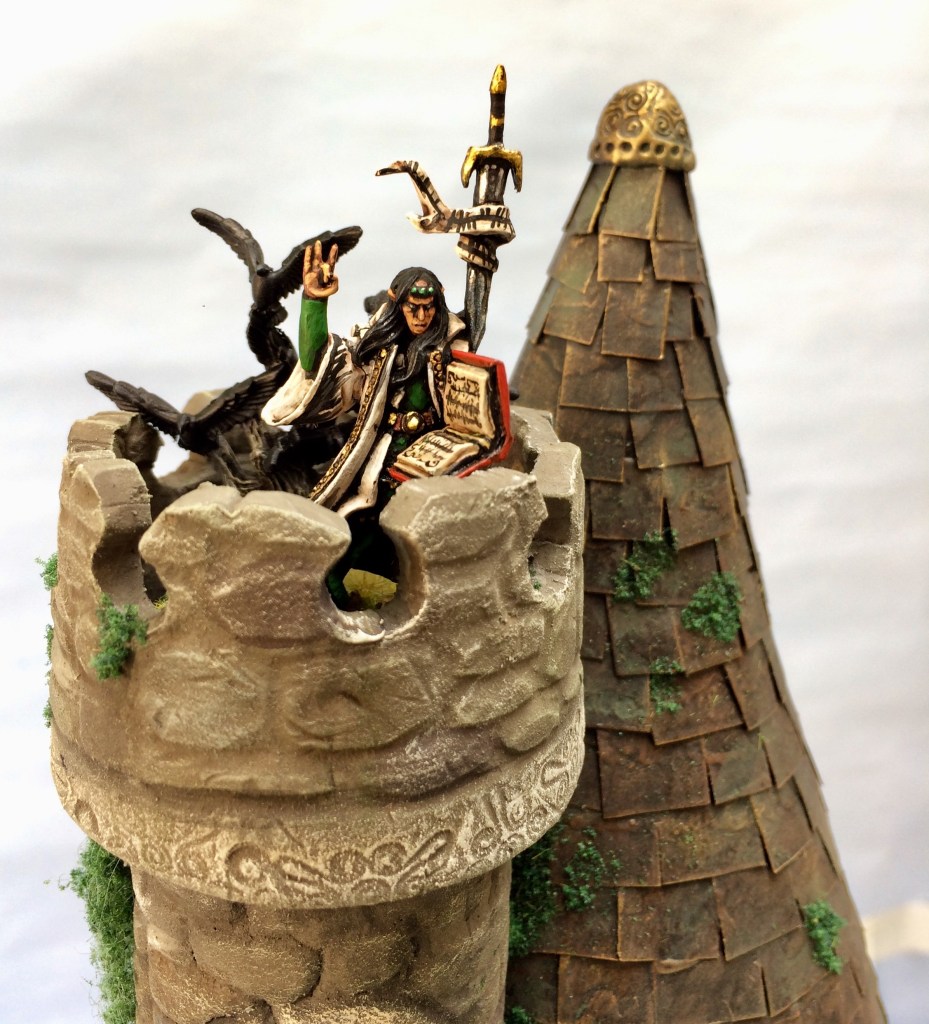
Towers are, unsurprisingly, a common theme in fantasy and mythology. Initially, I wanted a Tolkien-style Elf watchtower but with a swappable top section for a different look for other settings, specifically The Red Book of the Elf King (a Moorcock-inspired fantasy setting). The art of Rodney Matthews was also an influence at this stage of the project.
My basic construction material was to be foam cylinders, which I had cut for me by Gerard Boom of Shifting Lands at Crisis 2018; they’d been sat in my cupboard waiting to be used since then.

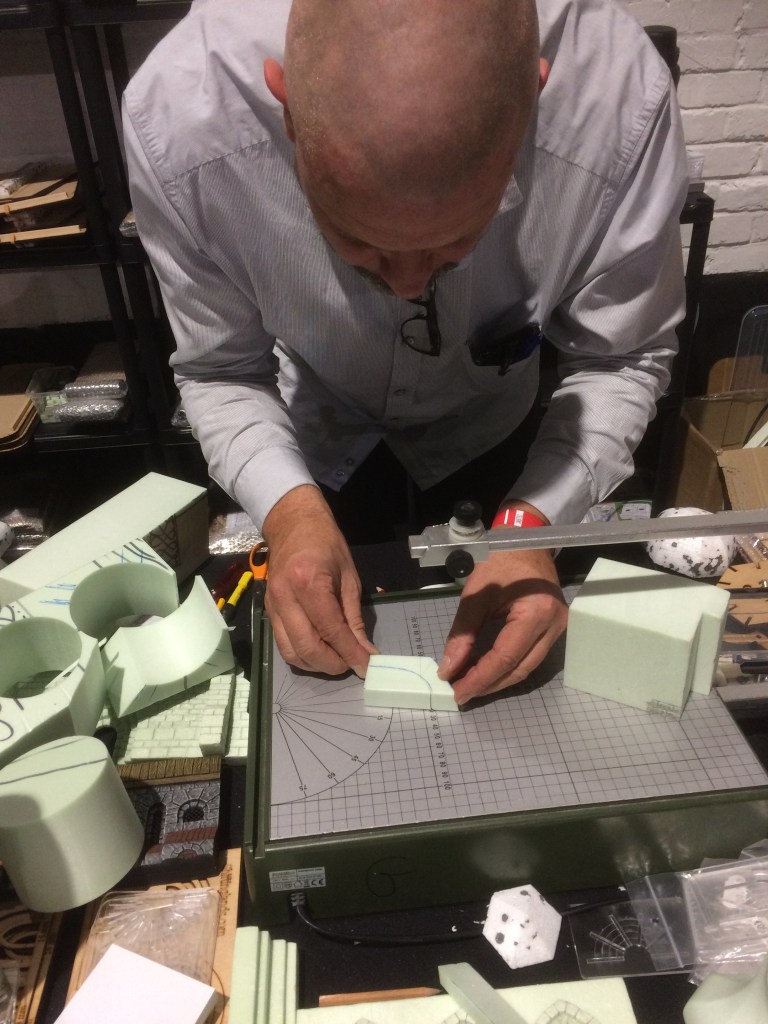

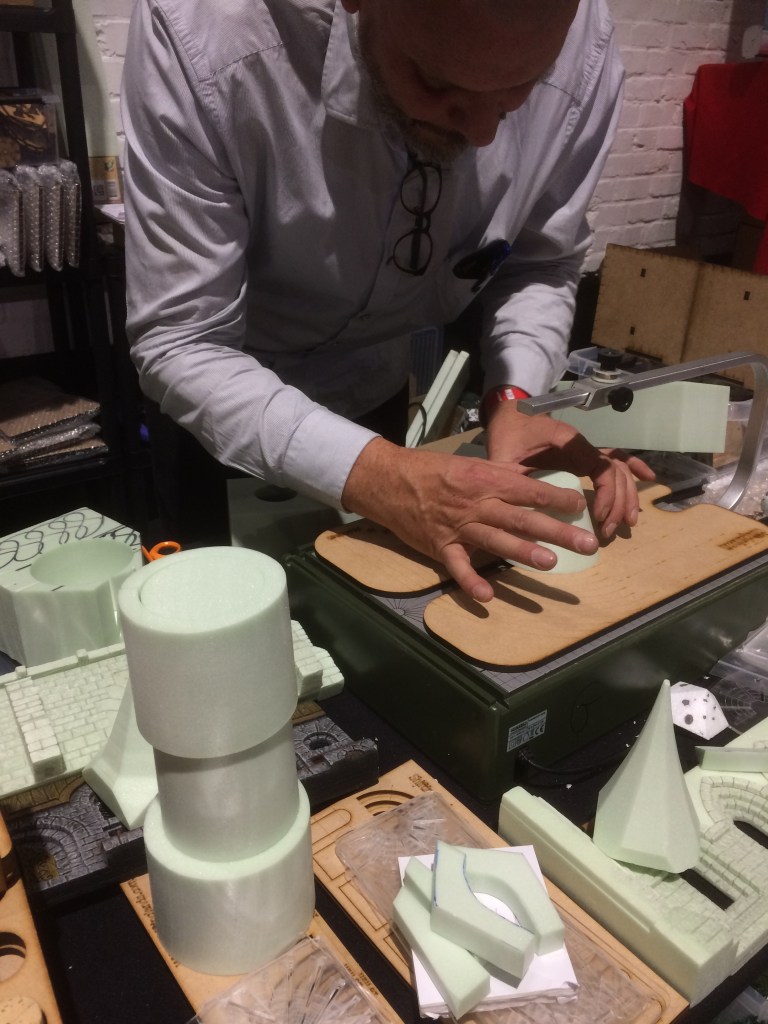
Above: foam meister Gerard Boom at work on his stand at Crisis 2018, cutting me pieces of tower to order.

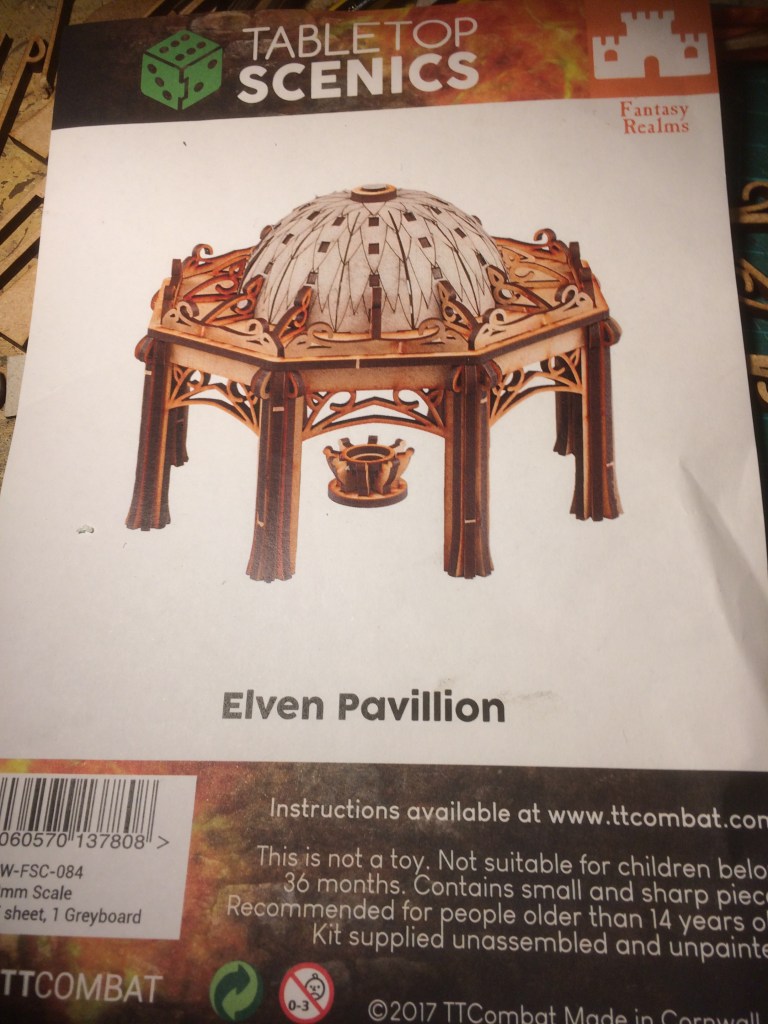
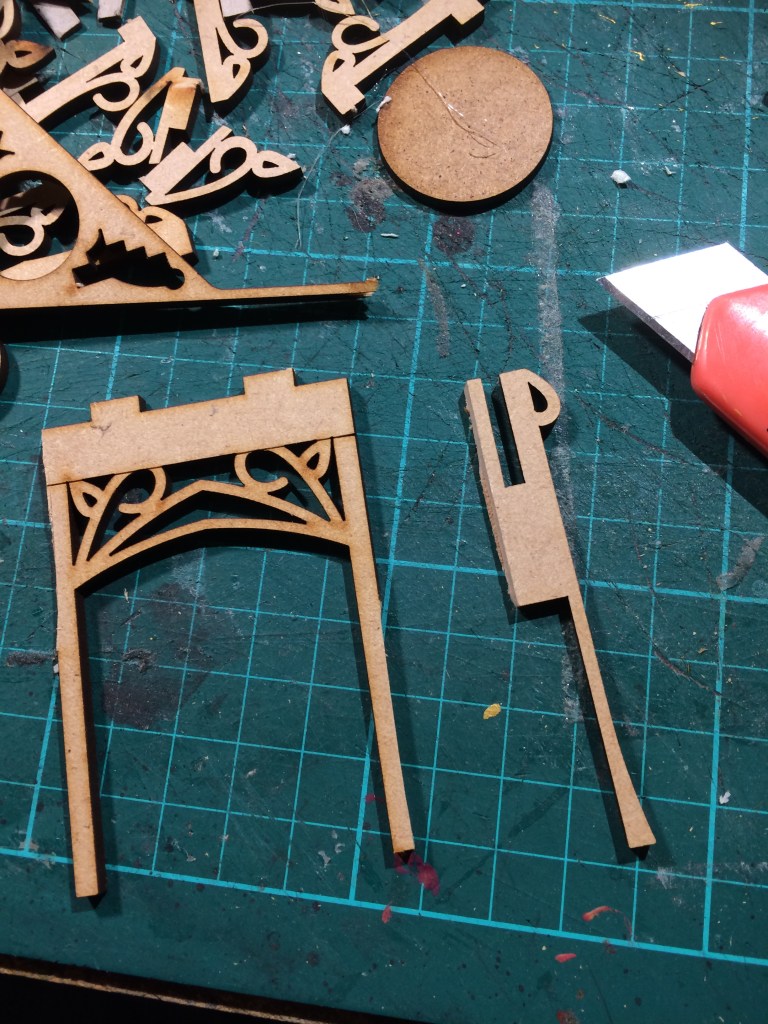
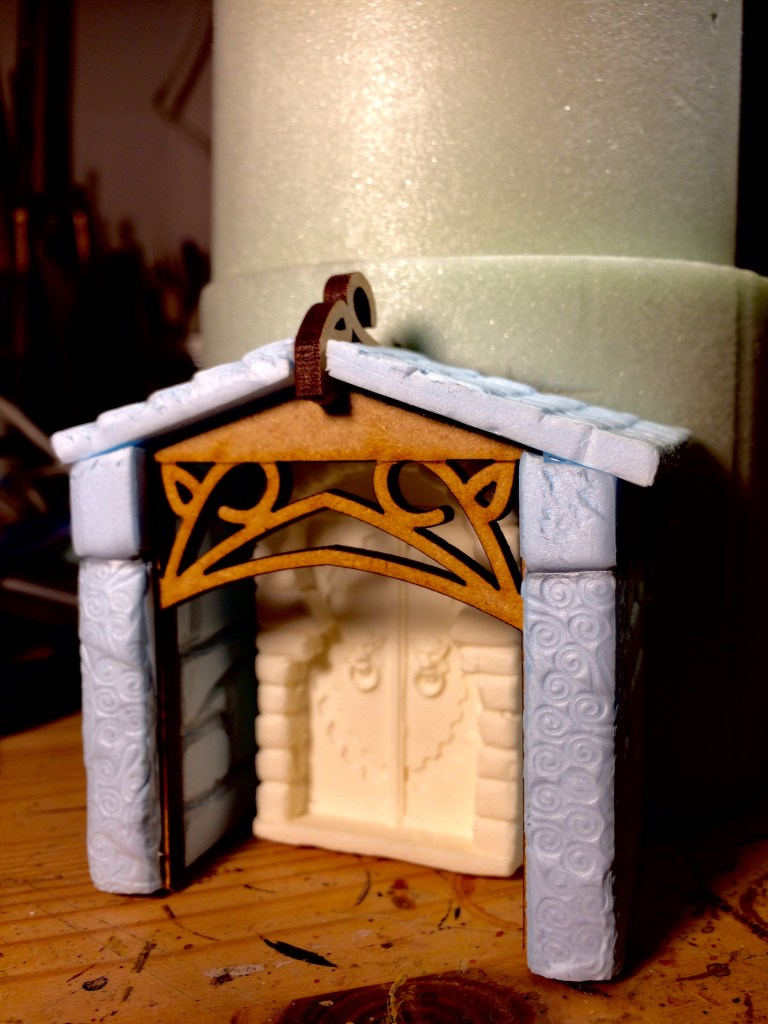
I realised that I could do with some extra parts to create the Elven look I was after; my chum Sam Dale recommended that I have a look at TT Combat’s MDF range and I quickly found pretty much exactly what I was after. The Elven Pavilion kit had a host of swirly bits that I could easily add to my foam cylinders for the look I was after.
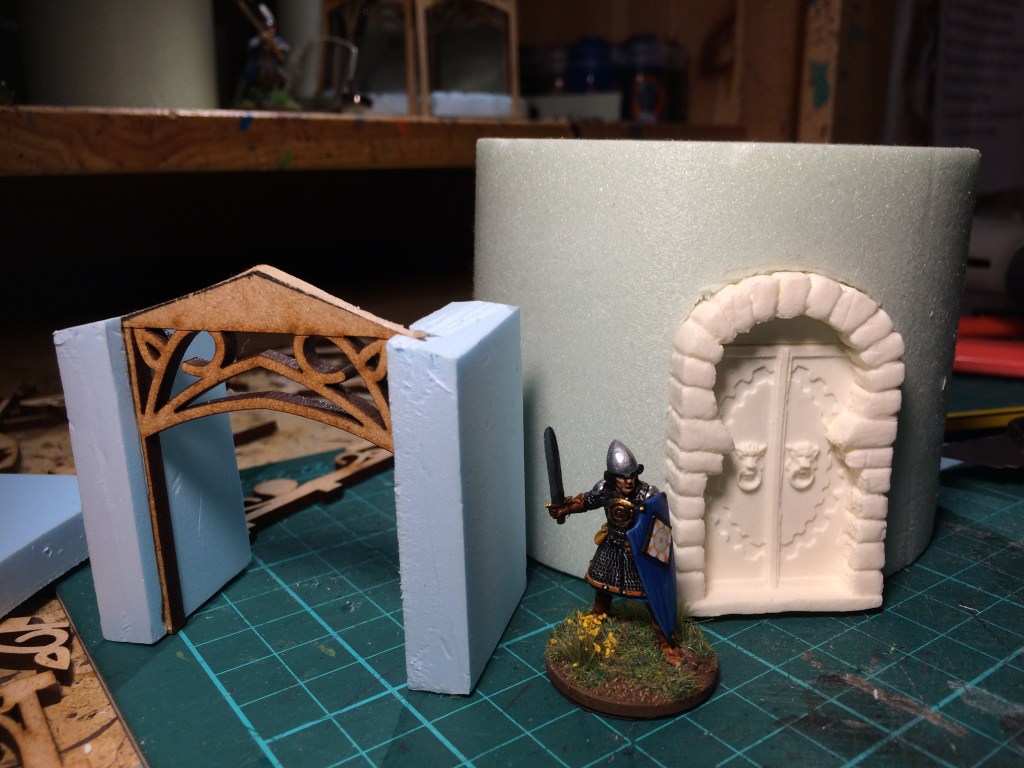
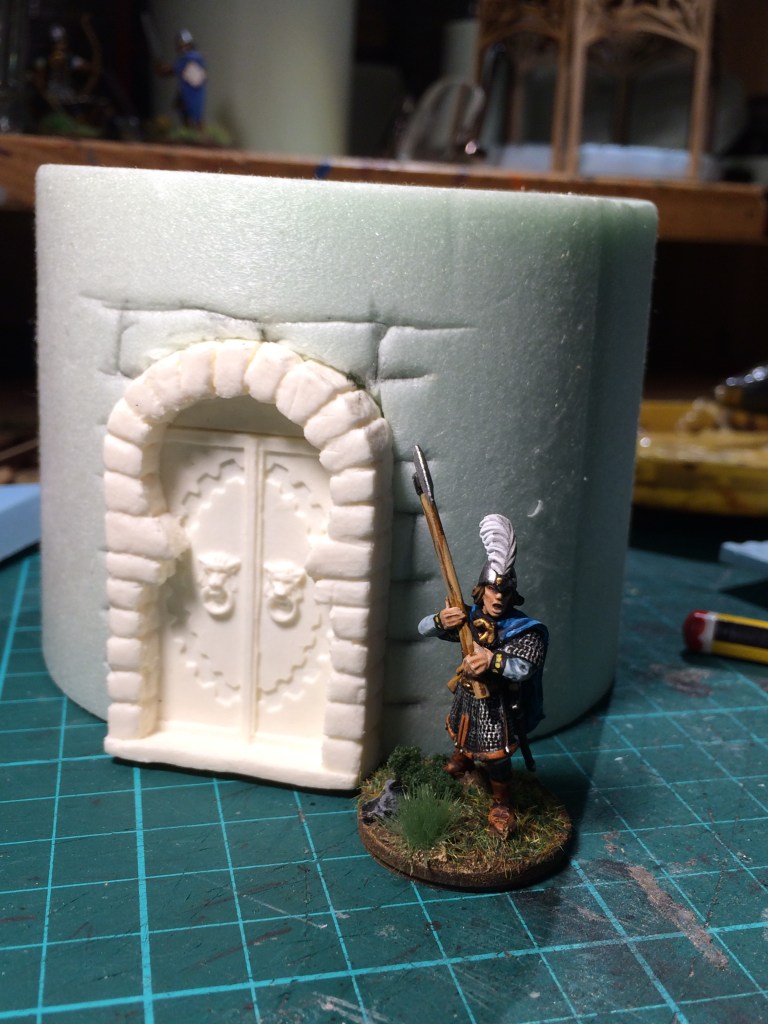
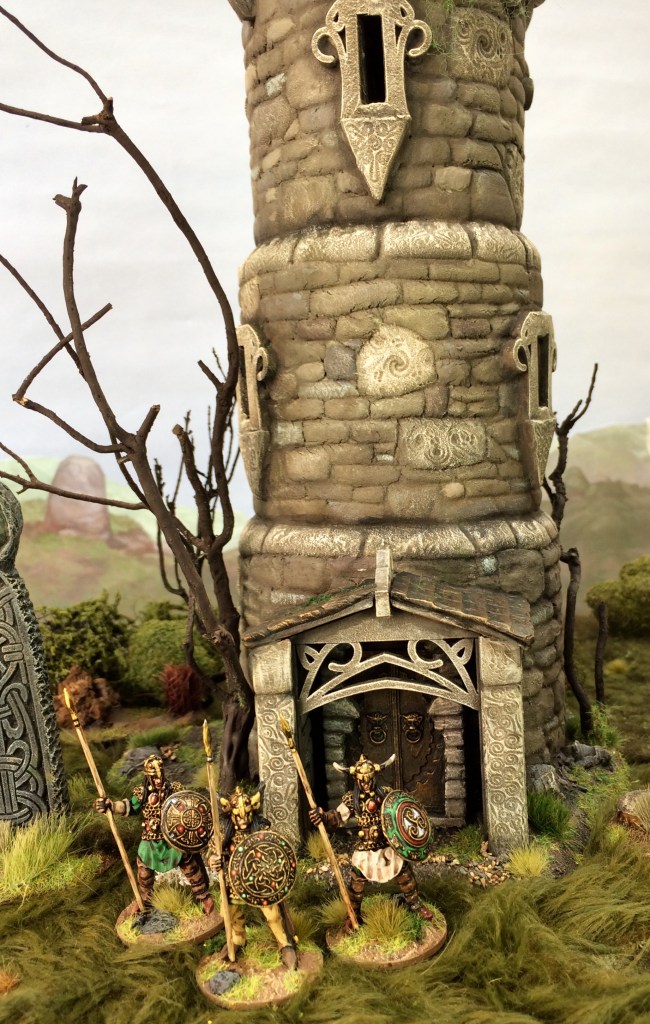
Armed with these lovely pieces of MDF, I began creating a porch for the front door (a resin doorway from Thomarillion, also purchased at Crisis 2018).
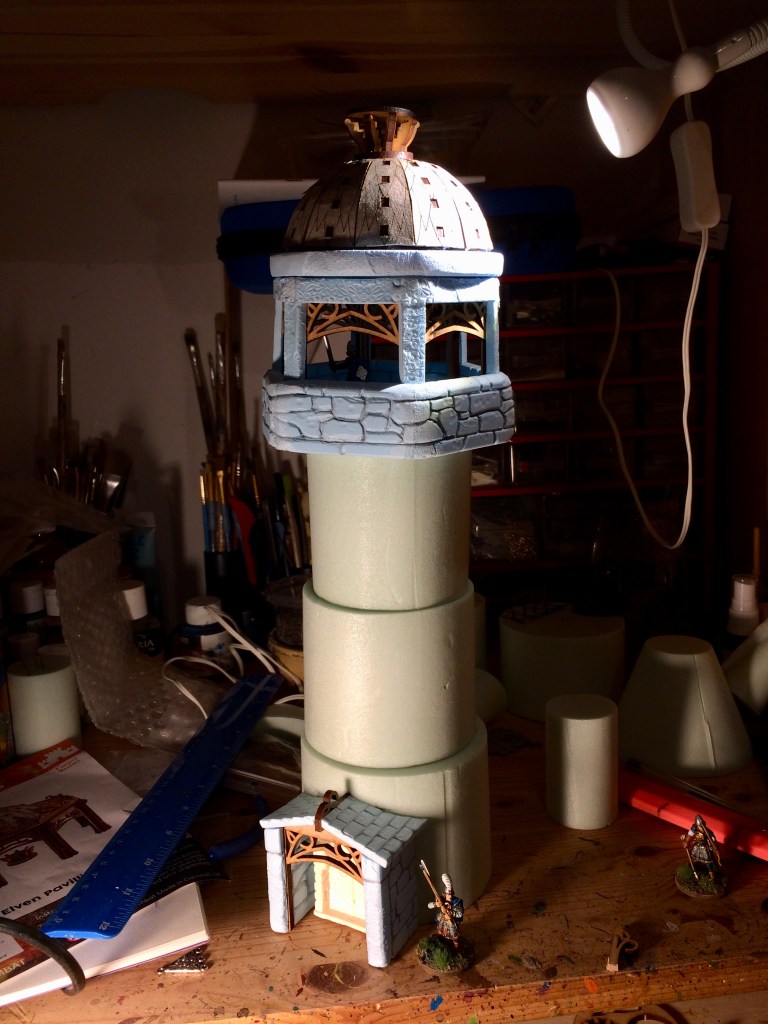
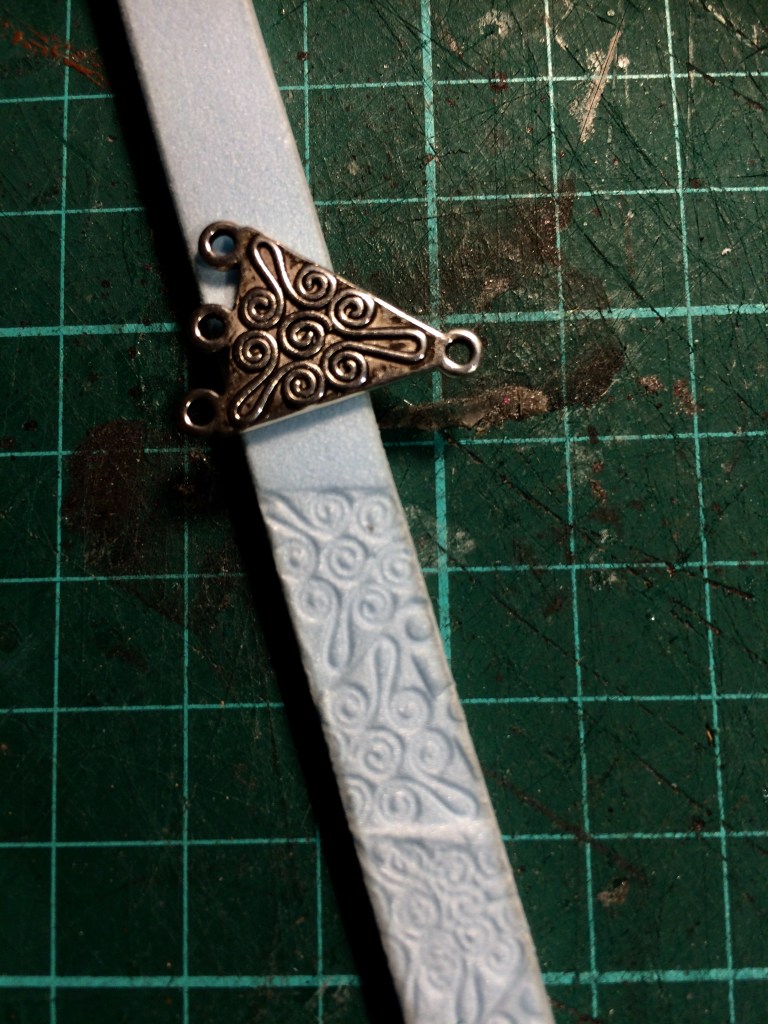
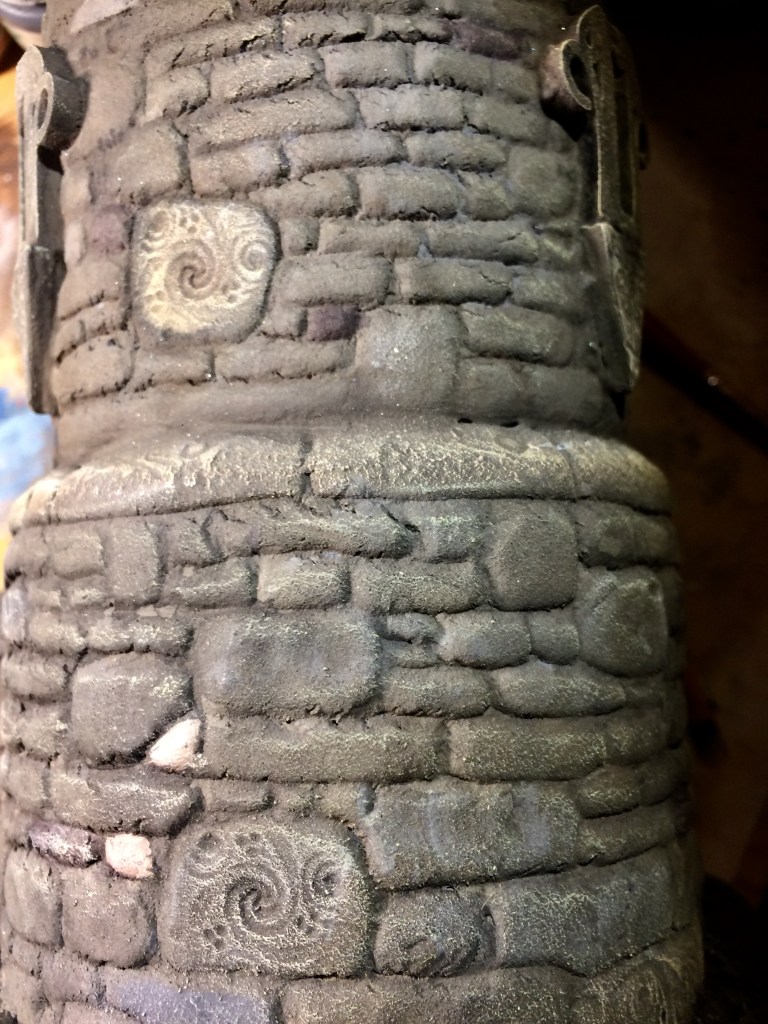
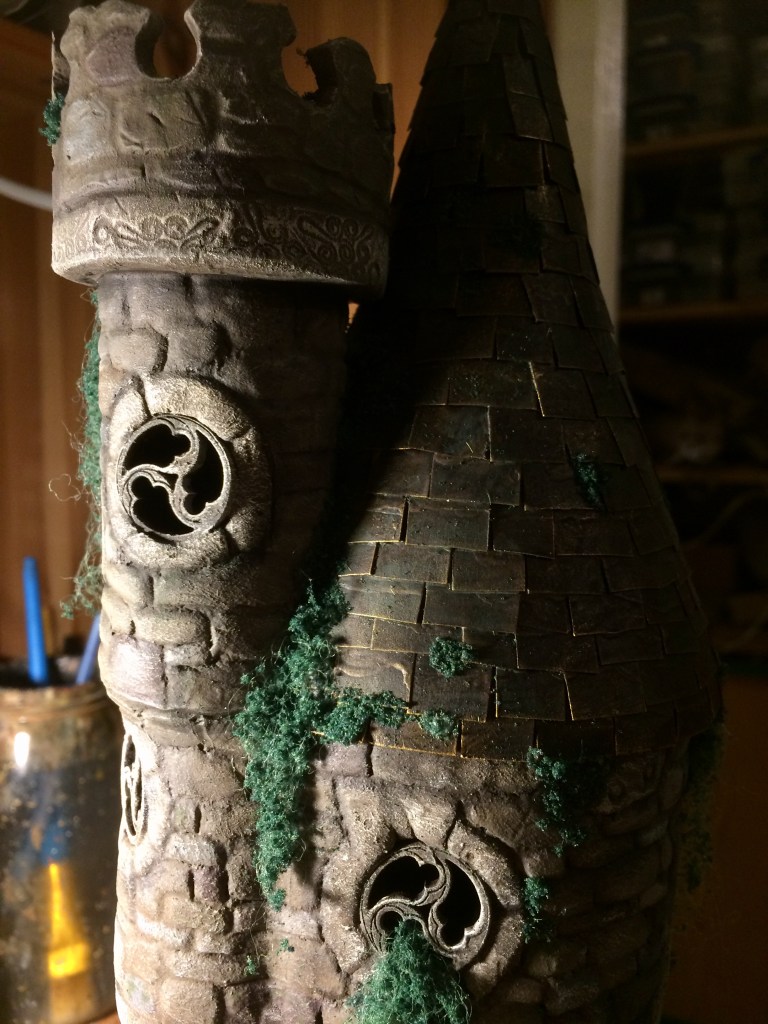
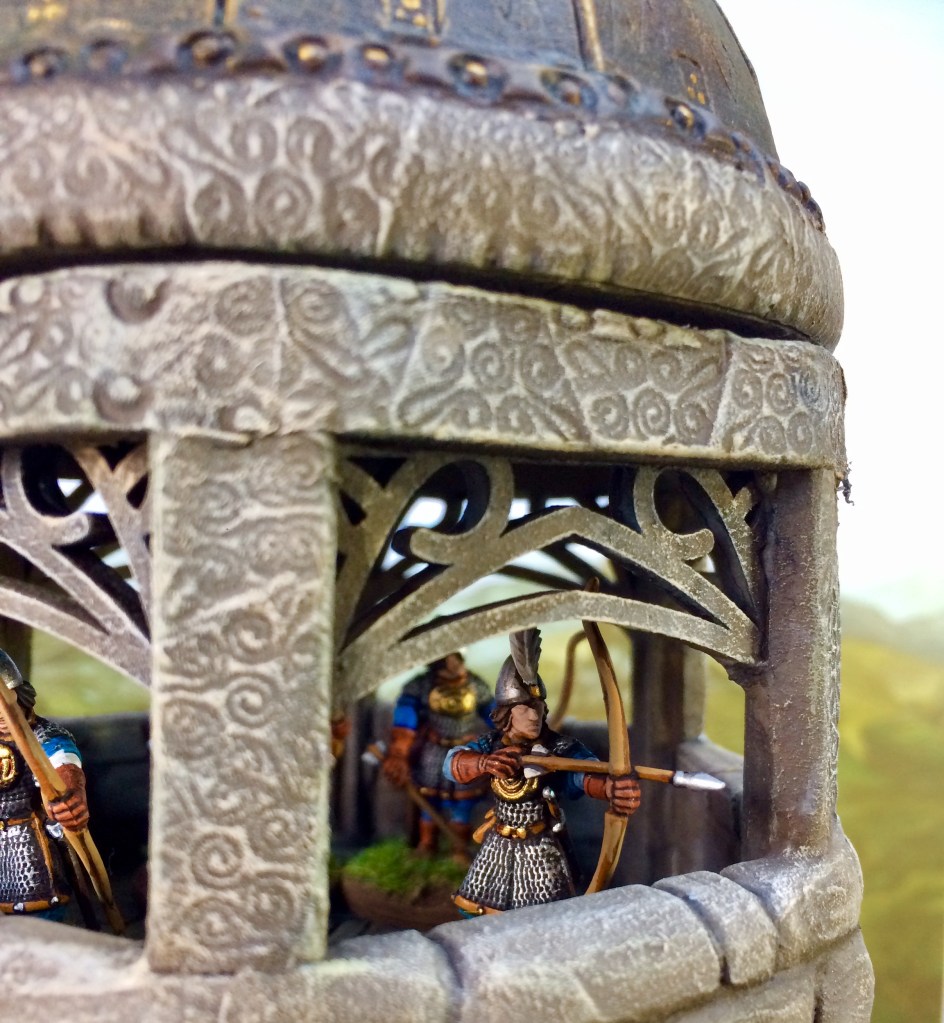
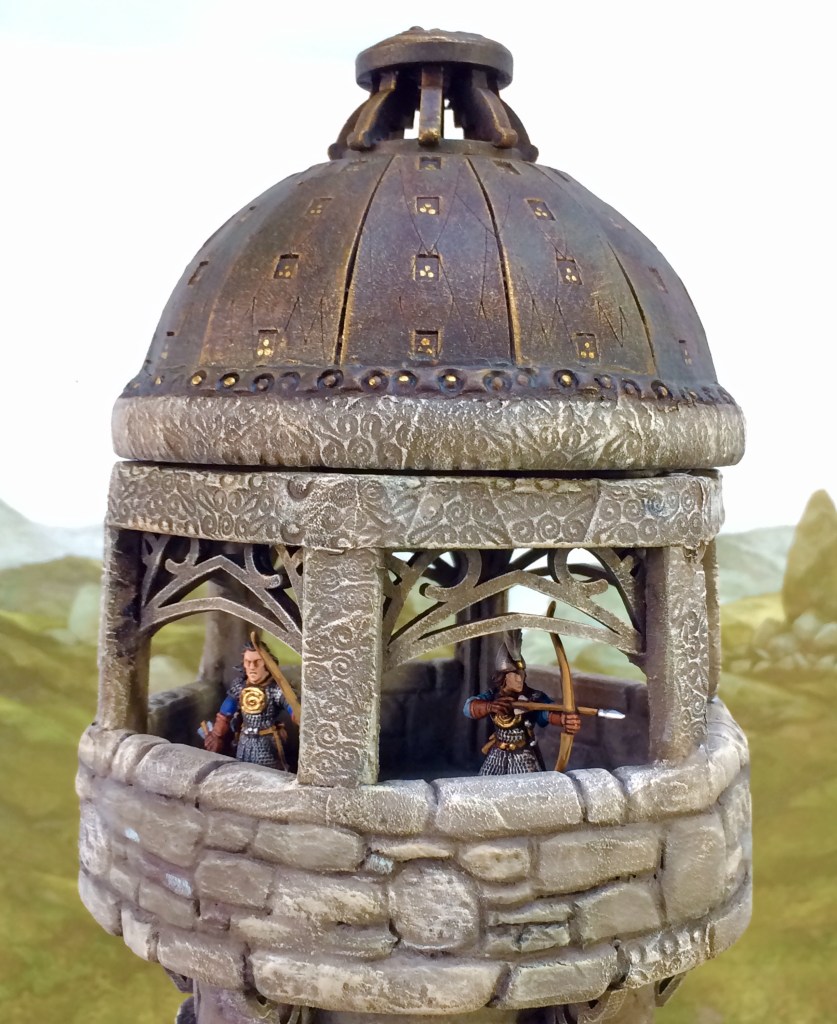
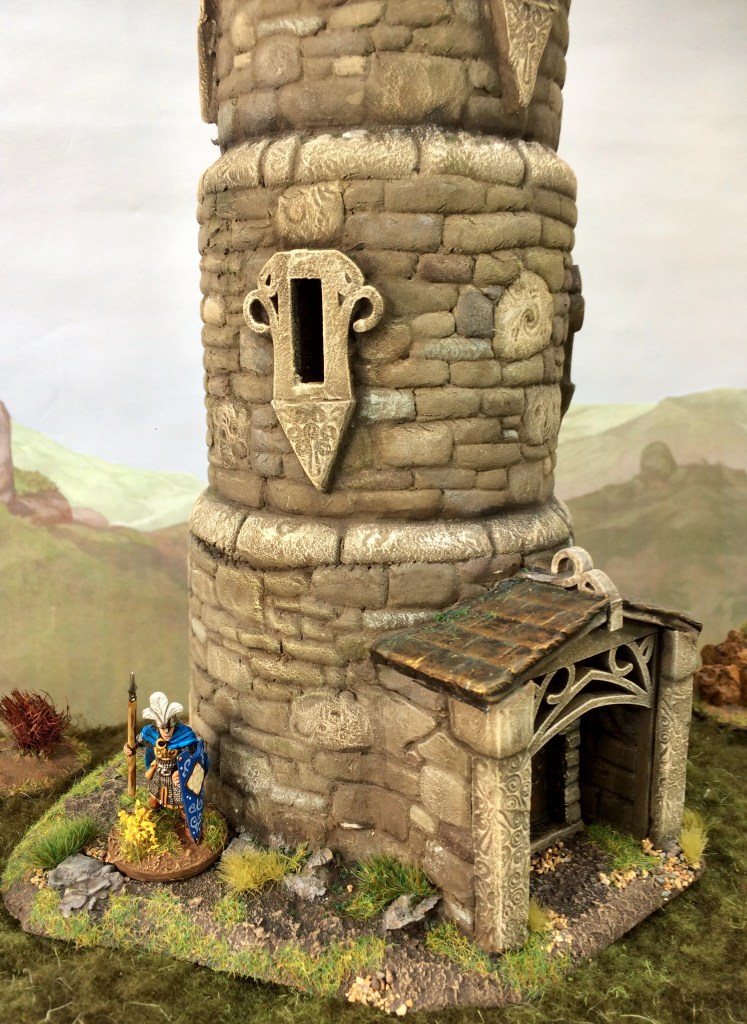
This led on to creating the matching lookout gallery, which I created from extruded blue foam and the MDF/ grey board parts from the TT Combat kit. Designs were pressed into the foam using some cheap Celtic jewellery pieces from the bits box – a very effective and easy method of creating an ornate texture with minimal work.
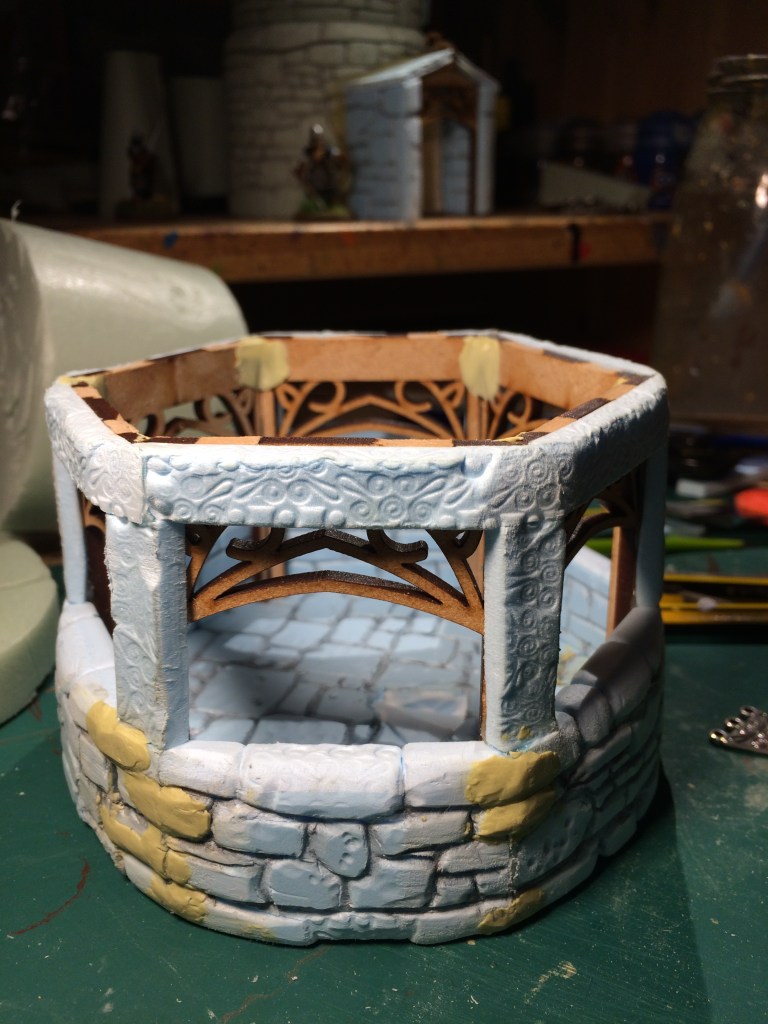

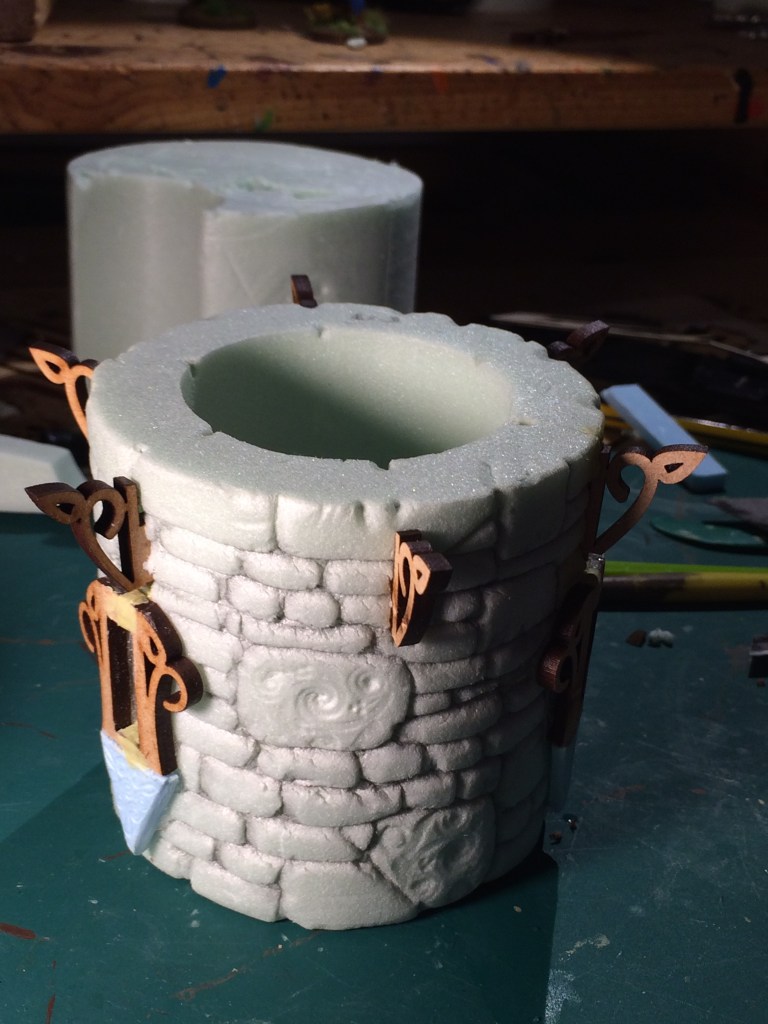
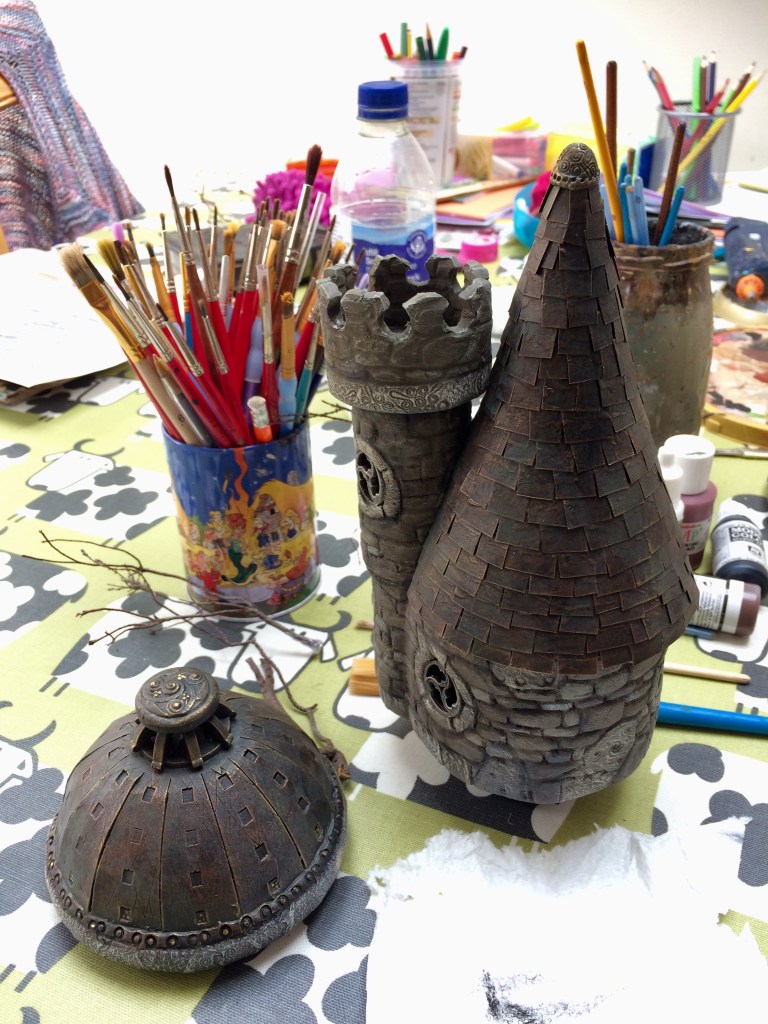
With the basic tower structure under way, I added windows and a base cut from 6mm plywood with an electric jigsaw. Stone work was pressed in across the foam cylinders using a pencil, with more embossed detail on odd stones.
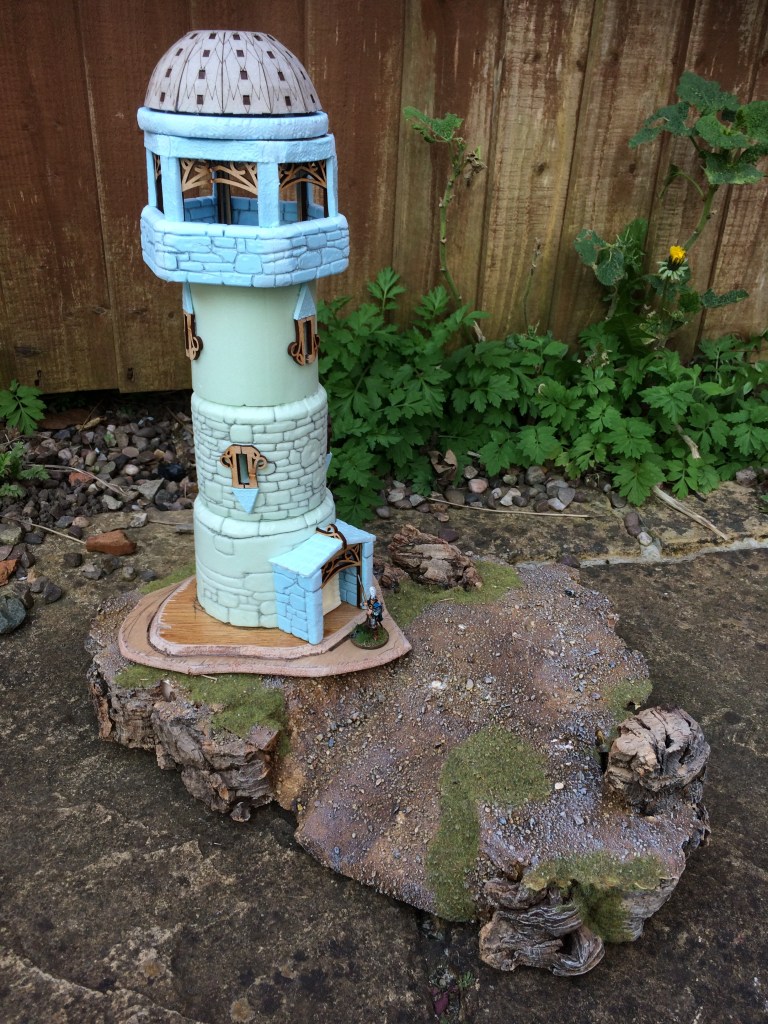

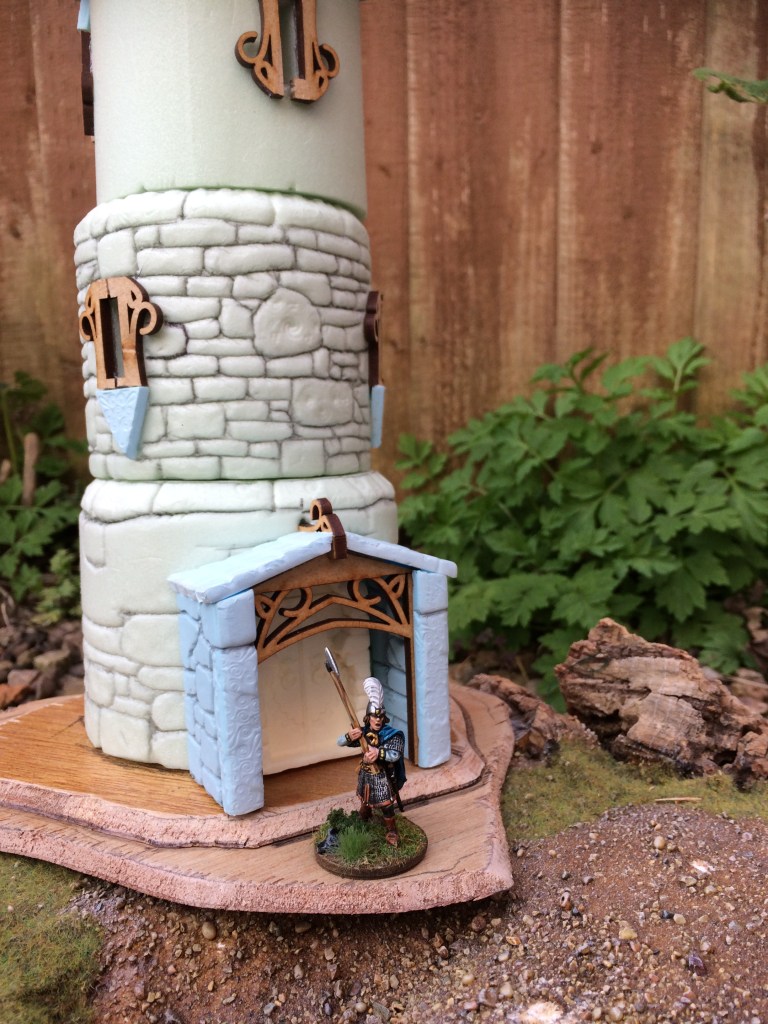
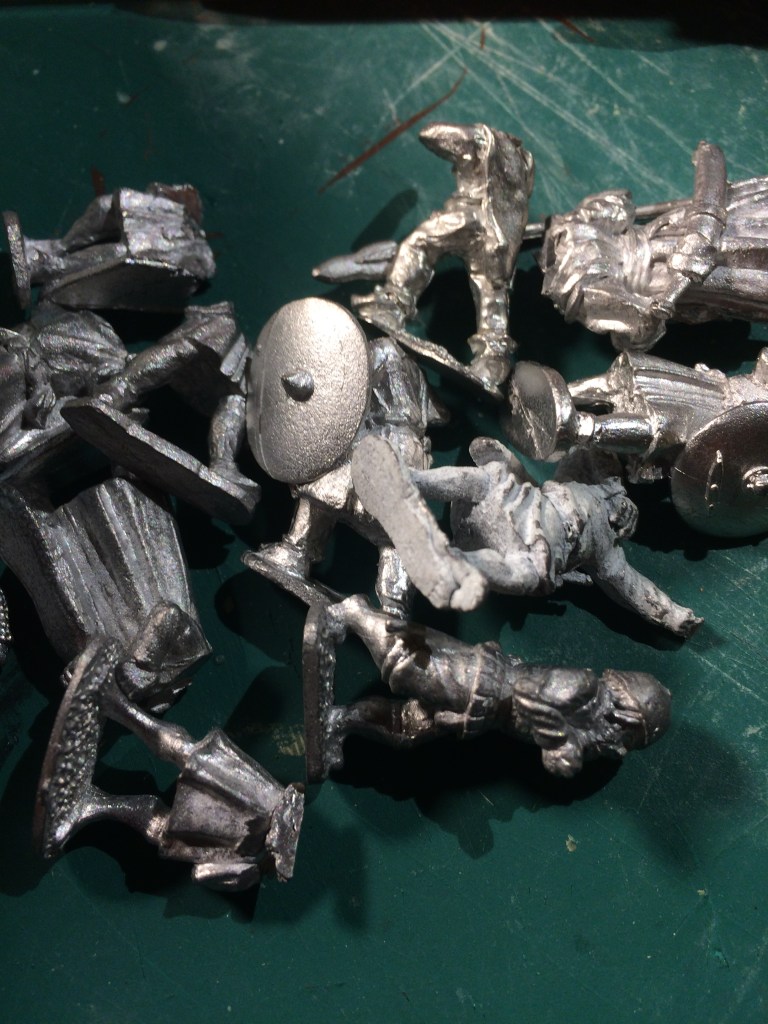
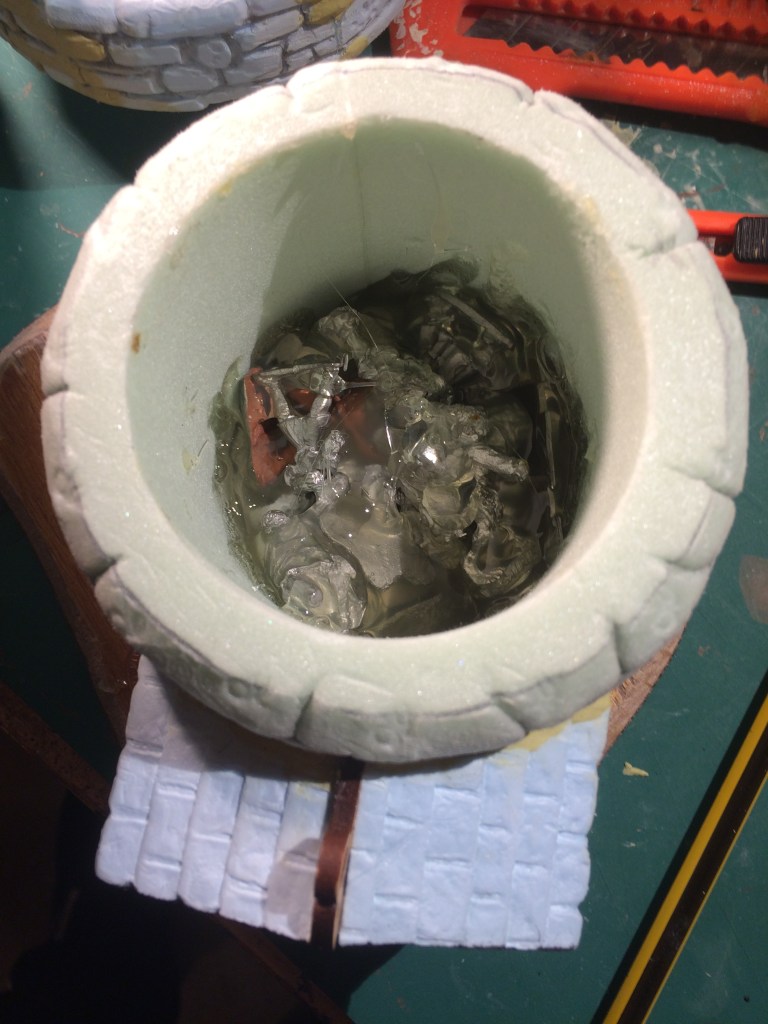
The base of the tower needed for weight for stability on the gaming table. I could have gone down the obvious route of gravel or stones, but I had a bag of deceased miniature warriors in the bits box – various unfortunates who had suffered parts being clipped off for conversions over the years. Around 20 of these fallen heroes were dumped into the bottom section of the tower and sealed in place with a layer of hot glue and a prayer to the gods.
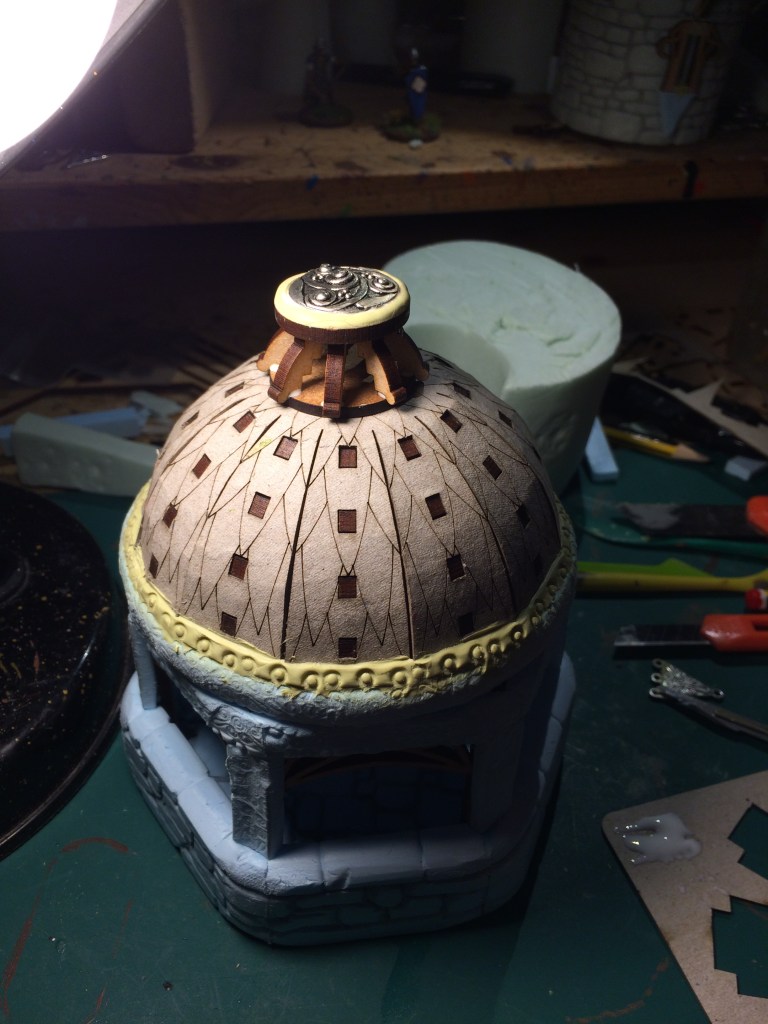
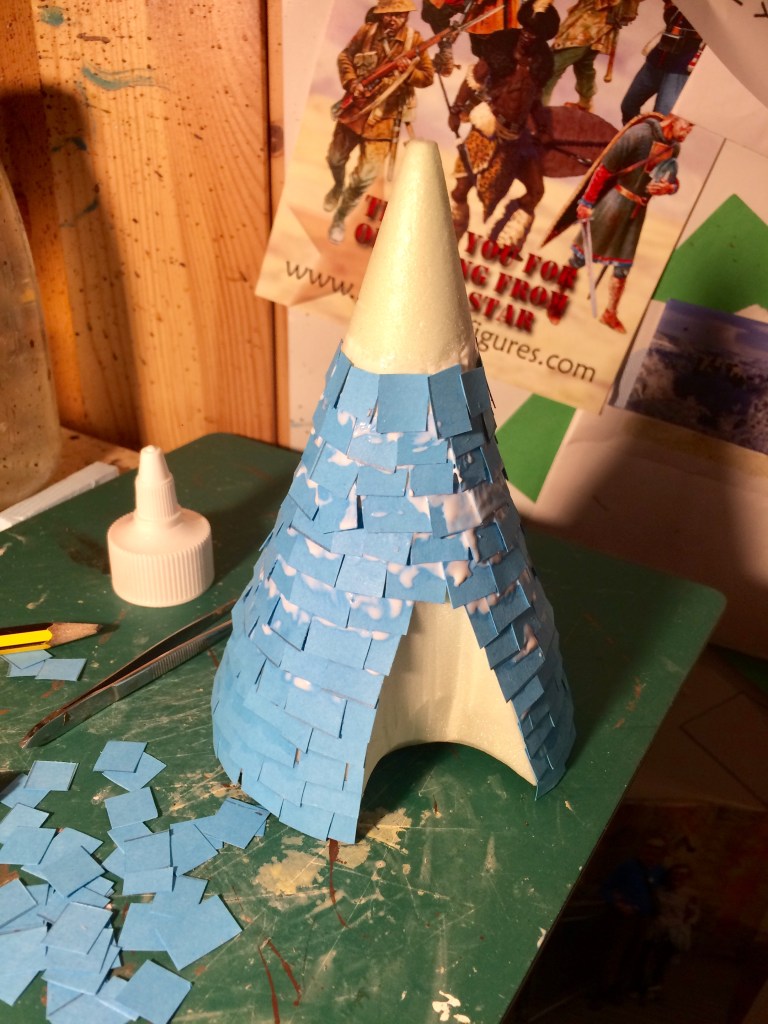
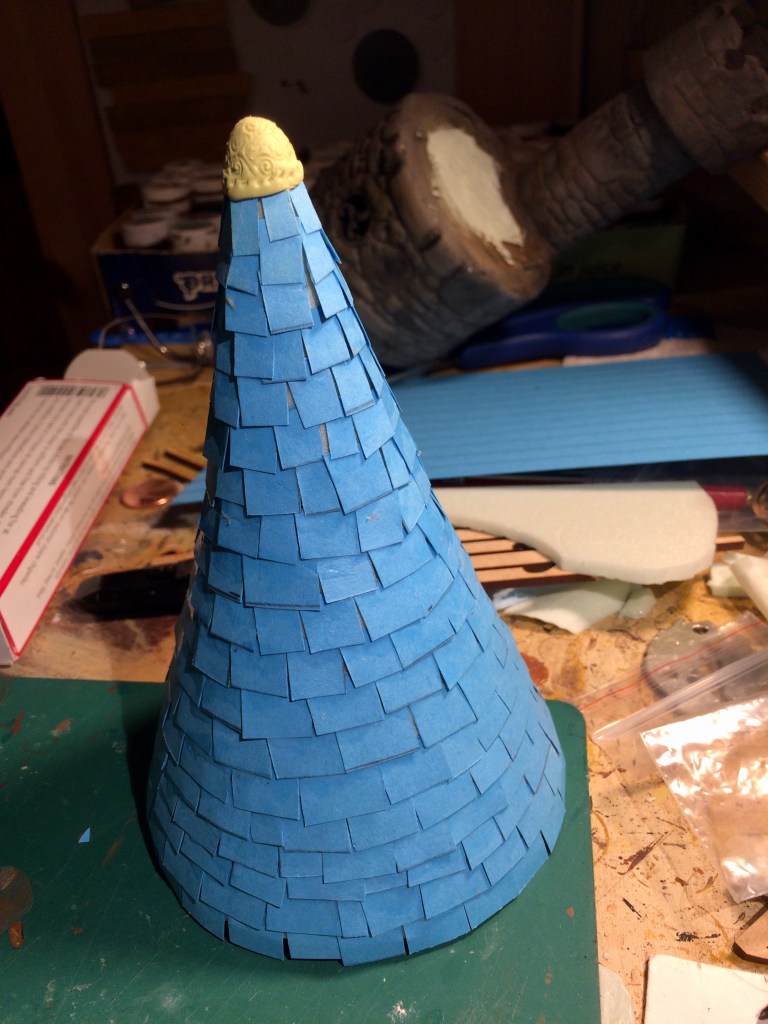
After this, I put some extra work into finishing off the various tower parts. The pointy fairytale roof was one of Gerard’s foam cones with tiles made from thin card (lots of wood glue!) and a finial from yellow-green Milliput.
The next step was to get the construction tidied up and gaps filled with Milliput. A thin watered-down layer of filler was brushed on for additional texture on the main tower.

Now it was on to painting. I used craft shop acrylics, with a mixture of greys, browns and khaki as a base layer. When this was dry, I applied a black/ brown wash, and then began to pick out different stones in a variety of colours. Dry-brushing the embossed patterns really paid off at this point.
The roofs were painted brown and highlighted to suggest bronze.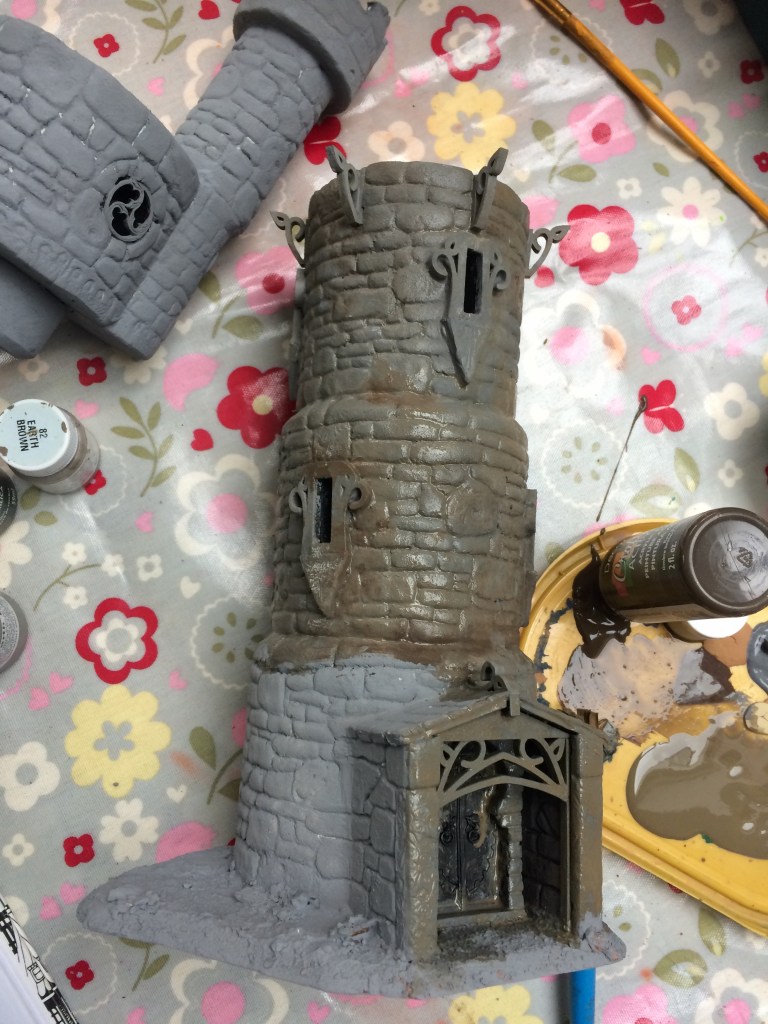


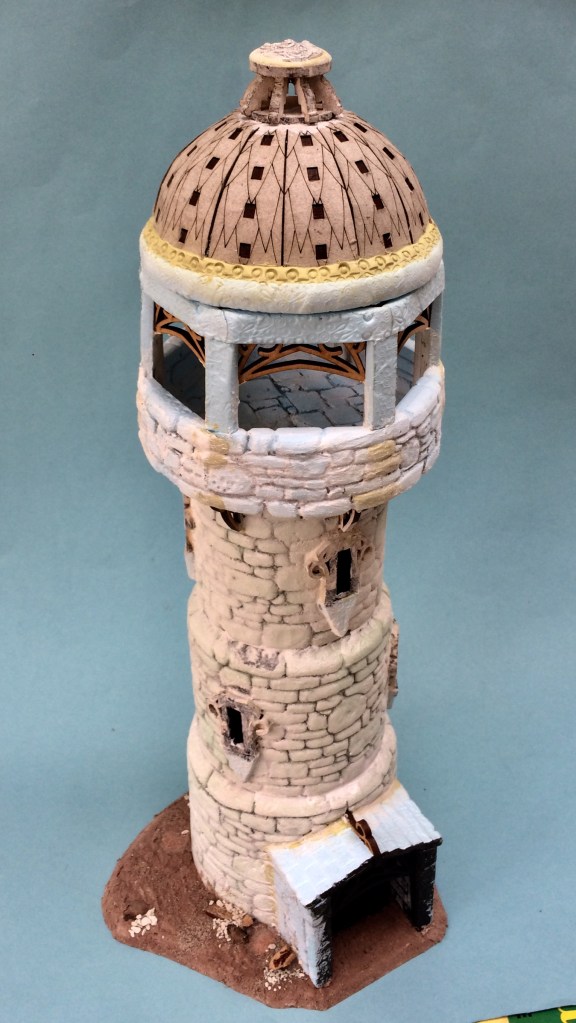
With the whole thing finished, it was time for a photo session in its three different guises. Probably the aspect I was most pleased with is how its appearance changes when it morphs between settings – even though the tower base is the same, it appears different each time.


I’ll be using most the techniques I learned here in my next terrain build, a new Norse myth piece aimed at my demo games of Midgard for 2023. More soon!

Great looking model
LikeLiked by 1 person
That looks fantastic, well done! love the patterns pressed in the stones, I’ll be keeping and eye out for cheap jewellery with interesting patterns now!
LikeLiked by 1 person
Cheers! The patterns were incredibly simple…keeps me occupied when taking my daughter round jewellery shops 🙂
LikeLiked by 1 person
That’s an amazing piece of work, I’m inspired.
LikeLiked by 1 person
Thank you! More coming soon.
LikeLike
Blimmin’ ‘eck. I’ve seen your tower in the background of various battle reports, but hadn’t appreciated just how detailed and beautiful it was. It’s a very impressive piece indeed.
I’m really enjoying these terrain ‘how-tos’, so thank you for posting them. Can I just ask where the standing stones in the last photo are from? Cheers.
LikeLiked by 1 person
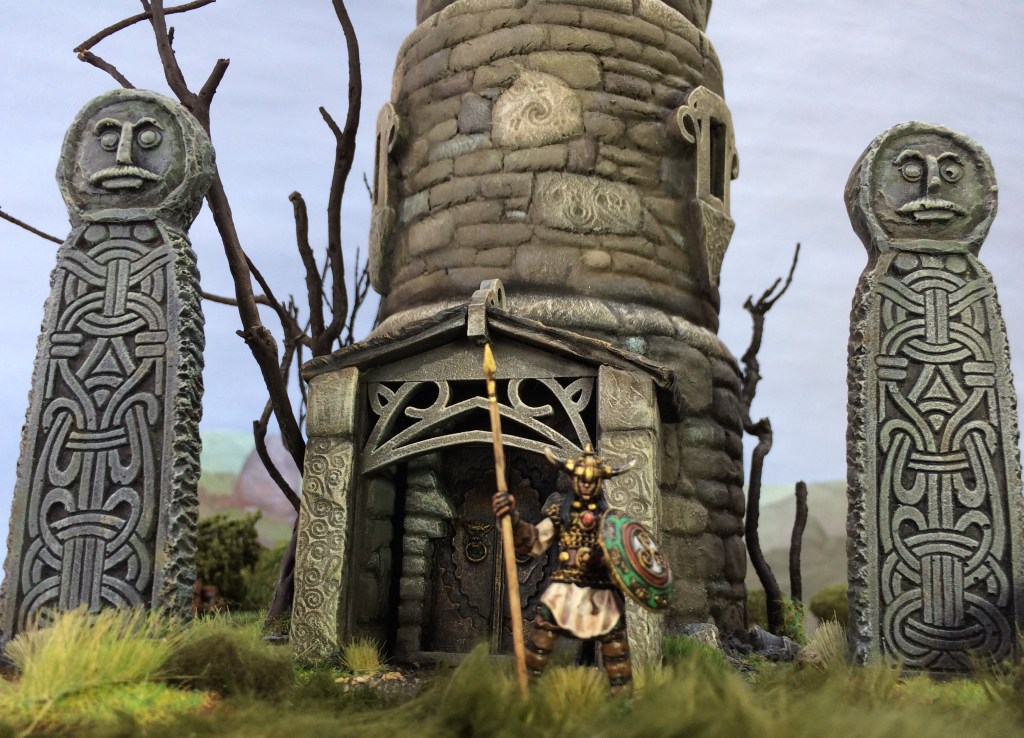
Thank you very much! I really enjoy this kind of thing so I’m glad it shows. Celtic stones in the last pic are OOP resin castings from Monolith.
LikeLike
Just flat out gorgeous — Love it!
LikeLiked by 1 person
Many thanks! Much appreciated. James
LikeLike