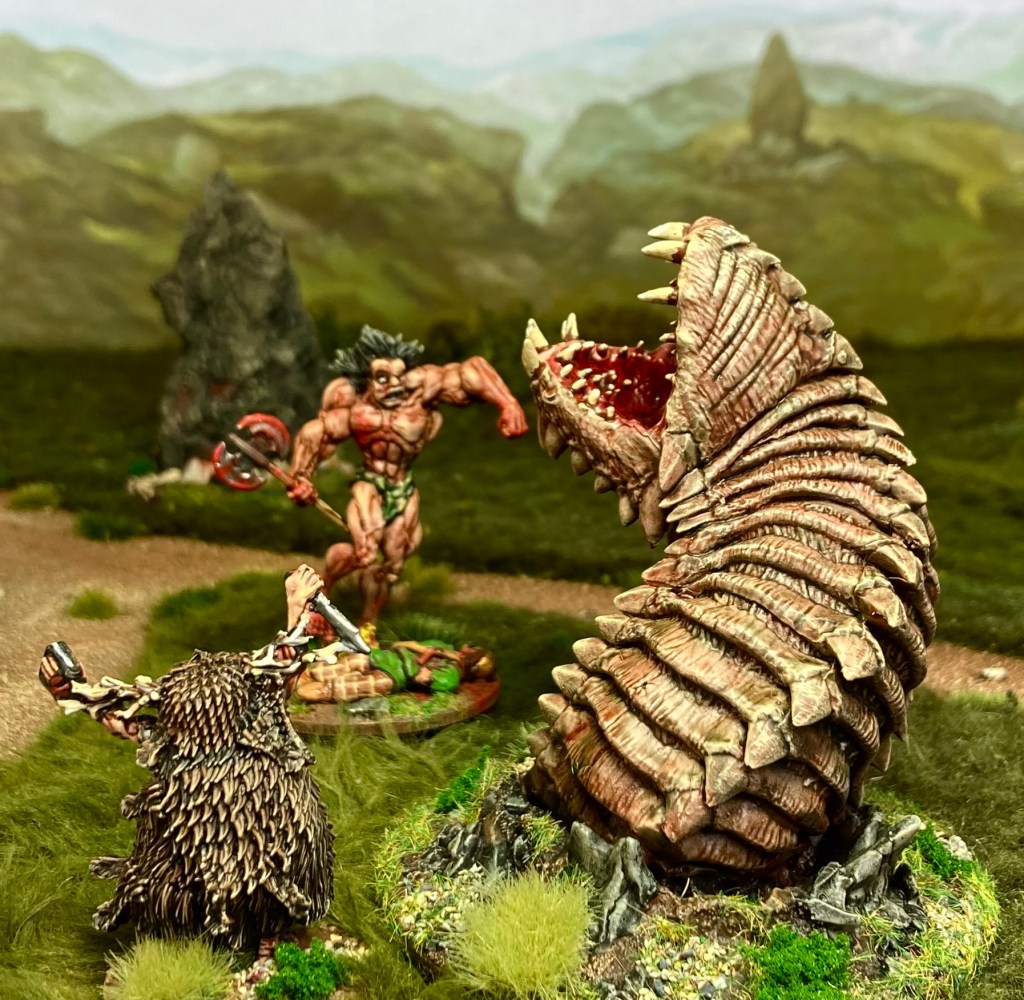
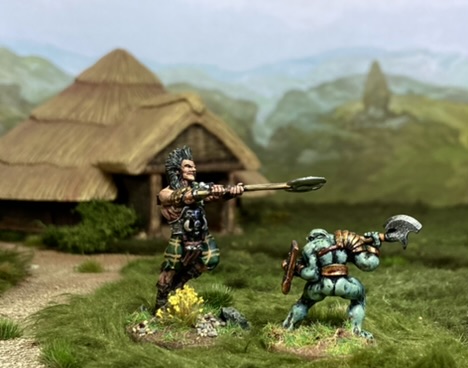
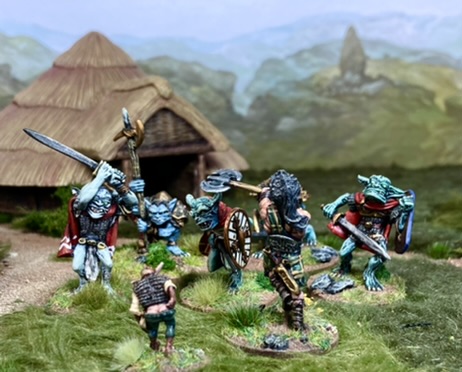
As a big 2000 AD fan in my teenage years, I got very excited when I heard that Warlord Games were producing a miniatures game based on the Slaine stories. Upon getting my grubby hands on some of the models ten days ago, I couldn’t wait to get them painted up for some Celtic gaming. This also turned out to be the catalyst that got two other Celtic beasties on my painting table finished off as well – Crom Cruach and a giant…

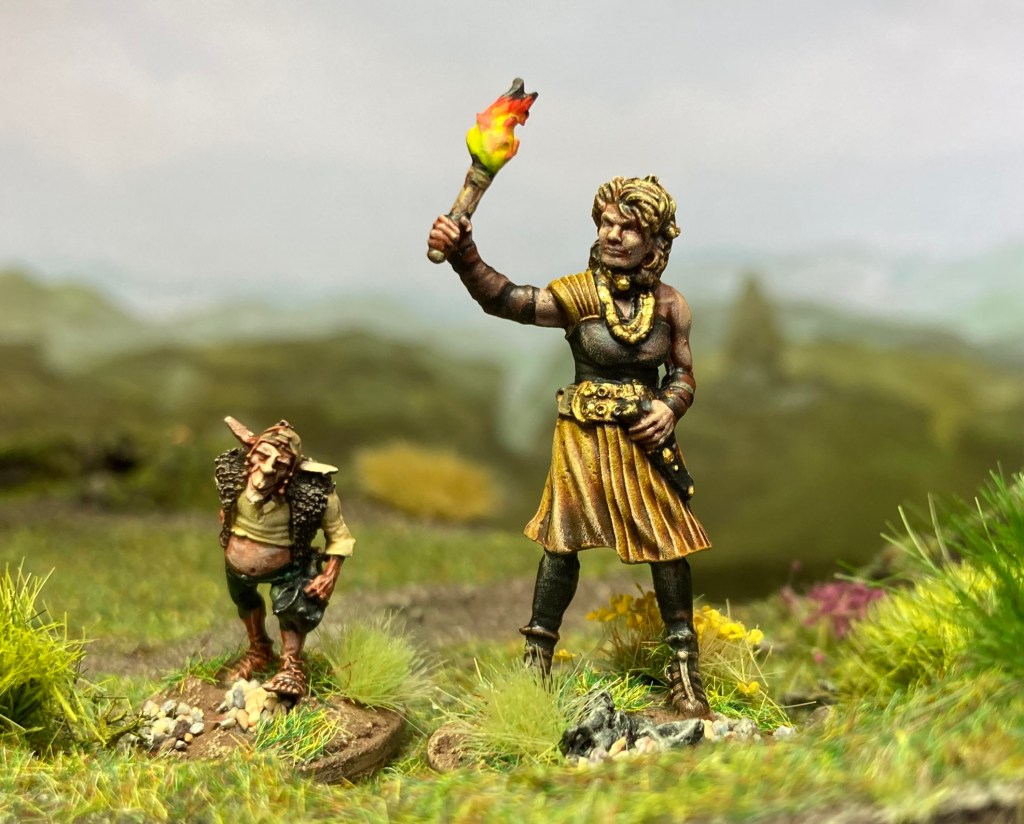
Having a birthday last week, I was fortunate enough to receive the Slaine boxed set, which contains a fair chunk of minis to get started with: Slaine, Warped Slaine, Ukko the Dwarf, Nest the Priestess, Slough Throt, a Drune priest, a Weirdstone and three Skull Swords. The figures are cast using Siocast (AKA ‘Warlord Resin’), a flexible and highly detailed plastic. It’s notoriously hard to clean up mould lines on Siocast figures – fortunately I was very pleasantly surprised with these, finding only a tiny amount of cleaning up was required – easily done with a fresh scalpel blade. Good job, Warlord!

The minis are on the tall side – as you can see from my pics below, they are around the 32-35mm mark. However, they are not unduly chunky and seem to fit well enough with my existing Celtic myth collection, which includes many metal Alternative Armies miniatures.

If you’ve not come across them, the AA Erin range includes over 85 different minis, including some Fomorians who are very much inspired by some of Simon Bisley’s art in Slaine: The Horned God (unlike the Warlord Fomorians, who are very much Glenn Fabry in style). Well worth a look!


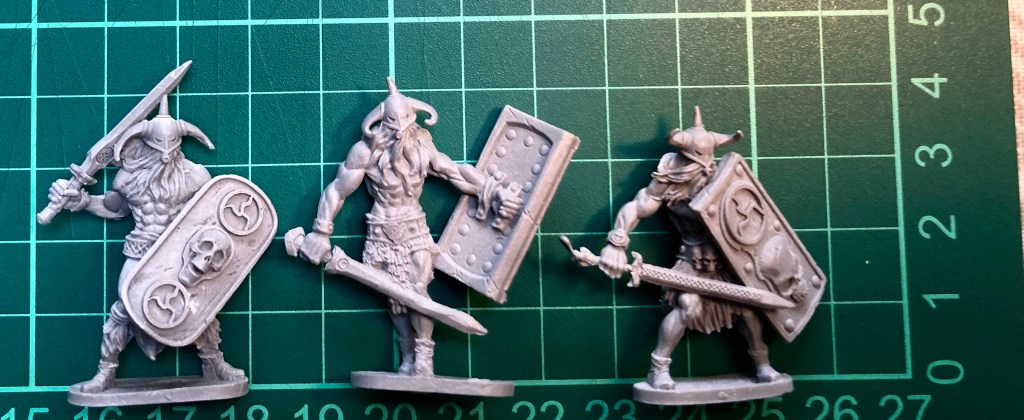
All the figures are one-piece castings apart from Slaine, who required his arms to be superglued into position. This was much easier than expected thanks to the clean fit of the parts – unexpected but very welcome! I then glued them all to a strip of card for painting and gave them two light spray undercoats – firstly, Halfords Plastic Primer (my absolute go-to for any work on potentially flexible plastic) followed by Halfords Matt White.
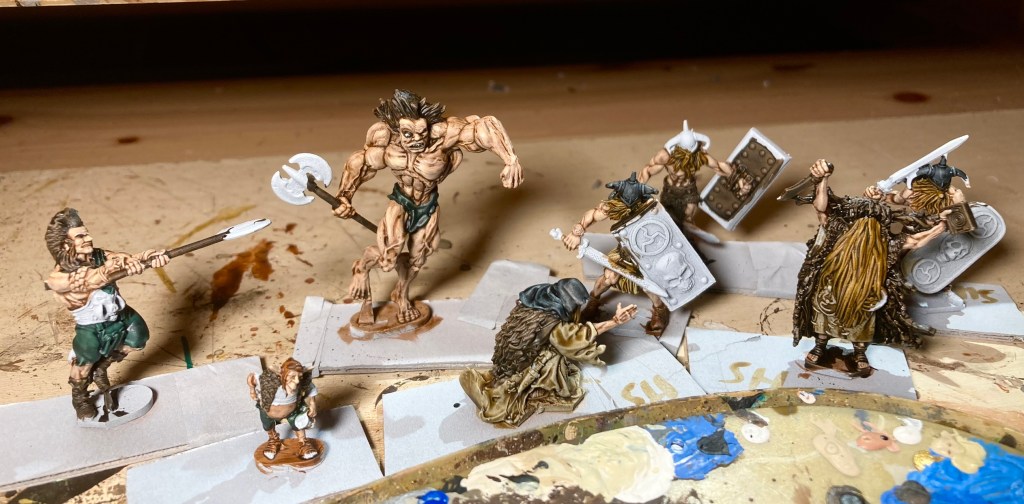
These models are oozing with detail – ideal for any washes or, in my case, a base coat of GW Contrast paint. Basic colours used were:
Skin – Guilliman Flesh/ Gore-Grunta Fur (in various mixes)
Shield backs, weapon hafts, dark clothing, furs – Wyldwood
Boots, leatherwork, hair – Snakebite Leather/ Wyldwood/ Black Templar
Light clothing – Skeleton Horde
Slaine’s clothing – Dark Angels Green

Following these layers drying, I gave most parts of the models a top highlight of standard acrylic paint (various lighter shades that complemented the base Contrast layer). A very light drybrush of Vallejo Iraqi Sand was used to bring up the detail, especially on cloaks and hair. Metalwork was given a base of black acrylic before the whole model was sprayed with two light coats of matt varnish to protect the minis from handling (Contrast paint is particularly prone to rubbing off and needs sealing in).
Following this, it was time to do the metallics. I’ve taken to leaving these till after the matt varnish coat to avoid killing the shine. Over the black base, these were done as follows:
Iron – Army Painter Gunmetal with a wash of thinned down GW Contrast Black Templar (this has a blue-black hue and is perfect for this job); finished off with a painted highlight of Army Painter Shining Silver.

Bronze – Vallejo Brass with a was of Army Painter Strong Tone ink; finished off with a painted highlight of Vallejo Gold.
Bases were textured with my usual mix – a paste of burnt umber craft acrylic, filler and sand before drybrushing and decorating with a mix of static grass and tufts by Gamers Grass.

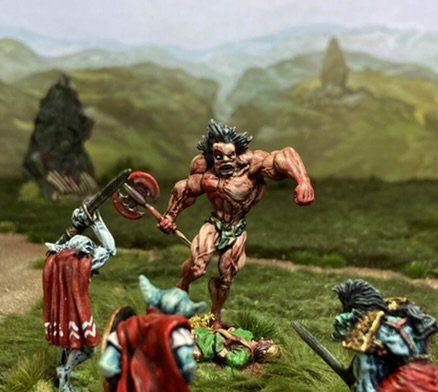
While I was about it, I worked on a giant that I’d bought to fit in with my Celtic myth stuff. This huge fella is one of the ridiculously good value creatures from Reaper Bones – a 13cm tall, 5 part plastic kit that cost me a whole £8.49 including delivery! (Golan, Hill Giant is his official title). Preparation was much the same as the Slaine models apart from giving it a thorough wash before assembly.

The giant received a similar paint job – base coats of Contrasts followed by highlights and some swirly tattoos to make him feel a bit more Celtic. Doubtless he’ll get an arrow in the head in his first game this week but he’s a cool model.

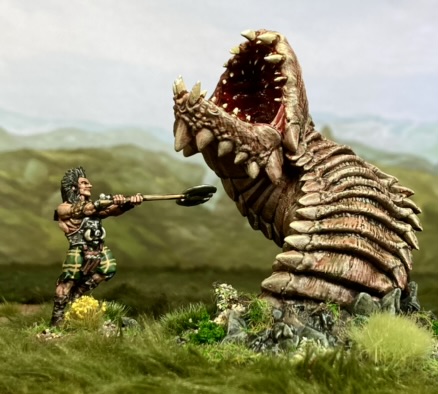
Crom! I was kindly gifted a D&D Purple Worm mini by a friend at the club a couple of years back, intending to turn it into the mighty worm god Crom Cruach….and never finished it. Armed with Contrast Paints and a renewed sense of purpose, I set to.

After the Halfords White Primer, I simply gave it an overall heavy base coat of GW Contrast Guilliman Flesh. When this was dry, I thinned down some Creed Camo to get a putrid effect on the lower body. The mouth was neatly filled with Blood Angels Red. The effect of these three colours was impressive on such a highly detailed casting.

After that, it was a case of adding a few extra highlights, dotting on the teeth and then simply making a good job of the base.


Lovely work James on some very interesting miniatures.
BTW, I’m sure I met Warped Slaine at the one and only WAB GT’ I entered!! LOL
LikeLiked by 1 person
Amazing work as ever and so inspirational too James! I’m thinking of getting the Reaper Bones Goremaw Great Worm to use as Crom Cruach as the Purple Worm isn’t easy to get hold off now
LikeLike
I’d have used the Reaper Bones one if I hadn’t been gifted this one.
LikeLike
Fantastic stuff. Couple of questions, if you don’t mind!
Did you use the Halfords Plastic primer on the Bones giant, and how did it go?
And what’s your recipe for the blue-green AA Fomo Ricans? I’ve had the selfsame grinning boys in the lead pile for about 25 years, and I’m thinking their moment has come!
LikeLiked by 1 person
Hi Stephen,
Many thanks! Halfords Plastic Primer I use on all my Bones models. I give them a really good wash in detergent before assembly, then a spray of the plastic primer. I’ve never had any problems doing it like this, but then I’ve never tried any other way.
Blue-green Fomorians were painted a while back. I undercoated black, then dry-brushed the skin areas with various shades of…blue and green, adding a littke bit of white for a top layer highlight. If I was doing them again now, I reckon the best method would be to undercoat black, then drybrush white before doing the skin with a variety of Contrast/ Speed Paints. There’s so much detail on these models I’m sure it would work a treat.
LikeLike