“I wanted the bards to sing of Derfel Cadarn at Mynydd Baddon. I wanted men to look at me and say, there is the warrior who broke the wall at Mynydd Baddon, I wanted the power that comes from reputation. A dozen men in Britain had that power; Arthur, Sagramor, Culhwch were among them, and it was a power that superseded all other except for kingship. Ours was a world where swords gave rank, and to shirk the sword was to lose honour.” – Excalibur, Bernard Cornwell

Partizan is unquestionably one of my favourite shows of the year – good light, airy venue, easy access and an unbeatable selection of games. Of course, this provides its own pressures, and I always push myself to try to put the best possible game out there. At my very first Partizan in 1993, I was inspired by a game put on by the Perrys (Late Romans vs Picts), so it’s a massive privilege to be here thirty years later doing the same thing.

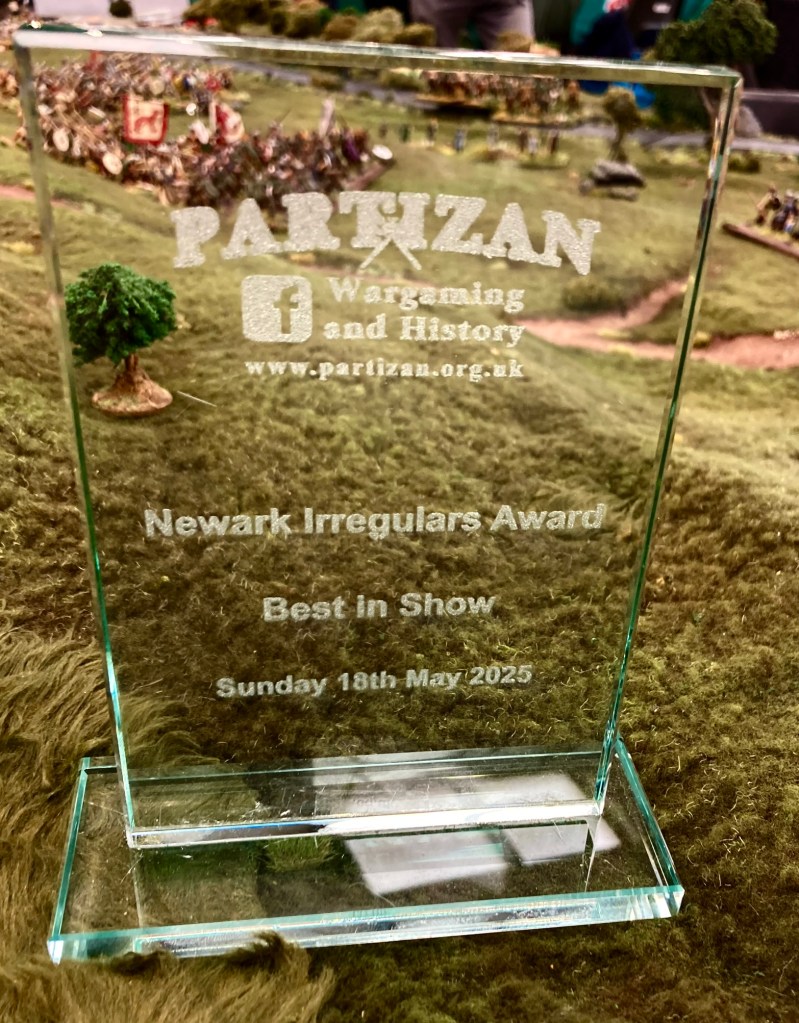
Having re-read Bernard Cornwell’s Warlord Chronicles trilogy last year, I’d determined to put on his version of the Battle of Mount Badon as a showcase for my Midgard Heroic Battles rules. Fortunately, we had a full complement of Morris & Chums, without whom the game would have been little but a static display manned by a very knackered version of myself! As the song goes, that’s what friends are for, and they did an amazing job of keeping the game running during the day which was, according to the judges, a factor in winning the Best In Show prize – a massive accolade given the sheer quality of games in the hall. Humbling stuff.
During the show, we had some lovely chats with friends old and new, fans of Bernard Cornwell, Arthurian enthusiasts and more than a few Midgard players, though we were also able to fit in some light shopping and keep the game running to a conclusion by 3 pm.

So what happened? Well, I’ve not posting the full scenario on here as I will be submitting for a magazine article, but I spent some time going through Cornwell’s description the battle and drawing up forces accordingly. Essentially, it’s an uphill battle where the Britons are outnumbered at the start, but the odds are then evened by the arrival of Arthur and his cavalry in the Saxon rear followed by Merlin, Gawain and Oengus Mac Airem’s Blackshield Irish coming in from the Saxon right flank. This meant that different contingents would be arriving throughout the day.
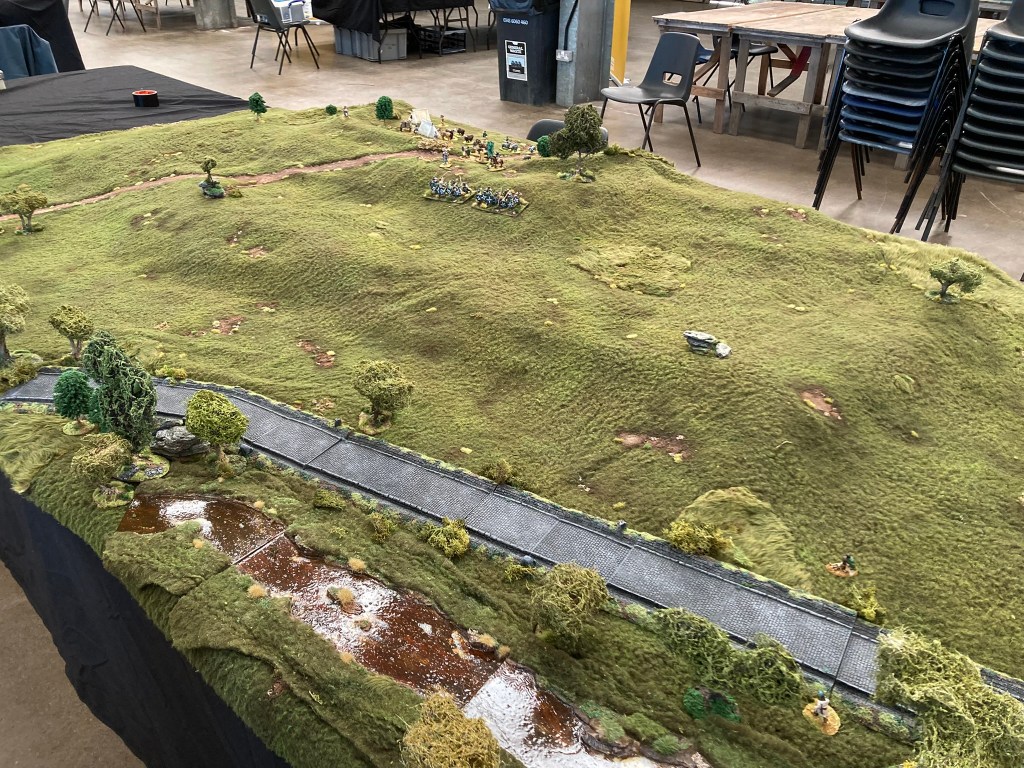
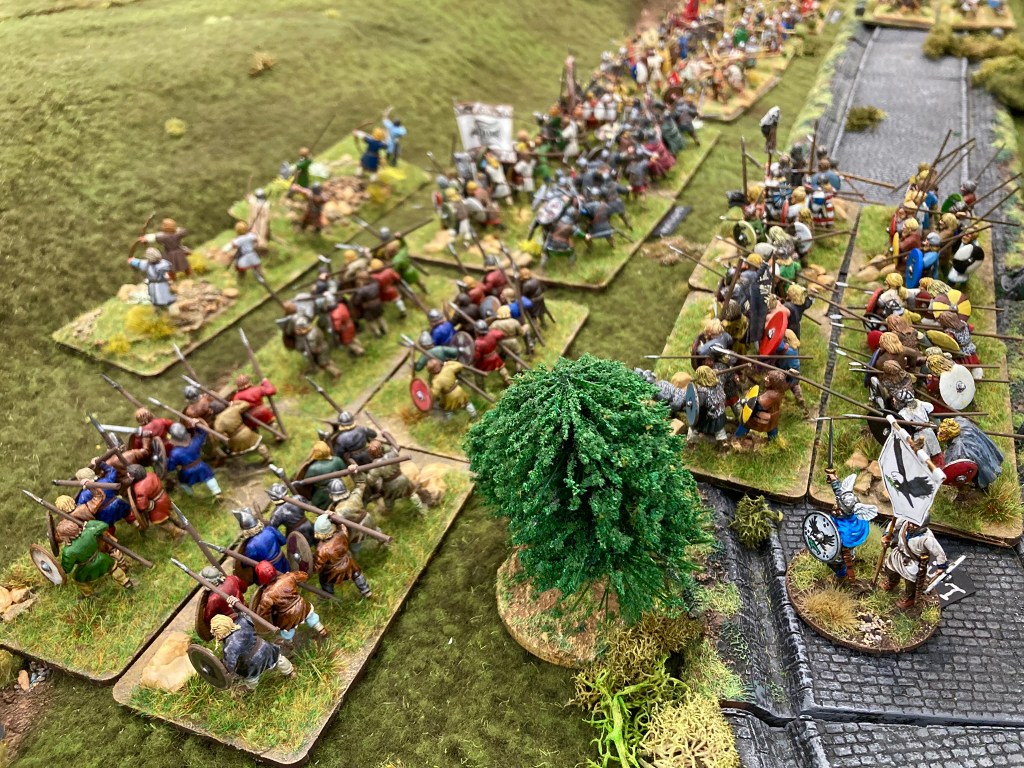
To keep it all manageable but keeping an epic feel, we used a standard Unit frontage (Spear Throw) of 24 cm for the game (rather than the usual 12 cm). With around 40 miniatures per Unit, this gave us a hefty-looking battle with around 1000 models on the table.
I popped out to Newark to set up the scenery the day before the show, which was well worth doing as I had to build up the slopes of Little Solsbury Hill. This was all pre-planned but I had to bodge a few bits when I finally got there – gaffa tape was my friend! The central table was jacked up on wooden blocks, one of the tricks I’ve used many times to create height on a battlefield.


With the elevation sorted, the entire table was covered with my very large black cloth, and then the battlefield was defined by my home made sherpa fleece terrain mat (see here for the full tutorial of how it was made).

The Fosse Way was next to go in place (a superb but out of production resin Grand Manner piece – it was lovely to see Dave and Spike of GM on the day of the show for a chat), followed by the River Avon (see here for the link for this terrain piece).
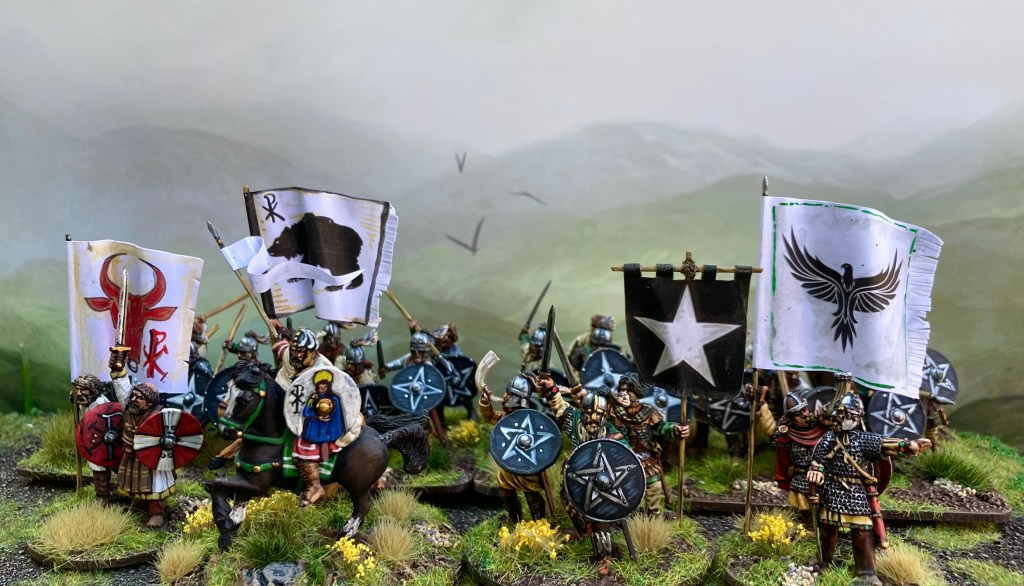
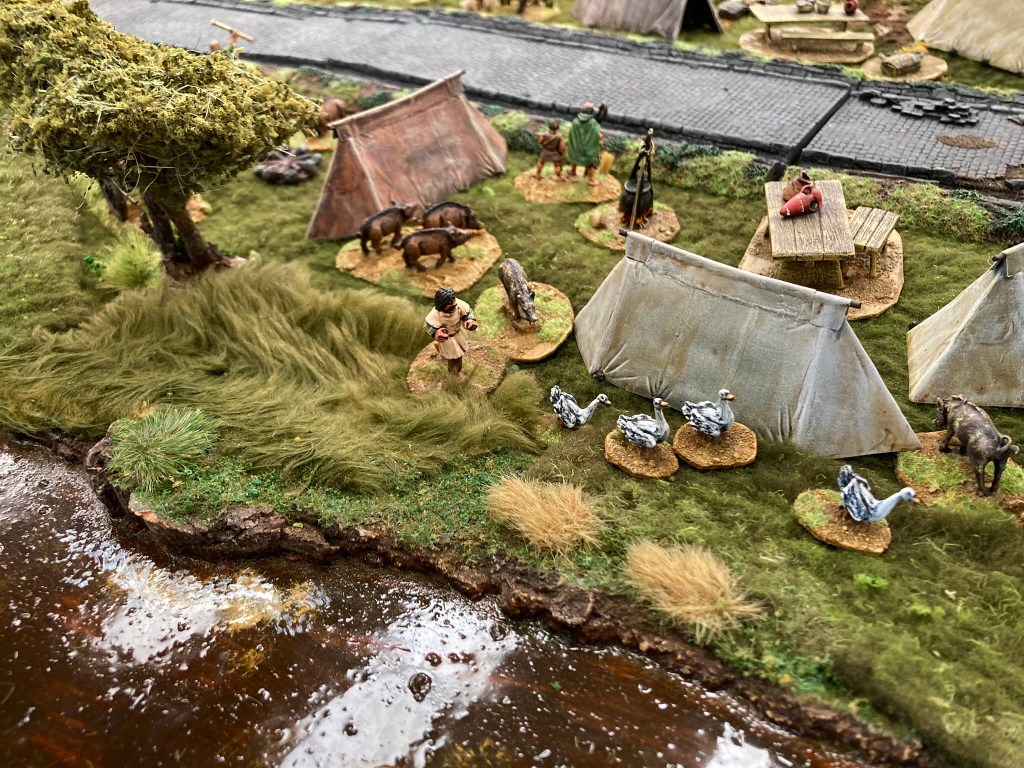
With trees and greenery in place, it was time to add vignettes. I’ve got a huge collection of these – mostly for the early medieval period – lovingly collected and converted over many years, so it was just a case of sorting them out to provide inhabitants for Derfel and Cerdic’s camps.


Saxon tents came from Renedra plastics. I grabbed a few photos of the terrain in situ and then it was time to retire for the night.

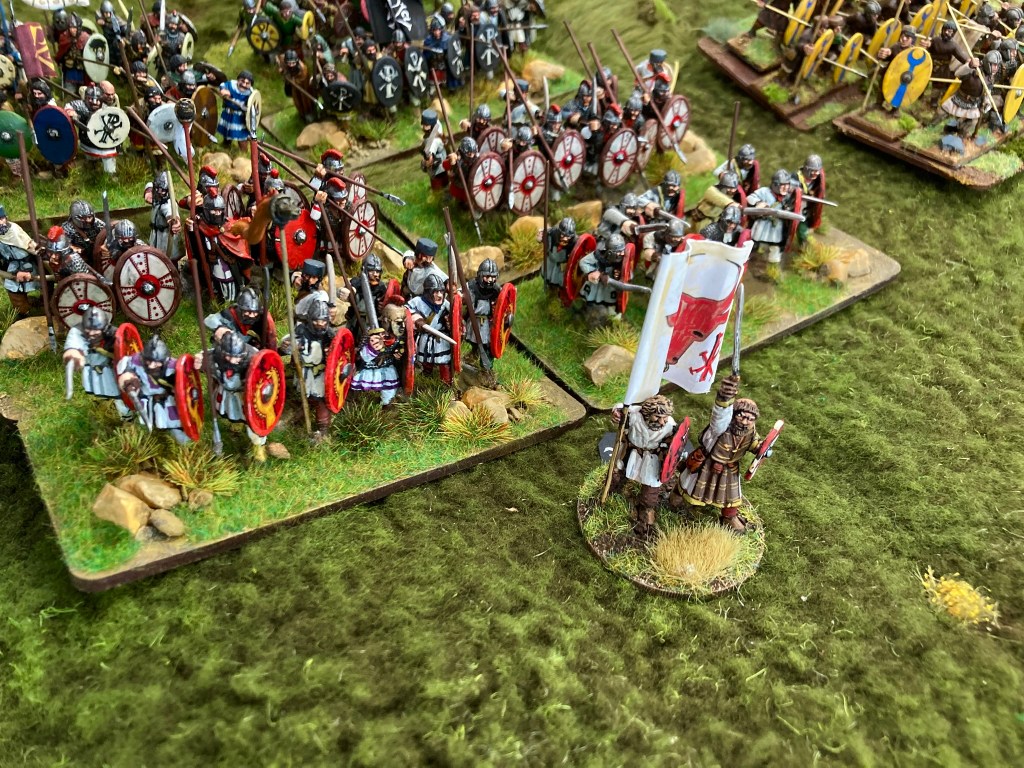
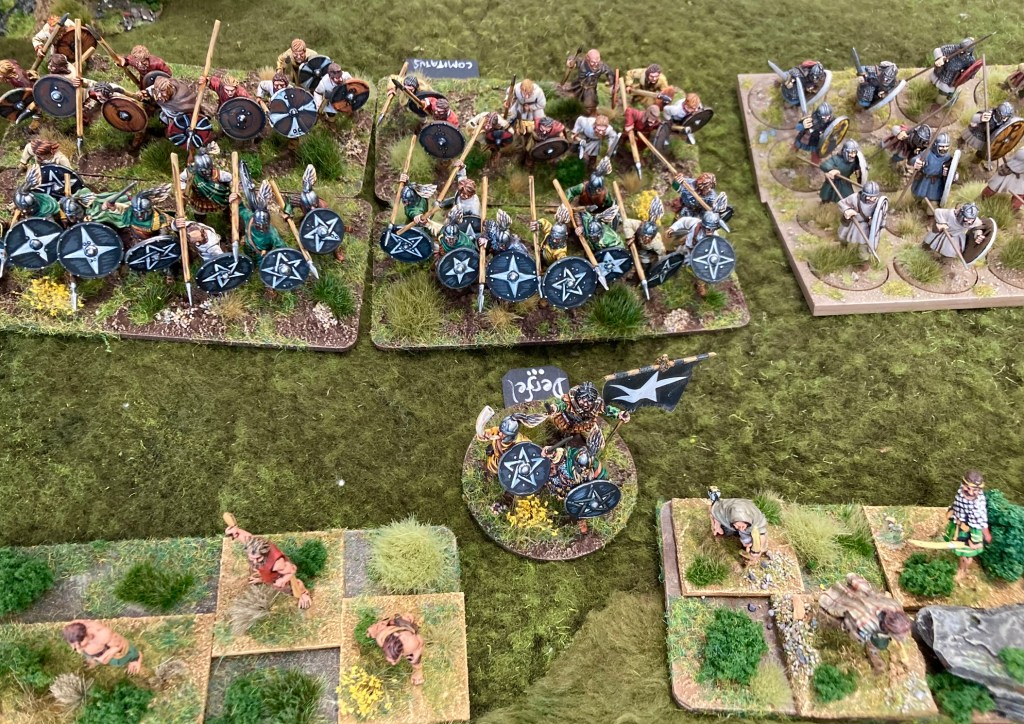
Show day saw the collections of the various Chums being marshalled into place according to the scenario. Tewdric, Sagramor and the men of Gwent took up position to the west of Mount Badon facing off against Aelle’s Saxons; on the eastern slope, Derfel’s Wolftails and Cuneglas of Powys stared down at an awfully large number of Saxons under Aelle and Cerdic’s command.

Around 1o:15 we got the scenario underway with Tewdric and Sagramor getting stuck straight into Aelle’s Saxons. Tom (playing the Britons) showed an unnerving tendency to roll ravens for Risk to Heroes tests, leaving Sagramor as the first major casualty of the battle (he wouldn’t be the last!)

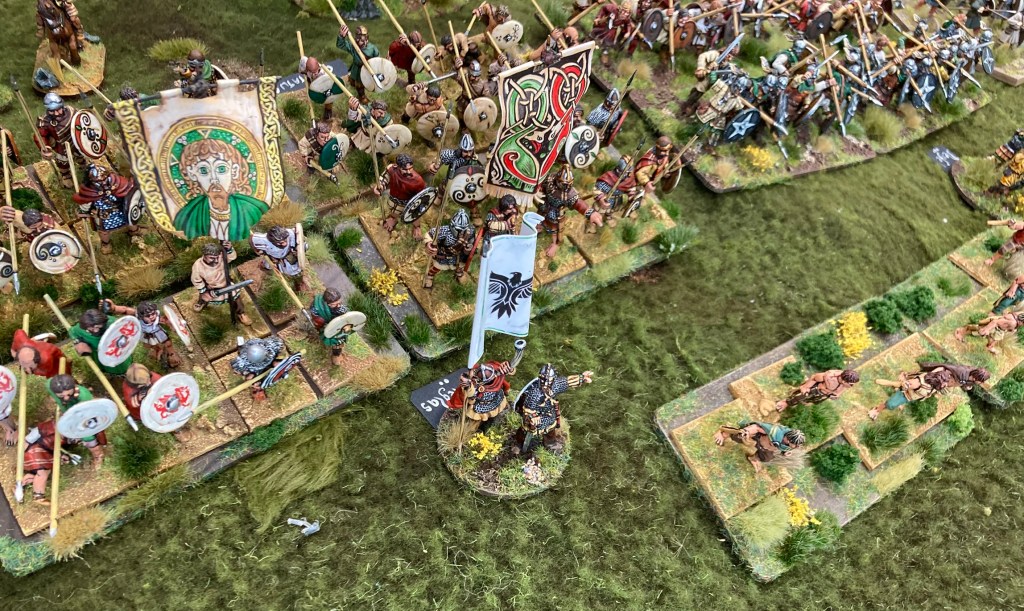
Tewdric of Gwent also died during the fighting and then Aelle himself – the western side of Solsbury Hill was turning into a complete bloodbath! However, loss of both their leaders left the Britons struggling and one of Aelle’s Saxon warbands broke through towards the hill fort.

This forced Derfel and Cuneglass to widen their shieldwall and attempt to hold off the Saxons before Cerdic got his act into gear.

Fortunately for the Britons, at this point Arthur arrived in the Saxon rear though his dice really weren’t up to much and he didn’t make the impact that the Britons were hoping for. He did, however, give the Saxons on the hill something to think about.
Cerdic and Lancelot then started to advance on Derfel and Cuneglas to force the issue. I’d placed Liofa, Cerdic’s champion, in a position where he might be able to challenge Cuneglas to the fateful single combat that occurs in Cornwell’s story. However, Arthur caught up him first, taking him down with Excalibur.
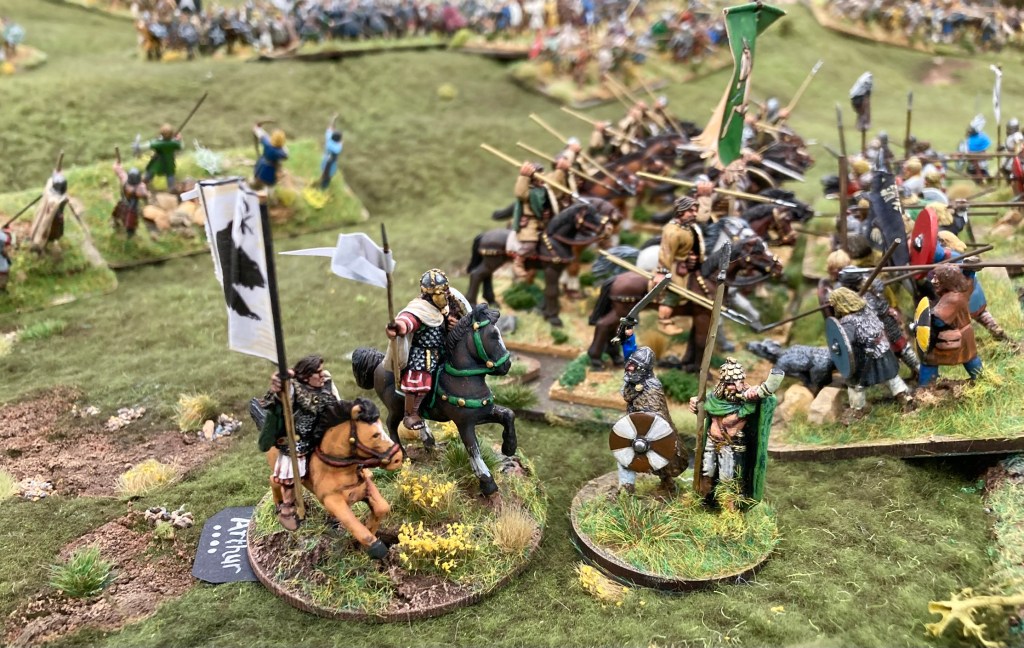
Although Arthur had by now lost one of his mounted units in the melee, his surviving cavalry found themselves face to face with Lancelot’s Saxon rearguard. While charging infantry to the front isn’t ideal for mounted warriors, it was the only course of action in the desperate struggle in the centre.

With his back firmly to the wall (or the river in this case), Lancelot was driven to fight Arthur one-on-one and delivered the shock of the game: he won the first round! (Maybe one of his bodyguard had distracted Arthur in the single combat).

Bloodied and furious, Arthur then took Lancelot’s head off with a single blow from Excalibur! The Saxons were driven into the water and Arthur was victorious. Epic stuff.

However, tragedy was just waiting in the wings as a group of Saxon archers took a pot shot at Arthur’s cavalry. Rolling a raven for his Risk to Heroes test, Arthur took an arrow in the back and was unable to reroll as he’d expended all his Mighty Deeds taking down the traitor Lancelot! This was a massive kick in the teeth for the Britons – losing 6 Reputation tokens at one fell swoop.

The fight on the eastern slope had by now kicked off in earnest as Cerdic ordered his men forwards. Derfel and Cuneglas came to meet them, though once again Tom was rolling those ravens and Derfel fell on the battlefield, as he might have wanted.

A huge scrap developed but the end was heralded by the arrival of Merlin on the eastern flank, putting paid to a Saxon advance.

At the end of Turn 7, both vessels of Reputation were empty – the Britons on -2 and the Saxons on -4! It was a nail-biting end to the battle, one that would doubtless end all warfare in Dumnonia for one or two generations to come.

Cerdic and Cuneglas were the only kings to survive the slaughter, though doubtless Mordred (who we didn’t have represented on the table, though he was probably riding with Arthur’s cavalry) found a way to avoid death and will be back for more.

This game was fun on an epic scale. Cheers to Newark Irregulars for running such a great show and many thanks again to Pete, Paul, Tom, Martin, Sam and Matt who turned up, chatted, provided figures and played the battle; I am in your debt!

