
To celebrate the rare coincidence of both of us having a day off work at the same time, I got together with old mucker Steve Jones for a game. Although our joint history is largely ancient and medieval (we co-wrote the Age of Arthur book for Warhammer Ancient Battles way back when), Steve’s long term personal project has been the American War of Independence. Since the earliest releases by the Perry Twins (first at Foundry, then at Perry Miniatures), he has collected and painted units for the period to an incredibly high standard.
Gaming has included some Black Powder (Steve also wrote the Rebellion AWI supplement for Warlord Games) but has mostly focused on developing his own Bloodybacks period-specific rules, which are now up to version 9.0. The latest variant includes card activation for leaders and now uses D12s for most rolls – interesting stuff!
The scenario was a refight of the Battle of Oriskany 1777 – especially chosen for me as Steve knows I prefer irregular warfare and Native Americans! Oriskany (popularly known as ‘the bloodiest battle of the Revolutionary War’) was a British-led ambush on a Rebel column which was coming to the relief of the besieged Fort Stanwix.
A force comprised almost entirely of Indians staged an attack on Brigadier General Nocholas Herkimer and 800 men of the Tryon Militia, killing and wounding around half of them (including Herkimer, who died several days after the battle) before being driven off, aided by a sortie from the fort that attacked the ambushers’ camp.

Steve’s scenario included a number of features to encourage the historical events of the battle. Both sides had three commanders apiece and each turn began with rolling an average die (remember them? I don’t think I’d ever used one before) to determine command points for each leader.

The better commanders had an increased chance of gaining more command points, though everyone had a minimum of one, so there was always going to be something to do.
From a gaming point of view, I think I prefer this to Black Powder, where a duff roll for a commander can mean doing nothing at all.

Activation involved a card draw to determine which commander activated when and also random events such as the duration of each turn, the timing of the ambush and a scenario-specific thunderstorm which halted action in the real battle for around an hour.

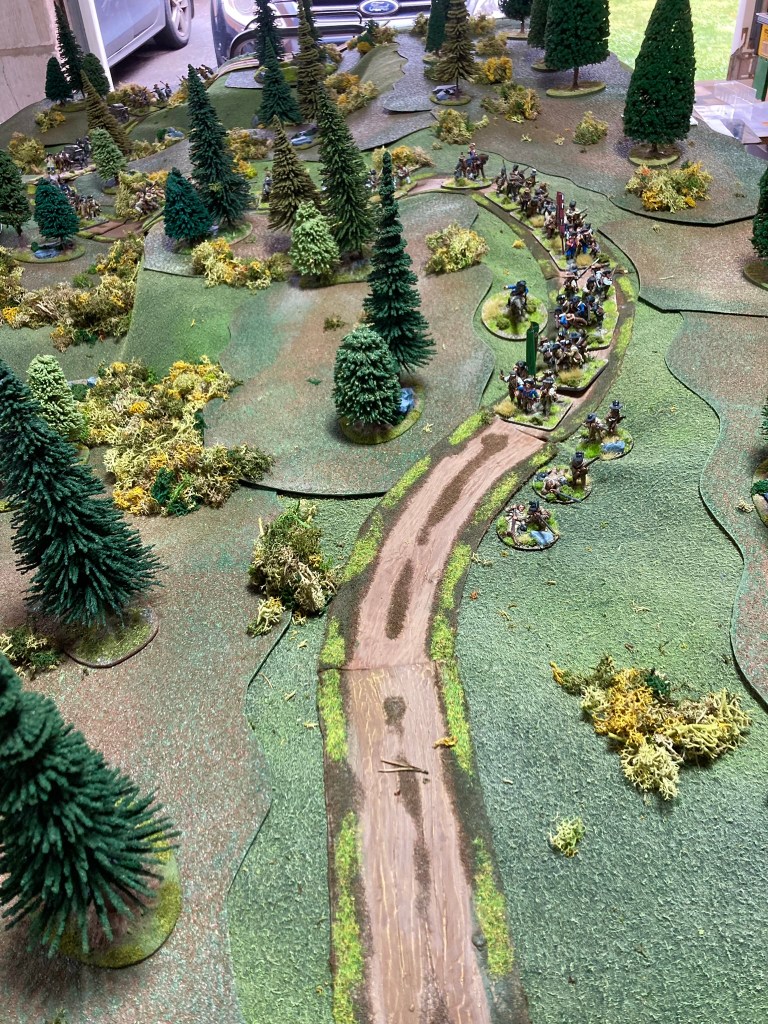
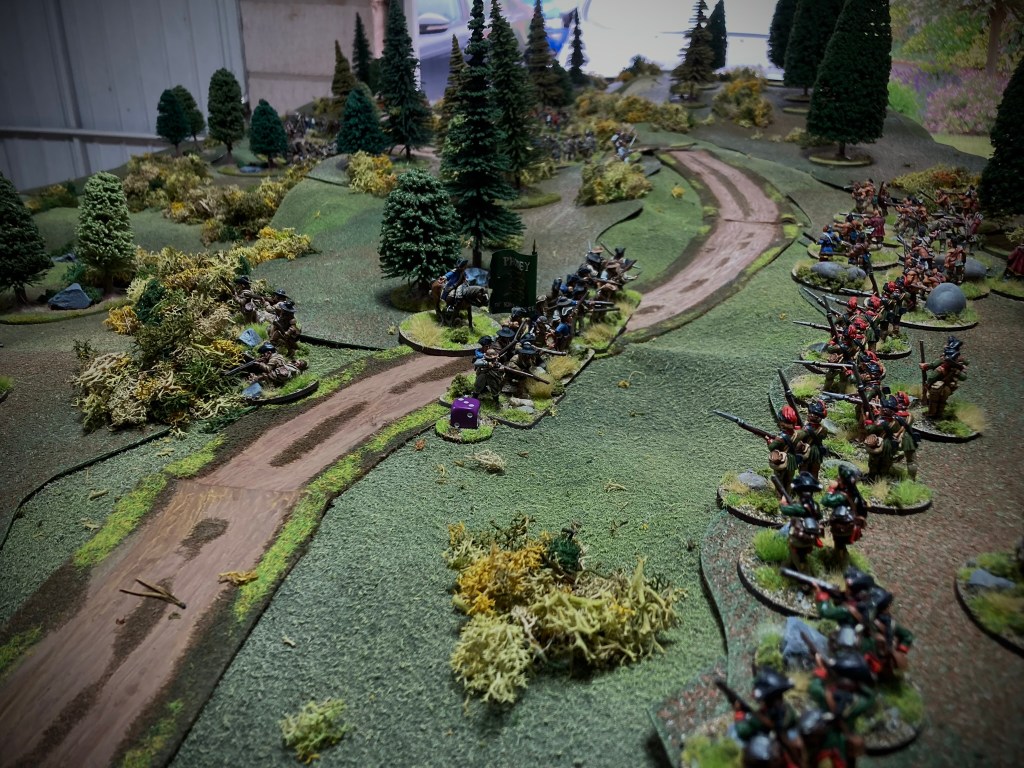
As play got under way, the Rebel column advanced further into the woodland before the inevitable happened.
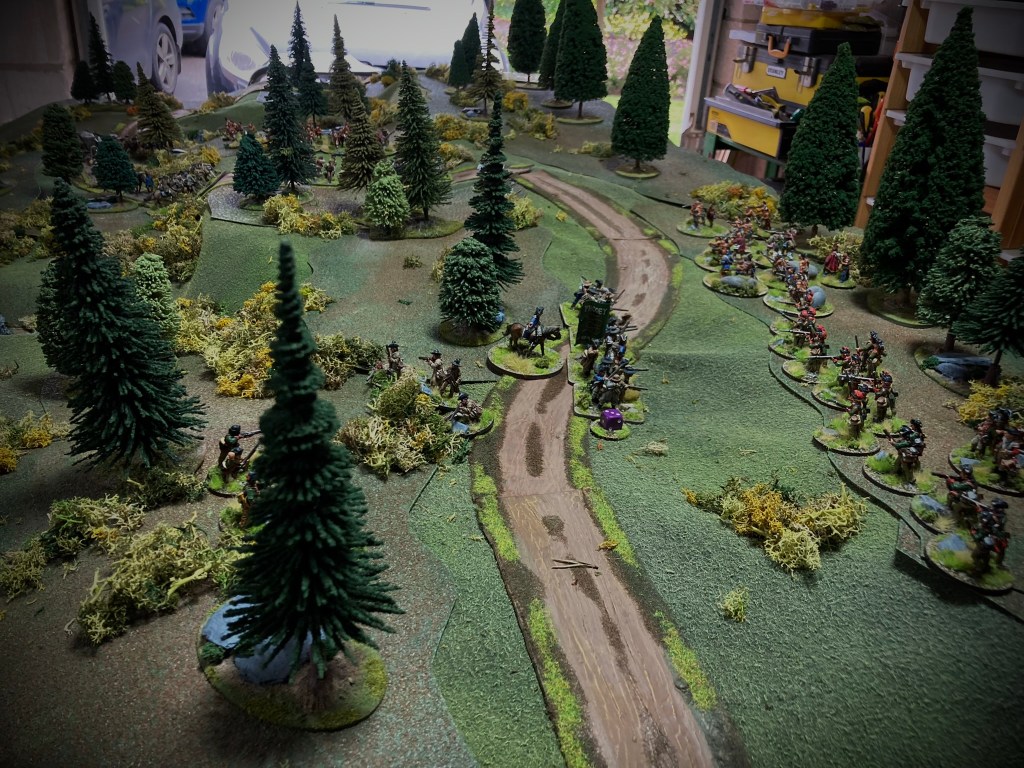
Steve and I were playing in a fairly narrative fashion, with both of us moving and dicing for different sides in different parts of the game. Once the ambush had been sprung, I had a free choice of where to place the Crown forces and went for uphill of the Rebels, both for the height advantage and to avoid getting caught in the loop of the military road.
Historically, the Indians started shooting before the Rebel column was completely over the first creek, and this was replicated in our game.

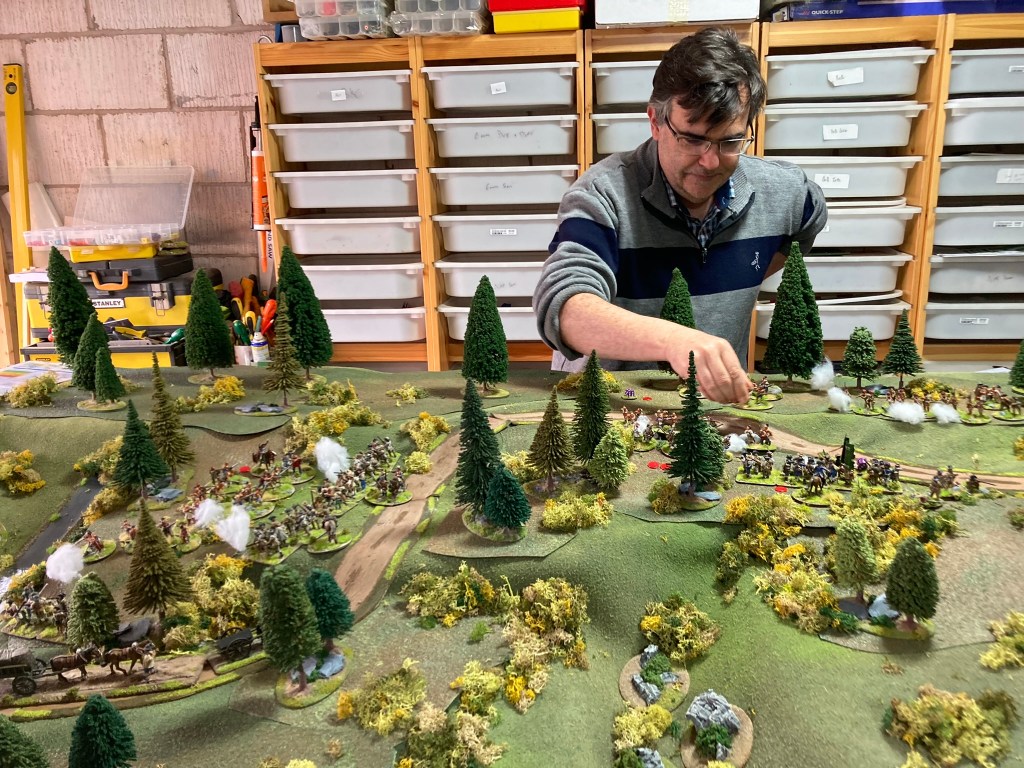
Steve’s terrain is pretty much entirely scratch built. The cloth is a piece of polar fleece with a lot of paint to add extra layers, and it’s ideal for this kind of undulating terrain where the contours have been created with boxes, foam and mats underneath.

I should point out that nothing on the table was my work (apart from the roads, which I made and sold to Steve about 25 years ago!)
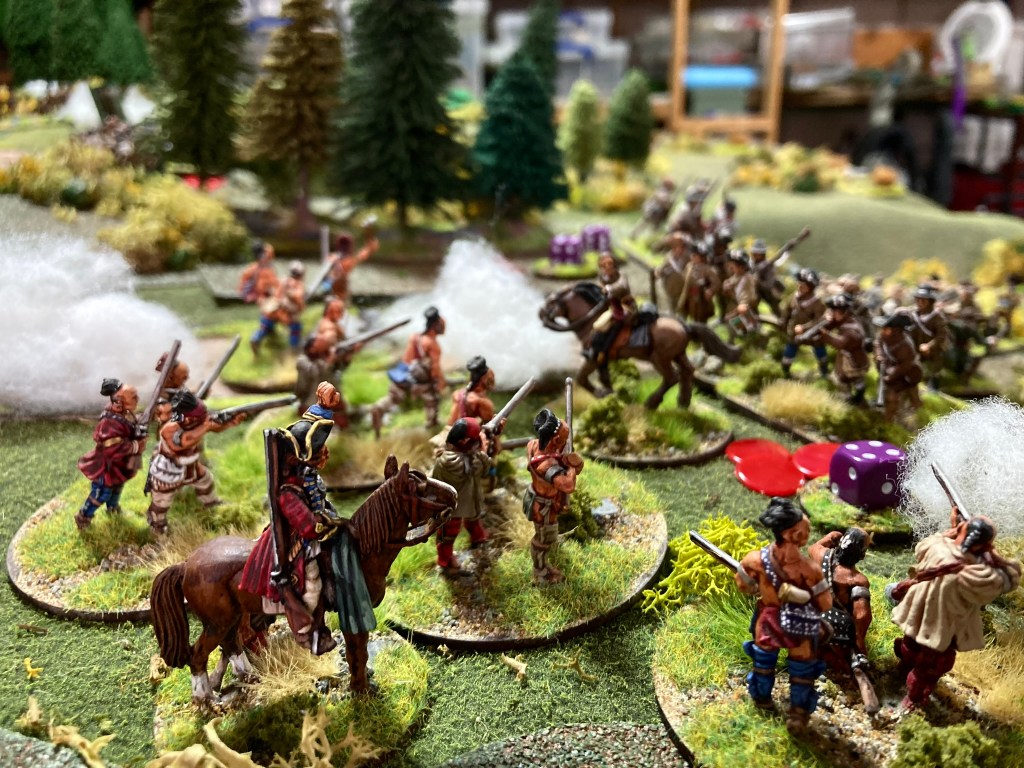
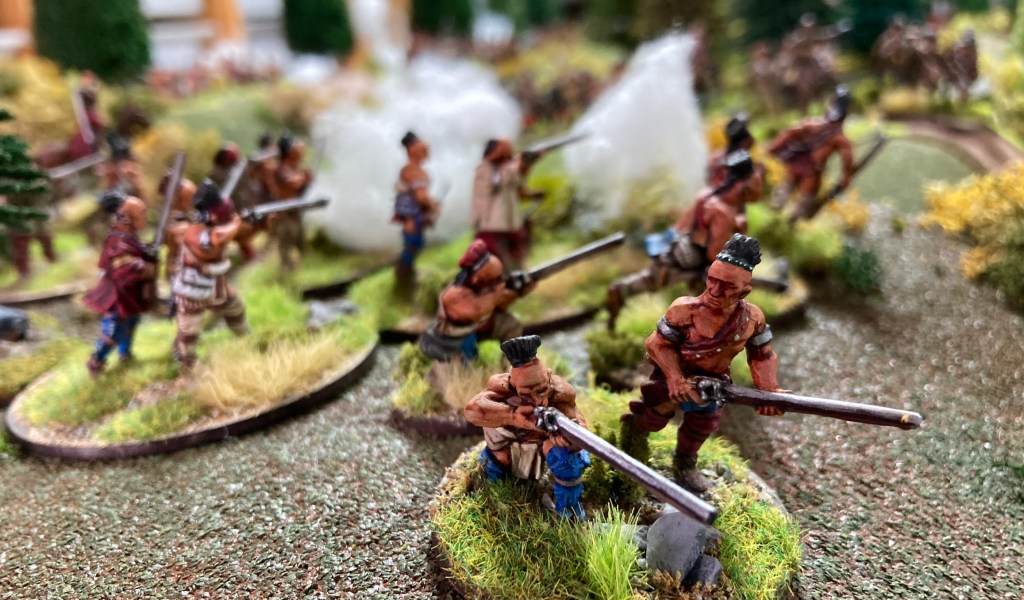
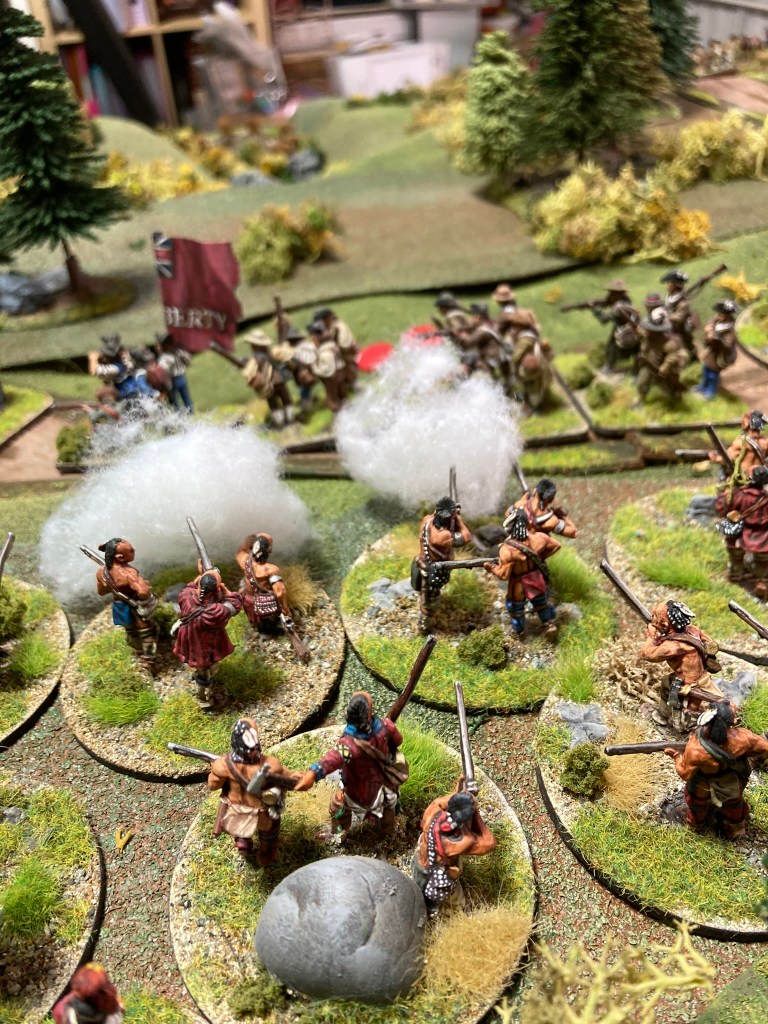
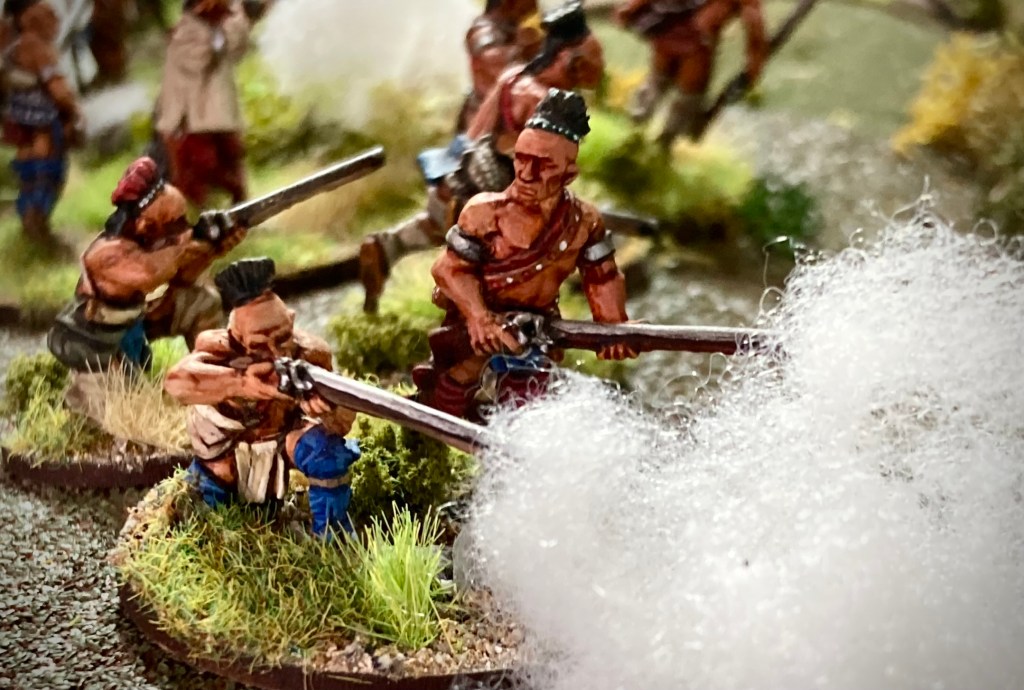
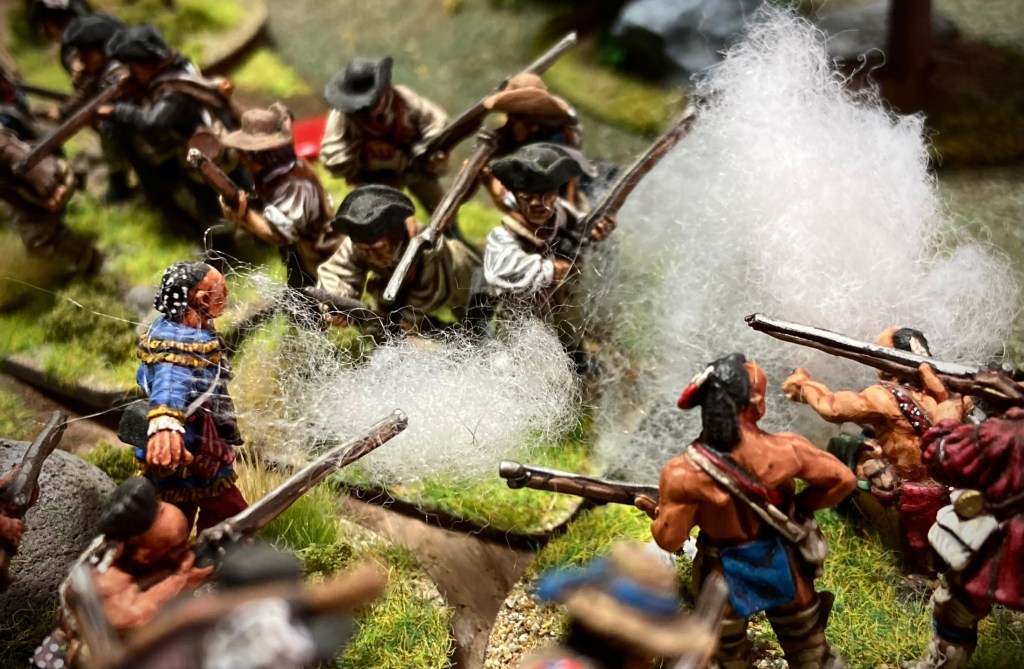
Joseph Brant’s Mohawks were the first to appear, with a couple of large units manifesting themselves uphill of Colonel Ebenezer Cox’s Tryon Militia and opening fire at very close range.

Cox was luckier than his historical self and survived the first first volley.

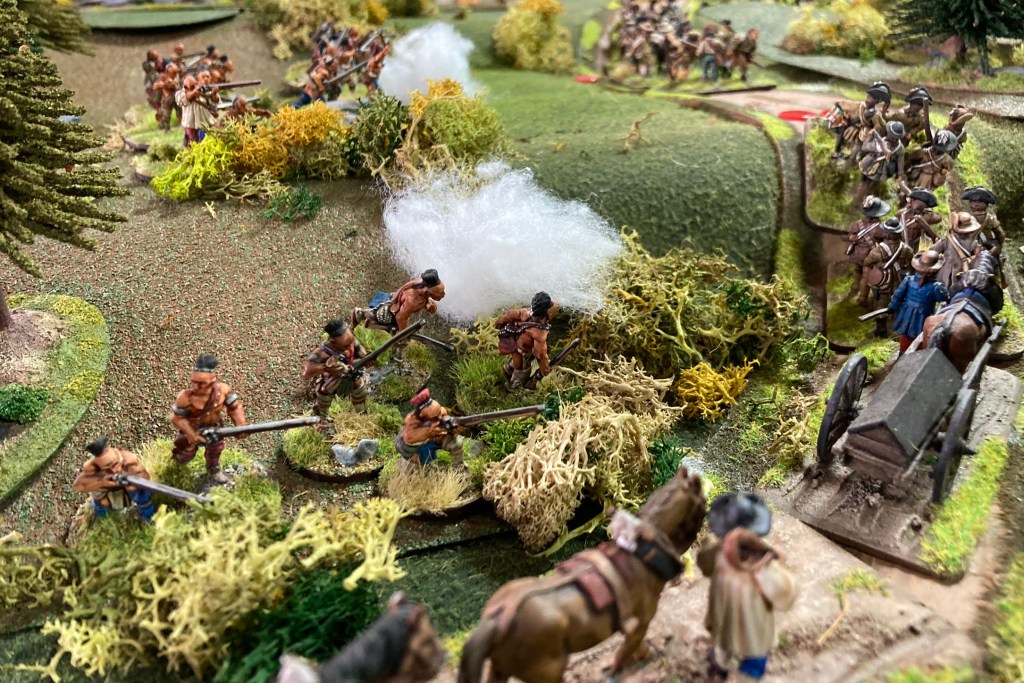
More Indians went for the baggage towards the rear of the column, but were held up by the small size of the unit and the fact that Black Snake was focusing his energies on the firefight further up the road.


Indian commander Black Snake pulled up directly opposite Herkimer’s command and again opened fire.

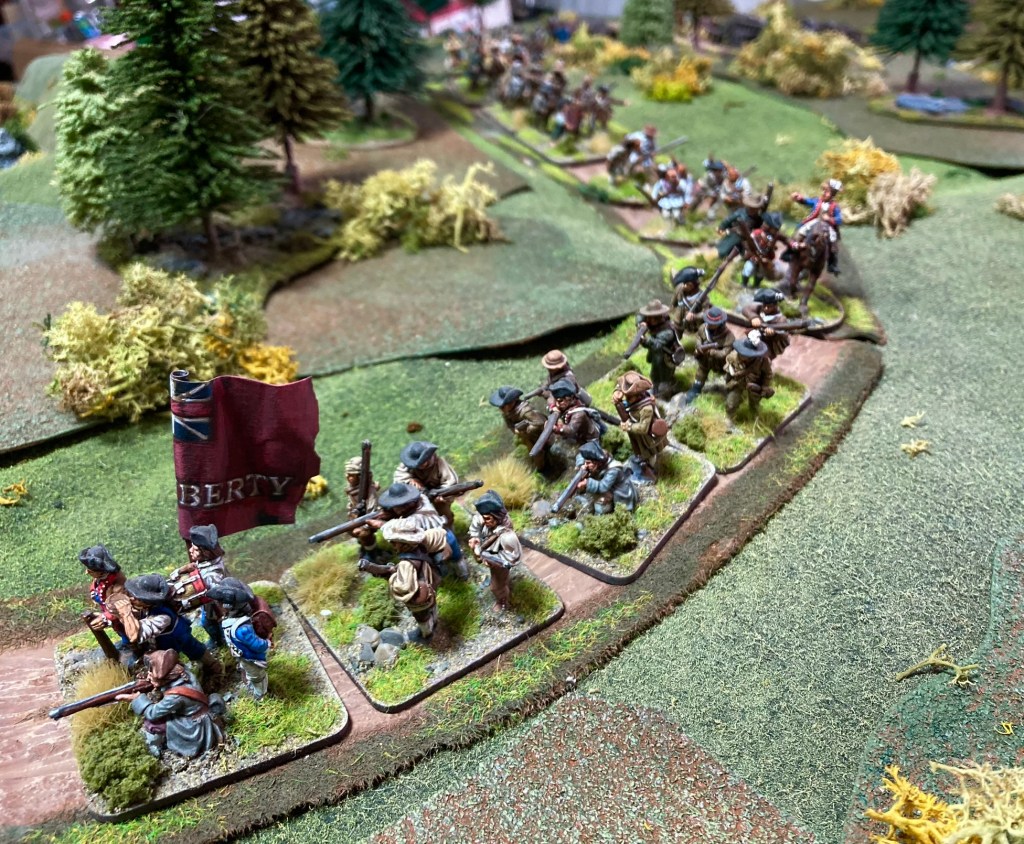
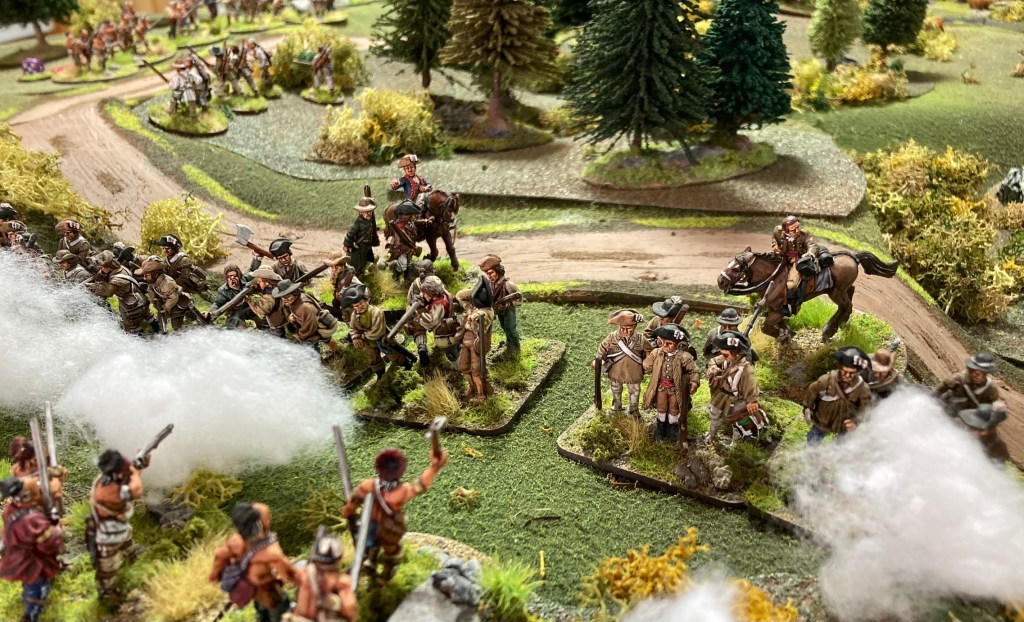
Colonel Visscher was doing a fine job of holding the rear of the column together, risking himself at several points as he encouraged his men.


Having escaped the first volley, Colonel Cox rapidly rallied his militia and turned them to face the threat from both The Mohawks and a few British units that had deployed at the front of the column.


After an initially fierce firefight, the cards dictated that the thunderstorm had arrived.

In the actual battle, this was so heavy that it halted all action, and we did the same in our game, only allowing some rallying.

Within an hour, the thunderstorm cleared and the combat started again.
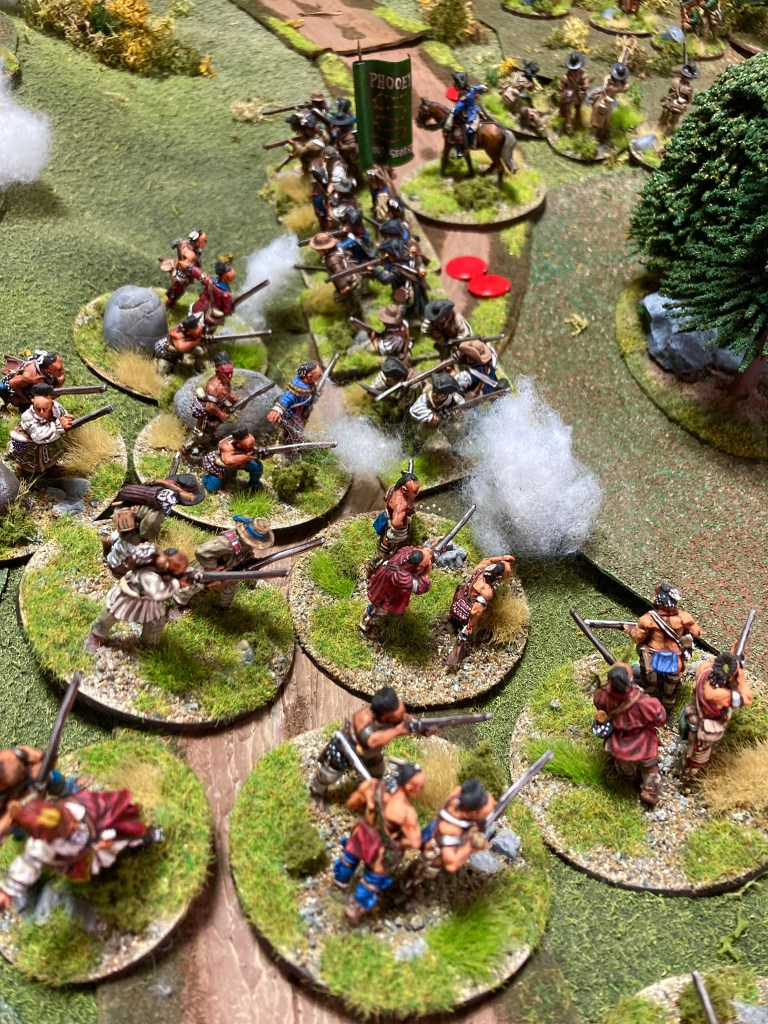
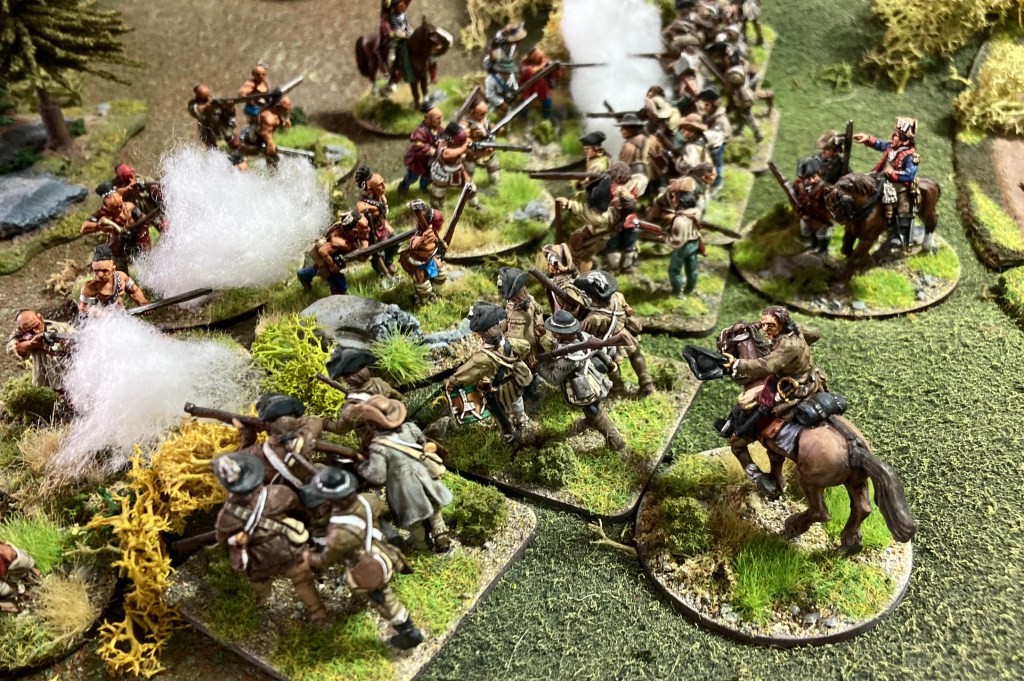
Brant’s Mohawks decided to risk an all-out charge on the wavering British centre. Despite inflicting casualties, they were unable to break the Tryon Militia and fell back.
This highlighted one of the things that I really like about Bloodybacks; units can, with a good activation roll (and leadership) take multiple actions in a turn. It reminded me a little of the Song of Blades And Heroes mechanisms, where you can push your luck and take up to three activations. This nicely represents the bursts of activity in this kind of battle and kept the action moving.
Brant’s warriors broke and ran, freeing up Herkimer’s Militia to attempt to move down the road and join up with Visscher’s rearguard.


By this point, Visscher had successfully brought up some more Tryon Militia to support Herkimer and fend off the attentions of Chief Black Snake’s warriors.

Feeling bolstered by a couple of good command rolls and feeling the need to break the deadlock, the Tryon Militia attempted to drive off their ambushers with a charge.
With some less than auspicious dice-rolling, this all went a bit Pete Tong, and both Herkimer and Visscher fell as casualties during the combat.
Steve’s rules don’t currently have a Leader casualty table, but after rolling a 5 and 6 respectively, we decided that Herkimer had been mortally wounded and Visscher brained with a tomahawk.

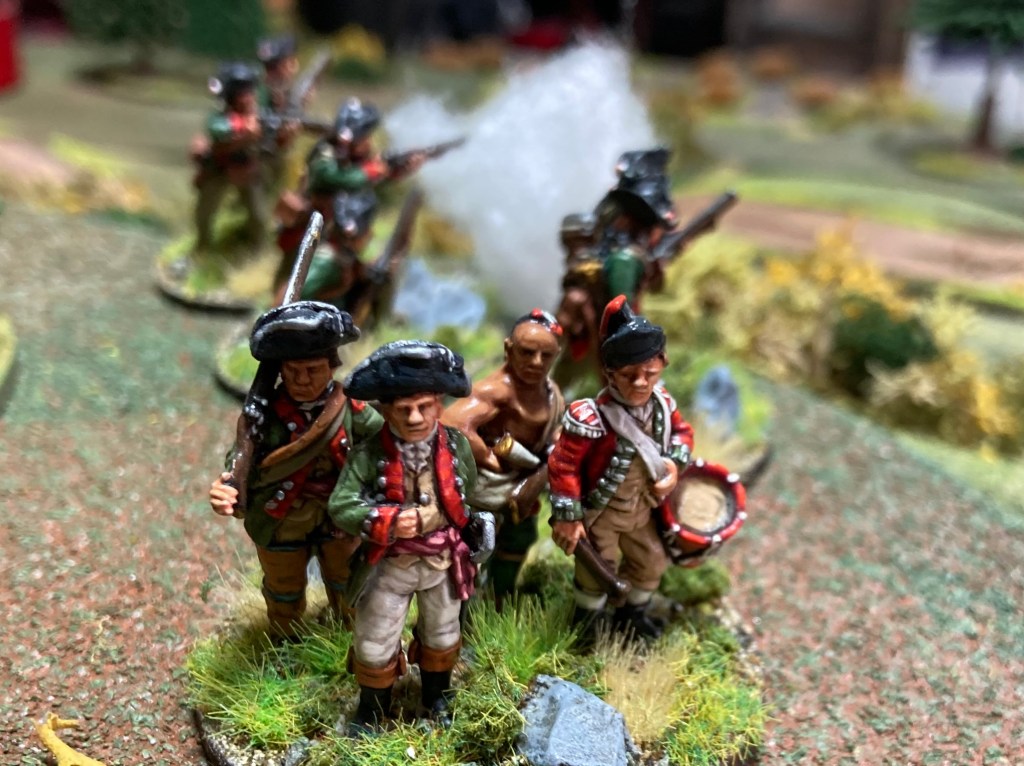
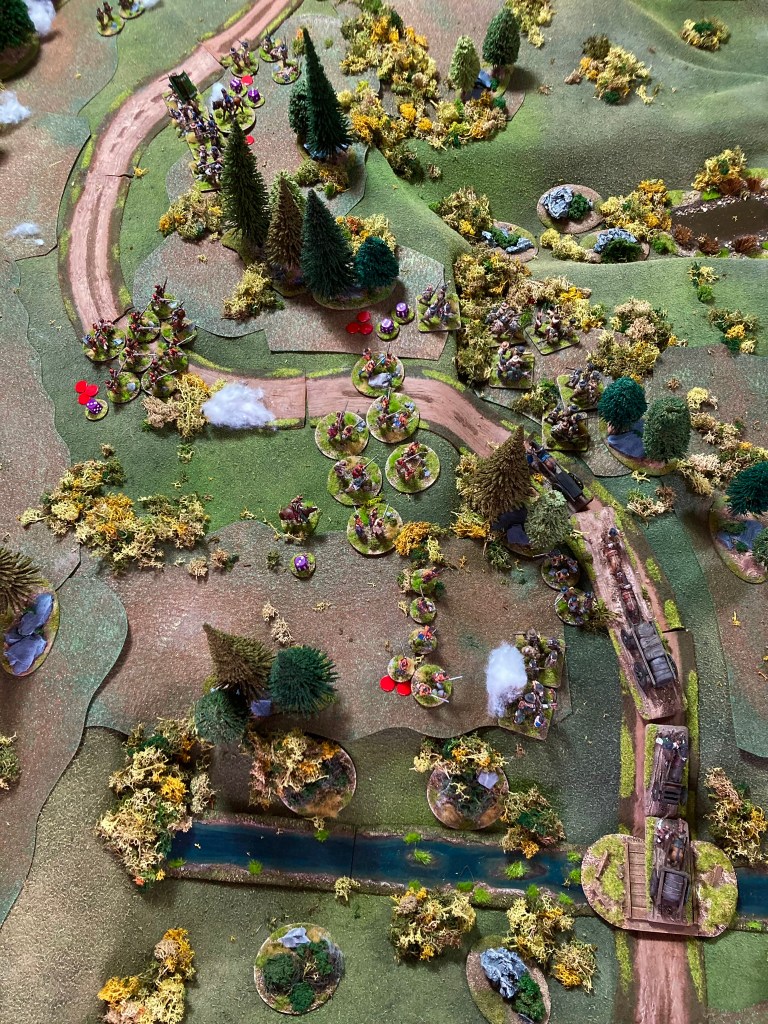
The leaderless Tryon Militia then found themselves being charged in the flank by the British Light Infantry, who had pursued down the valley at the behest of Johnston. Rude!

The Militia had had enough, and broke and ran. This was enough to seal the fate of the Rebel column. The rearguard began to retreat, leaving the wagons as prizes for the remaining Indians.

A super narrative game with some awesome minis and scenery. I was glad that I had Steve there to talk me through his rules and will doubtless play again in the future!

You can follow Steve’s Painting Shed on Facebook: https://www.facebook.com/paintingshedblog

Hi James, I haven’t been able to log into WordPress to make the following comment, so here it is again: “Brant’s Mohawks decided to risk an all-out charge on the wavering British centre. “
I tried to say something pithy about fickle allies but in all the stress of resetting my password repeatedly have forgotten my exact wording. Regards, Andrew
LikeLiked by 1 person
BTW, are the Bloody Backs rules going to be published at some point?
LikeLiked by 1 person
No, but Steve has just put the latest version up as a free download on his blog. https://paintingshed.blogspot.com/
LikeLike
Thanks. However, unless I’m dimmer than I thought, one has to go to Facebook to download them, which is contrary to good taste, decency and every other precept I can think of.
LikeLike
I can confirm my dimness. I found the rules at last, without incurring the self-loathing of creating a Facebook account. One has to look under ‘Pages’, though anyone unfamiliar with WordPress may experience similar initial difficulty as myself in locating this.
LikeLike
I’m glad you found it in the end. Cheers!
LikeLike