So began a battle that none had expected; and it was called the Battle of Five Armies, and it was very terrible. – The Hobbit, JRR Tolkien

Playing the Battle of Five Armies as a miniature wargame is nothing new, though I’d never done it in my many years of gaming, so this project was designed to put that straight! Inspiration came directly from The Hobbit and Tolkien’s many illustrations, which you can read about in our game preview here.

The combination of having successfully played many Midgard Heroic Battles games set in Middle-earth, along with the accumulation amongst our group of large numbers of 28mm miniatures and the desire to make a Tolkien backdrop finally set this project in motion.

While Midgard provides a good two-hour club game with around ten Units and 3-4 Heroes a side (roughly 100 miniatures a side with 8-12 figures in a Unit), it is also very scaleable. As the basic measure – the ‘Spear Throw’ – is determined by the width of the Units in the game, it’s very easy to go larger or smaller to suit your collection and playing space. For the Battle of Five Armies, we knew that we had several sizable figure collections available, so the decision was made to double the standard Spear Throw to 24 cm.

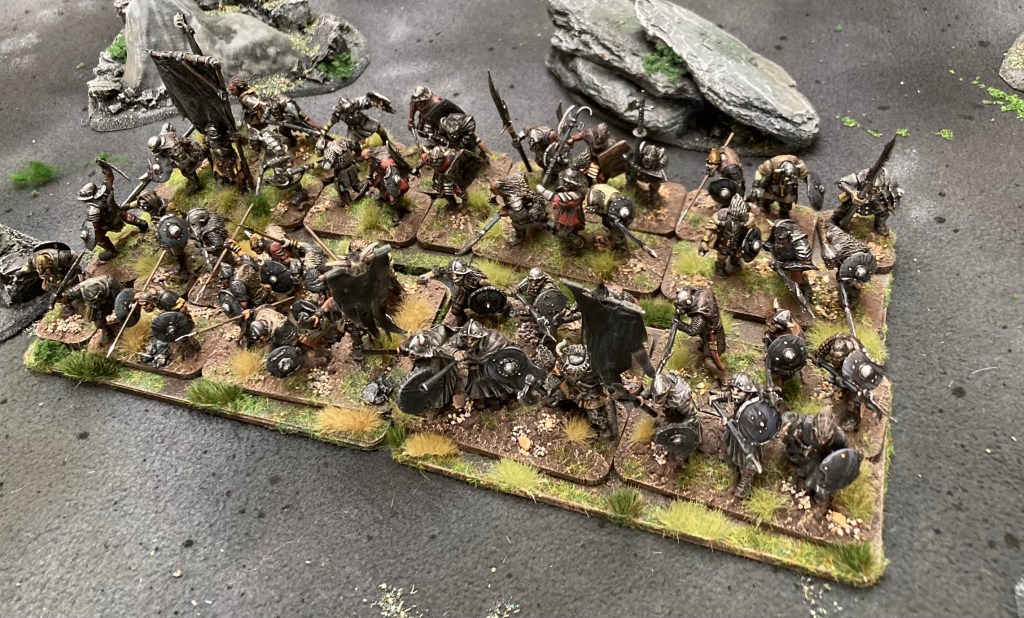
Warrior Units would also be deeper than usual, giving us roughly 32-48 miniatures per Unit – a very meaty spectacle indeed seeing as we would be fielding around 70 Units on the table!
Organising the game
Following a couple of initial discussions and some trial maps of the battlefield, Dave Hunter proposed a scenario based on five key events during the battle as described in The Hobbit. We would forgo the initial skirmishing by the Lakemen in the ruins of Dale (which wasn’t going to be represented on our table anyway) and move directly to the first elven charge upon the goblins and wolves. After this initial clash, there would be a lull in the fighting during which the troops would reset for the main battle. We were very aware that we needed to be able to conclude the game during the day so that visitors could see the progress of the battle in its different stages.

Reputation is the driving force behind Midgard, a game mechanism that can be best thought of as an ‘elastic force morale’. It is lost when Units and Heroes are destroyed, but can be gained for heroic deeds such as leading a charge or entering single combat with an enemy Hero. When a Force’s goblet of Reputation is empty, it breaks and flees the field.

Reputation is also used as part of the scenario design process. For the Battle of Five Armies, we wanted the Free Peoples to start with a lower Reputation than the goblins and wolves (19 and 27 respectively), but for it to rise at key points in the battle as Thorin, the Eagles and Beorn arrive on the scene. (Click here for Midgard Heroic Battles Synopsis if you want to know more about how the rules work).

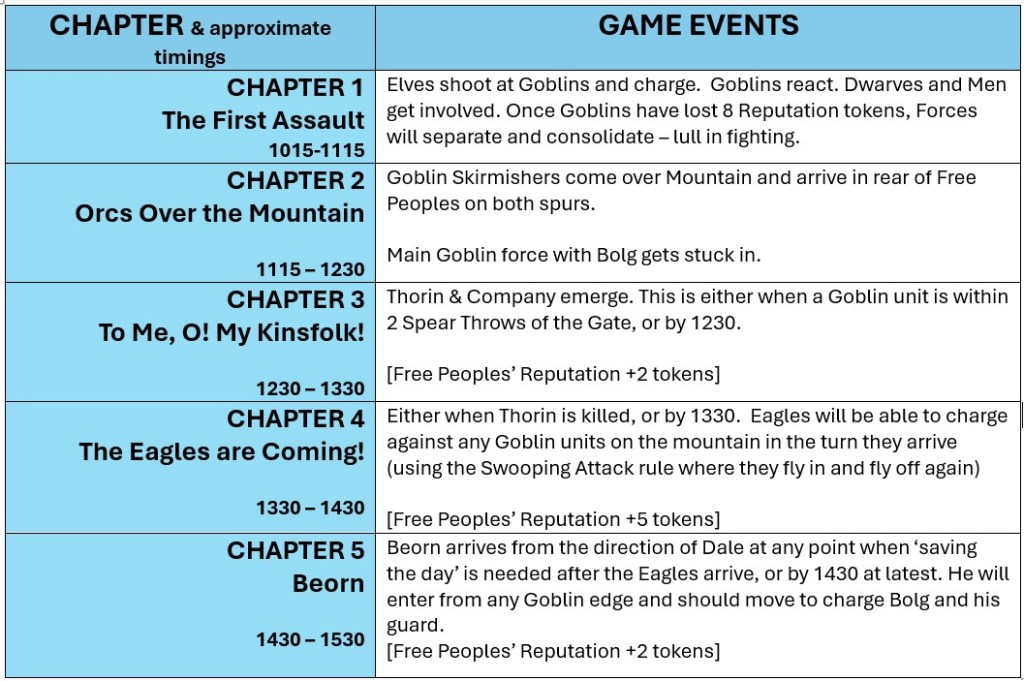
With this in mind, Dave’s proposed scenario timetable looked like this:
Dave had also drawn up the orders of battle, again based as far as possible on Tolkien’s descriptions in The Hobbit. We were at pains not to over-complicate the Units to allow the game to flow smoothly. This is always a factor when running a big game; there is often a temptation to make every Unit different, but in this case, we needed the minimum amount of variation.
Each Contingent had a Hero leading it, although as the goblins had only Bolg as a named leader, we added a number of nameless captains (Level 1 Champions) to add leadership to the orc host.

You can download Dave’s orders of battle below. These have been created using the Midgard Heroic Battles Excel Force Builder created for us by Ralph Plowman and contain an abbreviated version of each Trait (special rule) for ease of use. Although the Free Peoples do not have a specific ‘general’, we gave Gandalf the Army Commander Trait as he is listened to by all three, so has the opportunity to influence them during the battle.


Upon one side were the Goblins and the wild Wolves, and upon the other were Elves and Men and Dwarves. This is how it fell out.

The battle commenced with the vanguard of warg riders and goblins approaching the elves on the southwest spur. Before they had the opportunity to charge, the elves loosed their arrows and then surged down on the goblins, exactly as described in The Hobbit:

As soon as the host of their enemies was dense in the valley, they sent against it a shower of arrows, and each flickered as it fled as if with stinging fire. Behind the arrows a thousand of their spearmen leapt down and charged.


At the same time, Dain’s dwarves and Bard’s Lake-men appeared over the crest of the southeast spur and mounted a flank charge into the huge column of goblins marching towards the Front Gate of the Lonely Mountain.


While Midgard’s morale system works on the Reputation of the entire Force, we had a cunning plan to end the first phase of the battle: the goblins had 8 of their 27 Reputation tokens in a different colour. When these first 8 tokens had been lost from the goblet, the goblins withdrew and we reset for the second part of the game. This didn’t take too long; though the forces of evil inflicted some damage, the elves crushed the unsupported first line, and the dwarves and men took out the head of the orc column.
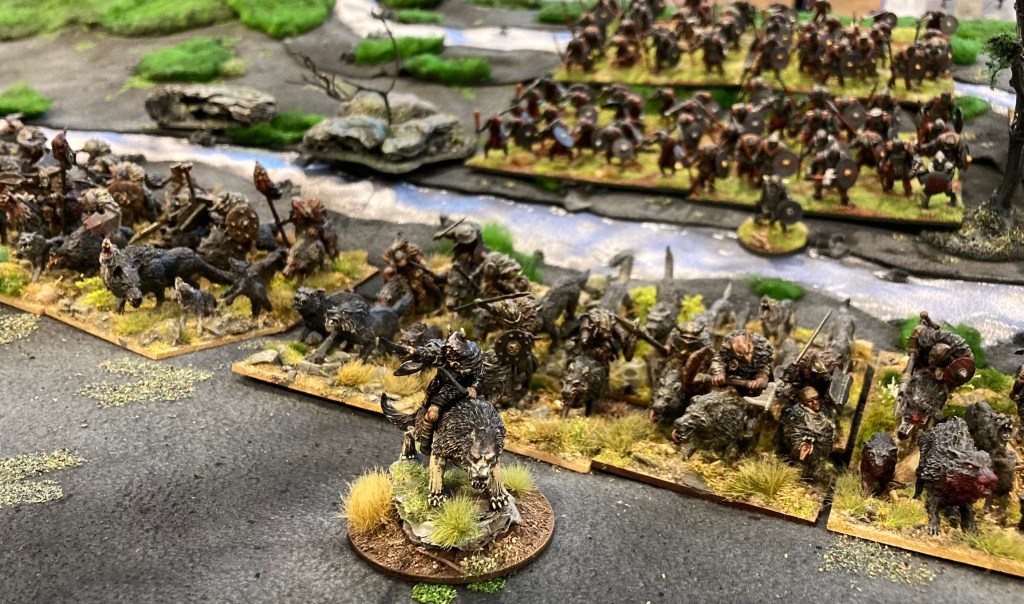
With this completed, both Forces consolidated their position in a lull in the fighting. The elves withdrew to defend the slopes of Ravenhill, while the men and dwarves pulled back to their ridge. With the arrival of Bolg and his bodyguard, backed up a second wave of orcs and massed wargs, the goblins mounted their second attack.

There a host of Wargs came ravening and with them came the bodyguard of Bolg, goblins of huge size with scimitars of steel.

This was the signal to get Bolg marching up into the fray. At the same time, Goblins started to climb down the mountain slopes, arriving in the rear of the Free Peoples…

