I’ve been running games based on Tolkien’s Silmarillion for a few years, but have always had a dragon-sized gap in my collection. Glaurung – a malevolent, wingless wyrm – features heavily in the First Age of Middle-earth and there have been many great interpretations of him on the Wargaming In Middle Earth Facebook page (a fine source of inspiration.)
I remembered that Schleich, the plastic toy company, had a wide range of dragons and dinosaurs and wondered if one of them might work. A quick Internet search was all I needed to find this rather fine lava dragon. He fitted the bill for me, having a rather arrogant look about him that suits Tolkien’s creation, and looking like he’d work without his wings.The bonus of having a pre-assembled model in plastic was not lost on me, remembering trying to assemble multi-part metal dragons in the 1980s! The price was good as well, setting me back £15 – a fraction of what it would cost in resin or metal.
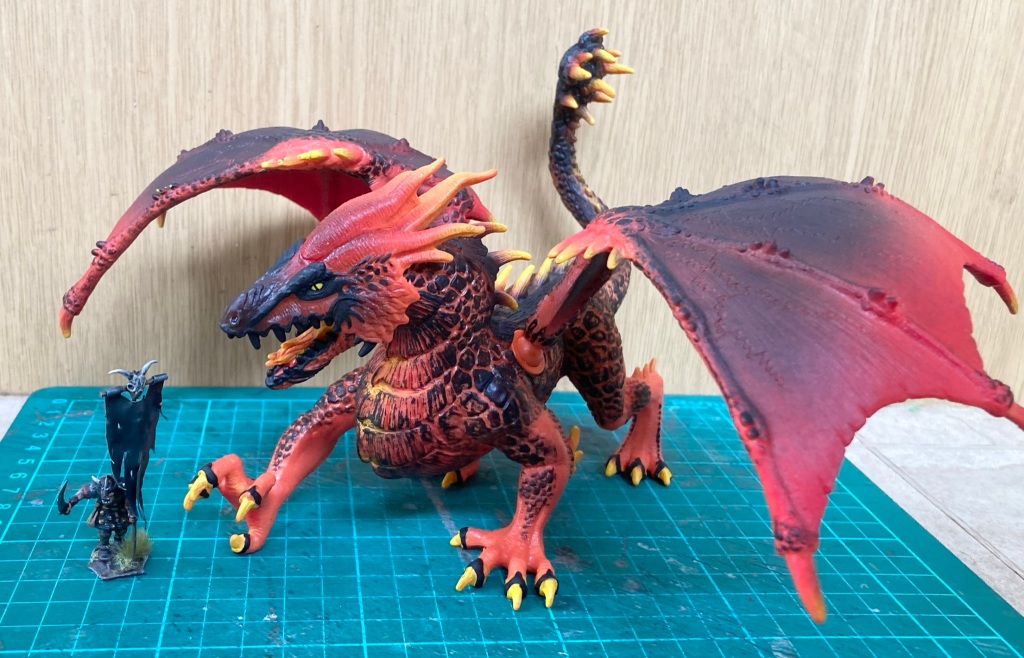
After arrival, his wings were even easier to remove than I had expected, being separate pieces attached with a ball and socket joint. All I had to do was pop the wings out, trim the edges of the socket and then fill in the holes with epoxy putty (Milliput in this case.) The surface of the putty was roughly sculpted to try to blend it in with the dragon’s scales. I can’t say that this was my best sculpting ever but it does the job of disguising the gaps.
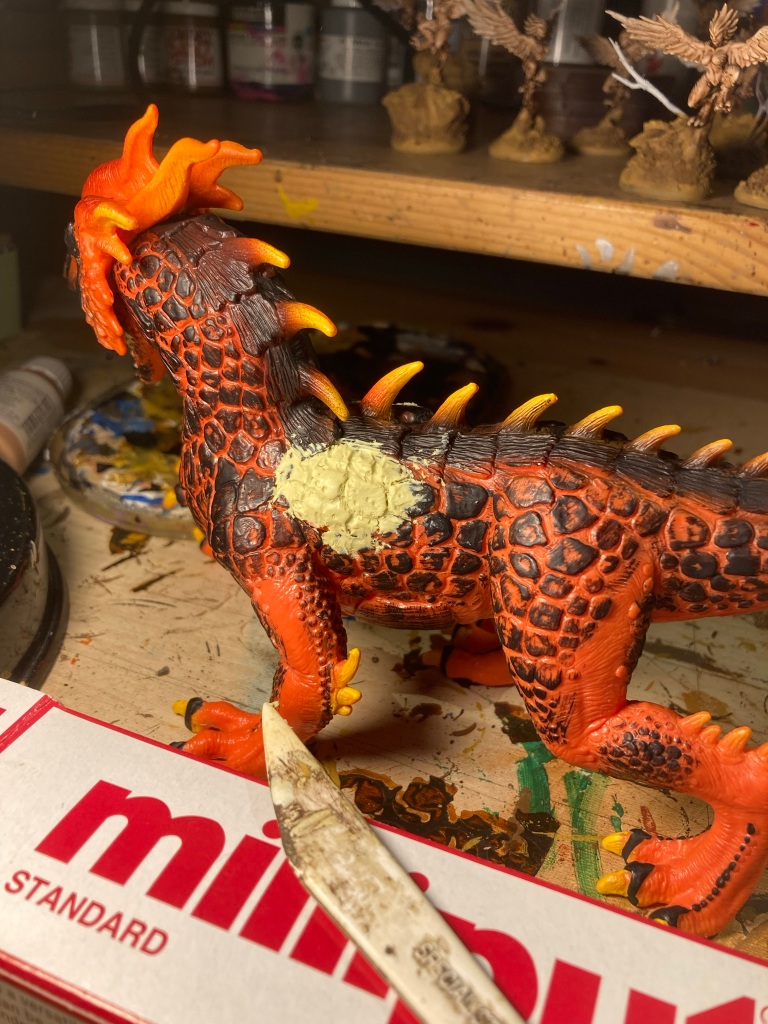
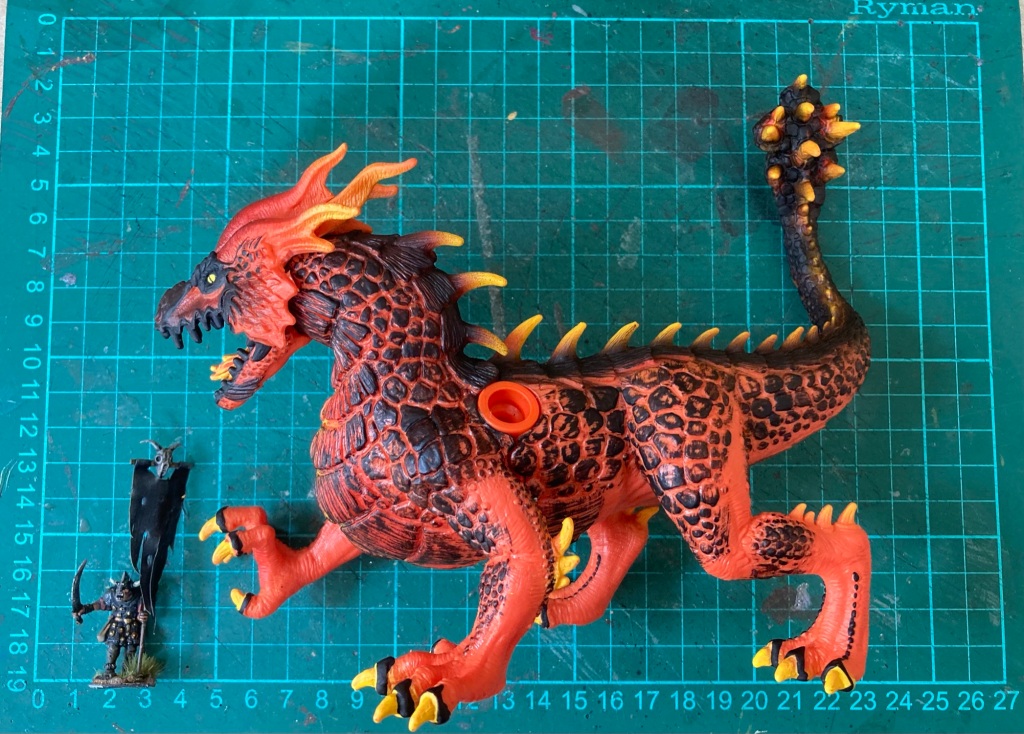
The Schleich model also had a moveable jaw with a gap underneath, so I used more Milliput to seal this open and fill the crack. I wasn’t quite sure about the tail at this stage – the lava dragon is modelled with a club-like tail reminiscent of an ankylosaur – but I left it as I couldn’t be bothered to change it at the time. I did, however, bend it downwards using a heat gun so that it would fit inside my usual big monster figure storage – a 9 litre Really Useful Box. After years of doing this stuff, I’ve learned the hard way that it’s best to plan how anything big is going to be stored before painting it!


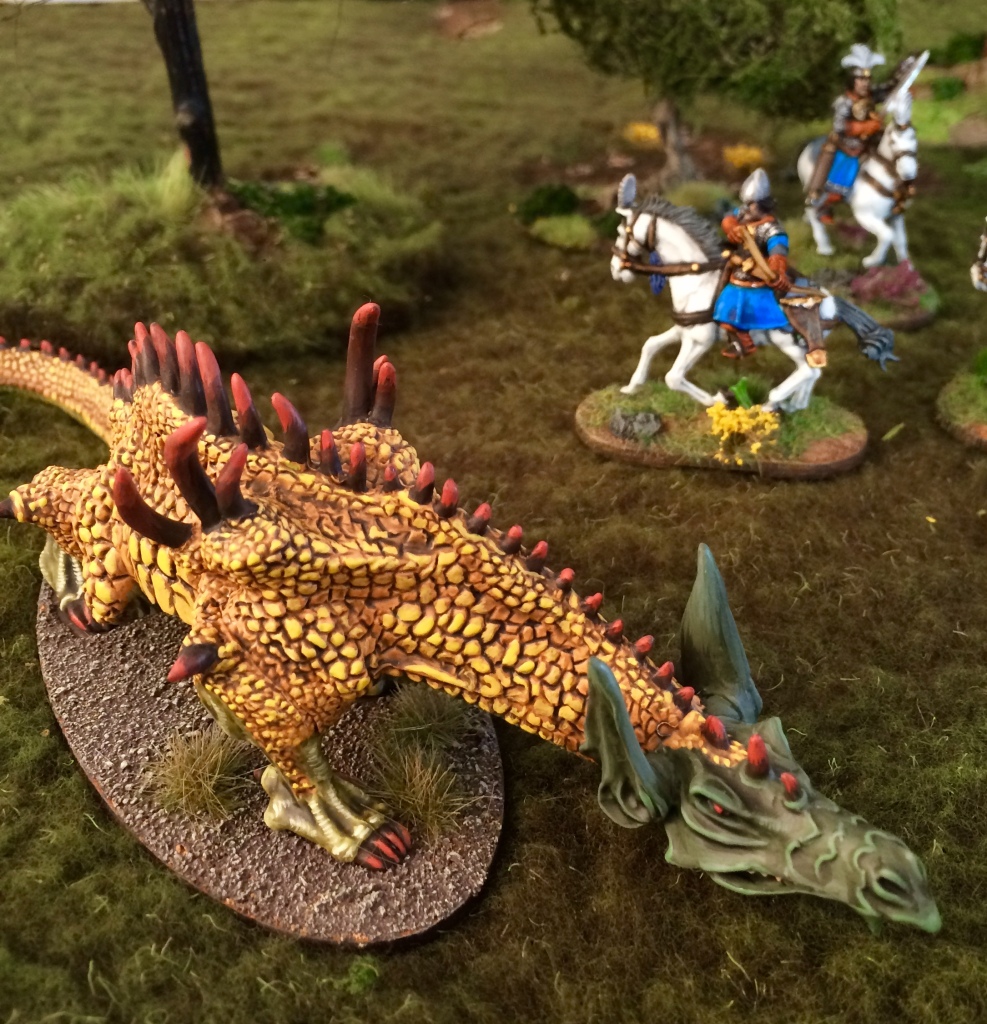
Consulting Tolkien’s only illustration of Glaurung, I couldn’t originally work out how I was going to incorporate a gold body with a green head. My friend Andy Hawes did an amazing job on his converted Mithril Miniatures Glaurung with a bold combo of yellows, greens and reds. I decided that I wanted to go with metallic gold blended into green, with a black underbelly. Exactly how I was going to achieve this I wasn’t quite sure.
I kicked off with an undercoat of Halfords grey plastic primer (my go-to product for undercoating any flexible plastics) and then tried a base layer using a coat of GW Contrast Black Templar. When dry, I started experimenting with dry brushing Glaurung’s top scales with several light layers of Vallejo Brass. Glaurung’s head received some light layers of Army Painter Army Green. This was very much trial-and-error, with me adjusting and repainting sections as I went along.

Glaurung then experienced a delay of a couple of months as I got distracted by preparing the El Cid Battle of Bairen game for the Partizan show. Upon returning him to the front of the painting table, I realised, finally, that the dino club tail had to go! He was rushed into surgery and quickly had it removed with a fresh craft knife blade, carving it to a point.
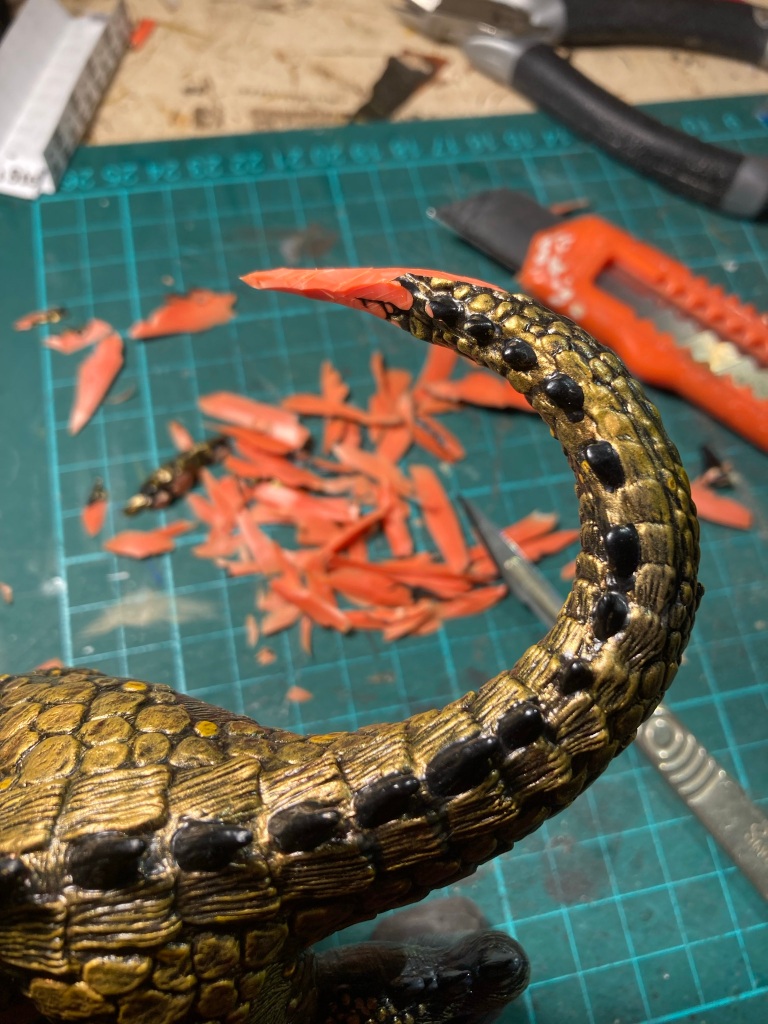
Next, I rolled up a piece of green stuff and rolled it into place around the tail. Following the advice of more skilled friends, I left it for 15 minutes until it was less sticky and then modelled some scales and texture to attempt to blend it in. I cut off the tips of the plastic spikes from the original tail (they are black in the pic below) and placed them in a line to continue the spines of the tail.

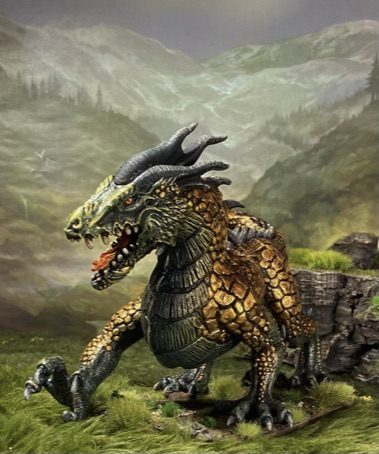
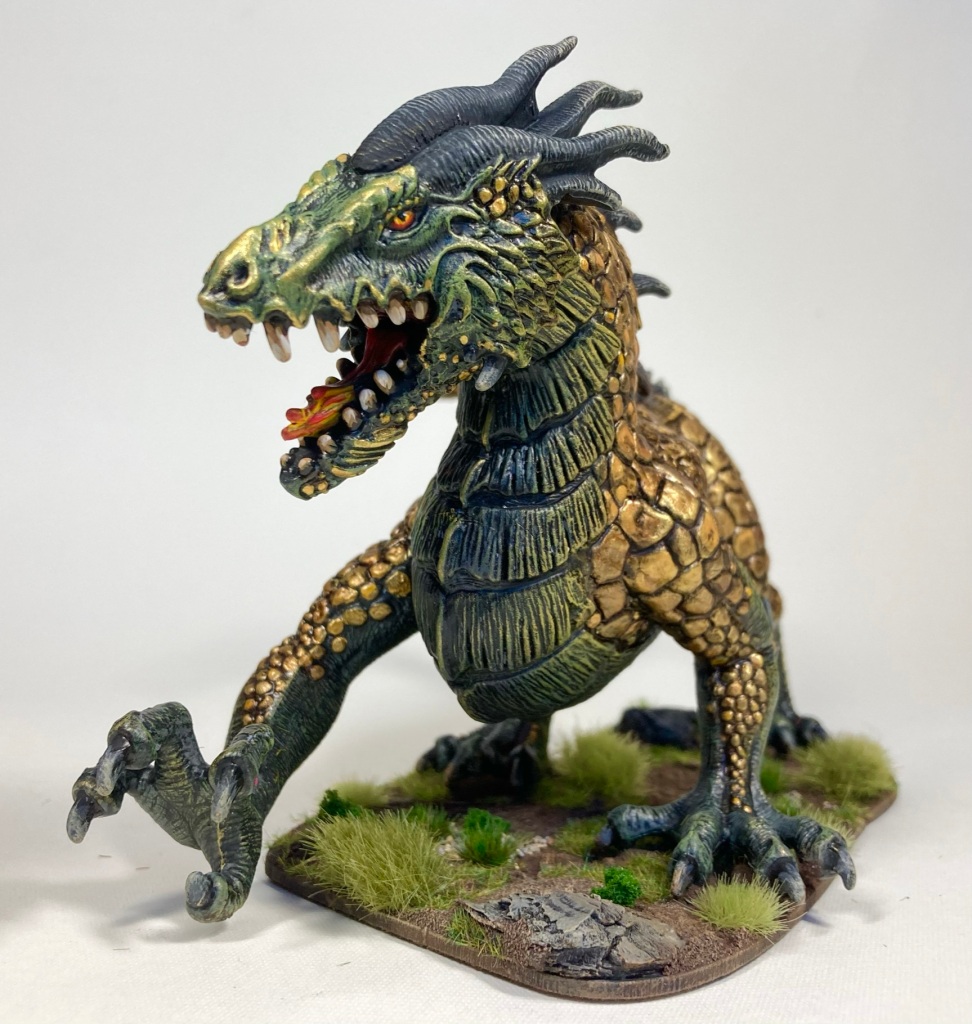
With this done, I undercoated the tail in black and set to finishing off the whole model. I continued adding dry brushed layers of Vallejo Brass, then gave the whole gold area a wash of Windsor and Newton Nut Brown ink. The scales were highlighted with Vallejo Gold and individual ones picked out. The eyes were worked up with a few layers of red, orange and yellow before adding a slitted pupil in black.

To finish off, Glaurung’s spines were repainted in black and dry-brushed with Foundry Charcoal Black to provide some definition from the rest of the body. Claws were painted with Miniature Paints MP84 Umber before highlighting up with Vallejo Iraqi Sand and Off-White.


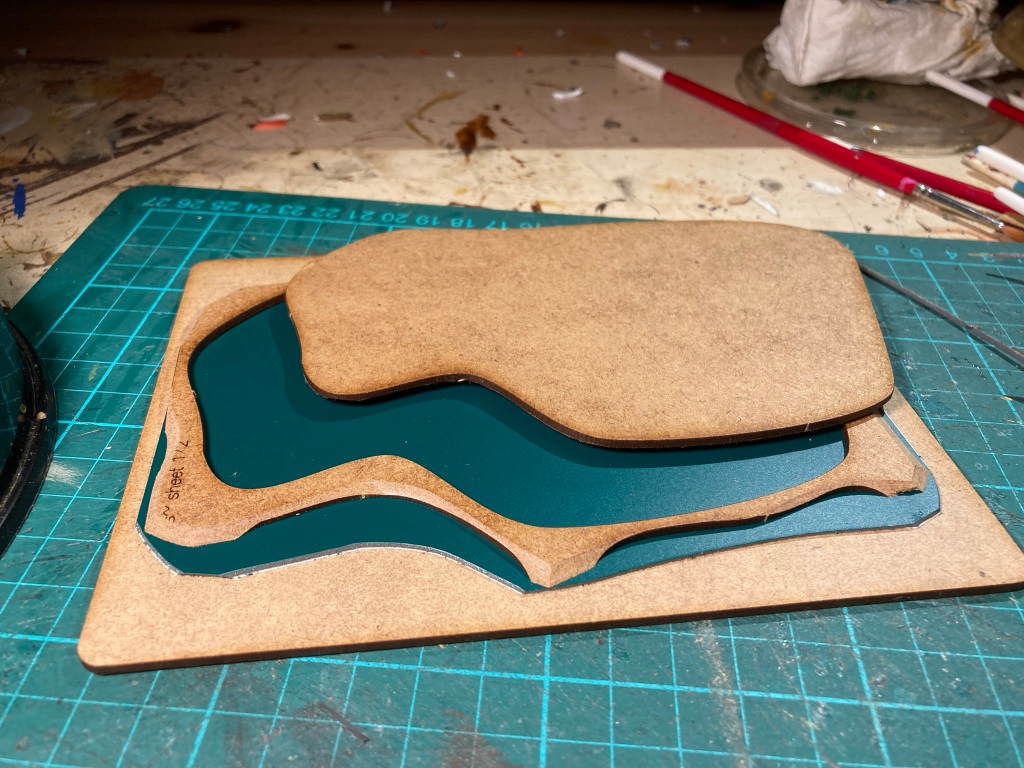
While all this was going on, I was also working on getting the dragon’s base ready for gaming. I wanted him on an irregular base that fitted within a 120mm wide sabot base for my games of Midgard. Normally this might be a custom job, but Warbases had it covered already. In my last order, I had picked up a pack of Pond Bases. This excellent product is a variety of irregular bases, ideal for any kind of scatter terrain and vignettes. I found the right size base for Glaurung and then kept the surround as the frame for my sabot base.

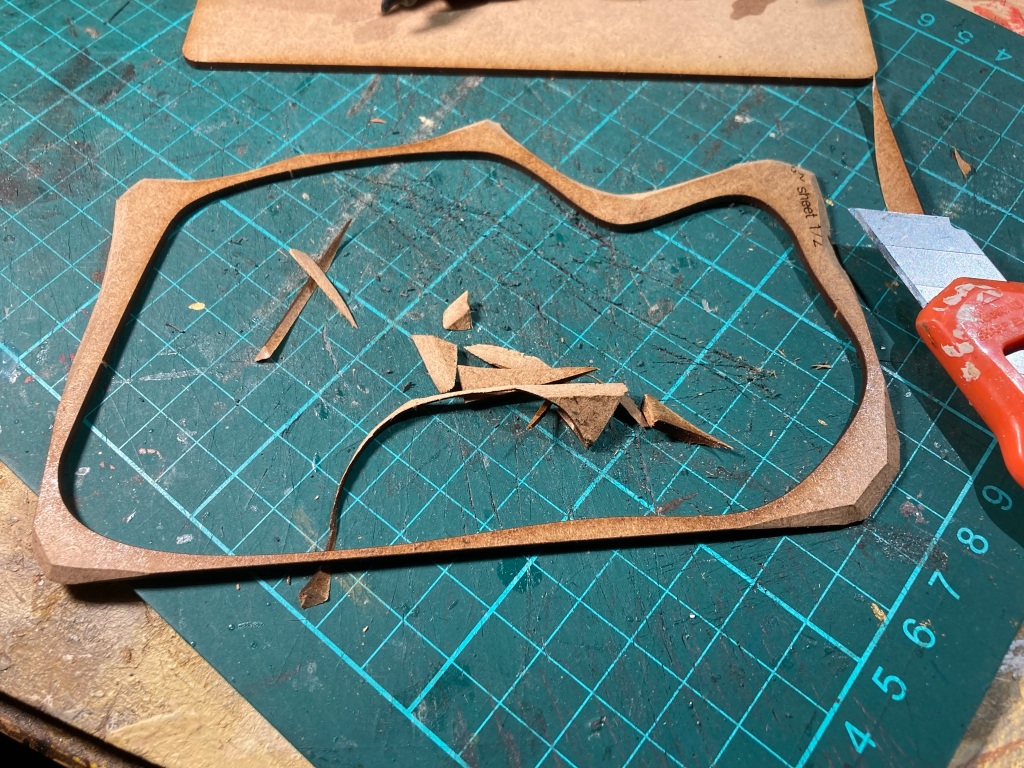
Having got the layers together, I then magnetised the components of the base before assembly. I used self-adhesive 0.5mm magnetic sheet and ferro steel supplied by Magnetic Displays to make sure that the smaller base would stay in position on the larger 120 x 160mm sabot.
The base was glued together and some Milliput and pine bark texturing added, checking, of course, that the central base would still lift out!
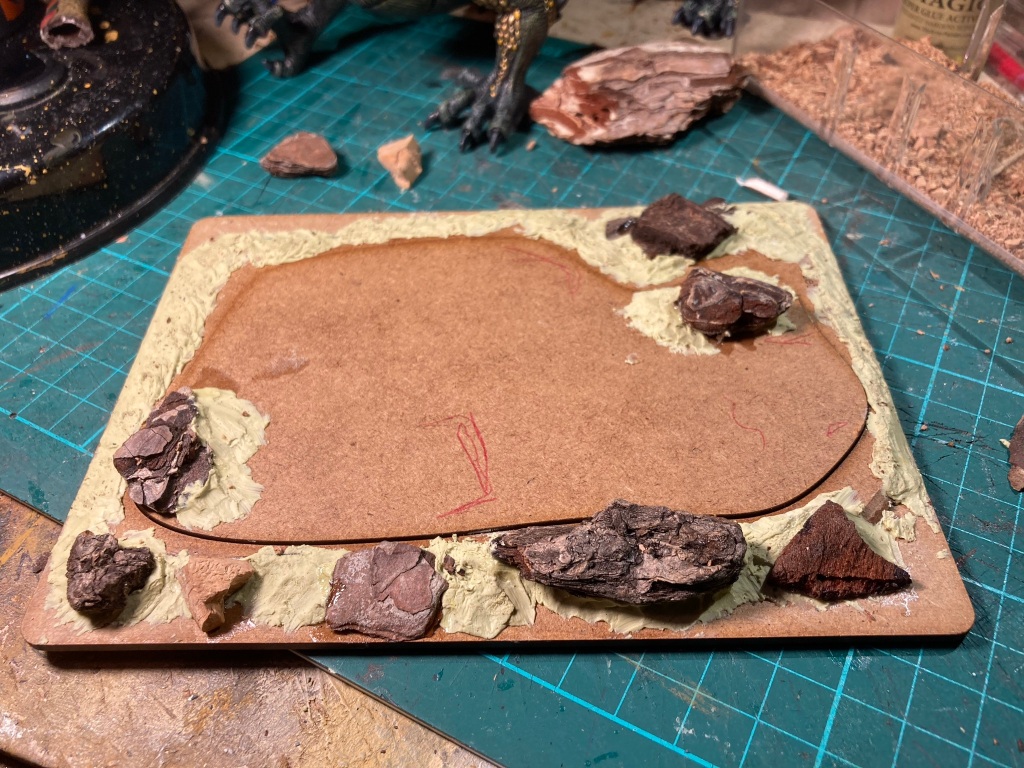
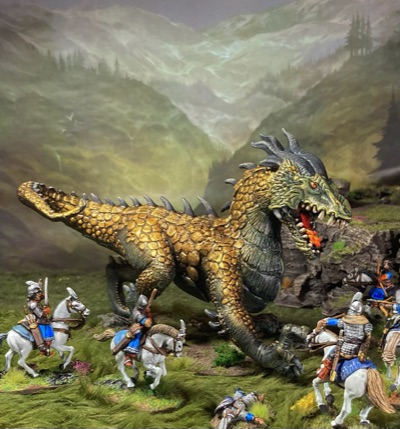
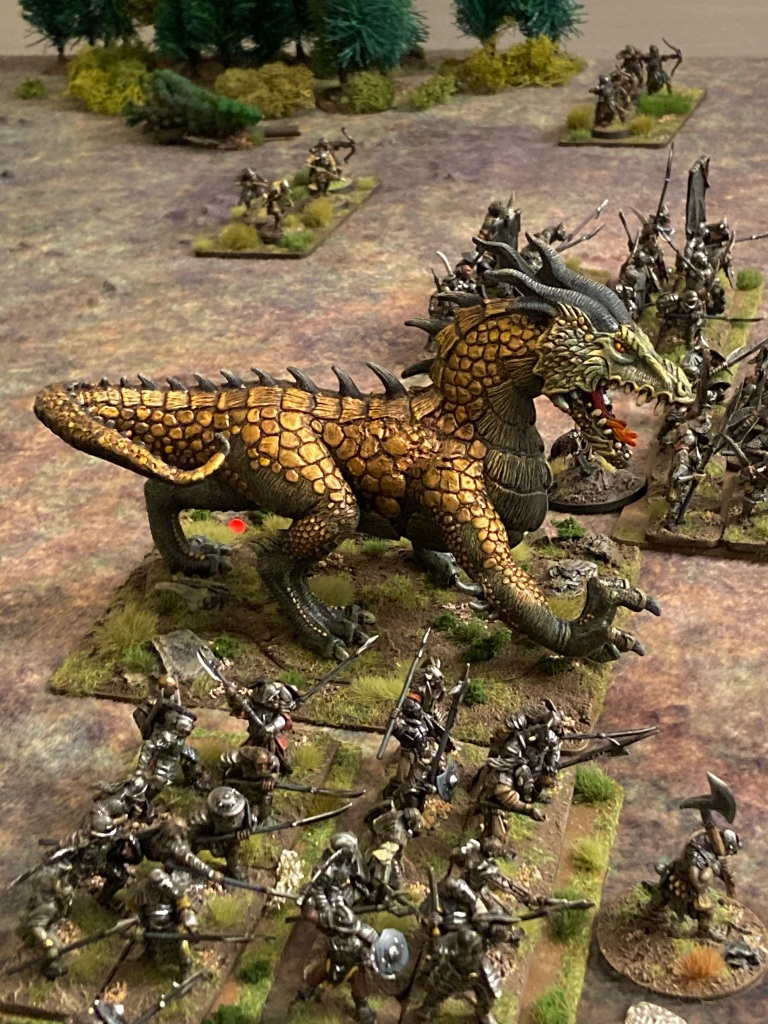
Having sprayed the whole base with Halfords Khaki Camouflage, I then glued the finished Glaurung into position and added textured paste, dry brushed the whole thing and stuck on tufts and flock. Voila!
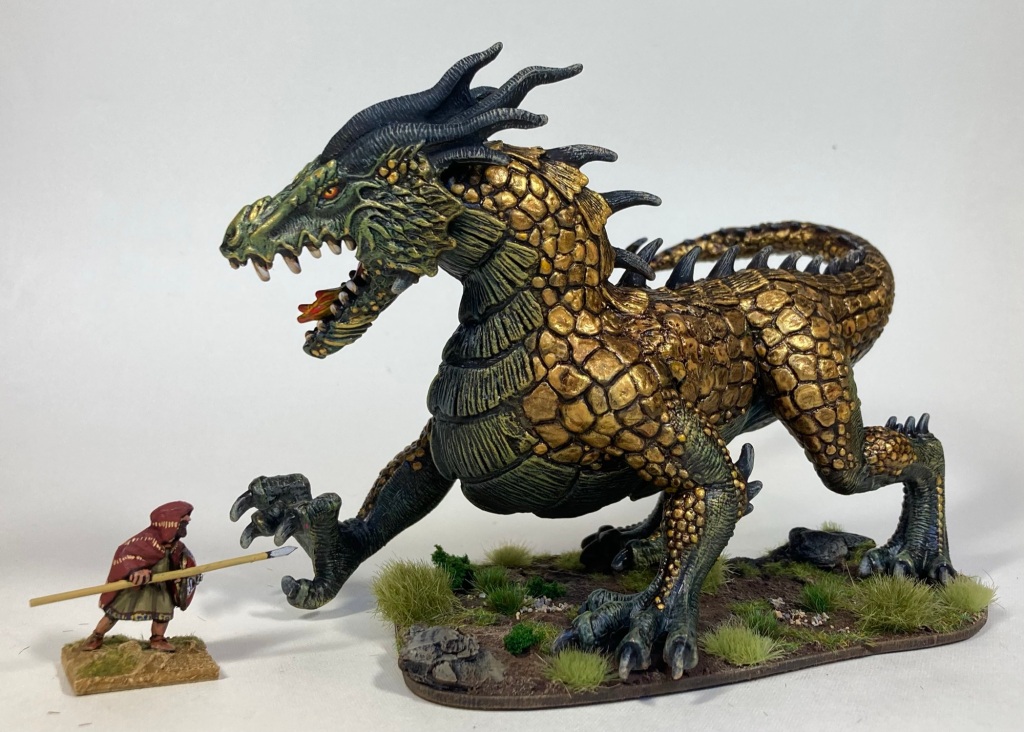
Within a few hours of the paint and glue drying, Glaurung was in action on the gaming table, leading my Orc host against Paul W’s Elves. As we all know, newly-painted models don’t last long, but the mighty wyrm survived until Turn 4 before being brought down by Elven archery! Ah well.


That is a fantastic model and the colours are great. A definite resemblance to Tolkiens description.
LikeLike
Cheers Scotty! I surprised myself by how much it looks like the Prof’s description and pic.
LikeLike
What a brilliant idea to source plastic toys for Dragons etc.
It looks the business now James and has all the ambience that one would expect from a Glaurung model
LikeLike
Thank you Darrell! The appreciation of Schleich toys can be directly attributed to browsing toy shops with my kids!
LikeLike
With the question being, who was the happiest to be browsing in the ship? You of the kids? ;>)
LikeLike
No comment 🙂
LikeLike
Outstanding work! A great looking dragon following your improvements.
LikeLike
Thank you!
LikeLike
A fabulous model and a fabulous job.
LikeLike
Cheers Norm!
LikeLike
Great work! Love your conversion and paint job.
LikeLike
Thank you, James. I just need to make him more resistant to Elven arrows now.
LikeLike